
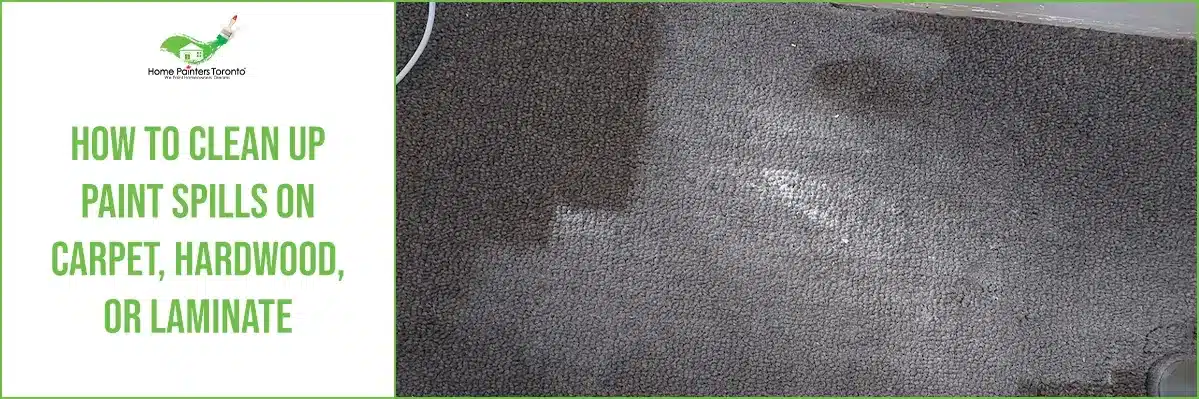
Whether you’re tackling a DIY paint project or a painting professional, accidents are bound to happen. One careless moment can lead to a paint splatter, splash, or even a spill on your beautiful flooring. Sometimes it happens. As careful and as cautious as we may be, accidents happen and paint spills. There’s no use crying over spilled paint, so here’s how to get paint out of carpet, hardwood or laminate.
How to Choose a Paint Colour for Your Small Apartment?
Materials For Cleaning Up Paint Spills:
- Rag
- Scraper
- Paint thinner
- Warm water
- Dish detergent
- Sponge or mop
Step 1: Assess the situation
- The cleanup is going to depend on what was spilled and where. What kind of paint, how big is the spill, and on what kind of surface?
- If the spill is very small, often just wiping it up quickly with a wet rag will take care of the problem. You don’t need any fancy paint clean-up products.
- Oil-based paint clean-up is going to be different from latex paint clean-up, but we can help you with both.
- With latex- or water-based paint, warm water and soap will usually do the trick.
- Oil-based paints can be trickier to clean, and you may need to bring out some paint thinner or mineral spirits.
Step 2: Make the liquid a solid
- For a big spill, help make the liquid-solid by dumping a lot of salt or cat litter on top of the paint.
- Give it a few minutes to absorb, then scrape it up and put the mixture into a container.
- Only use this method if the spill is on a hard surface (for example, if you spilled paint on concrete). Do not use this technique if you spill paint on the carpet! The salt or cat litter mixture will make it even harder to get the carpet clean.
- For the carpet, try soaking up the excess paint with an old towel that you can throw out later.
Step 3: Clean up paint
- If the paint spilled on concrete and the remaining paint has hardened, you can try scraping up as many paint flecks as you can
- Mix warm water with dish detergent, or use another gentle cleanser.
- Mop or scrub with a sponge until clean. If it’s in cracks or porous surfaces, use a wire brush to do the scrubbing for you.
- For carpet paint spills, you may need a stronger cleaning agent or spot remover.
- You can also try using paint thinner on the carpet, although this may end up changing the colour of the material, and it would be best to try other options first.
- If the carpet is a commercial grade, you may be able to use stronger chemicals or solutions. You may even be able to use a wire brush. But the key here is to try a small area and see how it removes it and be careful to look out for it because it is just making the situation worse. If it comes off, great! If not, then you need to try something a bit stronger.
Step 4: Disposal of spilled paint
- Allow the paint that you’ve collected as well as your cleaning materials to dry completely before disposing of them, this could take up to a few days.
- Waste disposal guidelines vary throughout Toronto and the GTA, double check with your local waste disposal agency for proper disposal procedures.
HINTS:
- Make sure to respond quickly. If the paint dries, it will become much harder to clean up.
- Ventilate the area, especially if using a paint thinner.
- Stay calm. With spilled paint, it’s easy to make a bad situation worse by spreading the spill rather than
containing or it. Staying calm and working step by step is the best way to handle a spill. - An ounce of prevention is worth a pound of cure. Always take the time to carefully prepare your workspace before starting to paint, covering all the floors, furniture, and fixtures with drop cloths or plastic.
Dried Paint Removal: A Step-By-Step Guide
Removing dried paint from floors can be a challenging task, especially if the paint has been there for a while. However, with the right tools and procedures, you can successfully remove dried paint from various types of floors such as carpet, hardwood, and laminate floors.
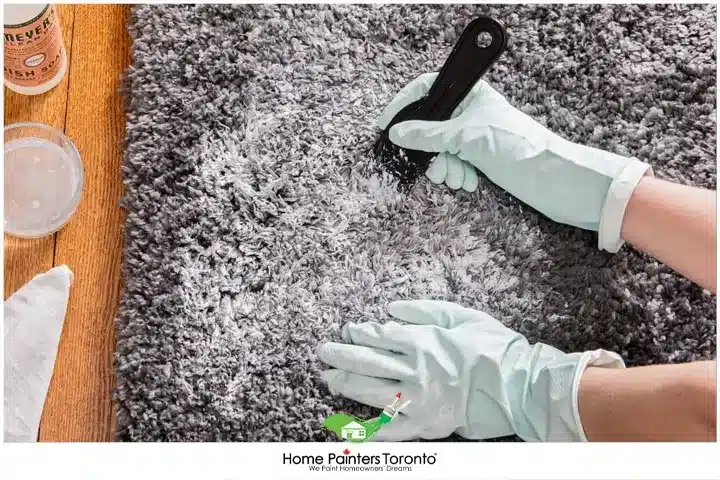
1. How to Get Paint Out of Carpet
Step 1: First, try to scrape off as much of the dried paint as you can. Use a plastic scraper or an old credit card and work slowly to prevent damaging the carpet fibres.
Step 2: If the paint is stubborn, apply a small amount of rubbing alcohol or a commercial paint remover to a clean cloth and gently dab it on the paint. Make sure to test any chemicals in a hidden area first to avoid discoloration.
Step 3: Rinse the area with a damp cloth to remove the solvent, then dry the spot by blotting with a clean, dry towel.
Step 4: Vacuum the area to restore the carpet fibres.
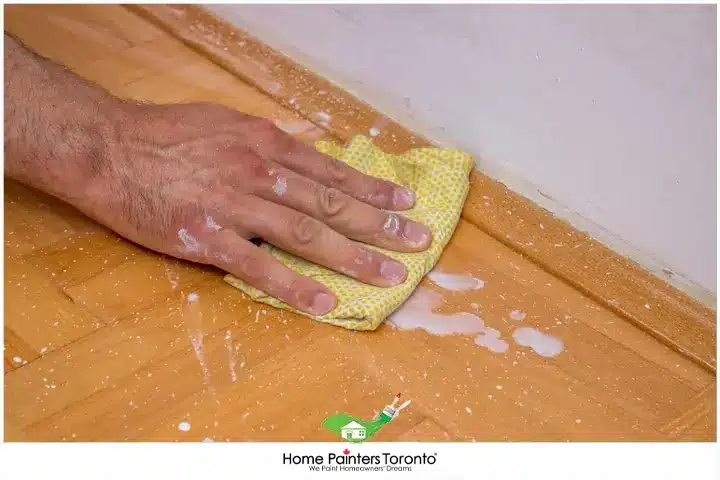
2. How Do You Get Spilled Paint Off Hardwood Floors?
Step 1: Use a plastic putty knife or a credit card edge to gently scrape away the dried paint. Do not use a metal tool, as it could scratch the wood surface.
Step 2: For any remaining paint, dampen a soft cloth with a bit of rubbing alcohol or a commercial paint remover and rub it on the paint stain in a circular motion. Make sure to spot-test the solvent on an inconspicuous spot of the flooring first to ensure it won’t damage the finish.
Step 3: Once the paint is removed, clean the area with a damp cloth to remove the solvent. Then immediately dry it with a clean, dry cloth to avoid water seeping into the wood.
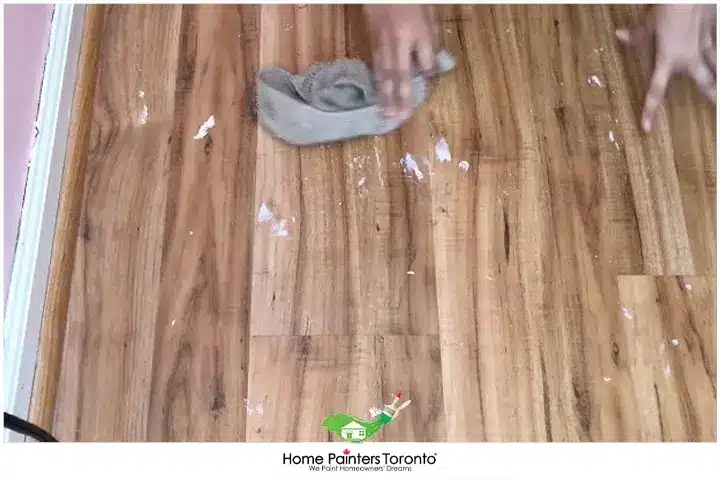
3. How To Remove Dried Paint from Laminate Floors
Step 1: Gently scrape away as much dried paint as possible using a plastic scraper or an old credit card. Be gentle to avoid scratching the laminate surface.
Step 2: Apply acetone or a commercial paint remover to a clean cloth and gently rub the area to lift off the dried paint. Do a spot test on a hidden area first to make sure it won’t damage the surface.
Step 3: Wipe the area with a clean, damp cloth to remove any remaining solvent, then quickly dry it with another clean, dry cloth.
Preventing Future Paint Spills: Essential Tips for Happy Painting
As satisfying as it may be to restore your space after a paint spill, it’s even better to avoid such mishaps in the first place. Let’s dive into some practical strategies to prevent future paint spills and ensure you have a hassle-free painting experience.
1. Preparation is Key
Before you even open the paint can, preparing your space can significantly reduce the risk of paint spills:
- Cover Up: Protect your floors and furniture using drop cloths, plastic sheets, or old newspapers. Make sure to cover a wider area than you think you’ll need, as paint can splatter farther than you might expect.
- Clear The Area: Remove any unnecessary items, particularly those that might cause you to trip or knock over a paint can.
- Tape the Edges: Use painter’s tape to create a barrier between the wall and the floor, which can catch any drips or spills before they reach your flooring.
2. Correct Handling of Paint Cans
How you handle your paint cans can have a big impact on avoiding spills:
- Careful Pouring: Instead of pouring paint directly from the can, consider using a smaller, manageable container. This can help avoid the paint from splashing or spilling over the sides of the can.
- Seal Promptly: Make sure to reseal the paint can lid properly after every use. An unattended, open paint can is a disaster waiting to happen.
3. Using Painting Tools Appropriately
Mastering your painting tools goes a long way in preventing spills:
- Don’t Overload Brushes or Rollers: Dab your brush or roller into the paint, and then wipe off the excess on the side of the paint container. An overloaded brush or roller is more likely to drip paint.
- Use a Paint Tray: This gives you more control over how much paint you’re dealing with at any one time, and the sloping design helps minimize the risk of spills and splashes.
4. Investing in Quality Equipment
Higher-quality painting tools might have a greater upfront cost, but they can help prevent accidents and offer a better finish:
- Use High-Quality Brushes/Rollers: These are less likely to shed bristles or lint into the paint and often hold and distribute paint more evenly, reducing the chances of drips and splashes.
- Get a Stable Ladder or Step Stool: A sturdy, non-slip surface is crucial when you’re working on high areas. An unstable base can result in not only paint spills but personal injury as well.
5. Clean-Up and Storage
When done for the day, spend a few extra minutes to clean and store your materials properly:
- Clean Your Brushes/Rollers Well: Thorough cleaning reduces the likelihood of dried paint flakes falling into your paint can and causing lumps that can lead to splashes and spills in your next painting session.
- Store Paint Appropriately: Store paint cans in an upright position and in a secured area, away from pathways. This reduces the chance of accidentally knocking them over.
Remember, the saying ‘Prevention is better than cure’ is particularly apt when it comes to avoiding paint spills. A little extra planning and care can save you a considerable amount of time and effort cleaning up afterwards. So, take these preventive steps and make your painting process as smooth and enjoyable as possible.
CONCLUSION
With these paint spill cleanup tips in hand, you’ll be prepared to tackle any paint splash, splatter, or spill on your carpet, hardwood, or laminate floors. Remember to work quickly and use the appropriate cleaning methods for your specific flooring type. With quick action and careful attention, you can restore your floors to their former glory and get back to enjoying your beautifully painted space.
Prone to paint spills? At Home Painters Toronto we have 36 years of experience in painting the interiors and exteriors of Toronto homes and businesses, and we’re happy to help. In all that time, yes, we’ve learned how to clean paint spills.
Avoid a paint spill clean up and ruined carpet, and call us today at 416 494 9095 or email us at [email protected] for a FREE quote. Professional painting contractors are just a phone call or a click away to help with your next home reno project. And don’t forget to follow us on all our social channels below!