
Trim Installation and Repair
INTERIOR TRIM
INSTALLATION AND
REPAIR

elated homeowners!

Family owned for 37 years
positive raving reviews
Award Winning Services


Home Painters Toronto Interior Trim Services

At Home Painters Toronto, we understand you may have questions about our interior trim installation and repair services. To help you make an informed decision, we have compiled a list of frequently asked questions and their answers.
Trims are the ultimate finishing touch in any room. They enhance your space’s aesthetics and protect your walls and materials from dings and other damage. The need to repair or install new trim arises when these versatile design elements show signs of wear. Or when homeowners aspire to revamp and personalize their spaces.
With over 37 years of experience under our belts, we know precisely what it takes to make your interior trims look beautiful again. Whether you need installation or a minor trim repair, we’ve got you covered!
The Intricate Role of Interior Trim
Interior trims, be it baseboards, crown moulding, wainscoting, or casings, while adding finesse and sophistication to your interiors, also serve a functional role. They cover gaps, hide uneven edges between walls and floors or ceilings, and protect walls from damage, particularly around high-traffic areas.
Recognizing the Need for Wood Trim Restoration
Over time, due to mere use or environmental factors, interior trims, especially those made of wood, develop issues such as:
- Fading or Discolouration: Whether from sun exposure or the passage of time, faded trims can detract from your home’s appealing aesthetics.
- Chipping or Scuffing: High-traffic areas, like doorways or corridors, commonly see chipping or scuffing on trims.
- Warping or Splitting: Changes in humidity and temperature can cause wooden trims to warp or split, affecting the smooth finish.
- Water or Pest Damage: Signs of water damage (like discolouration or swelling) or pest infestations (notably termites) in trims require immediate attention.
Types of Trim Installation and Repair
Proper trim installation and repair are essential to maintain your home’s or building’s aesthetic and functional capabilities. Trim serves decorative and practical purposes, creating smooth transitions and hiding gaps between surfaces. We’ll discuss each service in detail, highlighting their common problems and why proper installation and repair are crucial.
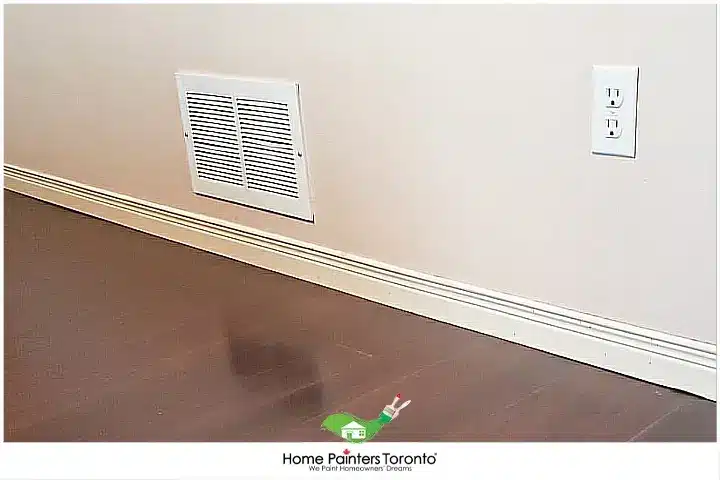
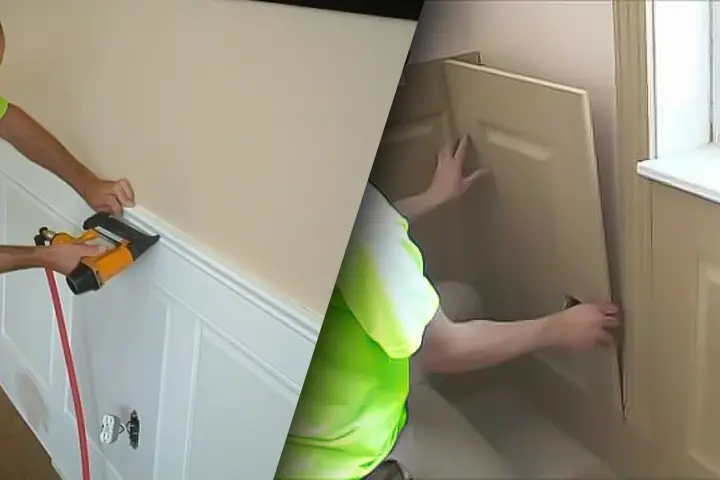
1. Baseboards
This type of trim is designed to cover the joint between the wall and the floor. It helps prevent dirt and moisture from entering your home by acting like a barrier between the floor and walls. They also help insulate your home against cold air drafts during winter months.
Common Problems and Issues:
Despite their sturdy look, baseboards can take a beating from daily wear and tear, moisture, and pests. Another common problem is dealing with baseboards chewed by dogs. They can also suffer from gaps, warping, or splitting caused by expansion and contraction due to temperature fluctuations.
Importance of Proper Installation and Timely Repair:
If your baseboards are sagging or warping, it’s time to schedule a repair. An improperly installed or poorly maintained baseboard can lead to structural damage, which is expensive and time-consuming. This is why it’s crucial to promptly repair damaged ones to ensure structural integrity and prevent further damage.
What to Expect from Baseboard Installation and Repair:
Baseboard repair includes identifying the cause of damage, removing damaged sections, and replacing them with matching trim. Additional steps such as caulking, painting, or staining may be required to ensure a seamless appearance.
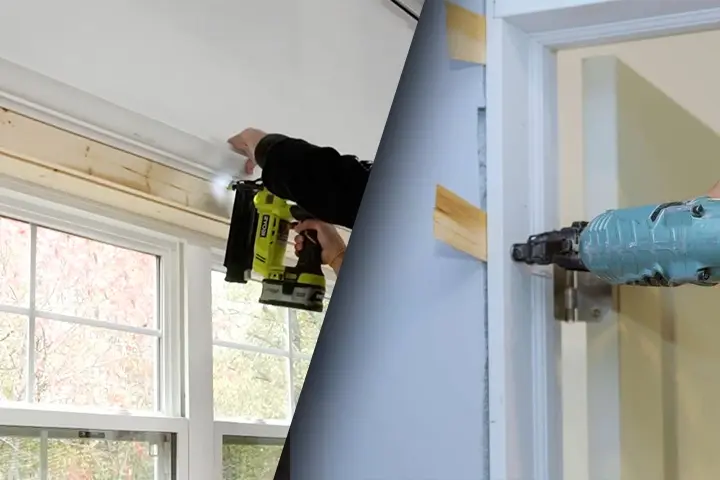
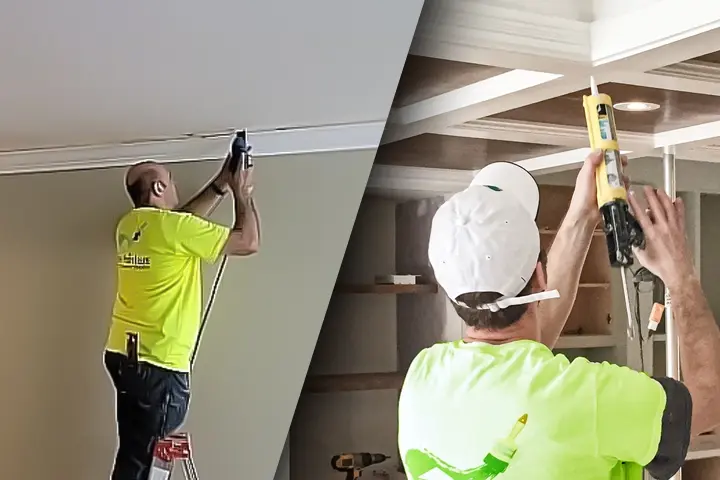
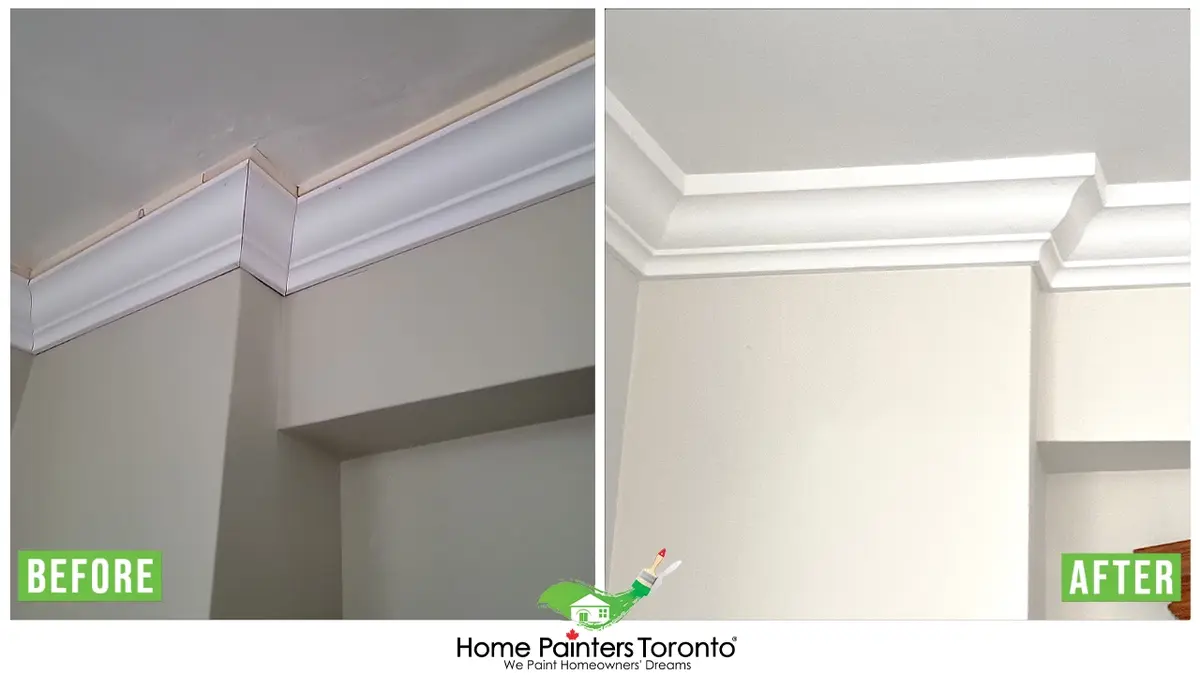
2. Crown Moulding
Crown moulding is the most common type of trim in a home. It is a flattering border along the junction where the top of a wall meets the ceiling. This decorative moulding trim lends a touch of elegance, making any room look polished and refined.
Common Problems and Issues:
Crown moulding can be damaged by water leaks or improper cleaning. If a home has suffered from a significant water leak, it may cause the wood to warp over time. This will lead to gaps between the ceiling and wall, creating an entryway for pests.
Importance of Proper Installation and Timely Repair:
While it’s relatively easy to install, crown moulding can be damaged over time. If you notice that your crown moulding is cracked, loose, or warped, it may need some repairs or replacement. You should take care of this as soon as possible since it can lead to other problems if left unattended.
What to Expect from Crown Moulding Installation and Repair:
Repairing crown moulding involves identifying the source of damage, removing affected sections, and installing new moulding to match the existing design. The final steps include filling gaps, caulking, and painting to ensure a seamless appearance.
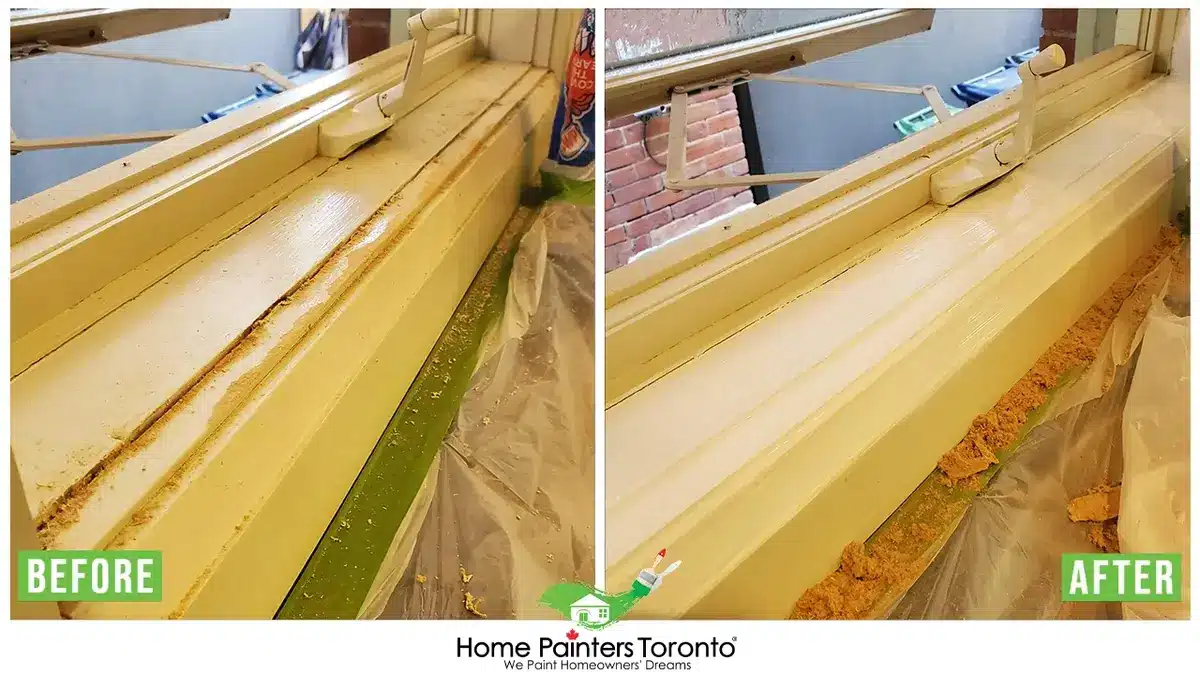
3. Door and Window Casings
Door and window casings are trims that frame these openings in your walls. Casings create a visually appealing transition between the wall and the door or window and hide any structural gaps or irregularities.
Common Problems and Issues:
The most common problems with door and window casings are cracking and peeling paint. This happens when the wood becomes dry and brittle over time, which makes it prone to cracking or chipping. The same thing can happen if you use paint unsuitable for exterior applications (which is often the case). Some other common issues with door and window casings include warped or bowed wood, loose joints, and damaged moulding.
Importance of Proper Installation and Timely Repair:
The door and window casings are an important part of the overall structure of your home. If any of these pieces are damaged or missing, it can lead to moisture infiltration and rot, which can cause structural damage. This could be costly to repair if it is not caught in time.
What to Expect from Door and Window Casing Installation and Repair:
Repairing door and window casings involves removing any damaged moulding sections and installing new ones to match the existing design. The final steps include filling gaps, caulking, painting, and sealing.
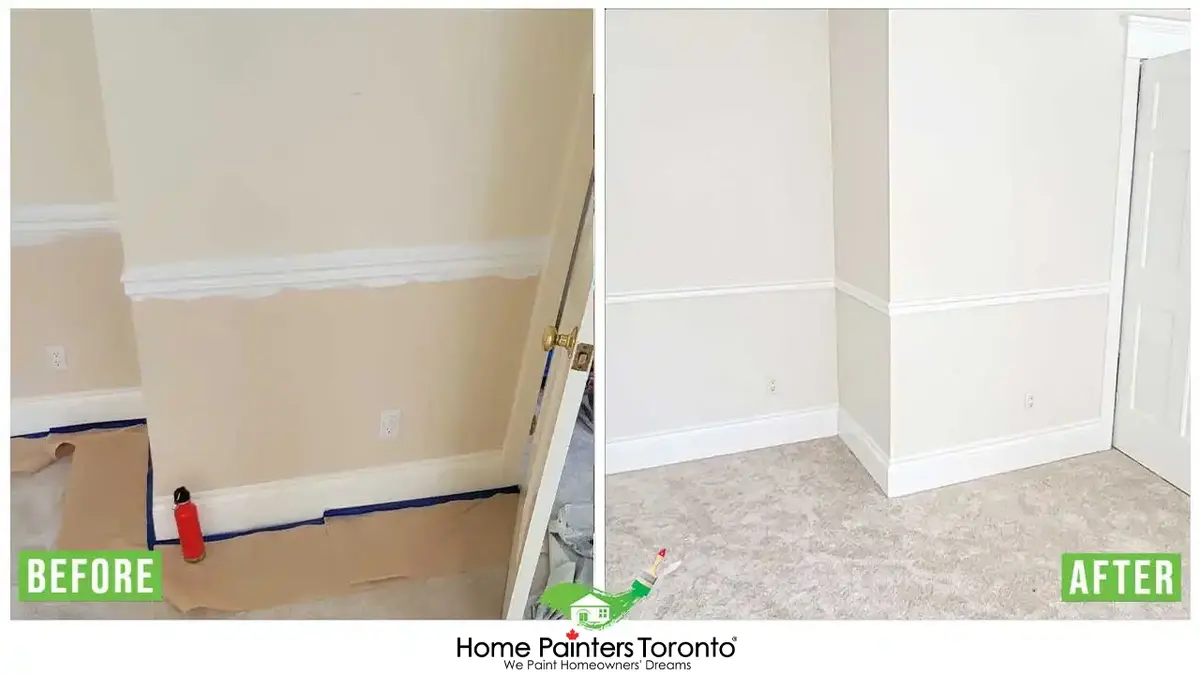
4. Chair Rails
Chair rails, placed horizontally around a room, serve a dual purpose. Originally, installers put chair rails in place to protect walls from chair damage, and now they enhance the decoration. These rails divide the wall and enable homeowners to try various paint colours or wall textures on either side of the rail.
Common Problems and Issues:
The most common problems with chair rails are paint flaking, peeling and chipping. If the texture is worn away, water may penetrate and cause mould or rot on the wall behind. This problem often occurs when homeowners paint over existing wood instead of replacing it with a new material, such as polyurethane.
Importance of Proper Installation and Timely Repair:
Beyond protecting walls from damage, chair rails also break up large expanses of walls and add textural interest, making a room feel more cozy and inviting. If you have chair rails for walls in your home that are damaged, it is important to repair them as soon as possible. If you don’t, you may find that mould and rot spread behind the wall and cause structural damage, which can be very difficult and costly to reverse.
What to Expect from Chair Rail Installation and Repair:
The first step in the process is to remove the old chair rail and patch any holes or other damage. Next, a new piece of wood and any necessary support structures are installed in its place. Finally, the surface will be sanded and finished to match your existing decor.
5. Wainscoting
The wainscoting trim is panelling that lines the lower part of the walls. People initially did wainscoting installations to protect and insulate walls, but now it’s widely appreciated for its decorative appeal. Styles include beadboard, board and batten, raised panel, and flat panel.
Common Problems and Issues:
Wainscoting can be vulnerable to moisture damage, especially in damp areas like bathrooms. You may notice that it has begun to warp or bow, a sign of dry rot. Other problems include cracking, loose panels, chipping, or material discolouration.
Importance of Proper Installation and Timely Repair:
Incorporating wainscoting into your interior design provides visual interest, breaks up blank walls, and protects walls from scuffs and dents. Wainscoting is a fast and affordable way to add style and character to your home. Proper installation is essential if you want the wainscoting to last for several years. If you notice any signs of moisture damage, such as warping or bowing, have it repaired immediately before the problem worsens.
What to Expect from Wainscoting Installation and Repair:
Repairing wainscoting involves diagnosing the issue, removing any damaged paneling, and ensuring the new material matches in style and colour. Finish with proper sealing against moisture and repainting or staining for a flawless appearance.
6. Picture Rails
Picture rails are horizontal trim pieces, typically installed near the ceiling, allowing artwork to be hung without nails or damaging the wall. They provide a practical and elegant alternative for displaying paintings and photographs.
Common Problems and Issues:
Picture rails can be damaged by moving furniture, dents, scratches from collisions, or more serious issues like water damage. They can also become loose over time, resulting in gaps between the wall and rail that make it difficult to hang artwork.
Importance of Proper Installation and Timely Repair:
Picture rails are installed to provide a sturdy surface for hanging artwork. Their ability to do so depends on their installation and repair quality. If dents, scratches, or other damage occur over time, they may become more difficult to repair.
What to Expect from Picture Rail Installation and Repair:
Repair work for picture rails involves assessing the issue, fixing or replacing damaged portions, and applying a fresh coat of paint if necessary. Additionally, secure the rail with appropriate hardware to avoid load-related issues.
7. Cove Moulding
Cove moulding is a concave trim that connects the wall and ceiling at a softer angle than crown moulding. It creates a curved, gentle transition, making rooms feel cozier and less formal.
Common Problems and Issues:
Cove moulding is prone to breakage and cracking, so it’s important to keep an eye on the condition of your cove moulding. Additionally, water can also harm it, causing the wood to swell and move out of place. It’s also vulnerable to peeling paint, leading to chipping or cracking.
Importance of Proper Installation and Timely Repair:
Installing cove moulding not only enhances a room’s overall aesthetic but effectively disguises irregularities in the wall and ceiling junction. It’s important to repair cove moulding that has been damaged, as it can cause structural damage and affect the overall integrity of your home.
What to Expect from Cove Moulding Installation and Repair:
Repairing cove moulding requires identifying problem areas, removing damaged sections, properly installing matching trim, and finishing with gap-filling, caulking, and painting. Ensuring seamless blending and proper adhesion is essential for a polished outcome.
Trim Installation Process
Pro tip: Before beginning the installation process, choose a material that complements your space and suits your budget (such as wood, MDF, or PVC).
Follow these steps for seamless trim installation:
- Measure and Cut: First, measure the lengths of the walls where the trim will be installed and cut the pieces accordingly.
- Mitre Angles: Then, create mitre angles for the trim corners. Mitre joints should be cut at a 45-degree angle using a mitre saw.
- Test Fit: Before attaching, always test fit the pieces to ensure they align correctly.
- Nail in Place: Using finishing nails, secure the trim to the wall, staggering the nails to prevent splitting.
- Fill and Sand: Next, fill gaps or nail holes with wood putty. And then sand the trim once the putty has dried.
- Paint or Stain: Finally, finish by painting or staining the trim to match your décor.
Common Interior Trim Repairs and Tips
Trims can endure daily wear and tear or accidental damage, necessitating repair. Here’s a list of common interior trim repair issues and solutions:
- Gaps: If gaps appear between the wall and trim or at mitered joints, fill them with flexible caulk and repaint them to match the trim.
- Split or Cracked Trim: Next up, remove the damaged section by carefully cutting and prying it away. Replace it with a matching piece and repaint.
- Water Damage: Subsequently, eliminate any source of moisture before repairing or replacing damaged trim to prevent rot recurrence.
- Loose Trim: Lastly, re-secure loosened trim pieces using finishing nails, then cover nail heads with wood putty and repaint as needed.
ANSWERS TO FREQUENTLY ASKED QUESTIONS
1. Why It’s Important to Properly Install and Repair Your Damaged Interior Trim?
You might find it easy to overlook a chipped edge or slight discolouration, but here’s why you should prioritize repairing or replacing damaged trim:
- Maintaining a Home’s Aesthetics: To begin with, trims add a polished, finished look. Properly maintained trim contributes tremendously to your home’s visual appeal.
- Preserving Property Value: Furthermore, potential buyers pay attention to the small details, and well-maintained trim can add to your property’s perceived value and appeal.
- Preventing Further Damage: Moreover, a crack or chip might seem small, but if left unattended, it can develop into significant damage, particularly from water exposure or pest infestations.
- Health Concerns: Trims suffering from damage, notably in humid settings, can harbour mould and mildew, creating potential health threats.
2. How Much Does Interior Trim Installation and Repairs Cost?
Installation and repair costs for interior trim in Toronto vary based on their size, the kind of wood used, and the extent of the damage.
But if you’re curious about what an interior wood repair and carpentry might cost, here are some ballpark figures:
• Small handyman project: $1,500 to $3,000 + HST
• Medium handyman project: $3,000 to $5,000 + HST
• Large handyman project: $5,000 to $10,000 + HST
• XL handyman project: $10,000 to $20,000 + HST
To receive a precise cost for your unique needs, we advise getting in touch with us for a free, no-obligation quote.
3. Will You Include the Materials and Labour?
Unless otherwise noted on the contract, yes, our quotes usually include both materials and labour costs. We only utilize premium materials to ensure durability and endurance, and our experienced professionals provide expert craftsmanship.

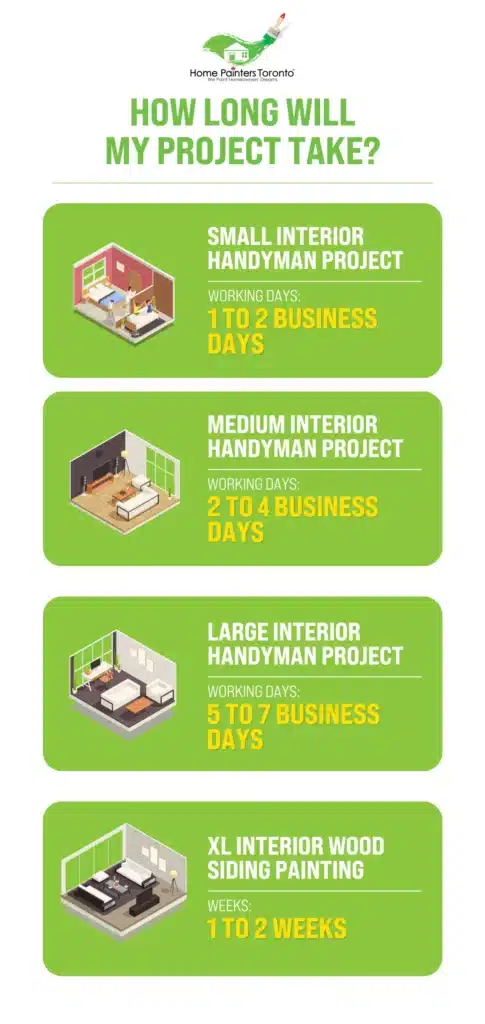
4. How Long Will My Project Take?
The scope and complexity of the work will determine how long the project takes. During our initial consultation, we will discuss a timeframe estimate and continue to keep you updated as the project progresses.
However, if you’re looking for a general idea of how long it might take, here are some average project timelines:
• Small handyman project: 1 to 2 business days
• Medium handyman project: 2 to 4 business days
• Large handyman project: 5 to 7 business days
• XL handyman project: 1 to 2 weeks
***Or if you are in a rush, inquire about our 1 or 2 day services.***
5. Who Will You Be Sending To Do My Interior Trim Project?
Home Painters Toronto has a team of skilled and experienced in-house carpenters, handymen, and painters (not subcontractors) who specialize in interior trim installation and repairs. The team member assigned to your project has the essential skills to complete it to the highest standard.
Our Services
Our expert team delivers services to help you create a flawless look for your home:
1. Interior Trim Installation
We offer a vast collection of designs, materials, and finishes for your specific taste. Our experts will ensure your new trim beautifully matches your home’s aesthetic.
- Crown Moulding Installation
- Baseboards
- Door and Window Casings
- Wainscoting
- Chair Rails
- Picture Rails
- Cove Moulding
2. Interior Trim Repair
Age, pest damage, or everyday wear and tear can deteriorate your interior trim. Our team has the experience to repair various types of damage, restore your trim to its original glory, and extend its lifespan.
- Fading or Discolouration
- Chipping and Scuffs
- Warping and Splits
- Water Damage
- Pest Damage
In conclusion, trim installation and repairs, though seemingly minor, require meticulous attention to detail and a keen understanding of home aesthetics. It’s about choosing suitable materials, knowing when to repair them, and perfecting the installations to match your unique home style. With the wrong approach, you risk damaging your property’s value and losing the charm and elegance that well-crafted trims bring.
That’s why hiring professionals for trim installation and repairs is crucial. At Home Painters Toronto, we ensure that your trims are functional and a standout feature of your interior decor.
Enhance the character of your home interiors with the impeccable trim services of Home Painters Toronto. Contact us today for a consultation and discover how we can make your home even more welcoming and distinctive. The perfect blend of style and substance awaits you!
Choosing the Right Toronto Trim Contractors
Selecting a trustworthy and knowledgeable team to install and repair trim in Toronto is crucial. Here are some factors to consider when choosing a handyman repair company:
Experience: Look for a business with a proven track record of successful interior trim installation and repair projects. Experienced professionals will have the necessary skills and knowledge to address issues and deliver high-quality results.
Quality Materials: A reputable trim repair company will use premium materials to withstand the elements and provide long-lasting performance.
Customer Reviews: Check online reviews and feedback to discover what former clients have to say about their experiences with the company. You can gauge the expected customer service and its quality through this.
Warranty: If you hire a reputable wood repair company in Toronto, it will fix your problems promptly and competently. They will back their work with a warranty, granting you peace of mind.
PROTIP: To find a reliable local business, just type “trim repair near me” or “Toronto wood trim repair” into your browser, and you’ll be able to find a company that’s close by, serving your area.
WHY CHOOSE HOME PAINTERS TORONTO?


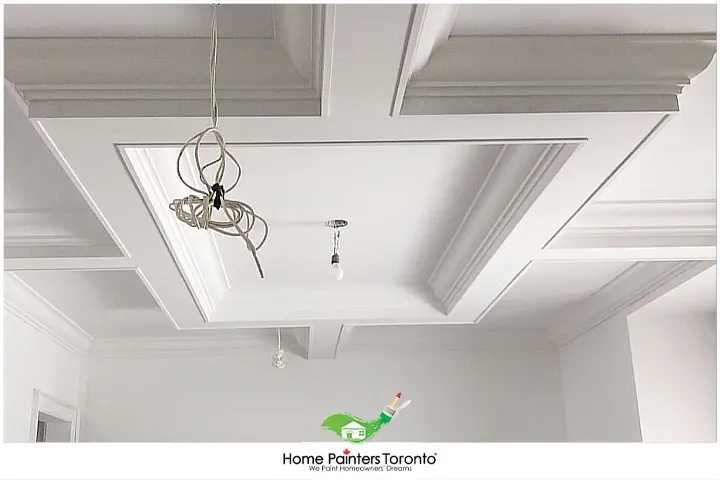
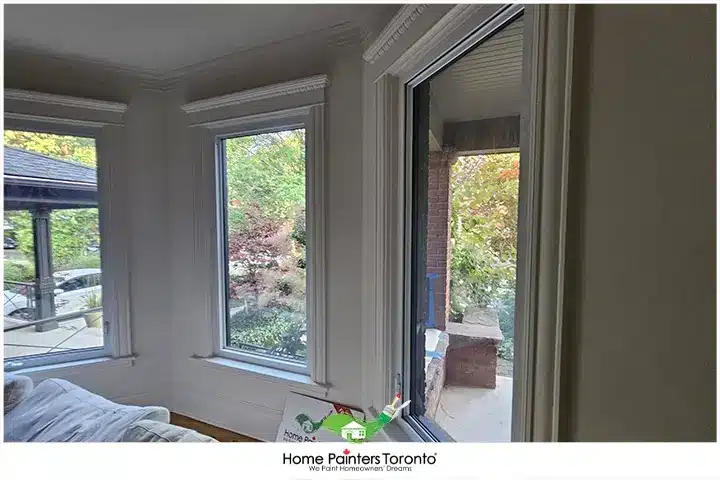
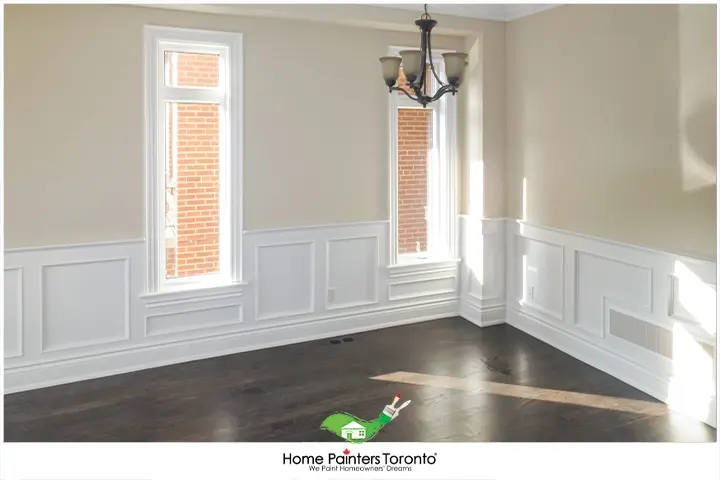
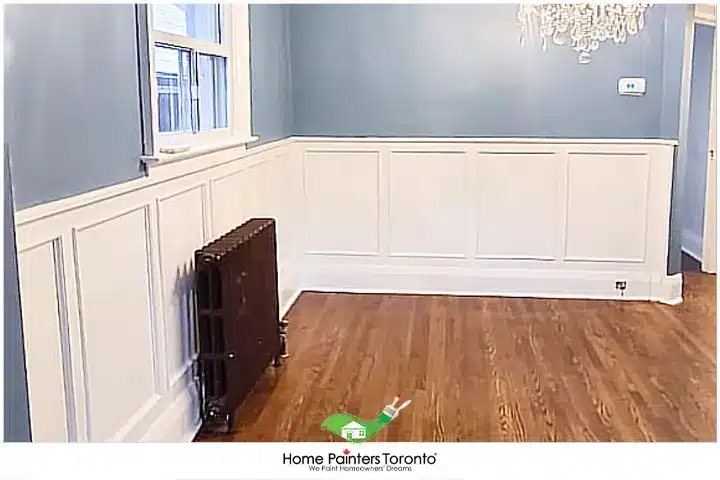
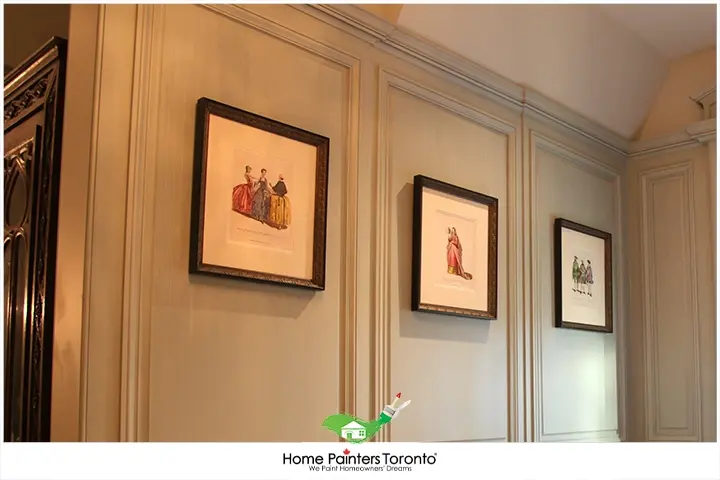
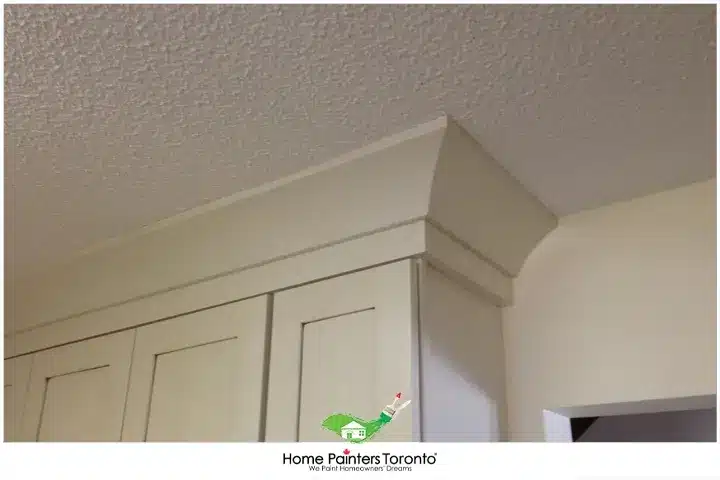
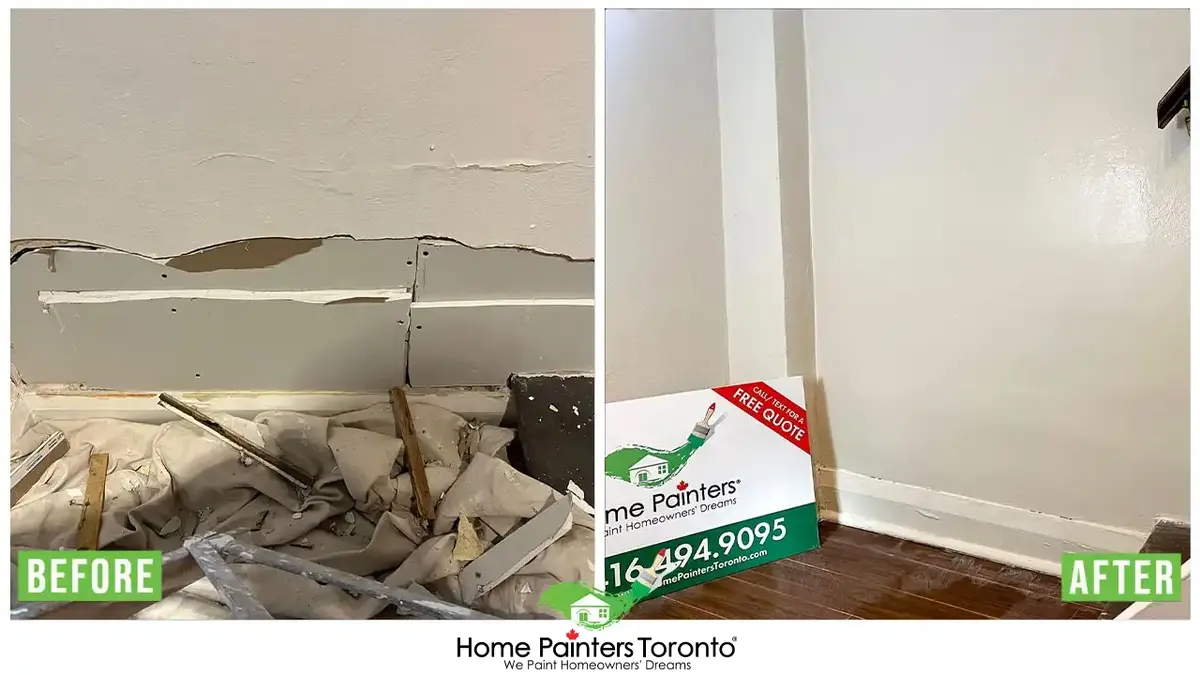
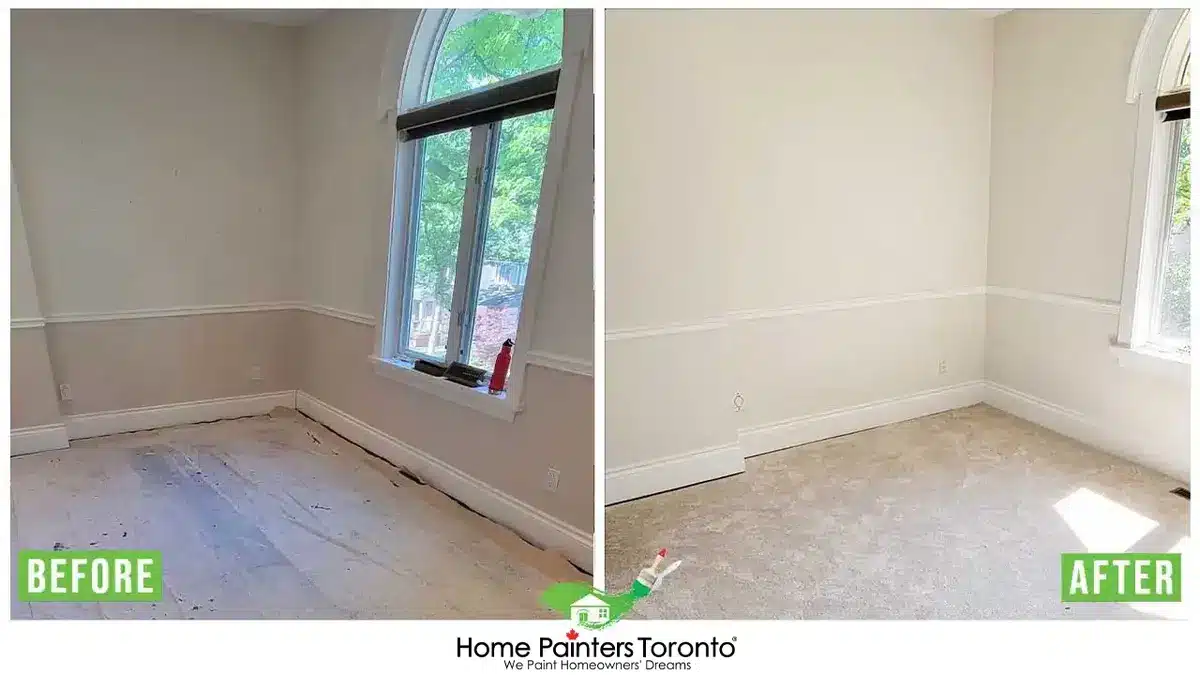
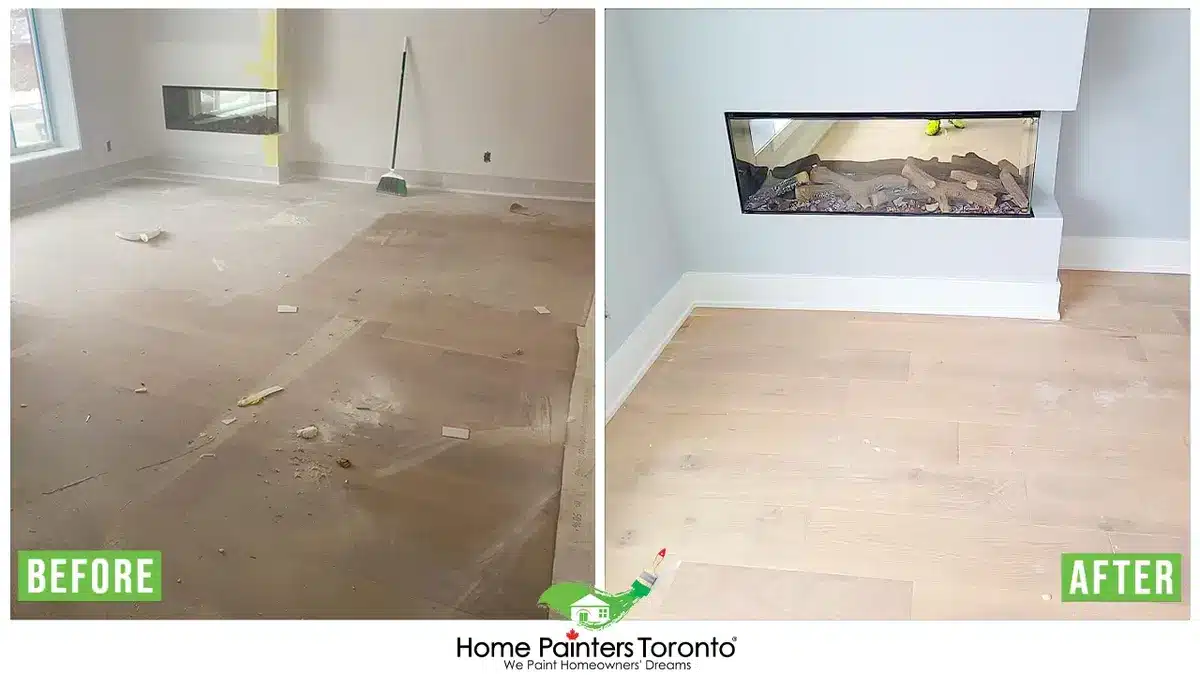
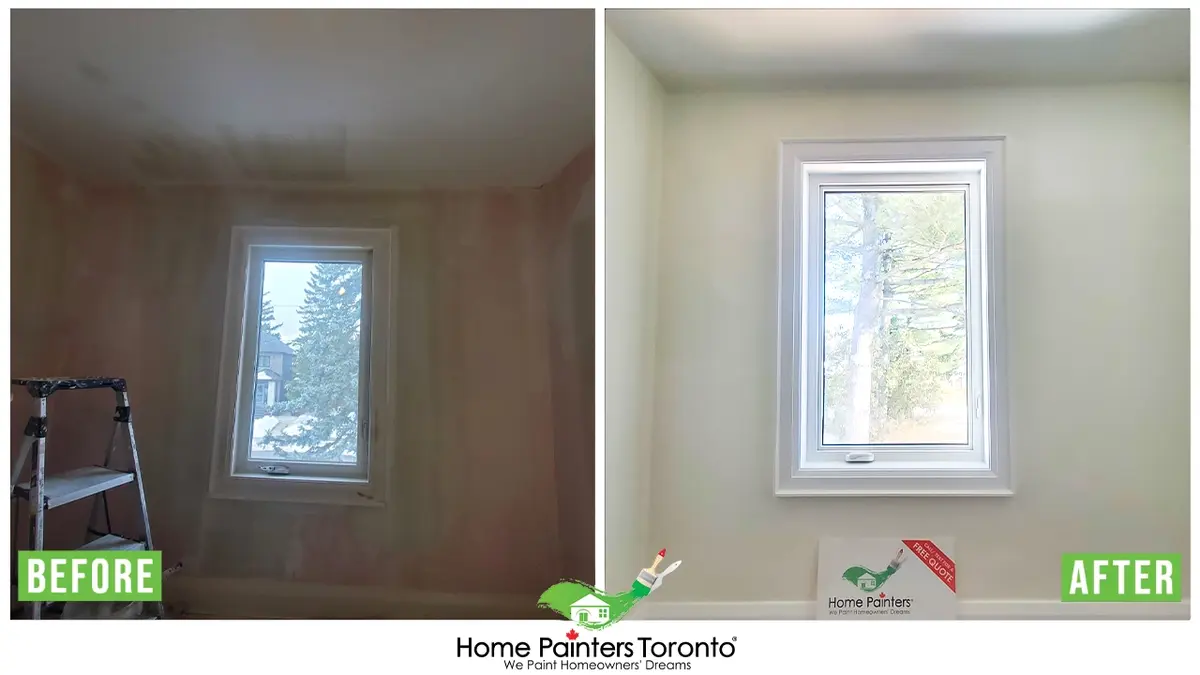
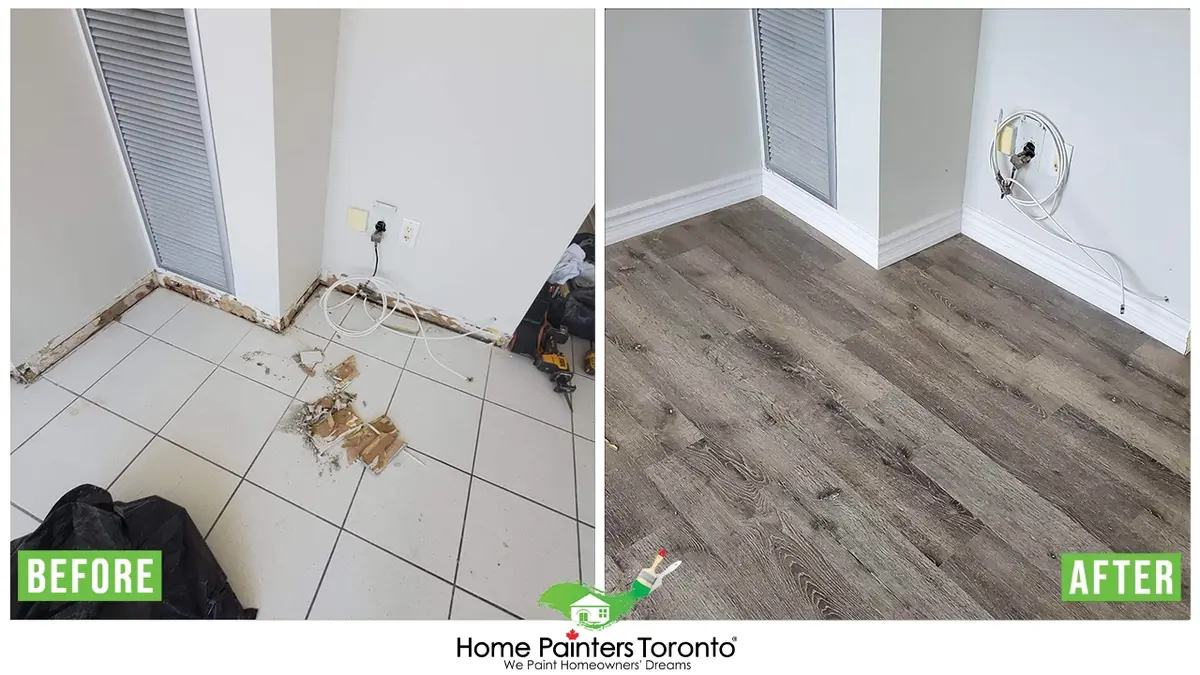
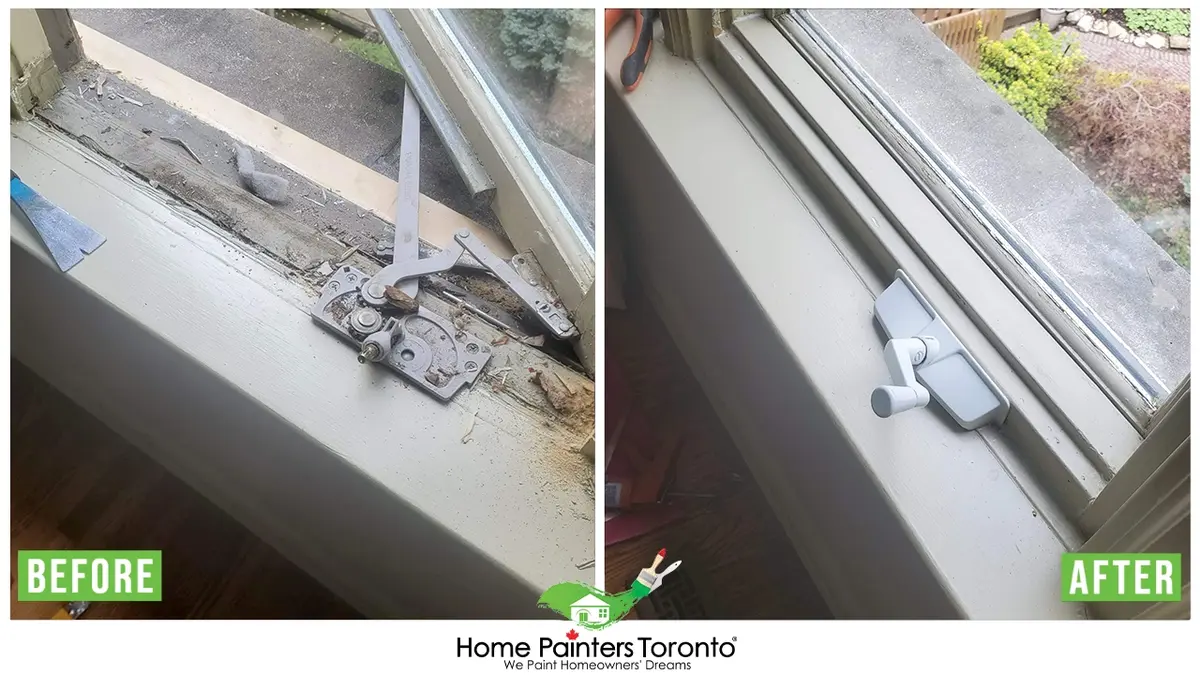
Best Interior Trim Installation and Repair Photos

MORE FREQUENTLY ASKED QUESTIONS
How much should I pay to have trim installed?
Trim installation costs vary depending on material, labor, and location, but you can expect to pay around $4 to $8 per linear foot. For a standard room, that often totals between $200 and $500. Getting quotes from a few contractors can help you find the best rate.
What is a maintenance installation and repair?
Maintenance installation and repair involve keeping parts of your home, like trim or fixtures, in good shape by fixing or replacing them as needed. This can prevent small issues from turning into costly repairs, keeping your home looking and functioning well.
How to fix damaged trim?
To fix damaged trim, start by sanding the area to smooth it out. Use wood filler for small dents or cracks, then sand again once it dries. For larger damage, replacing the trim piece might be best. Finish by painting or staining for a polished look.
How do you fix a bad trim job?
To fix a bad trim job, start by filling any gaps with caulk or wood filler. Sand down rough spots, repaint, and ensure each piece aligns properly. For major issues, removing and reinstalling the trim might be necessary for a cleaner, professional finish.
What causes cracks in trim?
Cracks in trim are often caused by changes in temperature and humidity, which make the wood expand and contract. Over time, this movement leads to small cracks, especially in older trim or trim that wasn’t installed correctly.
How do I make my trim look new again?
To refresh trim, start by cleaning it with a mild cleaner. Sand any rough spots, fill dents or cracks with wood filler, then sand again. A fresh coat of paint or stain can make it look brand new and add to your room’s appeal.
What is the cheapest trim option?
MDF (medium-density fiberboard) is often the cheapest trim option. It’s a budget-friendly material that can be painted easily and looks similar to wood. However, MDF isn’t ideal for high-moisture areas like bathrooms, as it’s less water-resistant than wood.
How to fix crack in trim?
To fix a crack in trim, clean the area and apply wood filler or caulk. Smooth it out, then let it dry fully. Sand the repaired area for a seamless look, and finish with paint or stain to match the rest of the trim.
Can you paint trim without sanding?
Yes, you can paint trim without sanding by using a bonding primer, which helps the paint adhere well. Clean the trim first, then apply the primer. This skips the sanding step and still provides a smooth, lasting finish for your trim.
What is the difference between trim and molding?
Trim is a general term for all finishing touches around doors, windows, floors, and ceilings, while molding usually refers to decorative elements like crown molding or baseboards. Essentially, molding is a type of trim with more intricate designs.
What kind of trim is popular?
Simple, modern trim styles like straight-edge or craftsman trim are popular for their clean, minimal look. For a classic feel, many choose crown molding or baseboards with subtle detailing. The right trim style can enhance any decor theme, from traditional to modern.
How do I choose a trim?
Choose trim based on your home’s style and the room’s purpose. Simple trim suits modern spaces, while ornate styles fit classic designs. Also, consider the trim material for durability—MDF is budget-friendly, while wood offers a timeless, high-quality finish.
Is it cheaper to replace trim or paint it?
Painting trim is usually more affordable than replacing it. If the trim is in good shape, a fresh coat of paint can restore its look. However, if it’s heavily damaged or warped, replacement may be the better long-term option.
How long does trim restore last?
A well-done trim restoration can last 7-10 years or more with proper care. Regular cleaning, avoiding moisture exposure, and touching up scratches or chips can extend its lifespan even further.
Why Feel Secure Using Home Painters Toronto?

The Best Warranties in the Industry

Regular Health and Safety Inspections

We Aren’t Satisfied Until You Are Satisfied

Full Workers Compensation
5 Million General Liability Insurance

Criminal Background Checks
Why Choose Home Painters Toronto?
What Makes Us Unique From Other Painting Companies?

speed
– We are open 7 days a week
– We offer ‘same day pricing’ estimates
– We can schedule commercial painters for your project within 1-2 business days or sooner
– Moreover, we also offer ‘one or two day’ painting services

Payment Flexibility
– We offer no interest payment plans
– Also, we offer ‘no fee’ credit card payments
– Visa, Mastercard, Paypal, E-transfers, Cheque, or Cash

1 stop shop
– We are a full-service painting company
– Professional painting, carpentry and handyman services
– We offer specialty niche painting services such as professional kitchen and vanity cabinet spraying, exterior brick staining, faux painting, and much more!

Reliability
– 38 years of proven industry experience
– 1200+ raving online reviews
– 17,000+ satisfied clients
– #1 rated house painter on HomeStars, winner 9 times and 7 years in a row!

Security
– The best warranties in the industry:
“A Lifetime Warranty on Interior Painting”
– 3 year warranty on exterior painting
-15 year warranty on brick staining
– 5 year warranty on cabinet spraying
– 100% Satisfaction Guaranteed!
Trim Installation & Repair Services in Toronto : Commercial Painters Toronto
Expert trim installation and repair services for commercial spaces in Toronto. Enhance your property’s aesthetics and durability with our professional baseboard, crown molding, and wainscoting solutions.