

Painting the garage is one of the most impactful home improvement projects a Toronto homeowner can undertake, and one of the most misunderstood. Most people approach it as a single project. It is actually three separate projects: the garage floor, the garage walls and ceiling, and the exterior garage door. Each surface has different prep requirements, different products, and different timelines. Treating them the same is the fastest way to end up with peeling paint on the floor, bubbling paint on the walls, or a garage door that needs repainting within two years.
This guide covers all three surfaces completely. Whether you are finishing an unfinished garage, refreshing a space that has not been touched in years, or preparing for a sale, every step is here: what to clean, how to prep, which products to use, how to apply them, and what the job costs professionally in Toronto in 2026.
- Why the garage is worth painting and what it does for your home's value
- Painting the garage floor: epoxy vs. concrete floor paint, prep, and application
- Painting garage walls and ceiling: surface types, primer, paint products, and technique
- Painting the exterior garage door: prep, primer, and product by door material
- Colour choices for garage walls and exterior doors
- Tools and supplies you need for the full garage painting project
- The correct order to paint a garage (ceiling, walls, then floor)
- DIY vs. professional: what each approach realistically involves
- What painting the garage costs in Toronto in 2026
- A real project case study from East York
- FAQ answers to the most common homeowner questions
Want the whole garage done professionally? Get a free quote for interior painting in Toronto or exterior painting in Toronto.
A complete garage painting project covers three distinct surfaces — floor, walls and ceiling, and exterior door — each with different prep, primer, and product requirements.
Why Paint the Garage?
For most Toronto homeowners, the garage is the least maintained interior space in the home. Bare concrete floors release dust constantly. Unpainted or stained walls make the space feel grim and make it harder to find anything. A faded or peeling garage door drags down the entire street-facing appearance of the property.
Painting the garage addresses all of these problems at once. A painted or epoxy-coated floor eliminates concrete dust, resists oil and chemical staining, and transforms the space visually. Painted walls and ceiling make the garage significantly brighter, which improves functionality for any work or storage use. A freshly painted garage door improves curb appeal on the front elevation of the home, where the door often accounts for 30 to 40 percent of the visible facade.
From a practical value standpoint, a fully finished painted garage adds meaningfully to the perceived value of a Toronto home at listing. Buyers notice a clean, finished garage. It signals maintenance and care in a way that a dark, dirty, unpainted garage never can, regardless of how recently the rest of the house was refreshed.
Painting the Garage Floor
The garage floor is arguably the most used and abused surface in your home. It has to contend with foot traffic, vehicle weight, oil and chemical spills, de-icing salt tracked in on tires, and the expansion and contraction of a concrete slab through more than 100 freeze-thaw cycles per Toronto winter. Standard interior or exterior paints are not up to this job. The right product makes the difference between a floor that holds up for years and one that peels within months.
Epoxy vs. Concrete Floor Paint: Which Is Right for Your Garage?
Painting the garage floor is a great way to turn the room from shabby to classy. Before you can start, however, you will want to apply a primer or a sealer. Primer is used in most other painting projects because it helps the paint stick to the surface.
If you have problems with moisture in your garage, a sealer will be more appropriate for the floor to prevent future stains and concrete dust from ruining your fresh coat. A sealer can also act as a primer, so there is no need to use both products if you do choose to seal the floor.
Once the primer or sealer has dried, you can start using epoxy-type paint made specifically for garages to finish up the job. Start at one end of the garage and work towards an exit to avoid ruining your paint job by walking over it to get out. You can use a paint roller for painting the garage floor for the most part but switch to a brush to get the corners and any hard-to-reach areas. Let the first coat dry for 24 hours before you apply a second one.
Epoxy vs. Concrete Paint: A Full Comparison for Toronto Garages
| Feature | Two-Part Epoxy Coating | One-Part Concrete Floor Paint |
|---|---|---|
| Durability | Excellent; 10 to 20 years with good prep | Good; 3 to 7 years with good prep |
| Adhesion on concrete | Exceptional when properly etched and primed | Good with correct masonry primer |
| Chemical and oil resistance | High; resists gasoline, oil, brake fluid | Moderate; some staining may occur |
| Moisture tolerance | Can fail if concrete has active moisture below | More tolerant of minor moisture |
| Application difficulty | Higher; must mix components, work quickly | Lower; single-component, simpler to apply |
| Freeze-thaw resistance | Excellent when properly cured | Good with quality acrylic floor paint |
| Cost | $80 to $150 CAD per kit (covers one-car garage) | $40 to $80 CAD per pail |
| Best for | Fully finished garage spaces, high-use areas, vehicles | Storage garages, lighter-use spaces, budget projects |
For Toronto homeowners who use the garage as a real working space with vehicles, the two-part epoxy system is the better long-term investment despite the higher complexity and cost. For garages primarily used for storage or casual use, a quality one-part acrylic concrete floor paint applied over an etched and primed surface performs well at lower cost and effort.
Garage Floor Prep: The Most Critical Step
Before the primer or paint goes on, the floor must be properly prepared. This is where most DIY garage floor projects fail, not in the painting but in the prep.
The floor prep sequence for a Toronto garage is:
- Remove everything from the garage floor. Do not attempt to work around stored items.
- Sweep and vacuum all loose dirt, dust, and debris. Pay attention to corners and the garage door threshold where material accumulates.
- Degrease thoroughly. Use a dedicated concrete degreaser on all oil and grease stains, apply per product instructions, scrub with a stiff brush, and rinse very thoroughly. Any oil contamination left on the concrete will prevent the primer from bonding.
- Etch the concrete. For bare, smooth concrete that has not been previously painted or coated, an acid etching step (phosphoric acid or muriatic acid wash per product instructions) opens the concrete pores and creates the surface profile that the primer needs to grip. This step is non-negotiable for two-part epoxy systems. Rinse thoroughly after etching and allow the floor to dry fully (48 to 72 hours minimum).
- Fill cracks and holes with a concrete patching compound and allow to cure before priming.
- Apply an epoxy primer (for epoxy floor systems) or a masonry sealer primer (for one-part concrete floor paint). Allow to dry per product instructions before applying the topcoat.
The most common reason garage floor paint fails early is moisture coming up from below the concrete slab. This is a particular concern in Toronto basements and below-grade garages. A simple moisture test: tape a square of plastic sheeting to the concrete floor and leave it for 24 hours. If moisture has condensed on the underside of the plastic when you lift it, the slab has active moisture transmission. Address this with a breathable masonry sealer primer rather than a film-forming epoxy system, which will trap the moisture and fail.
Painting the Garage Walls
Painting the garage walls is a little easier than painting the garage floor. Once again, you will likely need to prime the walls, especially if the drywall is brand new or if there is water damage. A primer will help prevent the paint from soaking into the drywall and stop future stains from occurring. If the walls had been previously painted, however, you may be able to skip this step as long as you are using the same type of paint (i.e., latex or oil-based) and you have chosen a darker colour to go over a lighter one.
Garage Wall Surface Types and What They Mean for Prep and Paint
Toronto garages have one of several wall configurations, and the prep and product requirements are different for each.
Drywall garage walls (most common in attached garages post-2000): Clean with a mild detergent solution, avoid saturating the surface. Prime new or bare drywall with a dedicated drywall sealer primer. Fill holes and cracks with spackling compound, sand smooth, and spot-prime before topcoat.
Concrete block or poured concrete walls (older garages, below-grade walls): Degrease with TSP solution, rinse thoroughly, allow to dry fully. Apply an alkali-resistant masonry primer, not a standard drywall primer, as the high alkalinity of concrete will cause standard primer to fail at the adhesion level. Use a masonry paint or premium interior latex rated for masonry as the topcoat.
Wood framing or bare stud walls (older detached garages): Apply an oil-based or high-adhesion acrylic exterior primer to all wood surfaces. Pay particular attention to end grains. Apply two coats of topcoat.
For a full detailed guide to cleaning garage walls before painting, including TSP concentration guidance by wall type and oil stain treatment, see our guide to cleaning garage walls before painting.
Garage Walls and Ceiling: Best Paint
Garage Walls and ceilings: The best paint for garage walls and ceilings is an interior latex paint with a finish like semi-gloss or satin. This garage wall paint is easy to wipe clean, durable, and moisture-resistant.
Best Paint Products for Garage Walls and Ceilings in Toronto
| Surface | Recommended Product | Finish | Notes |
|---|---|---|---|
| Drywall walls and ceiling | Benjamin Moore Ben Interior or Sherwin-Williams ProClassic | Semi-gloss or satin | Semi-gloss is most washable; satin is acceptable for ceiling |
| Concrete block walls | Sherwin-Williams Masonry Paint or Benjamin Moore Ultra Spec Masonry | Satin or semi-gloss | Masonry-specific product required over alkali-resistant primer |
| Ceiling (any surface) | Benjamin Moore Waterborne Ceiling Paint (508) or any flat white interior | Flat or ultra-flat | Flat white on ceiling maximizes light reflection |
| Water-damaged drywall | Sherwin-Williams Extreme Bond Primer followed by any interior latex | Satin or semi-gloss | Stain-blocking primer essential before topcoat on damaged areas |
| Mould-stained walls | Zinsser Mould Killer treatment, then stain-blocking primer, then topcoat | Satin | Kill mould before priming; never paint over untreated mould |
White and off-white are the most practical colour choices for garage walls because they maximize the light in what is typically a dim space. Benjamin Moore Chantilly Lace, White Dove, or Sherwin-Williams Extra White on walls and ceiling create a noticeably brighter space than any coloured paint. If the garage doubles as a workshop, gym, or multi-use space, light grey walls (Sherwin-Williams Agreeable Gray or Benjamin Moore Revere Pewter) create a more finished, polished look while still reflecting adequate light.
Painting the Exterior Garage Door
Why Paint the Exterior Garage Door?
The exterior garage door is often the single largest surface on the front elevation of a Toronto home. On homes with a front-facing attached garage (which describes a significant proportion of homes across Etobicoke, North York, and Scarborough), the garage door may represent 30 to 50 percent of the total visible facade. A faded, peeling, or rusted garage door communicates neglect regardless of how well the rest of the home is maintained.
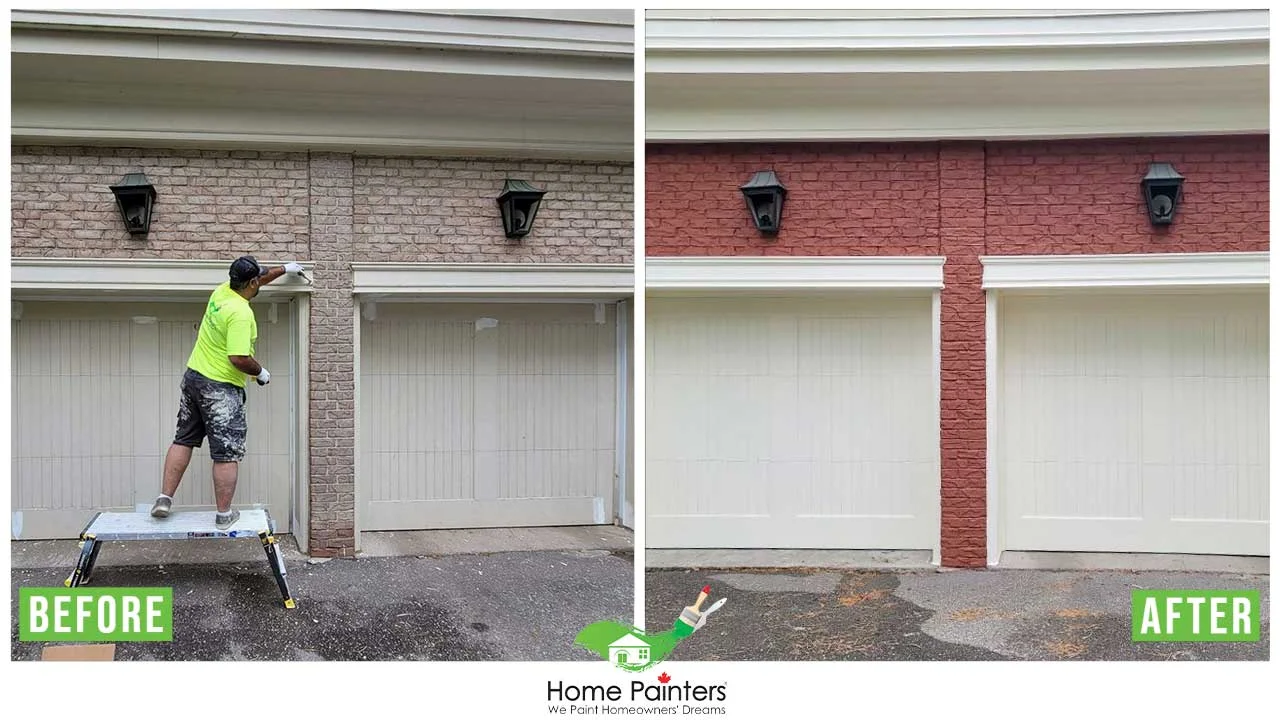
Painting the exterior garage door is the highest curb-appeal-per-dollar investment in the full garage painting project. A professionally spray-finished garage door in a fresh colour transforms the front elevation of a Toronto home as dramatically as a full exterior repaint at a fraction of the cost. For a complete guide to exterior garage door painting including material-specific guidance for steel, aluminum, wood, and fibreglass, see our exterior garage door painting guide.
How to Prepare Surfaces Before Painting the Garage Exterior
Before you start painting, take time to prepare the surfaces correctly to ensure a high-quality finish that will last.
Cleaning: Clean surfaces thoroughly with a solution of water and mild detergent to remove any dirt, grease, or grime. Rinse with clean water and allow it to dry completely.
Sanding: Lightly sand garage walls, trim, and any wooden surfaces to remove any loose or peeling paint and to create a smooth surface for the new paint to adhere to. Make sure to wear safety gear like a mask and goggles while sanding.
Filling Holes and Cracks: Fill any holes or cracks with a suitable patching compound, allowing it to dry completely before sanding it smooth.
Primer: Apply a high-quality primer to garage walls, especially if you're painting over a dark colour or bare wood. For concrete floors, apply an epoxy primer specifically designed for concrete surfaces.
Best Paint Products for the Exterior Garage Door by Material
According to Benjamin Moore's guide to painting garage doors, selecting the correct primer for the door material is the most critical step before any topcoat is applied. Using the wrong primer or skipping this step entirely is the most common reason exterior garage door paint fails early.
| Door Material | Primer | Topcoat | Notes |
|---|---|---|---|
| Steel | Rust-inhibiting metal primer (Rust-Oleum Clean Metal Primer or Benjamin Moore HP Acrylic Metal Primer) | Sherwin-Williams Duration Exterior or Benjamin Moore Aura Exterior (semi-gloss) | Treat any rust with rust converter before priming |
| Aluminum | Self-etching primer (Rust-Oleum Self-Etching Primer) | 100% acrylic exterior (semi-gloss) | Self-etching primer is non-negotiable on aluminum |
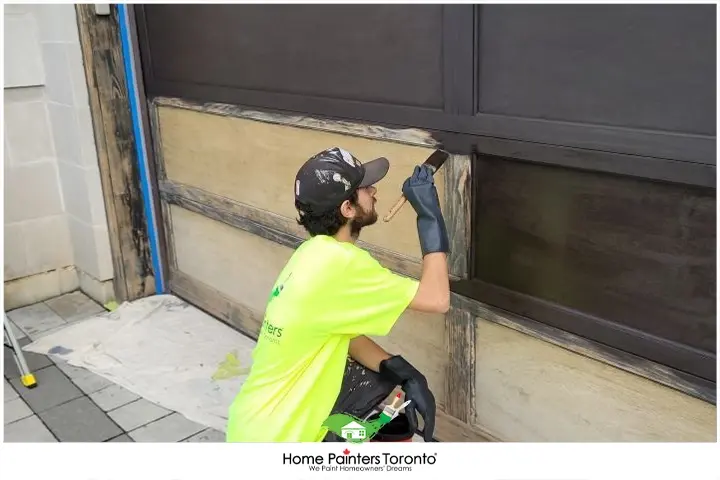
| Wood | Exterior wood primer (oil-based for bare wood) | Sherwin-Williams Duration Exterior or Benjamin Moore Aura Exterior | Fill and sand all cracks before priming |
| Fibreglass | Bonding primer (Sherwin-Williams Extreme Bond) | 100% acrylic exterior | Light sand before bonding primer |
Two topcoats are the professional standard on any garage door. Semi-gloss is the recommended sheen: it is more moisture-resistant than satin, easier to clean, and produces crisper paint lines. Always apply primer and topcoat in the same direction as the panel grooves to avoid visible brush or roller marks across the panel detail.
The correct painting order — ceiling, walls, floor, then exterior door — ensures drips from overhead work never land on finished surfaces below.
Tools You Need to Paint the Garage
Using the proper tools can make a big difference in the ease and finish of your painting project.
Brushes and Rollers: Opt for high-quality paintbrushes and rollers to achieve a smooth, even finish. Use angled brushes for cutting in, and remember to choose a roller with a nap length suitable for your wall's texture.
Paint Trays and Liners: Invest in sturdy paint trays and disposable liners to make cleaning up easier.
Extension Poles and Ladders: Use extension poles for rollers when painting garage walls and ceilings that are high, and have a ladder handy for those hard-to-reach spots.
Complete Tools and Supplies Checklist for Painting the Garage
Prep tools:
- Shop vacuum with brush attachment (dust removal before cleaning)
- Stiff-bristled scrub brush and sponges (cleaning walls and floor)
- TSP powder or TSP substitute (wall cleaning; do not use on garage floor if it will damage a new epoxy coating)
- Concrete degreaser (floor preparation)
- Acid etching solution (floor preparation for bare concrete)
- Wire brush (rust removal on steel door or metal surfaces)
- Concrete patching compound (floor crack repairs)
- Lightweight spackling compound (wall repairs)
- Exterior wood filler or auto-body filler (door repairs)
- Painter's tape (exterior-rated for door work, standard for interior walls)
- Drop cloths and plastic sheeting
Painting tools:
- 19mm (3/4 inch) nap roller covers for concrete block walls and floor
- 10mm (3/8 inch) nap roller covers for drywall walls
- 4-inch foam roller for garage door panel faces
- 10cm (4-inch) angled brush for cutting in corners and edges
- 6cm (2.5-inch) angled sash brush for garage door edges and profiles
- Extension pole for ceiling and high wall work
- Roller frame and paint tray with liner inserts
Safety equipment:
- Half-face respirator with organic vapour cartridge (epoxy systems and oil-based primers produce vapours that require more than a dust mask)
- Safety goggles
- Chemical-resistant gloves (for TSP, acid etch, and epoxy component handling)
- Non-slip footwear
The Correct Painting Order for a Garage
Paint in the Right Order: Start with ceilings, then move on to walls, trim, and finally, the floor. This order helps minimize the chance of getting paint on freshly painted surfaces.
This order is not just a recommendation. It is a functional necessity, particularly for the floor. Drips from the ceiling and wall work inevitably fall on the floor. If you paint the floor first and then the walls, every drip from wall painting lands on your new floor coating and has to be removed. Painting ceiling, then walls, then floor means all drips from overhead and wall work fall on an unpainted or primed floor that will be coated afterward. The garage door is typically painted separately, either before or after the interior work depending on whether it is being done in the same project scope.
The full painting order for a complete garage project is:
- Ceiling: Cut in with brush, roll flat areas. Apply primer plus two coats of flat white ceiling paint.
- Walls: Cut in with brush, roll flat areas. Apply primer plus two coats of interior semi-gloss or satin.
- Trim and baseboard: Brush application. Apply primer plus two topcoats if any wood trim is present.
- Floor: Apply acid etch or degreaser prep, allow to dry, apply epoxy primer or masonry sealer primer, apply two coats of epoxy or concrete floor paint with 24-hour dry time between coats.
- Exterior garage door: Painted separately from the interior work. Clean, sand, prime, two topcoats.
Drying and ventilation are critical throughout. Open the garage door or any windows for ventilation during and after all painting stages, particularly during epoxy floor work which produces significant vapours. Follow the manufacturer's recommendations on drying and cure times and do not drive onto the floor or apply the second topcoat before the first is fully dry per product specifications.
DIY vs. Professional Garage Painting
| Factor | DIY | Professional |
|---|---|---|
| Total project time | 3 to 5 days including drying between stages | 2 to 3 days with a professional crew |
| Floor prep quality | Risk of skipping acid etch; adhesion failures common | Correct prep for concrete type guaranteed |
| Wall primer selection | Risk of using wrong primer for wall material | Correct product for each surface type |
| Garage door finish | Roller and brush; acceptable results | Spray application; smooth, factory-like finish |
| Cost | $400 to $900 in materials for a complete garage project | $1,500 to $4,000 for full professional scope |
| Warranty | None | Home Painters Toronto: 3-year warranty on all painting work |
| Best for | Sound drywall walls, single-component floor paint, homeowner comfortable with prep | Epoxy floor systems, concrete block walls, exterior garage door spray finish, or where professional quality is the goal |
What Does Painting the Garage Cost in Toronto in 2026?
DIY Cost Estimate
- Interior latex paint for walls and ceiling: $50 to $90 per 3.78L (most garages need 2 to 3 pails for two coats)
- Drywall or masonry primer: $40 to $80 per pail
- Concrete floor epoxy system (primer and topcoat): $150 to $350 for a two-car garage
- Garage door exterior paint and primer: $80 to $180
- TSP, concrete degreaser, acid etch solution: $40 to $70
- Spackling, patching compound, sandpaper, painter's tape: $30 to $50
- Roller covers, brushes, drop cloths, extension pole: $50 to $100
- Total DIY materials for a full garage project (floor, walls, ceiling, door): $450 to $950 CAD depending on garage size and product choices
Professional Cost Estimate
Professional painting of a full garage in Toronto runs $1,500 to $4,000 CAD depending on:
- Garage size (single car vs. double car vs. oversized)
- Wall surface type (drywall is faster than concrete block)
- Whether the floor is included and which floor system (one-part paint vs. two-part epoxy)
- Condition of existing surfaces and extent of prep required
- Whether the exterior garage door is included in the scope
A professional scope that includes walls, ceiling, floor epoxy, and exterior garage door in a standard two-car Toronto garage typically runs $2,500 to $3,500 CAD, with the floor coating accounting for approximately 40 to 50 percent of that total. For a precise quote based on your specific garage, request a free estimate from Home Painters Toronto. For broader residential interior painting costs, see our interior painting cost guide.
Real Project: Garage Exterior Painting in East York
East York Detached Single-Car Garage: Exterior Repaint with Fascia Repairs and Coordinated Door Colour
Here is a summary of a recent garage painting project our team completed on a detached home in East York, which illustrates what a professional exterior garage project involves in practice.
The situation: The homeowner's detached single-car garage had an exterior that had not been painted in over twelve years. The wood siding on the garage was peeling on the south and west elevations, the fascia boards showed soft spots in two locations, and the steel garage door had rust developing at the bottom two panels. The homeowner wanted to match the garage to a fresh exterior paint job recently completed on the main house.
What the job involved: Our carpentry team addressed the two soft fascia sections before any paint work began. The full exterior of the garage was power washed and allowed to dry for 48 hours. Peeling paint was scraped and sanded, all caulk at corners and trim joints was replaced, and all bare wood was primed with Sherwin-Williams Exterior Latex Primer. The steel garage door received rust converter treatment at all rust areas, followed by a rust-inhibiting bonding primer and two coats of Sherwin-Williams Duration Exterior in a deep charcoal semi-gloss finish matching the garage door treatment on the main house. Two coats of Sherwin-Williams Duration Exterior in the same warm off-white as the main house were applied to all exterior wood siding.
The result: A fully cohesive exterior for both the main house and the garage, with the coordinated charcoal door colour tying the two structures together from the street. The carpentry repair work done before painting prevented the soft fascia sections from becoming significantly larger rot issues by the following spring. For more completed projects, visit our Toronto painting projects page.
Frequently Asked Questions About Painting the Garage
For maximum durability in a Toronto garage that sees regular vehicle use, a two-part epoxy floor system is the best choice. Two-part epoxy bonds chemically with the concrete, resists oil, gasoline, and salt-brine from winter tires, and handles Toronto's freeze-thaw cycling better than one-part paints when properly prepared and applied. For garages with moderate use, a quality one-part acrylic concrete floor paint is easier to apply and still provides a significant upgrade over bare concrete, though it will require recoating sooner than a two-part epoxy.
Yes, in almost all cases. New bare drywall requires a drywall sealer primer. Concrete block and poured concrete require an alkali-resistant masonry primer. Previously painted walls in good condition with no significant colour change can sometimes be painted without a full primer coat, but any bare spots, repaired areas, or staining require spot-priming before topcoat. Using the wrong primer for the wall material, or skipping it entirely on bare surfaces, is the most common reason garage wall paint fails to adhere and looks patchy within a season.
Semi-gloss is the recommended sheen for garage walls. It is the most washable, the most moisture-resistant, and the most practical for a space exposed to dust, grease, and general garage use. Satin is an acceptable alternative if a slightly less reflective finish is preferred. Flat or matte should not be used on garage walls.
For one-part acrylic concrete floor paint, most products recommend waiting 24 hours before light foot traffic and 72 hours before vehicle traffic. For two-part epoxy systems, the standard recommendation is 72 hours before light foot traffic and 7 days before vehicle traffic. Always follow the specific manufacturer's cure time guidance on the product packaging, as these vary by formulation. Driving on a floor coating before it has fully cured is one of the most common causes of tire-mark indentations and early coating failure.
The right colour depends on your home's exterior colour scheme and what visual role you want the door to play. The most common and broadly appealing approach is to match the garage door to the trim colour on the house (typically white or off-white), which creates a traditional, architectural look. For a more contemporary result, matching the door to the main body colour of the house makes the door recede visually and the front entrance become the focal point. A bold contrast colour (charcoal, navy, forest green) creates a strong visual statement and works particularly well when it matches or coordinates with the front door colour. For specific colour recommendations and how to coordinate the garage door with the rest of the home's exterior, see our exterior garage door painting guide.
If the garage renovation is more than two to three years away, yes. Painting the garage walls, ceiling, and floor now protects the surfaces through that period, makes the space significantly more functional and pleasant to use in the interim, and does not prevent the renovation from proceeding. If the renovation involves full drywall replacement or a floor demolition, the paint job will be lost, but the cost of painting is modest relative to the benefit of having a functional, finished space in the meantime. If renovation is less than a year away, investing in a full epoxy floor system is not sensible, but a simple wall and ceiling paint job using a basic interior latex is still worth doing.
Cleaning Tools: Clean brushes, roller covers, and trays immediately after use. For water-based paints, use soap and water. For oil-based paints, you will need to use paint thinner or mineral spirits.
Paint Disposal: Dispose of leftover paint and containers responsibly according to local regulations.
More Interesting Blogs Related to Painting the Garage: Everything You Need to Know
Want the Whole Garage Done Professionally?
Home Painters Toronto has been painting garages, interiors, and exteriors across Toronto and the GTA since 1987. Call 416-494-9095 or email [email protected] for a FREE quote.