

How to Repair and Touch-up Walls When They Get Scuffed or Damaged
Scuffed and damaged walls are one of the most common complaints from Toronto homeowners, and most of the damage does not require a full repaint to fix. Home Painters Toronto, a HomeStars Best of Award 2026 winner with over 37 years serving the GTA, has repaired countless scuffed, scratched, and patched walls across North York, Etobicoke, Scarborough, and beyond. The challenge is not just removing the mark. It is matching the existing paint sheen, feathering the repair, and avoiding the blotchy halo that tells everyone a touch up was done. This guide walks through every damage type, the right products for each, and the steps that produce a result that actually blends.
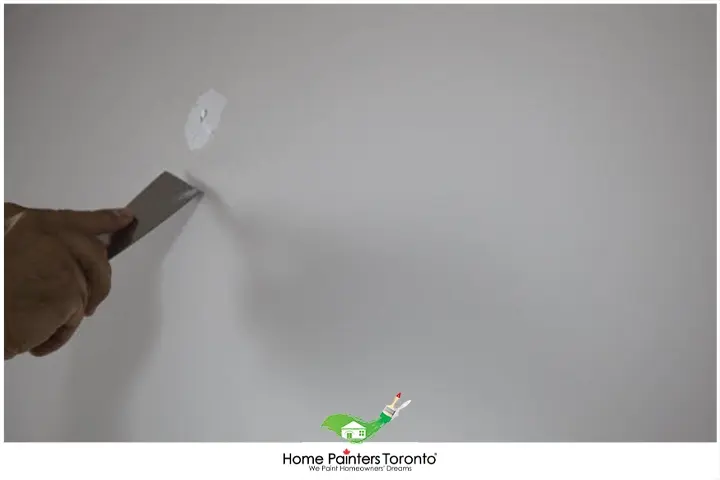
The repair that actually blends starts with identifying the damage type, priming the patch, and feathering thin coats outward — skipping any of these three steps is why most touch-ups remain visible.
Why Touch-Up Paint Often Looks Worse Than the Original Damage
Most touch up paint jobs fail because of sheen mismatch, not colour mismatch. Paint sheen changes as it ages. A spot of fresh flat paint on an aged flat wall will still look different because the new paint has not oxidised or settled the same way. In Toronto homes, where humidity swings between very dry winters and humid summers, this sheen drift happens faster than in more stable climates.
The second failure point is surface prep. Applying paint directly over a scuff or cleaned area without priming means the paint soaks in at a different rate, producing a dark or shiny spot called flashing. Priming the repair area first, even with a small amount of the original primer, levels the porosity and gives the touch up coat a uniform base to grip.
The third issue is application volume. Too much paint in one spot creates a raised edge that catches light and reads as a visible patch. Thin coats, feathered at the edges, always produce better results than one heavy coat.
How to Repair and Touch-up Walls When They Get Scuffed
Identifying the Type of Damage
Before you start the repairing process, determining the type of damage your walls have sustained is essential as it will dictate your course of action.
- Scuffs and Marks: These are common and typically simple to address. They are usually caused by objects brushing up against the wall, leaving behind minor superficial marks.
- Small Dings and Nail Holes: Small dings or nail holes are slightly more substantial than scuffs and might be a result of hanging picture frames or minor impacts.
- Large Holes or Dents: These are usually caused by a significant amount of force, like a door swing without a doorstop, and may require more intensive repair efforts.
Touch Up Walls: Dealing With Scuffs
A lot of the time, scuffs on the wall can be cleaned away. Here are some things to try before you bring out the paint.
- Use a Tennis Ball: Gently rubbing a tennis ball on the scuff can get rid of the mark on the wall.
- Wash the Wall: Use a soft cloth with soap and water to try and wipe the scuff off. You could also try making a baking soda solution by mixing 4 tablespoons of baking soda into a quart of water.
- Erase the Scuff: You could try using an eraser to erase the mark.
Whatever method you try, be careful not to take the paint away with you. If you do happen to wipe away some of the paint or cannot quite remove the entire scuff, you could put matching paint in a paint touch up pen and fill in the spot.
How to Use a Paint Pen To Touch Up Walls
For a perfect match when touching up small scuffs, dents, and marks on walls, you can use a paint pen. The best way to fill the pen with paint is to do so when you originally paint your walls, or with your original paint.
Most paint pens are airtight, meaning the paint you put inside will last for years. Fill the paint pen according to the instructions. Once you have the paint right down to the brush, you can simply paint over the mark in small, light brush strokes.
To repair and paint over small dents with a paint pen or paint brush, fill the dent with putty so you have a flat surface, even with the rest of the wall, and then paint over the putty. For walls that require more extensive prep, see our guide on how to prepare walls for an interior painting job.
Touch Up Walls With Small Holes
You can touch up small holes in the walls without having to repaint the entire space. Here is how:
- Smooth the edges of the hole using a small knife
- Clean around the hole and use a fine sandpaper to sand it down
- Use putty or joint compound to fill the hole.
- Lightly sand again to ensure a smooth finish
- Clean the area with warm, soapy water
- Use a small amount of paint to paint over the hole. It is important that you use the same paint. Two or more coats of paint may be needed. Be sure to let each coat dry before applying more.
Addressing Large Holes or Dents
Fixing larger holes typically requires a bit more effort and some additional materials.
Materials needed:
- Repair patch made of durable material (like Teflon)
- Adhesive (if the repair patch is not self adhesive)
- Broad Knife
- Joint compound (pre mixed)
- Fine grit sandpaper
- Primer
- Paint matching your wall colour
- Paintbrush
Ensure the area around the hole is clean and dry. Apply the adhesive to the patch (skip this step if your repair patch is self adhesive). Carefully align the repair patch over the hole and firmly press it against the wall.
Using the broad knife, apply a thin layer of the joint compound over the repair patch, extending it slightly beyond the patch edges. Let it dry as per the product specifications.
Use fine grit sandpaper to sand down the joint compound until you achieve a smooth surface.
Apply a single coat of primer over the repaired area to facilitate even painting. Once the primer dries, use the matching wall paint to touch up the area, just as you would for a small dent or hole. If you have a large repair to make, it is best to use an airless paint sprayer for walls instead of a paintbrush or roller. Our team also provides professional drywall repair and installation for larger wall damage that goes beyond a simple patch.
Damage Type vs. Repair Method: Quick Reference for Toronto Homeowners
The repair method depends on the severity of the damage. Using the wrong approach wastes time and produces a worse result. This table gives you the direct match between what you are seeing on your wall and what the fix actually involves.
| Damage Type | Cause | Repair Method | Paint Step Required |
|---|---|---|---|
| Surface scuff (no paint loss) | Furniture or objects brushing the wall | Tennis ball, eraser, or baking soda solution | Only if cleaning fails to remove the mark |
| Scuff with paint loss | Abrasion that removes the top paint film | Clean, spot prime, touch up coat | Yes, prime first then thin coat |
| Nail hole or small ding (under 6 mm) | Nail, screw, or minor impact | Spackling compound, sand, prime | Yes, always prime before painting |
| Medium hole (6 mm to 10 cm) | Door handle, shelving bracket removal | Self adhesive mesh patch plus joint compound | Yes, prime the patch and feather the edges |
| Large hole (over 10 cm) | Door swing, significant impact | California patch or drywall replacement | Yes, prime entire patch area before final coats |
| Water stain or ring | Moisture infiltration from above | Address moisture source, stain blocking primer | Yes, shellac primer first or stain bleeds through |
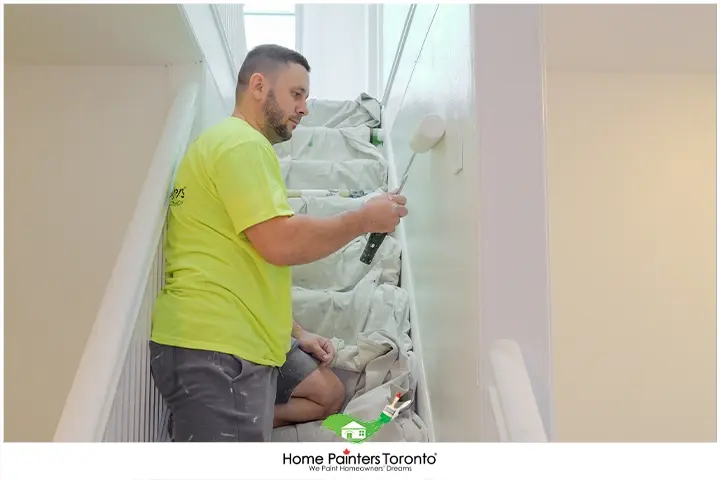
Sheen mismatch — not colour mismatch — is the most common reason touch-up paint remains visible. Painting the full wall section corner to corner is the only reliable fix when sheen drift is significant.
How to Match Paint When You No Longer Have the Original
If you no longer have the paint or paint code on hand, you can still get an almost perfect match made from a paint store. But, you will have to get a small sample of paint from the wall to take into the store with you. To do this, you will want to remove a small scraping of paint from the wall. Try and take from near the area that needs painting so you can repair and repaint both spots at once.
Use a sharp knife or box cutter to cut a small square that is at least 5 cm by 5 cm. Keep in mind, the larger the sample, the easier it will be for the paint store to match. Once you have cut the square, gently peel the paint sample from the wall. Take it with you to the paint store. A paint professional will be able to get you a colour and sheen match.
Paint Sheen Matching in Toronto: The Most Overlooked Step in Wall Touch-Ups
Colour matching gets all the attention, but sheen matching is what actually determines whether a touch up is visible. Toronto homes built in the 1970s through the 1990s often have multiple layers of paint in different sheens, especially in high traffic areas like hallways and stairwells where homeowners have repainted over the decades without keeping records.
Paint sheen is measured on a scale from flat through matte, eggshell, satin, semi gloss, and high gloss. Each sheen reflects light differently. A fresh eggshell spot on a wall painted with aged eggshell from ten years ago will still look different because the older paint has dulled from cleaning, UV exposure, and airborne particulates.
The professional solution for severe sheen drift is to paint a full wall section from corner to corner, not just the patch spot. This approach is called full wall feathering. It eliminates the visible boundary between old and new paint. For Toronto homeowners preparing a home for sale, this step often makes the difference between a wall that looks refreshed and one that looks repaired.
If your walls are in rough enough shape that sheen drift is visible across multiple rooms, a full interior repaint may be more cost effective than spot repairs throughout. See our interior house painting services for pricing and process details.
| Paint Sheen | Typical Room Use | Washability | Touch Up Difficulty |
|---|---|---|---|
| Flat / Matte | Bedroom ceilings, formal living rooms | Poor, marks easily | Hard (absorbs unevenly, shows patches) |
| Eggshell | Living rooms, bedrooms | Fair | Moderate (feather carefully) |
| Satin | Hallways, kids rooms, kitchens | Good | Moderate (sheen reflects patch edges) |
| Semi gloss | Bathrooms, trim, doors | Very good | Easier (more forgiving on small spots) |
| High gloss | Trim, cabinets | Excellent | Difficult (every imperfection shows) |
Tips for Touching Up Wall Paint
Pulling off a seamless touch up paint job on walls is not as easy as it seems. However, a bit of skill and some useful tips can help you get very close. Here are some of the best ways to touch up paint on your walls:
Always retain important information regarding the paint you used for your walls including color, brand, finish, and batch number. Paint colour can vary between different batches due to slight colour tweaks by manufacturers. Hence, the batch number can often be more crucial than colour and brand.
If possible, always save a bit of leftover paint specifically for touch ups. Since it is from the original batch, it will perfectly match your current wall colour. Store it in a tightly sealed, rust free can and a cool, dry place to maintain its quality.
Select the right sized brush for your job. Smaller brushes give you greater control for more precise touch ups. For larger patches, a bigger brush or roller might be more efficient.
Ensure the wall surface is thoroughly clean and free from dust or debris before applying paint. You might need to lightly sand the area or use a primer in some cases to help the paint adhere better.
When touching up, start with a thin layer of paint, let it dry, then see if you need another coat. Multiple thin layers often blend better than one heavy coat.
To avoid creating a visible outline of your touch up, feather the paint out from the center towards the edges. This technique blends the new paint seamlessly into the old.
Weather conditions can influence how paint dries and, consequently, the colour. If the weather is substantially different compared to when you first painted the walls, you might notice some colour variation. Paint dries darker during colder days and lighter during hotter days.
Lighting greatly influences colour perception. Different times of the day can make the same colour appear different. Examine your touch up job under different lighting conditions to ensure it blends well at all times.
By following these tips, you will be better equipped to handle any necessary touch ups, helping to maintain your wall's fresh and clean look over time.
When a Touch-Up Is No Longer Enough: Professional Repair Costs in Toronto
Most minor scuffs and small holes can be addressed without professional help. But there are damage scenarios where the scope of the work, or the risk of a poor result, makes professional repair the smarter choice. Walls that have multiple large patches, severe water staining, or repeated touch up failures from mismatched paint often need a trained eye to diagnose correctly before any repair is attempted.
At Home Painters Toronto, we are WSIB compliant, fully insured to $5 million general liability, and all our work is warranty backed. Our interior painting comes with a lifetime warranty. Here is a realistic cost breakdown for Toronto homeowners in 2026.
| Repair Scope | Typical Cost (CAD) | Notes |
|---|---|---|
| Small hole patching (up to 5 spots) | Included in painting quote | Typically part of surface prep on a full paint job |
| Drywall patch and paint, single room | $400 – $900 | Includes compound, prime, two coats on affected wall |
| Full interior room repaint (living or dining) | $400 – $900 | Per room, includes prep and two coats |
| Full interior room repaint (bedroom) | $400 – $800 | Per room, includes prep and two coats |
| Bathroom painting with repair | $250 – $500 | Moisture resistant products required |
| Hallway and stairwell repainting | $700 – $1,200 | High traffic areas often need full wall feathering |
For a full breakdown of what professional interior painting costs across all room types, see our interior painting cost guide.
Real Project: Wall Repair and Touch-Up in a North York Home
North York Hallway: Five Visible Patches, Sheen Mismatch, and Full Wall Feathering
One of the clearest examples of how touch up work can go wrong before it goes right came from a recent project in North York. A homeowner contacted Home Painters Toronto after several attempts to touch up a hallway wall that had been scuffed during a furniture move. Each attempt had made the wall look worse. There were now five visible patches in different shades of the same colour, all slightly off because each was painted at a different time of day under different lighting.
Our team assessed the wall and identified two separate problems. The original paint had been a satin finish. The touch up paint the homeowner had used was an eggshell in a similar colour. Even with a good colour match, the sheen difference was creating a blotchy, reflective inconsistency. The second issue was that no primer had been used on the patched spots, which caused the touch up coats to absorb unevenly.
The solution was to apply a thin coat of Benjamin Moore Fresh Start 100% Acrylic Primer to all five patched spots, allow it to cure to the touch (approximately 1 hour at 20 degrees Celsius), and then apply two thin coats of Benjamin Moore Regal Select in Satin finish, feathering from the patch centre out to approximately 30 cm in every direction. The entire hallway wall was completed corner to corner on the longest run to eliminate any sheen boundary line.
The result was a wall with no visible repairs and a uniform finish across the full length of the hallway. For completed projects like this one, visit our Toronto painting projects page. Our team handles everything from single wall repairs to full home interior repaints across the GTA.
WRAPPING UP
Now you have it. A comprehensive guide to repairing and touching up your walls when they get scuffed or damaged. While minor wall damage is practically unavoidable, especially in a bustling household, it does not mean you have to live with unsightly marks, dents, or holes. With a little patience and the right approach, you can keep your walls looking fresh and well maintained. For larger repairs, our interior painting services cover everything from spot repairs to full room repaints across Toronto and the GTA.
Frequently Asked Questions About Repairing and Touching Up Walls
The key is matching both colour and sheen, priming the repair area before applying paint, and feathering the edges of the touch up outward from the patch centre. For older Toronto homes where paint has faded or changed sheen over years of cleaning and UV exposure, painting a full wall section from corner to corner produces a more seamless result than a small spot touch up.
Paint changes sheen as it ages through oxidation, UV exposure, and cleaning. Fresh paint from the same tin applied to an older wall will still reflect light differently. Sheen mismatch is the most common cause of a visible touch up. If the sheen drift is significant, the only reliable fix is to repaint the entire wall section from corner to corner with two thin coats.
For nail holes and small dings under 6 mm, a lightweight spackling compound like Polyfilla is fast and easy. For holes between 6 mm and 10 cm, use a self adhesive mesh patch backed with two coats of pre mixed joint compound, sanding between coats. For holes larger than 10 cm, a California patch using a cut piece of drywall is the most stable repair and requires a primer coat before painting.
Spackling compound for small holes typically dries within 2 to 4 hours at normal indoor temperatures (18 to 22 degrees Celsius). Joint compound used for larger patches needs 24 hours minimum between coats and at least 24 hours after the final coat before priming. Primer dries to the touch in 1 hour but should cure for at least 2 hours before topcoat application. Rushing this process causes the topcoat to drag and lifts the compound beneath.
Yes. Our team handles repairs of all sizes across Toronto and the GTA. Small repairs are often bundled into a larger interior painting project, but we also assess standalone repair requests. The best way to find out what makes sense for your situation is to request a free estimate. Call 416-494-9095 or visit our interior painting services page to start.
A 100% acrylic primer is the standard choice for drywall repairs in Toronto. Benjamin Moore Fresh Start is a reliable product our team uses frequently on patch work. For walls with water staining or heavy discolouration, a shellac based primer like Zinsser BIN is needed first to prevent the stain from bleeding through the topcoat. Always apply primer before your topcoat on any patched area, regardless of how small the repair.
When a wall has more than four or five visible patches, or when the existing paint is more than 7 to 10 years old and has faded significantly, a full repaint is typically more cost effective than continued touch up attempts. A full repaint produces a uniform result without sheen boundaries or visible repair zones. Our interior painting cost guide gives a clear breakdown of per room pricing so you can compare the cost of touch ups against a full repaint.
More Helpful Blogs on Interior Painting and Wall Repair
Need Wall Repair or Touch-Up Help in Toronto?
Home Painters Toronto serves over 17,000 clients across the GTA with a lifetime warranty on interior painting. Call 416-494-9095 or email [email protected] for a FREE quote.