

Etobicoke and North York homeowners often call Home Painters Toronto after another contractor has already quoted aluminum fascia capping over an aging wood fascia board. Aluminum fascia capping wraps a painted aluminum coil around the existing wood, and that wrap can hide either a legitimate repair or a serious moisture problem building underneath it. Some capping jobs protect sound, properly primed wood for years, while others trap rot behind a shiny new surface and let the damage spread completely unseen. The difference comes down to the condition of the wood before the aluminum went on and whether the installer actually checked it with a moisture meter or a screwdriver probe. This guide explains when capping is a genuine fix, when it becomes a cover-up, and exactly what to check before you agree to it on your Toronto or GTA home.
Aluminum fascia capping is a legitimate repair when it covers dry, structurally sound wood that has been primed and properly fastened, extending its life with minimal upkeep. It becomes a cover-up when a contractor wraps aluminum over wet or rotted wood without repair, trapping moisture that lets hidden decay spread for years before it surfaces.
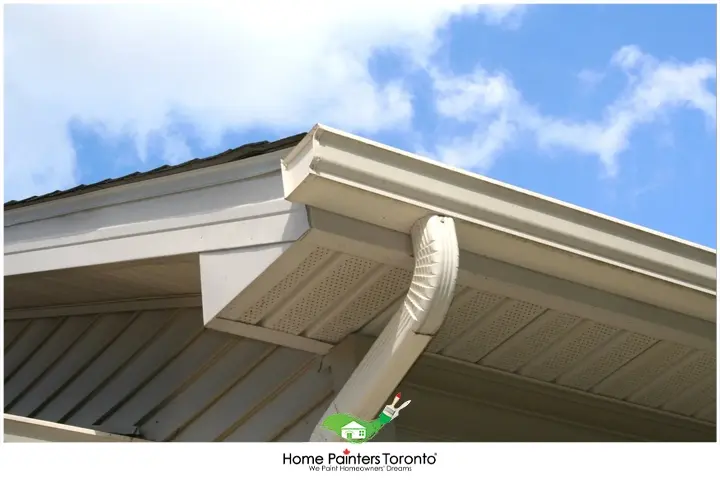
Some capping jobs protect sound, properly primed wood for years, while others trap rot behind a shiny new surface
What Is Aluminum Fascia Capping?
Aluminum fascia capping is the process of wrapping a thin, factory-painted aluminum coil around an existing wood fascia board to shield it from moisture, sun, and paint failure. Installers bend the coil on site to match the board's profile, tuck the top edge under the drip edge or shingle line, and fold the bottom edge around the underside near the soffit. The aluminum itself never needs repainting, which is why capping gets pitched as a lower-maintenance alternative to repainting exterior wood every few years. It is not the same job as wood fascia replacement, since capping covers the existing board without removing it. On Toronto and GTA homes, capping usually goes on during a broader exterior painting project alongside eavestrough work, since the same crew and ladders are already in place. Capping shows up most often on detached and semi-detached homes in North York, Etobicoke, and Scarborough, where original wood fascia dates back several decades and has already been through multiple repaint cycles. Homeowners usually consider it after noticing peeling paint at the roofline or after a roofer flags fascia condition during a shingle replacement quote.
When Aluminum Fascia Capping Is a Legitimate Repair
Aluminum fascia capping is a legitimate repair when the wood underneath is dry, structurally sound, and free of active rot at the time of installation. A qualified installer probes the board with a screwdriver or awl at multiple points along its length, checking for softness, and backs that up with a moisture meter reading below roughly 19 percent, a threshold CMHC's building moisture research associates with the point where wood-decay fungi stop actively growing. Sound wood gets a coat of exterior primer on any exposed or freshly cut grain before the aluminum goes on, and end grain at joints and corners gets sealed separately, since end grain absorbs moisture far faster than the face of the board. The same prep standards apply to exterior wood siding repairs elsewhere on the home, where bare, unsealed wood is the most common point of failure. Ventilation gaps at the soffit line stay open and are not sealed shut, so trapped attic moisture still has somewhere to escape. When these steps happen in order, capping can protect good wood for years with minimal repainting, since factory-applied coil coatings are engineered to outlast standard exterior paint cycles.

A qualified installer probes the board with a screwdriver or awl at multiple points along its length, checking for softness
When Capping Hides a Bigger Problem Underneath
Capping hides a bigger problem when a contractor wraps aluminum directly over wet, rotted, or delaminating wood without removing and repairing the damaged sections first. Aluminum is not a breathable material, so once it closes over a board that already holds excess moisture, that moisture has nowhere left to go. The wood stays wet at the core even while the surface looks finished from the ground, and decay fungi continue breaking down the cellulose fibers underneath the metal for months or years before anyone notices. Homeowners often only discover the problem once the aluminum ripples, a fastener pulls loose, or a section finally gives way under the weight of an extension ladder.
How Trapped Moisture Behind Capping Accelerates Wood Rot
Trapped moisture accelerates wood rot because decay fungi need both oxygen and sustained moisture above roughly 20 percent to spread, and a sealed aluminum wrap creates exactly that environment behind the metal. Trapped moisture is a primary driver of mould and structural decay inside building assemblies, according to CMHC's guidance on moisture and mould in housing. Toronto's freeze-thaw cycle makes this worse, since trapped water expands each time it freezes over winter, which further separates wood fibers and speeds up decay. By the time staining or softness becomes visible at the aluminum's edge, the rot has often already spread several feet in both directions.
- At a recent roofline inspection in Etobicoke's Islington-City Centre West neighbourhood, our crew removed a six-foot section of aluminum capping a previous contractor had installed roughly three years earlier.
- A moisture meter reading behind the aluminum came in at 32 percent, well above the threshold associated with active decay, and the wood underneath had gone soft and spongy along an eight-foot run.
- We cut the damaged fascia back to solid wood, primed the new material with Benjamin Moore Fresh Start All Purpose Primer, and finished the exposed trim in Benjamin Moore Aura Exterior in Low Lustre applied at roughly 4 to 5 mils wet film thickness before recapping the repaired section with new aluminum.
How to Tell If Your Fascia Was Capped Over Rot
You can tell fascia was capped over rot by checking for soft spots when you press on the aluminum, rippling or waviness along its length, dark staining or streaking at the seams, and a hollow sound when you tap near the roofline. Rot that starts at the fascia can travel into nearby window wood repair territory if it is left unaddressed, particularly where a run of fascia meets a window head, and it can affect aluminum siding painting results nearby if moisture keeps tracking sideways. The table below breaks down what each warning sign usually means.
| Sign | What It Usually Means | What to Do Next |
|---|---|---|
| Soft or spongy feel when pressed | Wood underneath has lost structural integrity | Request a probe test at that section |
| Rippling or waviness in the aluminum | Wood is swelling and shrinking with trapped moisture | Ask for a moisture meter reading |
| Dark staining at seams or joints | Water is tracking behind the capping | Check for a source above, such as a gutter or roof edge |
| Hollow sound when tapped | Wood has decayed and lost density | Schedule an inspection before painting nearby trim |
| Sagging along a run of fascia | Fasteners are pulling out of rotted wood | Treat as urgent, since a section could fail |
Capping vs. Full Fascia Replacement: Cost and Longevity Compared
Capping costs less upfront than full fascia replacement, but it only makes financial sense once the wood underneath has been confirmed sound, since capping over decay simply delays a more expensive repair. See our general exterior project cost ranges for how fascia work compares with other exterior projects, and review the side-by-side breakdown below before choosing a direction.
| Factor | Aluminum Capping | Full Fascia Replacement |
|---|---|---|
| Typical cost range (GTA) | $2,000 to $4,000 for a standard home | $4,000 to $8,000 or more, including new wood, primer, and paint |
| Best used when | Wood is dry and structurally sound | Wood shows soft spots, staining, or active rot |
| Ongoing maintenance | Minimal repainting needed on the aluminum | Standard exterior paint maintenance cycle |
| Hidden-damage risk | Moderate to high if wood was not inspected first | None, since damaged wood is fully removed |
| Warranty fit | Only meaningful when paired with a wood inspection | Covered under HPT's exterior and carpentry warranty terms |
Questions to Ask a Contractor Before You Agree to Capping
Ask a contractor whether they will remove a test section of the old material to inspect the wood, what their plan is if they find rot, and whether their warranty covers damage discovered after installation. The following questions help separate a careful contractor from one who is planning to cap over whatever is already there. A contractor who hesitates to answer any of these, or who insists a test section is not necessary, is usually more interested in a fast install than an honest assessment of your roofline.
- Will you probe or moisture-test the fascia before capping, and can I see the reading?
- What happens if you find soft or wet wood during the test section?
- Do you replace damaged sections before capping, or cap over them regardless?
- Is your crew WSIB compliant and fully insured for roofline work?
- Does your warranty cover hidden rot that surfaces after the aluminum goes on?
- Can I see recent project photos from similar roofline work in my neighbourhood?
Home Painters Toronto crews are WSIB compliant and fully insured, and every fascia repair or capping job we complete is warranty-backed, so it is fair to expect the same standard from any contractor you are considering. You can read verified client reviews from GTA homeowners who have had similar roofline and aluminum siding and window painting work done before making a decision.
The Right Way to Install Aluminum Fascia Capping
The right way to install aluminum fascia capping starts with a full moisture and probe inspection of every linear foot of the board before any aluminum goes on, not after. The steps below outline a proper sequence from inspection through to the finished wrap.
- Probe and moisture-test the entire run, marking any soft sections.
- Cut out and replace damaged wood, matching the existing profile.
- Spot-prime all exposed and freshly cut wood, including end grain.
- Confirm soffit vents remain clear and unobstructed.
- Bend aluminum coil on site to the correct profile and gauge.
- Fasten with concealed nails at proper spacing, leaving room for expansion.
- Tuck the top edge under the drip edge and fold the bottom cleanly at the soffit line.
The same crew that handles wood deck repair and other exterior carpentry on your property typically completes fascia capping as part of one exterior visit. Where fascia meets a masonry chimney, our carpentry crews coordinate with brick and mortar repair specialists to keep the whole roofline watertight.
Coil Gauge and Paint Film Thickness for Fascia Capping in Toronto Winters
Fascia capping installed in the GTA generally uses aluminum coil in the .019-inch gauge range, thick enough to resist denting from ladders and hail while still bending cleanly around a standard board profile. The factory-applied paint finish on that coil measures roughly 1 mil on smooth stock and closer to 3.5 mils on textured or striated finishes, according to trade data on aluminum coil stock published by the Journal of Light Construction. Thinner gauges save on material cost but dent and oil-can more easily once Toronto's temperature swings put the metal through repeated expansion and contraction.
Fastening Spacing and Drip Edge Placement
Proper fastening spacing keeps the aluminum flat and prevents the rippling that signals trapped moisture underneath. Installers typically nail up through the bottom leg of the coil every 18 to 24 inches, tucking the top edge under the drip edge or shingle course instead of face-nailing through the visible surface. Correct drip edge placement directs water away from the fascia and gutter line instead of letting it wick back behind the new aluminum.
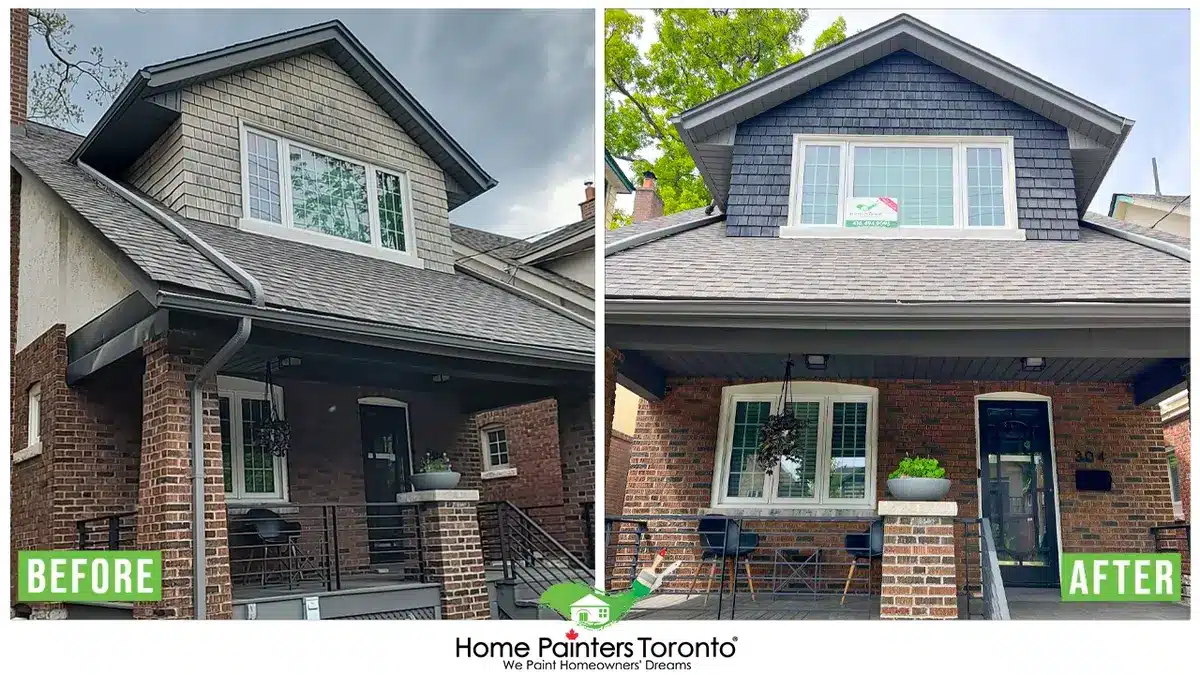
Correct drip edge placement directs water away from the fascia and gutter line instead of letting it wick back behind the new aluminum
Frequently Asked Questions About Aluminum Fascia Capping
Aluminum fascia capping typically lasts 20 to 30 years on the metal itself, according to typical finish warranties published by aluminum trim coil manufacturers, since factory-painted coil resists fading and chalking far longer than field-applied paint. That lifespan only holds if the wood underneath stayed dry when the capping went on, since rot underneath will keep spreading regardless of how the aluminum looks from the ground.
Yes, aluminum capping can be removed to inspect the wood underneath, and a reputable contractor should be willing to pull back a test section before quoting a full job. Removal usually takes a few minutes per section and causes no damage to sound wood, though it will expose any existing rot immediately.
Capping is usually cheaper upfront than full fascia replacement, generally landing in the $2,000 to $4,000 range for a standard GTA home compared with $4,000 to $8,000 or more for replacement. That gap narrows or reverses once you factor in the cost of tearing off aluminum later to fix rot that was capped over instead of being properly repaired the first time.
Capping does affect colour matching later, since factory-painted aluminum finishes cannot be perfectly matched by field-applied exterior paint if a section needs future repair. Most fascia capping comes in a limited range of standard colours, so homeowners with a custom exterior palette should confirm colour availability before choosing capping over a painted wood or full replacement option.
You can usually tell a contractor is planning to cap over rot if they quote the job from the ground without touching a ladder, refuse to pull a test section before signing a contract, or describe capping as a way to avoid dealing with the wood underneath entirely. A contractor confident in the wood's condition will welcome a probe test, since it protects them from a callback as much as it protects you from a hidden repair bill later.
Aluminum capping can go over previously painted fascia, provided the paint film is still adhered and the wood underneath tests dry. Loose, peeling, or blistering paint should be scraped and the wood re-tested before capping, since flaking paint under aluminum is often a sign that moisture was already getting into the board. Browse our full frequently asked questions page for more detail on how we approach exterior carpentry and roofline inspections.

Get an Honest Aluminum Fascia Capping Assessment in Toronto
Aluminum fascia capping can be a smart, long-lasting repair or an expensive way to hide a problem that keeps growing behind the metal, and the only way to know which one you are getting is a proper inspection before the aluminum goes on. Home Painters Toronto crews are WSIB compliant, fully insured, and back every roofline repair with warranty-backed work, so you get a straight answer about what is happening behind your fascia before any capping begins. We offer fast free quotes and warranty-backed work on every soffit, fascia, and exterior carpentry project across Toronto and the GTA.
Contact Home Painters Toronto to book your free, no-obligation roofline assessment today.
Get a Free Estimate