

Cedar Siding Repair in Toronto: Shakes, Shingles, and Boards
Cedar siding repair in Toronto covers cracked boards, cupped shakes, and grey, weathered shingles on the city's Victorian, Edwardian, and mid-century homes. Toronto's freeze-thaw winters and humid summers put real stress on cedar, and the older housing stock in neighbourhoods like Leslieville, Cabbagetown, and The Annex makes repair versus replacement a common question for homeowners. Home Painters Toronto has repaired cedar shakes, shingles, and board siding across the GTA for more than 38 years, earning over 1,200 positive reviews on HomeStars, Google, and Houzz, and matches new material to existing exposure and profile so patched sections blend in. Not every damaged cedar wall needs a full re-clad. This guide explains what causes cedar siding to fail in Toronto's climate, how to tell weathering from rot, and what professional repair actually involves.
Cedar siding repair in Toronto typically means replacing individual cracked, cupped, or rotted shakes, shingles, or boards while matching the surrounding exposure and stain colour. Most damage under about 25% of a wall section is repairable. Grey, weathered cedar without soft or spongy wood usually needs cleaning and refinishing, not replacement.
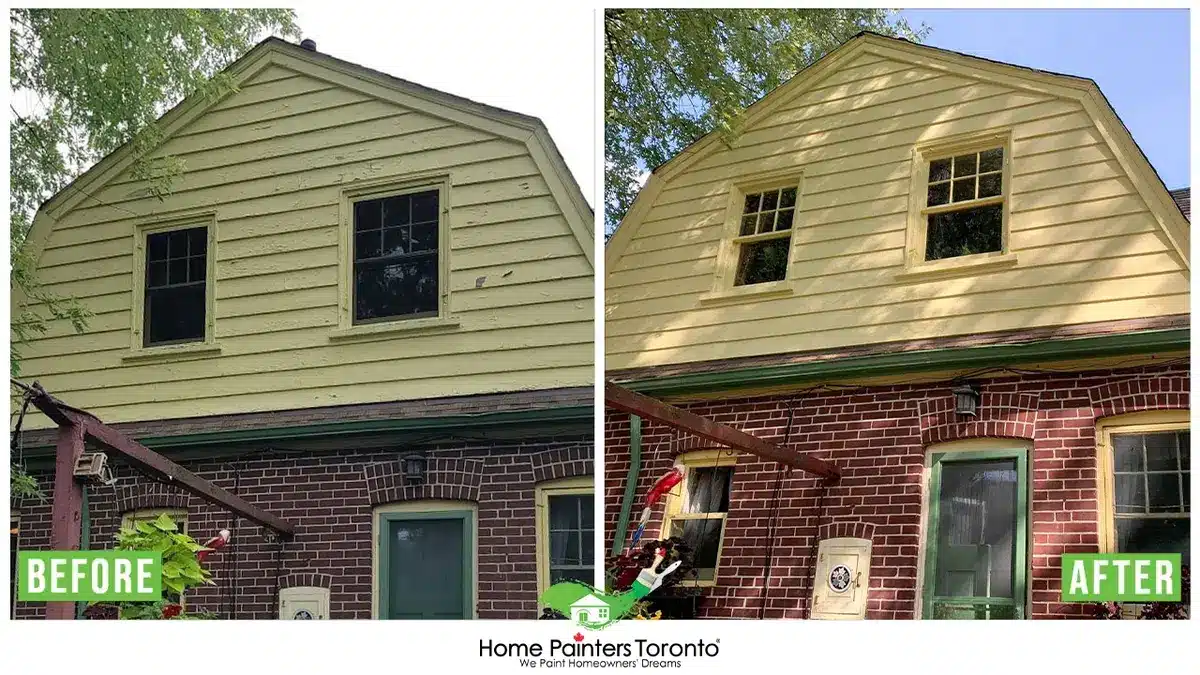
Not every damaged cedar wall needs a full re-clad
What Cedar Siding Repair Involves in Toronto
Cedar siding repair in Toronto means removing and replacing individual damaged shakes, shingles, or boards, then matching the new pieces to the surrounding exposure, profile, and stain colour so the patch is not visible from the street.
Cedar shows up on Toronto homes in three main forms: hand-split or machine-cut shakes, thinner sawn shingles, and solid board siding installed as tongue-and-groove or board-and-batten. Victorian and Edwardian houses across Cabbagetown, Riverdale, and The Annex often carry cedar shingle siding on gable ends and dormers, while mid-century homes in North York and Scarborough are more likely to use cedar board siding on full walls.
Repair work is narrower in scope than a full re-clad exterior wood siding project. A repair addresses a defined area, such as a cluster of split shakes around a downspout or a section of board siding damaged by a fallen branch, and it leaves the rest of the wall untouched. This keeps costs down and avoids disturbing sound, well-adhered material elsewhere on the house.
Many Toronto homes mix cedar with other exterior materials on the same elevation. Our crews also handle aluminum siding painting and vinyl siding painting for homes with mixed cladding, so a single crew can assess the whole exterior instead of sending a homeowner to three different contractors.
Because cedar ages and weathers unevenly depending on sun exposure, a repair crew also needs to read how the existing wall has aged before selecting replacement stock, which is part of our broader exterior carpentry and handyman services across the GTA.
Why Cedar Siding Fails in Toronto's Climate
Cedar siding in Toronto fails mainly from moisture cycling, ultraviolet exposure, moss and algae growth, and woodpecker damage, and all four causes are worse in this city's freeze-thaw winters than in milder climates.
- Moisture cycling: Toronto sees dozens of freeze-thaw cycles each winter, and repeated freezing of trapped moisture inside cedar grain causes splitting and cupping over time, according to freeze-thaw frequency data mapped by the Climate Atlas of Canada.
- Ultraviolet exposure: South and west-facing walls dry out fastest and lose surface extractives, which leads to greying, checking, and a rougher surface texture over a period of years.
- Moss and algae growth: shaded, north-facing walls in tree-lined neighbourhoods like Riverdale and High Park hold moisture longer, which encourages moss and green algae staining that traps water against the wood.
- Woodpecker damage: homes near ravine lots in areas such as Rosedale and Don Mills see occasional woodpecker holes in cedar shakes, which then let water behind the siding if the holes go unrepaired.
Most cedar failures in this city come from a combination of these four causes instead of a single one, which is why an on-site assessment gives a more accurate scope than a generic repair estimate. A wall on a shaded, mature-tree lot in Riverdale often shows moss and moisture cycling together, while an exposed south wall in a newer North York subdivision usually shows UV greying on its own.
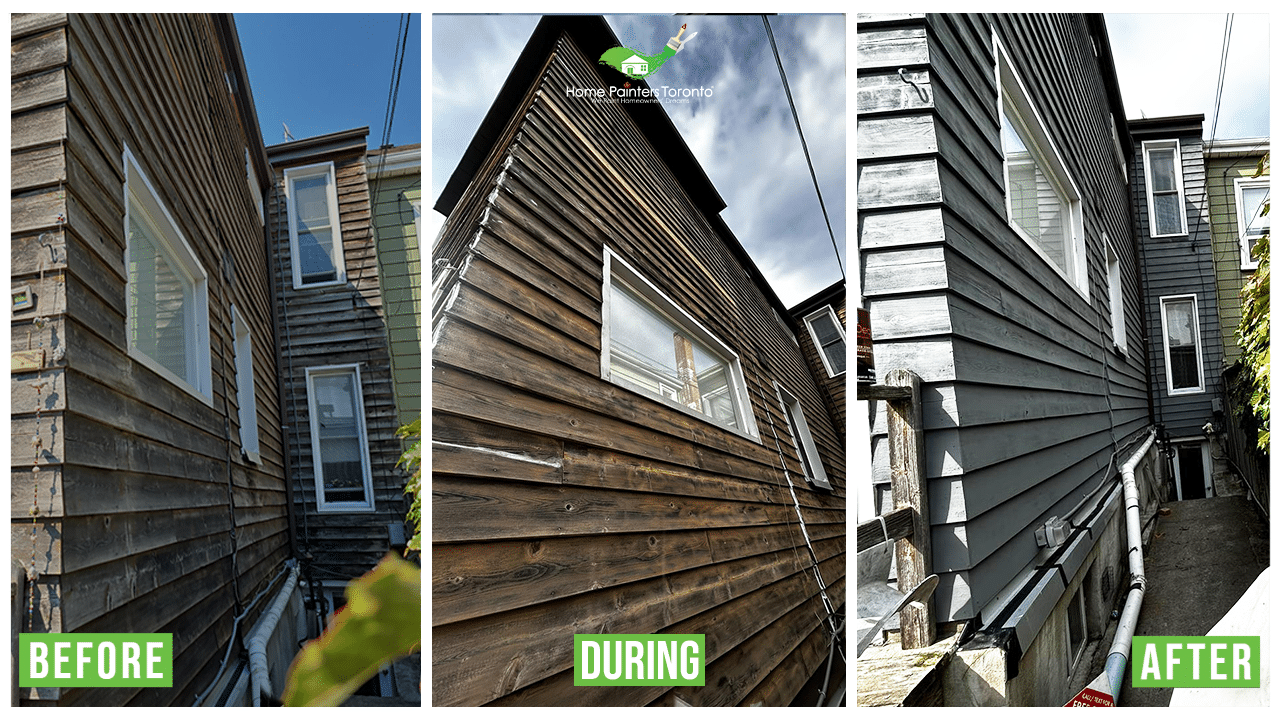
Most cedar failures come from a combination of causes instead of a single one
Signs Your Cedar Siding Can Be Repaired vs. Replaced
Cedar siding is usually repairable when damage is limited to cupping under about 3 millimetres, surface greying, or a handful of cracked pieces, and it usually needs replacement when the wood underneath is soft, spongy, or crumbles under light pressure.
| Sign | Repair or Replace | What to Look For |
|---|---|---|
| Grey, weathered surface with sound wood underneath | Repair (clean and refinish) | No soft spots when pressed with a screwdriver tip |
| Cupping or curling under 3 mm | Repair | Individual shakes lift slightly but stay attached |
| Isolated cracks or splits | Repair | Crack does not run the full length of the piece |
| Soft, spongy, or crumbling wood | Replace | Screwdriver tip sinks in easily, often with a musty smell |
| Damage across more than 25-30% of a wall section | Replace | Multiple adjacent pieces fail the same test |
| Rot at the base near grade | Replace, and inspect sheathing | Discoloration extends behind the siding into the wall assembly |
A trained assessor checks these signs with a screwdriver or an awl during the on-site estimate, since rot often hides behind sound-looking surface wood and photos alone can be misleading. Two shakes that look identical from the sidewalk can test very differently once pressure is applied, which is why we walk the full wall instead of sampling a single section near the ground.
Age alone is not a reliable predictor either. A 40-year-old cedar wall on a well-ventilated, sun-exposed elevation can still test sound, while a 10-year-old wall installed over poor flashing near a downspout can already have hidden rot at the base. The assessment always weighs moisture exposure and detailing over the calendar age of the siding.
How We Repair Cedar Shakes, Shingles, and Boards
Home Painters Toronto repairs cedar shakes, shingles, and boards in four stages: assessing damage and matching the exposure, removing and replacing individual pieces, priming bare wood, and staining or painting to blend the patch into the existing wall.
- Assess and match profile and exposure. We identify shake or shingle width, exposure (the visible portion of each course), and butt thickness so replacement stock lines up with the existing coursing.
- Remove and replace damaged pieces. Damaged shakes, shingles, or boards are pried free without disturbing the surrounding felt or house wrap, and new cedar is fastened using corrosion-resistant nails set to match the original pattern.
- Prime bare wood. Every cut edge and bare face on the new cedar gets a stain-blocking primer before finishing, which limits moisture uptake and helps the finish coat adhere evenly.
- Stain or paint to blend. The final coat is matched to the surrounding wall's current colour, not the original swatch, because older cedar has usually faded several shades from what it looked like when new.
Matching Shake and Shingle Exposure on Victorian and Edwardian Homes
Character homes in Cabbagetown and The Annex often carry cedar shingles with a 5-inch exposure and a wavy or fishscale butt pattern on gables, and most hardware-store shingle stock does not replicate that pattern. We source or custom-cut replacement shingles to match the original exposure and butt profile so the repaired section reads as original construction and not as a visible patch, an approach we also use on Tudor board wood repair for similar-era homes across the city.
Priming and Staining Bare Cedar Replacement Pieces
New cedar arrives dry and light in colour, which will not match a wall that has weathered for 20 or 30 years without extra work. We back-brush an oil-based, stain-blocking primer into the grain of every replacement piece, then apply two coats of finish stain and blend the sheen and tone against adjacent, older wood before calling the section complete.
- At a recent cedar shake repair in Leslieville, our crew replaced 42 damaged shakes on the north wall of an Edwardian semi-detached home, where shake cupping measured close to 4 millimetres and moisture readings ran above 19% before the work began.
- We primed the bare cedar and finished the wall with Benjamin Moore Arborcoat Semi-Transparent Stain in a matched cedar tone, applied at the manufacturer's recommended wet-film thickness.
Once cured, the patched section was indistinguishable from the surrounding 30-year-old shakes. That job also included resealing the window trim with exterior caulking around the same wall, since open seams there were letting water track behind the original shakes in the first place.
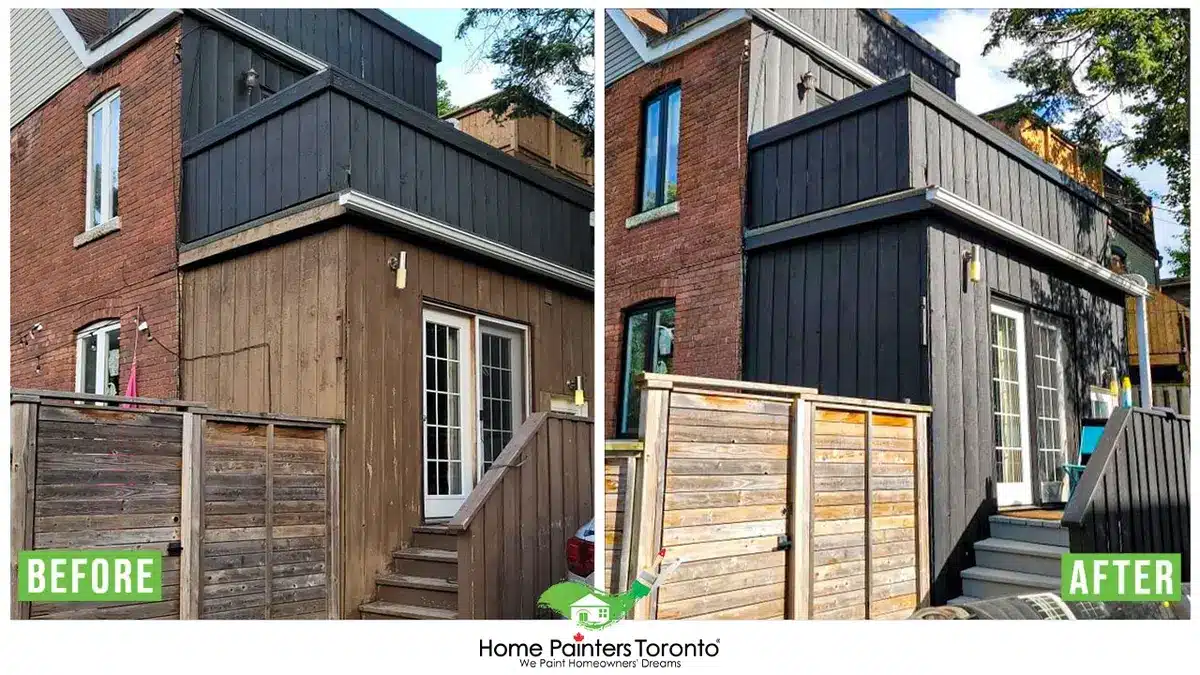
Once cured, the patched section was indistinguishable from the surrounding 30-year-old shakes
Cedar Siding Repair Cost in Toronto
Cedar siding repair in Toronto generally costs between $2,000 and $10,000 CAD + HST, depending on whether the work is a small patch, a cluster of shakes, or a larger wall section.
| Tier | Typical Scope | Estimated Cost (CAD + HST) |
|---|---|---|
| Small patch | A handful of shakes, shingles, or one to two boards | $2,000 – $4,000 |
| Medium cluster | A full gable end, dormer, or a multi-board section | $4,000 – $8,000 |
| Larger section | Extensive damage across one or more walls | $8,000 – $10,000 |
Custom-milled or hand-split shakes, matching a discontinued profile, or repairing rot that extends into the sheathing behind the siding can push a project toward the higher end of these ranges. Every estimate from Home Painters Toronto is a free, on-site quote, since photos alone rarely show cupping depth or hidden soft spots accurately. A written quote also breaks out material, labour, and finish coats separately, so homeowners can see exactly what drives the total before any work begins.
Caring for Cedar Siding After a Repair
Cedar siding needs a re-stain roughly every 3 to 5 years, regular moss removal, and clear gutters, based on typical recoat intervals published in Benjamin Moore's Arborcoat product guidance for exterior wood stains.
- Rinse cedar walls annually to remove pollen, dust, and early moss growth before it takes hold.
- Trim back shrubs and tree branches that keep a wall shaded and damp for long stretches of the day.
- Keep gutters and downspouts clear so runoff does not sheet down the siding after storms.
- Re-stain on the manufacturer's recommended interval instead of waiting for visible greying, since the wood is already losing its protective extractives by the time colour changes are obvious.
- Have any new cracks or lifted pieces looked at promptly, since a small repair now is far less invasive than replacing a wider section later.
If your property also has other exterior wood features nearby, we handle wood fence replacement and repairs, wood railings, posts, and pickets, and deck and fence staining on the same visit, which keeps the finish and maintenance schedule consistent across the whole property.
Why Grey Cedar Isn't Always Damaged Cedar
Grey, weathered cedar is not automatically damaged cedar. The colour change comes from ultraviolet light breaking down surface extractives in the wood, a natural process documented by Canadian forestry researchers at FPInnovations, and it does not on its own mean the shakes need replacing.
Many Toronto homeowners assume a grey wall is a failing wall and ask for a full re-clad when a clean and refinish would solve the problem for a fraction of the cost. The greying is a surface-level change measured in fractions of a millimetre, not a structural one, and it happens even to premium-grade cedar that was installed correctly. Confusing weathering with rot is the single most common reason homeowners overspend on cedar siding work in this city.
How to Tell Weathering From Rot in 30 Seconds
Press the tip of a screwdriver or awl firmly into the greyed area. Sound, weathered cedar resists the point and only leaves a small dent. Rotted cedar lets the tip sink in with little resistance, often accompanied by a musty smell and a darker, almost black discoloration around the soft spot. A moisture meter reading above roughly 20% in that same spot is a second confirming sign that the damage has gone beyond surface weathering, consistent with general moisture-content thresholds used in wood durability research.
Get a Free Cedar Siding Repair Estimate
A free, on-site estimate is the fastest way to find out whether your cedar siding needs a targeted repair or something more, and Home Painters Toronto provides same-day quotes across Toronto and the GTA.
Every cedar repair is warranty-backed, and our crews operate WSIB-compliant and fully insured on every job site, with criminal background checks completed on all crew members before they set foot on your property. With more than 17,000 clients served and over 1,200 client reviews on HomeStars, Google, and Houzz, homeowners in Leslieville, Cabbagetown, The Annex, and across the GTA have trusted our crews with their character homes for decades. You can read more about why homeowners choose Home Painters Toronto and confirm your neighbourhood is inside our service area before booking your free cedar siding repair estimate.
Cedar Siding Repair FAQ
Cedar siding usually needs repair, not replacement, when damage is limited to a handful of pieces and the wood underneath stays firm when pressed with a screwdriver tip. If soft, spongy wood or heavy discoloration shows up across more than a quarter of a wall, replacement of that section is typically the better long-term option.
Most cedar siding in Toronto is stained instead of painted, because a breathable stain lets the wood release moisture, while a paint film can trap it and blister. Stain also shows less obvious lap marks when a future repair needs to be blended into the surrounding wall.
Grey cedar siding is not automatically damage. It is a natural weathering process caused by ultraviolet light breaking down surface wood fibres, and sound cedar underneath a grey surface can usually be cleaned and refinished instead of replaced.
Yes, cedar shakes can usually be spot-repaired without replacing the whole wall, as long as the damage is confined to a defined area and the surrounding shakes remain sound and well-adhered. A wider re-clad only becomes necessary when damage or discontinued profiles affect most of the wall.
Most cedar siding repairs in Toronto take one to three days on site, depending on how many pieces need replacing and whether the finish coat needs extra time to cure between coats. Larger sections or custom-matched shingle profiles can extend that timeline.

Conclusion
Cedar siding repair works best when damage is caught early and matched carefully to the existing wall, whether that means a handful of shakes on a Leslieville gable or a full board-and-batten section in Scarborough.
Home Painters Toronto offers fast free quotes and warranty-backed work on every cedar repair across Toronto and the GTA.
Contact Home Painters Toronto to schedule your free, on-site cedar siding assessment.
Get a Free Estimate