

House painting and repair belong on the same work order for most Toronto homes, inside and out, and one experienced crew can handle both. Paint is a thin protective film, so it only performs as well as the wood, stucco, siding or drywall beneath it. Rotted trim, failed caulking, cracked parging and water-stained drywall all need fixing first, or the new coating peels early. Home Painters Toronto has provided house painting in Toronto since 1991, with more than 20,000 homes painted and 1,200+ positive reviews on HomeStars, Google and Houzz. This guide covers what our crews repair before primer goes on, the order the work follows, what a written quote should list, and which jobs belong to another licensed trade.
Before house painting, a crew should fix rotted wood trim, soffit and fascia, damaged siding, cracked stucco or parging, failed caulking and damaged drywall. Each repair must dry and be primed before paint goes on. A painting company with in-house carpenters can handle the repair, moisture check, priming and painting under one quote.
Key Takeaways
- Paint failure is usually a moisture symptom, so the water source gets fixed first.
- Exterior repairs cover wood rot, soffit and fascia, siding, stucco and caulking.
- Wood should read 15 percent moisture or lower before primer, per Behr Pro's exterior painting specification.
- New stucco and parging need a 30-day cure before coating, per Benjamin Moore's Aura Waterborne Exterior data sheet.
- Electrical work belongs to a Licensed Electrical Contracting Business, not a painter.
- Repairs should appear as separate line items in the written quote.
| Problem | Why it matters | Typical fix |
|---|---|---|
| Rotted window sill or trim | Softwood holds water and will not hold primer | Cut out the rot, splice or replace the board, prime all faces |
| Paint peeling in the same spot | Moisture is entering behind the paint film | Find and fix the leak, let the area dry, then prime |
| Failed caulking at windows and doors | Open joints let wind-driven rain behind the cladding | Remove the old bead and re-caulk with a paintable exterior sealant |
| Cracked stucco or parging | Water enters the crack and freezes | Cut back to sound material, patch, cure, then prime |
| Dented or loose siding panel | A broken finish exposes metal or lets water in | Reset, fill or swap the panel, then spot-prime |
| Nail pops and cracked drywall | Defects show through fresh paint | Reset fasteners, tape, fill, sand and prime the patch |
Painting and repairs in one job? Ask about our in-house carpenters when you request an estimate.
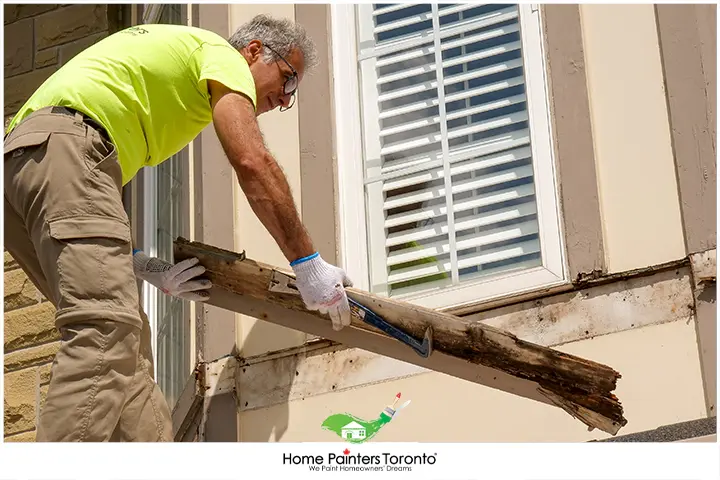
Repairs are completed and primed before any finish coat goes on
House Painting and Repair: Why They Go Together
House painting and repair go together because paint cannot bond to damaged, damp or moving surfaces. Most paint failure we see across the GTA is a symptom, not the real problem. Peeling on a window sill usually means water is reaching the wood from behind or below. Blistering on stucco often points to moisture trapped under the coating. Repainting over either one hides the damage for a season, and then it fails again.
Toronto's climate makes this worse. The Climate Atlas of Canada tracks freeze-thaw cycles as a climate variable for the region, and each cycle turns trapped moisture into ice. That expansion opens joints, lifts paint edges and widens stucco cracks. A coating applied over a wet substrate is under stress from its first winter.
Benjamin Moore describes Aura Exterior as a breathable film that lets internal moisture escape. That helps with small amounts of vapour. It does nothing for a rotted sill, an open mitre joint or an overflowing eavestrough. Those problems need a carpenter before they need a painter.
There is a cost side as well. A repaint that fails early means paying for scraping, priming and two finish coats a second time. The repair still has to happen, and it is usually larger by then. Home Painters Toronto's siding repair guidance notes that small damage left through another winter tends to spread. This is why most exterior house painting projects we quote include at least one repair line.
House Painting and Repair on Older Toronto Homes
Older Toronto homes need repair planning before painting because their old coatings may contain lead. Health Canada states that a home built before 1960 probably contains lead-based paint. Homes built between 1960 and 1990 may still have it on the exterior. That covers much of Riverdale, the Annex, High Park, East York and older parts of Etobicoke.
Health Canada also warns against using sanders or heat guns on lead-based paint, because they create toxic dust and fumes. Repair and prep on these houses call for a contractor with a dust-control plan. Ask how the crew will contain scrapings and clean up before work starts. A written quote should name the method.
Exterior Repairs Before House Painting
Exterior repairs before house painting cover six surfaces: wood trim, soffit and fascia, siding panels, stucco and parging, caulking, and window and door frames. Each one fails in its own way, and each has its own fix. The table below shows what our crews look for and where each repair fits.
| Surface | What fails | Repair before paint | Related HPT service |
|---|---|---|---|
| Wood trim and sills | Rot at end grain and open joints | Cut out soft wood, splice or replace, prime bare wood | Exterior wood repair and carpentry |
| Soffit and fascia | Rot behind eavestroughs, peeling board edges | Replace damaged boards and seal the joints | Soffit and fascia repair |
| Siding panels | Dents, cracks, loose or rotted boards | Reset, patch or swap the damaged panels | Siding repair in Toronto |
| Stucco and parging | Hairline cracks, bulging, crumbling patches | Remove loose material, patch and allow a full cure | Stucco repair and parging |
| Caulking | Split, shrunken or missing beads | Remove the failed bead and re-caulk | Exterior caulking for windows and doors |
| Windows and doors | Soft sills and open frame joints | Repair or replace the damaged wood sections | Window wood replacement and repairs |
The order on site matters. Carpentry comes first and masonry patches second. Caulking goes last, because sealant has to bridge finished joints. Our written estimate names each repair, so nothing is left to assumption.
Pressure washing is part of this stage, but it is not a substitute for repair. A wash removes dirt, chalk and mildew so primer can bond. It does not open weathered wood grain or remove failing paint edges. That takes scraping and mechanical sanding. Washed wood also needs drying time before any moisture reading counts.
Rotted Wood Trim, Soffit and Fascia
Rotted wood must be cut out and replaced, because paint and filler cannot restore soft fibres. Our carpenters probe suspect boards with an awl. Sound wood resists, and rotted wood gives way. Small, localized rot can take a two-part epoxy repair when the surrounding wood is solid. Deep or spreading rot calls for a new board.
New wood gets primer on all faces and cut ends before it goes up. End grain absorbs water fastest, so sealing it is what makes the repair last. The same logic explains why wood siding repairs come before repainting. Skipping primer on bare wood all but guarantees peeling, however good the topcoat is.
Siding, Stucco and Parging Cracks
Siding and stucco damage needs repair before paint because coatings bridge only the smallest gaps. Home Painters Toronto's siding guidance treats damage under about 20 percent of one wall as a repair job. Wider damage, repeat failures or wet sheathing point to replacement. Aluminum and vinyl panels interlock, so one damaged section can often be swapped without disturbing the wall.
Stucco cracks are cut back to sound material and patched with a cement-based product. Benjamin Moore's Aura Waterborne Exterior data sheet calls for new masonry to cure 30 days before priming or painting. A patch coated too early can show alkali burn and lose adhesion. The schedule has to respect that cure, even when the weather window is tight.
Interior Repairs Before House Painting
Interior repairs before house painting cover drywall and plaster, trim and baseboards, doors, and water damage. These are the items our crews check during the estimate:
- Drywall and plaster: nail pops, corner cracks, dents and holes. Our drywall repair and installation crew resets fasteners, tapes, fills and sands.
- Trim and baseboards: open gaps, split casings and swollen MDF. Baseboard installation and repair closes the gaps that fresh paint would highlight.
- Doors: sticking edges, damaged jambs and loose hinges. Door installation and repair comes before the finish coat.
- Water damage: stains, soft drywall and bubbled paint. The leak gets fixed first, and then the damaged board is replaced.
Sheen is the reason interior repairs matter so much. Eggshell and satin finishes reflect light across the wall, so every ridge and patch edge shows. An unprimed patch also absorbs paint differently than the wall around it. Painters call the result flashing, and a second coat will not hide it. A primer-sealer over each patch evens out the porosity first.
Older Toronto homes with plaster walls need a different patch than drywall. Loose plaster is re-secured or cut back to solid material before filling. Cracks along the ceiling line usually return unless they are taped. We reinforce them and feather the compound wide, so the repair disappears under paint.
Water stains need their own step. A stain-blocking primer locks in the tannin and mineral marks that bleed through latex paint. That primer only works once the source is dry. Our interior carpentry and handyman team handles the wood side of these repairs on the same schedule.
The Sequence: Repair, Dry, Prime, Paint
The sequence for house painting and repair is fixed: inspect, repair, dry, prime, caulk, then paint. Changing the order is the most common cause of early failure. Here is how a combined project runs on site:
- Inspect and find the moisture source. We check eavestroughs, flashing, caulk joints and grade before quoting any repair.
- Remove failed material. Rotted wood, loose stucco, failed caulk and damaged drywall all come out.
- Rebuild the surface. Carpenters replace boards, and patches go into stucco, siding and drywall.
- Let the repair dry or cure. Wood must reach a safe moisture reading, and masonry patches must cure.
- Prime bare and patched areas. The primer is chosen to suit each substrate.
- Caulk the joints. Sealant goes on after primer, so it bonds to a sealed surface.
- Apply two finish coats. Each coat goes on at the film thickness the data sheet lists.
We check surfaces are dry before we prime. That one habit prevents most callbacks on repair-and-paint projects.
Moisture Readings Before Primer
Wood should read 15 percent moisture or lower before primer goes on. Behr Pro's exterior painting specification sets that 15 percent ceiling for wood, measured with an electronic moisture meter. The same specification requires the surface to sit at least 5°F, or about 3°C, above the dew point. That second number matters in a Toronto fall. A sunny October afternoon can feel warm enough, yet the siding can cool to the dew point by early evening.
Temperature has a floor as well. Benjamin Moore's Canadian product page lists low-temperature application down to 2°C for Aura Exterior. Surface temperature is what counts, not the forecast high. Shaded north walls often run colder than the air around them.
At a recent exterior repaint in The Kingsway, Etobicoke, I found paint peeling on two front window sills and a length of fascia. Our pin meter read 24 percent on the lower sill, well above the 15 percent limit. Our carpenter traced the water to an open mitre joint and a clogged eavestrough above it. We replaced the sill nosing and about three metres of fascia, then primed every cut end. Four dry days later, the same sill read 12 percent.
We spot-primed with Benjamin Moore Fresh Start exterior primer and applied two coats of Benjamin Moore Aura Exterior in Low Lustre. The data sheet for that finish lists a dry film of 2.0 to 2.8 mils per coat, and we checked our wet film against it. Our quote listed the repair as its own line item. That way, the homeowner saw the cost before we started.
How Each Repair Changes the Primer and Paint Spec
Each repair changes the primer and paint specification, because new wood, fresh patches and cured masonry absorb and react differently than old painted surfaces. One primer does not suit every repair. The table shows what changes after each fix.
| Repaired surface | What changes in the spec | Why it matters |
|---|---|---|
| New or bare wood | Exterior wood primer on all faces and end grain | Tannins and resins bleed through latex without a blocking primer |
| Epoxy wood repair | Sand the cured epoxy, then prime | Cured epoxy is smooth and needs a profile for adhesion |
| Stucco or parging patch | Full cure, then a masonry sealer or primer | Fresh cement is highly alkaline and attacks standard coatings |
| Hairline stucco cracks | Patching compound or an elastomeric coating | A flexible film bridges cracks that move through freeze-thaw |
| Aluminum siding repair | Remove chalk and prime any bare metal | Chalky residue and bare aluminum both block adhesion |
| Drywall patch | Primer-sealer before the finish coats | Stops flashing and uneven sheen |
| Water stain | Stain-blocking primer once the area is dry | Stops marks from bleeding through the topcoat |
This is the detail a low quote often leaves out. A single "prime and paint" line hides the fact that each substrate needs its own product. Benjamin Moore's Aura data sheet pairs wood with a Fresh Start exterior wood primer and masonry with a masonry sealer or primer. A specification that names the primer for each surface shows the contractor has planned the repairs. Ask for that level of detail in writing.
Mil thickness matters too. A coat spread too thin over a fresh patch leaves the repair under-protected. Benjamin Moore lists a wet film of 4.6 to 6.4 mils for Aura Waterborne Exterior Low Lustre. Crews confirm it with a wet film gauge during application, not by eye.
What's Included in the Quote and What's Extra
A house painting quote normally includes standard surface preparation, and it lists structural or hidden repairs as separate line items. The split usually looks like this:
- Usually included: washing, scraping loose paint, sanding, filling nail holes and hairline cracks, spot-priming and caulking small gaps.
- Usually itemized: wood replacement, soffit and fascia boards, siding panel swaps, stucco and parging patches, larger drywall replacement and water damage.
| Quote line | Typical range (CAD + HST) |
|---|---|
| Exterior painting, small home | $2,000–$4,000 |
| Exterior painting, medium home | $4,000–$8,000 |
| Exterior painting, large home | $8,000–$10,000 |
| Interior painting, per bedroom | $400–$800 |
| Interior trim, doors and baseboards | $700–$1,200 |
| Exterior wood repair, smaller scope | $1,500–$3,000 |
| Exterior wood repair, mid-size scope | $3,000–$5,000 |
| Siding repair, small patch | $100–$300 |
| Siding repair, board or panel level | $150–$1,500 |
These are typical ranges from Home Painters Toronto's published pricing, and every home differs. Final pricing comes from an on-site assessment or detailed photos. Access, storey count and the amount of damage all move the number.
Hidden damage is the main reason quotes change. A sill can look sound and still be soft behind the paint film. A good quote covers the repairs that are visible and states in writing how extra findings are priced and approved. Ask whether the repair carries the same warranty as the paint.

A primer-sealer over each patch keeps flashing from showing through the finish coat
Why One Crew for Repair and Painting
One crew for repair and painting removes the handoff where most problems start. The comparison below shows where separate contractors tend to clash.
| Issue | One crew | Separate contractors |
|---|---|---|
| Schedule | Carpentry, drying time and painting are planned together | The painter waits on the carpenter, or paints too soon |
| Colour and sheen match | Repairs are primed and finished with one coating system | Patches may be primed with an incompatible product |
| Warranty | One company answers for the repair and the finish | Each trade can point at the other |
| Moisture checks | The same lead verifies readings before priming | Often nobody owns the reading |
| Access | Ladders or scaffolding go up once | Equipment is set up twice and billed twice |
Timing is where separate trades collide. A carpenter finishes on Friday, and the painter arrives Monday whether the wood is dry or not. With one crew, the same lead decides when a surface is ready. Nobody is pushed to prime early to hold a booking.
Home Painters Toronto has carpenters and handymen on staff full-time, alongside our painters. We are WSIB compliant and fully insured, with $5M in general liability coverage and criminal background checks on crew members. Exterior painting carries a 3-year warranty, and interior painting carries a lifetime warranty. That is what warranty-backed results look like in practice. Our client reviews show how combined projects have gone for other GTA homeowners.
What a Painting Company Can and Can't Repair
A painting company with in-house carpenters can repair wood, siding, stucco, caulking and drywall, but it cannot do electrical work or fix roofing and structural problems. The table sets out where the line falls.
| Work | Who does it | Why |
|---|---|---|
| Wood trim, sills, soffit and fascia | Painting company with carpenters | Finish carpentry tied to the coating system |
| Siding and stucco patches | Painting company with repair crews | Localized cladding repair |
| Drywall and plaster | Painting company | Standard surface preparation |
| New outlets, fixtures or wiring changes | Licensed Electrical Contracting Business | Required under Ontario's electrical safety rules |
| Roof leaks and failed flashing | Roofer | The water source sits outside a paint scope |
| Framing or foundation movement | Structural contractor or engineer | Needs assessment before any finish work |
Electrical work is the clearest limit. The Electrical Safety Authority states that only a Licensed Electrical Contracting Business can be hired to do electrical work in an Ontario home. Each licensed business carries a 7-digit ECRA/ESA licence number. Painters can remove and refit cover plates, but wiring changes go to a licensed firm.
Painting itself works differently. Skilled Trades Ontario classes Painter and Decorator as a non-compulsory trade, so certification is not mandatory to work as a painter. That makes insurance and WSIB the real checks. Ask for a current WSIB clearance certificate and proof of liability coverage before any work begins.
House Painting and Repair FAQs
These are the house painting and repair questions Toronto homeowners ask us most often.
Yes, painting companies with in-house carpenters repair siding, stucco and trim before painting. Home Painters Toronto handles wood rot, soffit and fascia, siding panels, stucco patches and caulking under the same quote. Not every painter offers this, so confirm it before booking. Ask who performs the carpentry and whether they are employees.
No, you cannot paint over rotted wood and expect the finish to last. Rotted fibres hold water and crumble, so primer has nothing solid to grip. The paint peels again, and the rot keeps spreading underneath. The damaged section has to be cut out and repaired or replaced first.
Minor preparation is included in a house painting quote, and larger repairs are listed separately. Scraping, sanding, filling small holes and spot-priming count as standard prep. Wood replacement, siding panels, stucco patches and drywall replacement appear as their own lines. Home Painters Toronto's published range for smaller exterior wood repair work is $1,500 to $3,000 plus HST.
Painting can start once the repair is dry or cured, and the wait depends on the material. Wood should read 15 percent moisture or lower, per Behr Pro's exterior specification. New stucco or parging needs 30 days, per Benjamin Moore's Aura Waterborne Exterior data sheet. Drywall patches are ready once the compound is fully dry and primed.
No, you do not need separate contractors when the painting company employs its own carpenters. One company can repair, prime and paint under a single schedule and warranty. You will still need a Licensed Electrical Contracting Business for wiring and a roofer for roof leaks.
Paint hides hairline cracks only briefly, and it cannot hide cracks that move. Benjamin Moore lists a dry film of just 2.0 to 2.8 mils per coat for Aura Waterborne Exterior Low Lustre. A moving crack tears through a film that thin. Cracks need filling, patching or an elastomeric coating first.
Getting House Painting and Repair Done by One Crew
Getting house painting and repair done by one crew means one inspection, one written quote, one schedule and one warranty. The repairs come first, and the surfaces dry. The right primer goes on each one, and the finish coats follow. That order is what carries a paint job through Toronto winters. Home Painters Toronto has done this work across Toronto and the GTA since 1991, and we are open seven days a week with same-day estimates.

Ready to have repairs and painting handled together? We offer fast, free quotes and warranty-backed work on every project.
Get Your Free Estimate Now