

How Long Exterior Caulking Lasts on a Toronto Home
Toronto homeowners often discover failing exterior caulking long after the damage begins. A failed bead around a window frame or brick joint lets water penetrate the substrate every time it rains. In a city with 65 or more freeze-thaw cycles per year, that moisture expands inside the joint and destroys the surrounding material fast. At Home Painters Toronto, we have seen this pattern on hundreds of homes across the GTA, and with over 1,200+ positive reviews on HomeStars, Google, and Houzz, we know exactly what causes caulking to fail and how to fix it right the first time.
Exterior caulking on a Toronto home lasts between 5 and 20 years, depending on the product type, surface material, and climate exposure. Polyurethane sealants on masonry last 10 to 15 years. Silicone around windows can last 20 years. Standard acrylic caulk degrades in 2 to 5 years under GTA winter conditions.
Exterior caulking lifespan in Toronto ranges from 2 years to over 20 years depending entirely on the sealant chemistry and where it is applied. For a complete picture of caulking windows and doors on GTA homes, the substrate and joint movement are the two most important variables to assess first. The biggest mistake Toronto homeowners make is using standard acrylic caulk on exterior masonry joints. That product belongs indoors. Outside, it absorbs water, loses adhesion within two winters, and cracks open before homeowners realise it has failed.
Windows, doors, metal frames, vinyl flanges
Brick, masonry, siding joints
Wood trim, painted surfaces, fascia joints
Interior transitions only — fails fast outdoors

Product chemistry and substrate are the two variables that determine caulking lifespan — silicone at 20+ years on metal and glass, polyurethane at 10–15 years on brick and masonry, standard acrylic failing in two winters outdoors
Why Toronto's Climate Destroys Caulking Faster Than Other Cities
How Toronto's Freeze-Thaw Cycles Attack Caulking Joints
Toronto sits in a climate zone that experiences more freeze-thaw cycles per year than most Canadian cities on a per-week basis during shoulder seasons. Each cycle forces the joint to expand as moisture inside the substrate freezes and then contracts as temperatures rise above zero. A caulk bead that cannot flex at least 25 to 50 percent of its joint width will tear loose from the substrate within two to three seasons.
Many homeowners think the problem is the cold. The real problem is the cycling. A sustained minus 20°C winter is far less damaging to a caulked joint than 60 consecutive freeze-thaw events between November and March. UV exposure compounds this in spring and summer. South-facing and west-facing exterior surfaces receive intense solar radiation that breaks down the polymer chains in acrylic and lower-grade siliconized products. By the time a homeowner calls us, the bead has already lost its elasticity and cannot seal the joint under any load.
| Factor | Impact on Lifespan | GTA Context |
|---|---|---|
| Freeze-thaw cycles | High | Toronto averages 65+ cycles per year |
| UV exposure | High | South and west faces degrade fastest |
| Joint width and movement | High | Joints over 12 mm need backer rod |
| Surface prep quality | Critical | No adhesion on dusty or oily substrates |
| Product grade | High | Big box store tubes fail 2 to 3x faster |
| Application temperature | Medium | Must be applied above 5°C for proper cure |
Caulk applied below 5°C does not cure properly. The sealant stays tacky, collects debris, and never achieves full adhesion strength. We see this frequently on homes where a contractor rushed the job in late October or November. We always check the overnight low for the 48 hours following application before scheduling any caulking work, not just the daytime temperature.
The Professional Caulking Process: What Happens on Site
Choosing the Right Caulking Product for Toronto Exteriors
Product selection is the most critical decision in the entire job. Silicone works best on non-porous surfaces like vinyl frames, glass, and metal. It bonds poorly to painted wood and cannot be painted over. Polyurethane sealants bond to virtually every exterior substrate, remain paintable, and flex through wide joint movement. They are the correct choice for brick-to-wood transitions, masonry control joints, and around precast window lintels. Siliconized acrylic latex is paintable, easier to tool than silicone, and lasts five to eight years on wood trim under GTA conditions.
Here is the full professional process we follow on every exterior caulking job in Toronto:
- Remove all old sealant using an oscillating tool or manual scraper — never caulk over existing beads
- Clean the joint with a stiff brush and solvent wipe to remove dust, oils, and efflorescence
- Install a closed-cell backer rod in joints wider than 8 mm to control bead depth and prevent three-point adhesion
- Mask both edges of the joint with painter's tape for a clean tooled finish
- Apply the sealant in a single continuous pass at consistent pressure
- Tool the bead immediately with a wet finger or caulk tool to press it into the joint faces
- Remove tape while the sealant is still wet and allow full cure before painting
Skipping the backer rod step is a common failure point on deep joints. When caulk bonds to the back of the joint as well as both sides, any movement tears the bead out from the centre. Backer rod forces the sealant to bond only on two faces, which is how it achieves full elongation capacity through Toronto's freeze-thaw cycles.
The Hidden Failure Signs Homeowners Miss Until It Is Too Late
Most caulking failures are invisible from street level until water damage has already occurred behind the wall. A bead can look intact from the outside while the adhesion line has already separated from the substrate on one or both sides — this is called edge failure, and it is the most common form of caulk degradation on brick and masonry joints in Toronto.
Press lightly along the edge of any suspect bead with a fingernail. If it lifts away from the substrate without resistance, the caulk has lost adhesion and water is already entering the joint on wet days. A bead that looks grey and chalky has experienced UV degradation of the surface film. It may still be partially sealed but will fail completely within one season.
Interior signs of failed exterior caulking that already require attention:
- Paint peeling or bubbling around window frames on interior walls
- Efflorescence (white mineral deposits) appearing on brick below window sills
- Soft drywall or damp smell in rooms adjacent to exterior walls after heavy rain
- Staining on soffits or fascia boards directly below window heads
When interior moisture damage appears, the repair scope often expands beyond caulking. Our team handles drywall repair and installation and brick and mortar repair as part of a comprehensive remediation when water damage has already spread into the wall assembly.

Edge failure looks intact from the street — the bead retains its shape even after debonding from the substrate. A fingernail pressed along the joint edge reveals the gap water has been using for one or two seasons
Caulking Longevity by Surface Type: What to Expect in the GTA
Not every surface ages at the same rate. Brick and masonry joints are subject to continuous thermal movement and UV exposure. Vinyl and aluminum window frames expand and contract at a different rate than the surrounding wall, creating shear stress at the caulk line with every temperature swing. The table below shows realistic lifespans for each surface type under Toronto climate conditions.
| Surface Type | Recommended Product | Realistic Lifespan (GTA) |
|---|---|---|
| Brick and mortar joints | Polyurethane (Sikaflex 1a) | 10 to 15 years |
| Vinyl windows and door frames | 100% Silicone | 15 to 20+ years |
| Wood trim and siding joints | Siliconized acrylic latex | 5 to 8 years |
| Stucco to wood transitions | Polyurethane | 8 to 12 years |
| Soffit and fascia joints | Siliconized acrylic latex | 5 to 7 years |
| Aluminum siding seams | 100% Silicone | 15 to 20 years |
Soffit and fascia joints are frequently overlooked during exterior maintenance cycles. Failed caulking at the soffit and fascia junction allows moisture to travel horizontally into the fascia board and wall framing, leading to wood rot that costs far more to fix than a simple reapplication. Similarly, exterior stucco surfaces require a flexible polyurethane sealant at every transition point to wall framing. Our team covers both exterior stucco siding and exterior wood siding painting to ensure every surface transition is sealed before paint goes on.
Case Study: Exterior Caulking and Repainting on an East York Semi-Detached
1963 Brick Veneer Semi-Detached: Edge Failure Causing Interior Moisture at 19%
We were called to a 1963 brick veneer semi-detached on Donlands Avenue in East York last autumn. The homeowner had noticed paint peeling along the interior window reveals on the second floor and suspected a roof issue. Our site assessment told a different story. Using a Tramex moisture metre, we recorded readings of 19% at the header course above two east-facing windows. The threshold for acceptable masonry moisture content is typically below 12%. The source was not the roof — it was a complete edge failure of the original polyurethane caulk bead on both window frames. The bead was still visually intact but had separated from the brick on the inboard side over its full length.
We removed the old sealant mechanically, installed a 10 mm closed-cell backer rod, and applied Sikaflex 1a polyurethane sealant at a 3/16 inch bead width tooled to a 45-degree concave profile. We allowed a 48-hour cure at 12°C ambient temperature before applying Benjamin Moore Aura Exterior in a Satin finish over the repaired and primed window surround. Follow-up moisture readings two weeks later showed 8%, well within the safe range.
That project is representative of the client reviews we receive regularly: homeowners who came to us for painting and left with a fully sealed, structurally sound wall assembly. Caulking is not an afterthought in a professional exterior house painting Toronto job. It is the first line of defence.
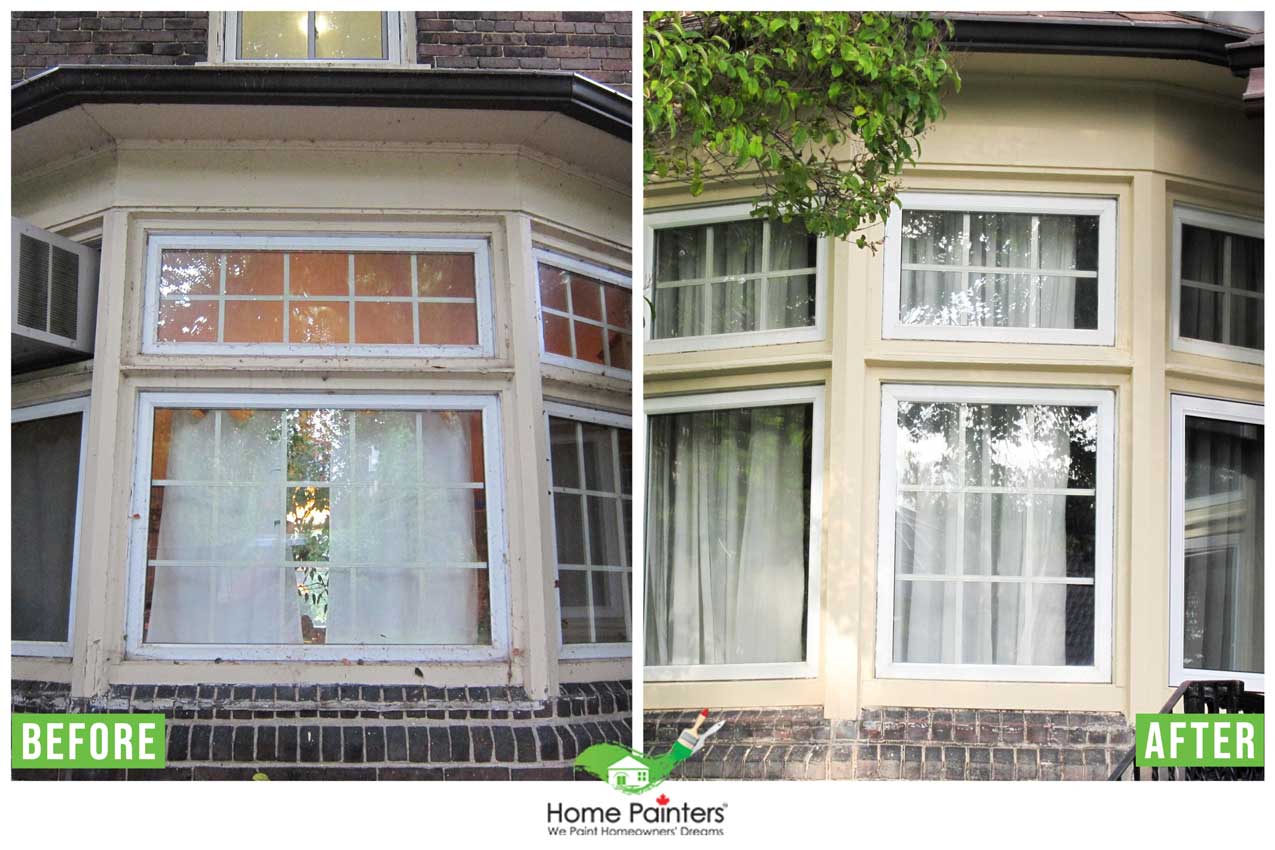
East York project: edge failure confirmed behind an intact-looking bead, moisture at 19% → 8% after backer rod, Sikaflex 1a at 3/16 inch tooled to 45-degree concave profile, 48-hour cure, Benjamin Moore Aura Exterior Satin
When Repainting and Recaulking Should Happen at the Same Time
Recaulking and repainting should always happen together during a full exterior refresh. Applying new paint over old, failing caulking is one of the most common callbacks we see from homeowners who hired a cheaper contractor. The paint bridges the failed bead and looks fine for six months. Then the bead moves, the paint film splits along the caulk line, and water enters the wall.
Remove old caulking → prepare the substrate → apply new sealant → allow full cure → prime → paint. Skipping any of those stages to save time produces a failure point that costs more to repair than the original job.
We are WSIB-compliant, fully insured with $5 million general liability coverage, and back every exterior job with warranty-backed results. Our interior painting comes with a lifetime warranty and our exterior painting with a 3-year warranty. We have served over 17,000 clients across the GTA in 38+ years as a family-owned and operated business.
Check out our painting projects portfolio or read about why homeowners choose Home Painters Toronto to understand what sets us apart from standard contractors. Understanding the cost of painting a house helps homeowners budget for both the painting and caulking scopes together. When caulking is included in the same mobilisation, the marginal cost is small compared to the water damage repair bills that follow a failed seal. If you are pairing exterior caulking with deck work, our deck and fence staining service covers all wood transitions and rail post bases where water infiltration is most common.
Frequently Asked Questions About Exterior Caulking Lifespan in Toronto
Run your fingernail along the edge of the bead where it meets the wall surface. If it lifts or separates without resistance, adhesion has failed. Cracked, chalky, or shrunken beads that show gaps along their length also require immediate replacement. Do not wait for interior moisture symptoms before acting — by the time paint is peeling inside, the substrate has likely been absorbing water for one or more seasons.
No. Applying new sealant over old failed caulk does not restore adhesion. The new product bonds to the degraded surface of the old bead, not to the substrate itself. Old caulk must be removed fully before reapplication to achieve proper adhesion and a watertight seal.
Polyurethane sealants, specifically Sikaflex 1a or a comparable single-component polyurethane, are the professional standard for masonry joints in Ontario. They bond to brick, mortar, and concrete, remain paintable, and flex through the thermal movement that Toronto winters impose on exterior walls. Silicone does not adhere well to masonry and cannot be painted over, making it the wrong product for brick joints.
Caulking is typically included within the scope of a full exterior painting project. A full exterior repaint for a small Toronto home runs between $2,000 and $4,000 CAD plus HST, while a medium home ranges from $4,000 to $8,000 CAD plus HST. Trim and caulking work on its own typically falls within the $700 to $1,200 CAD plus HST range. Contact us for a specific quote based on your home.
Polyurethane sealants require a minimum of 24 to 48 hours of cure time before painting, depending on ambient temperature and humidity. In cooler fall conditions at around 10°C, allow the full 48-hour window. Painting over under-cured caulk traps solvents in the bead and causes surface wrinkling and paint adhesion failure.
Yes, significantly. Air leakage through failed caulk around windows and doors is one of the leading causes of heat loss in older Toronto homes. Re-sealing the building envelope with fresh polyurethane or silicone sealant can reduce air infiltration measurably. This is not just a cosmetic repair — it directly reduces heating costs in Ontario winters.

Protect Your Home with the Right Exterior Caulking
Exterior caulking is the first line of defence between your home's wall assembly and Toronto's punishing climate. The right product, applied correctly to a clean substrate with a backer rod in place, will protect your home for 10 to 20 years. The wrong product, or the right product applied over an unprepared joint, will fail in two winters and let water do thousands of dollars of structural damage. At Home Painters Toronto, we treat caulking as a structural repair, not a cosmetic finish step. That is why our exterior brick staining and exterior painting jobs start with a thorough inspection of every joint on the building envelope before a brush or roller touches the wall.
Get a Fast Free Quote for Exterior Caulking and Painting
Ready to get a proper assessment of your home's caulking and exterior condition? Contact Home Painters Toronto today for fast free quotes and warranty-backed work. We are open 7 days a week with same-day estimates available for most GTA locations.
Contact Us for a Free Quote