

Hidden Moisture Behind Siding: Why It Takes a Professional to Find and Fix
Toronto homeowners often notice a soft spot on their siding long after the real damage started. Moisture behind siding rarely announces itself. Water slips behind a panel through a nail hole, a cracked caulking line, or a lifted flashing edge, then sits against the sheathing for months. By the time paint bubbles or a wall feels spongy to the touch, the sheathing, framing, or insulation underneath may already be compromised. This is why moisture behind siding is one of the hardest problems for homeowners to catch on their own and one of the easiest for a trained contractor to find with the right tools. Home Painters Toronto has served the GTA for 38+ years and holds a HomeStars Best of Award 2026 win, backed by 1,200+ verified reviews on HomeStars, Google, and Houzz.
Moisture behind siding means water has penetrated the cladding and is trapped against the sheathing, framing, or insulation, often invisible from outside. Toronto contractors detect it using moisture meters and probe testing, then repair the entry point, dry or replace damaged sheathing, and restore proper drainage before resealing the wall.
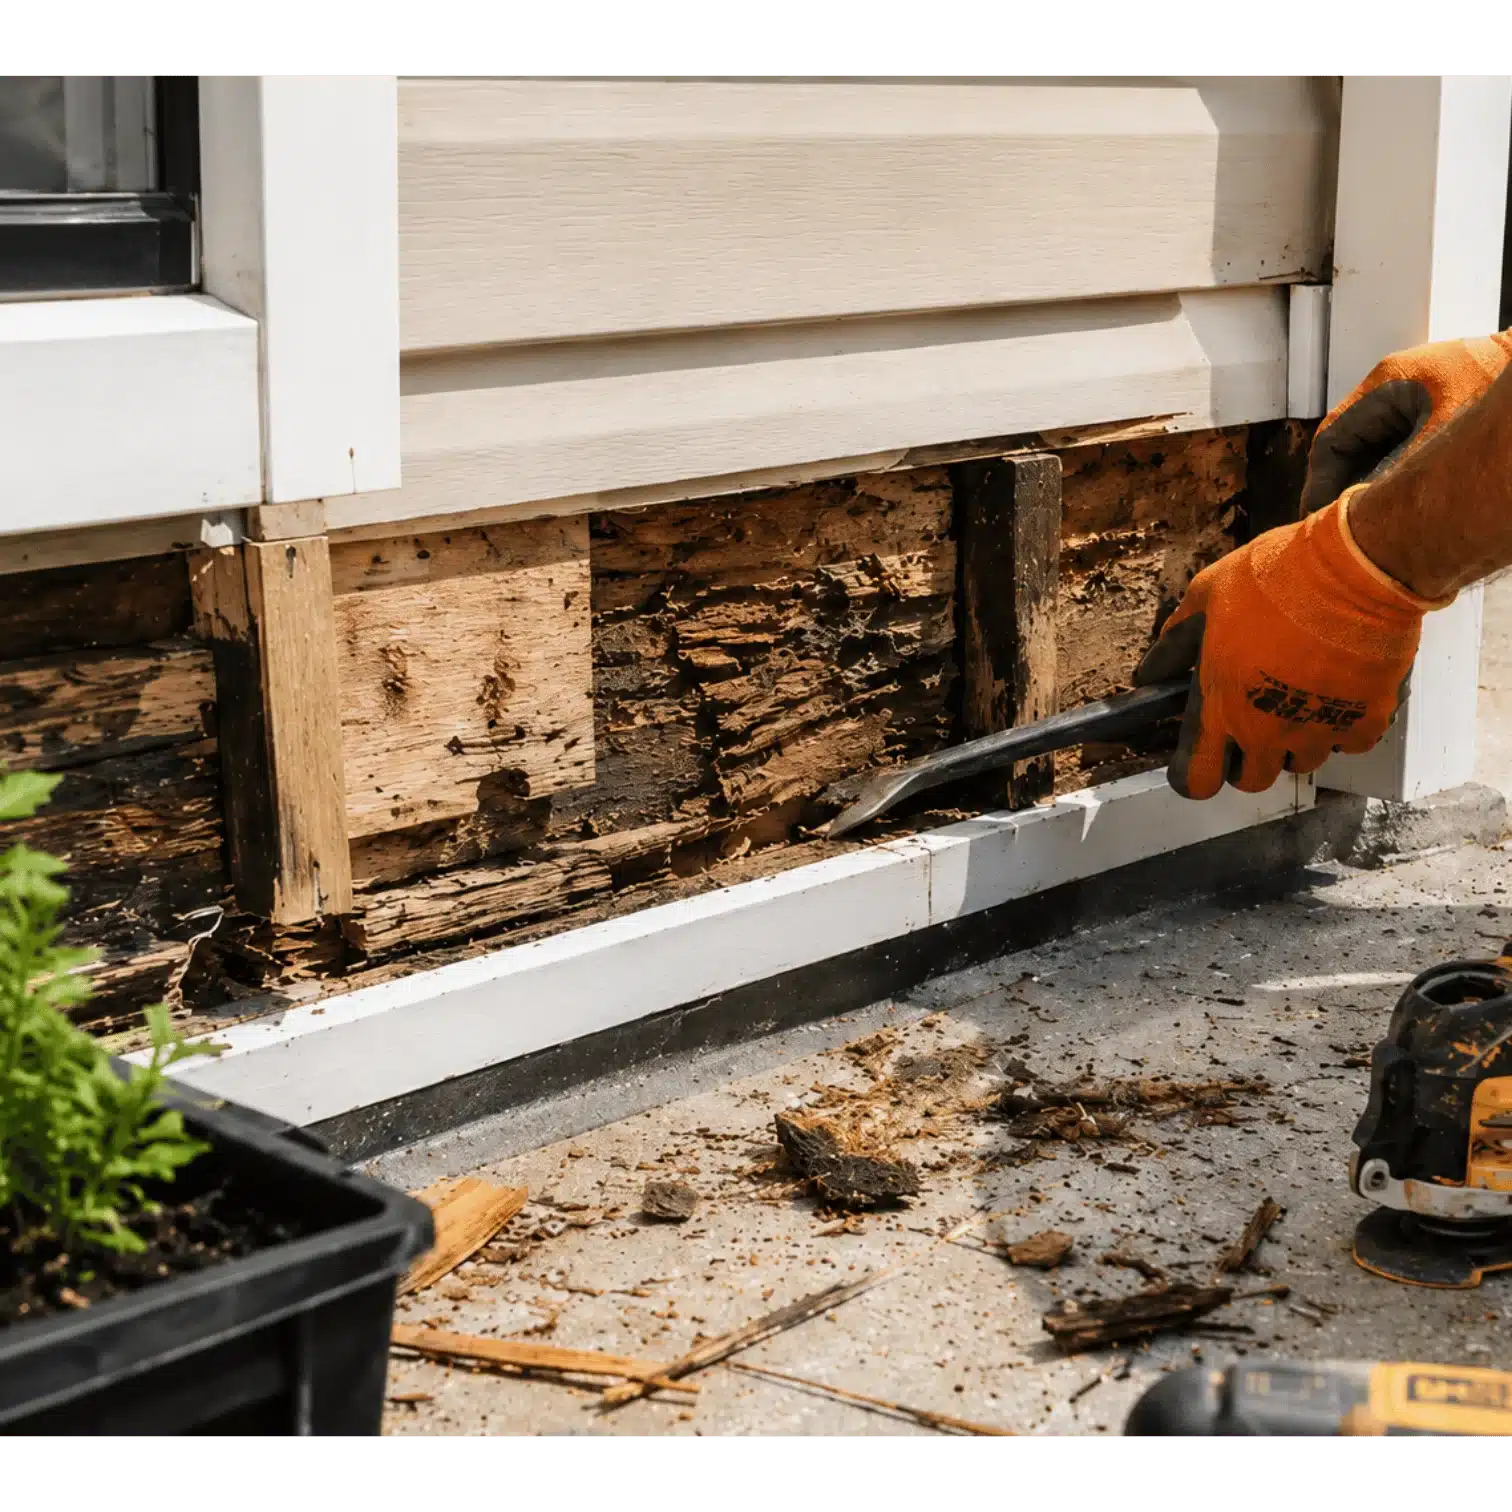
Moisture behind siding rarely announces itself, and the sheathing underneath may already be compromised before a homeowner sees a symptom
What Hidden Moisture Behind Siding Means for a Toronto Home
Hidden moisture behind siding is water trapped between the cladding and the wall sheathing where it cannot dry out on its own. The siding itself, whether vinyl, wood, aluminum, or fibre cement, is only the outer layer of a wall system. Behind it sits a water-resistive barrier, then the sheathing, usually OSB or plywood, then the stud cavity and insulation. When water gets past the siding and stays against that sheathing, wood-based materials start to absorb moisture instead of shedding it.
Building scientists call this a reservoir cladding problem. Wood, fibre cement, and stucco all hold some water on their own. A properly built wall lets that water dry to the outside through an air gap or a permeable house wrap. Without that drainage path, moisture behind siding sits against the sheathing through an entire winter, feeding rot and mould growth long before a homeowner sees a stain on the wall.
This is a different problem from a cracked panel or peeling paint. A siding repair replaces what is damaged on the surface. A moisture repair addresses what is trapped behind it, including wood frame repair and full sheathing replacement where needed.
How Water Gets Behind Siding in Ontario's Freeze-Thaw Winters
Water gets behind siding through four main paths in Toronto homes: capillary draw at panel seams, wind-driven rain forced past laps, condensation where warm indoor air meets a cold sheathing surface, and gaps around windows, corners, and utility penetrations. Each path lets in a small amount of water on its own. Ontario's freeze-thaw cycle turns that small amount into a much bigger problem over a single season.
According to the EPA's building envelope moisture guidance, most water damage in buildings begins with small, repeated intrusion points instead of one dramatic leak. Freeze-thaw cycles make this worse. Water that gets behind a panel in November can freeze by December, expand, and force the seam further open. By February, that same gap lets in more water every time the temperature climbs above zero.
Building Science Corporation's research on rain control explains why almost every siding type, including lap siding and vinyl, allows some water past the outer surface. A wall built with a drainage gap lets that water run down and out. A wall built tight against the sheathing, common in homes renovated before current codes, has nowhere for that water to go.
| Entry Point | Why It Fails During Freeze-Thaw Winters |
|---|---|
| Nail holes and seams | Small gaps widen as ice forms and panels shift |
| Caulking joints | Caulking hardens and cracks in cold weather, losing its seal |
| Window and door flashing | Flashing laps installed backward channel water inward |
| Rooflines and kick out flashing | A missing kick-out flashing dumps roof runoff behind the wall |
| Utility and vent penetrations | Old sealant around pipes and vents shrinks and splits |
Signs You Might Have Moisture Trapped Behind Your Siding
Five signs point to moisture trapped behind siding, starting with a musty odour near an exterior wall and a panel that feels soft under light hand pressure. Homeowners often catch one of these signs without connecting it to a hidden water problem. Recognizing the pattern early keeps a moisture repair small instead of letting it spread across an entire wall section.
| Sign | What It Likely Means |
|---|---|
| Musty odour near an exterior wall | Trapped moisture is feeding mould growth inside the wall |
| Soft or spongy siding when pressed | Sheathing behind that panel has started to rot |
| Paint bubbling or peeling in one spot | Water vapour is pushing out through the finish |
| Dark staining at seams or the bottom edge | Water is tracking down inside the wall assembly |
| One panel rippling or bowing | Moisture has swollen the sheathing behind it |
Homeowners often notice the paint symptom first and book an exterior house painting quote to fix the look. A qualified contractor checks for these signs before quoting any surface work, because painting over trapped moisture only hides the problem for another season.
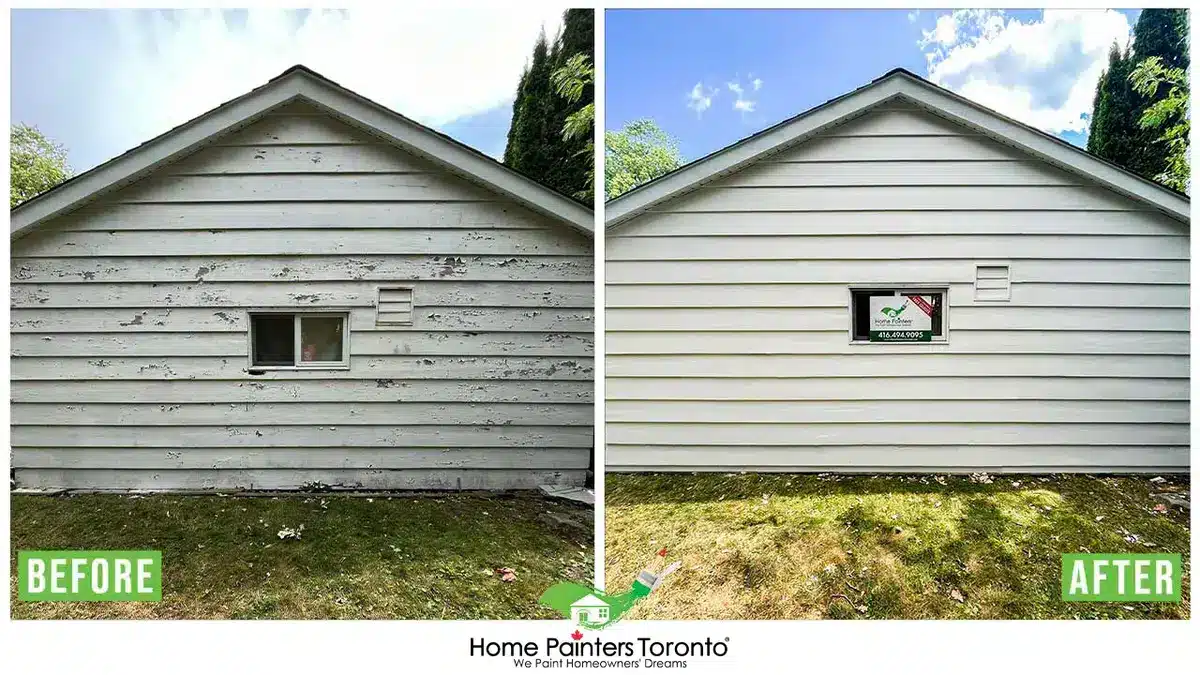
Painting over trapped moisture only hides the problem for another season
Why Homeowners Miss Moisture Damage Until It Gets Expensive
Homeowners miss moisture behind siding because the visible surface can look fine for years while the sheathing underneath rots. A single bead of fresh caulking around a window often gets praised as a fix. In practice, that bead can seal water into the wall instead of letting it drain out, which speeds up hidden damage instead of stopping it.
Most homeowners also assume a small stain or a slightly soft spot is cosmetic. By the time a panel visibly bows or an interior wall feels damp, the sheathing behind it has often been wet for one or two full seasons. At that point, the repair usually grows from a small patch into a full section replacement, including new sheathing, insulation, and a rebuilt drainage path.
This is why the true cost of ignoring hidden moisture rarely shows up on a homeowner's radar until the bill arrives. A homeowner comparing the cost of painting a house against a full moisture repair usually finds the repair is the far larger job, simply because it started small and grew unseen behind a wall that looked fine from the curb.
How Professional Contractors Detect Moisture Behind Siding
Professional contractors detect moisture behind siding using calibrated moisture meters, then confirm the reading with a probe test at the most likely entry points. This step-by-step process rarely changes: locate the suspect area, test it, confirm it, then plan the repair around what the numbers show instead of a guess.
- Visual walk around to flag staining, soft spots, and failed caulking
- Pin-type moisture meter readings taken at seams, corners, and low wall sections
- Pinless meter scan across a wider panel area to map how far the moisture has spread
- Probe test at the worst reading to check sheathing condition directly
- Photo and moisture percentage documentation before any panel comes off
Moisture Meter Readings and Probe Testing Behind Siding
Healthy wood-based sheathing usually reads under 15 percent moisture content. Readings between 15 and 20 percent point to elevated moisture that needs monitoring or a repair plan. Readings above 20 percent, and especially above 28 to 30 percent as noted in the building science research on rain control referenced above, generally mean active decay is already underway, and the sheathing in that section needs to come out. Home Painters Toronto crews record these readings on every moisture behind siding assessment so the homeowner sees the exact numbers behind the recommendation, not a guess.
Where Water Actually Gets In: Flashing, Caulking, and Trim Joints
Most hidden moisture starts at four weak points: window head flashing, siding butt joints, corner trim, and the spot where a roofline meets a wall. Each of these details relies on a small piece of metal or a bead of sealant doing a big job. Any one of them can fail quietly for years before a homeowner notices a symptom on the surface.
Common Entry Points Around Windows and Butt Joints
- Window head flashing installed flat instead of sloped, letting water pool and seep behind the trim
- Horizontal butt joints in wood and fibre cement siding without a back flashing strip
- Corner boards caulked once at installation and never resealed since
- Kick out flashing missing where a lower roof meets a sidewall, sending runoff straight down the wall
- Deck ledger and porch roof connections cut into the siding without proper step flashing
A caulking around windows and doors service call often turns up more than one of these issues at once. Soffit and fascia repair frequently uncovers the same root cause, since water travelling along a roofline often finds its way behind the wall before it ever reaches the ground.
What a Full Moisture Repair Fixes That a Surface Patch Cannot
A full moisture repair removes and replaces saturated sheathing and insulation, then rebuilds proper flashing and drainage. A surface patch, by comparison, replaces only the visible panel and leaves the wet material behind it in place, which means the same failure point stays open under the new surface.
| Aspect | Surface Patch | Full Moisture Repair |
|---|---|---|
| Sheathing condition | Left in place, even if wet | Removed and replaced if compromised |
| Drainage path | Not addressed | Rebuilt with proper flashing and gap |
| Root cause | Often left untouched | Identified and corrected |
| Warranty | Rarely offered on the wall itself | Backed by a written exterior warranty |
| Typical outcome | Damage tends to return | Wall dries out and stays dry |
This distinction matters most on wood siding and stucco walls, where trapped moisture spreads sideways through the sheathing well past the original leak point. A wood frame repair done without addressing drainage often needs to be redone within a few years, because the same water path stays open behind the new material.
What to Look for When Hiring a Contractor for Moisture Repair
The right contractor for a moisture behind siding repair carries WSIB coverage, checks moisture content with a meter before quoting, and puts the repair in writing with a clear warranty. A contractor who quotes a price from the driveway without testing the wall is guessing, not diagnosing.
- Do they use a moisture meter and probe test before quoting the job
- Are they WSIB compliant and fully insured with general liability coverage
- Will they document readings and photos before closing the wall back up
- What written warranty covers the repaired section specifically
- Do they have hands-on experience with your exact siding material
- At a recent moisture inspection in Leslieville, our crew found a moisture reading of 34 percent in the sheathing behind the original cedar siding near a corner downspout, well above the 15 percent threshold for healthy wood.
- We opened the wall, removed roughly a metre of saturated OSB sheathing, corrected a missing kick-out flashing above the porch roof, and rebuilt the drainage gap before closing the wall back up.
- Once the sheathing was dry and replaced, we primed the new wood with Benjamin Moore Fresh Start All Purpose Primer and finished the repaired section with Benjamin Moore Aura Exterior in Low Lustre finish to match the existing wall.
- The homeowner's repair came with warranty-backed results, completed by a fully insured, WSIB-compliant crew.
Homeowners can review our client reviews on HomeStars, Google, and Houzz before booking, and our why homeowners choose Home Painters Toronto page outlines our WSIB compliance, insurance coverage, and 38+ years in the trade in more detail.
Moisture behind siding repairs typically fall in the $2,000 – $4,000 exterior small project range for a single wall section, and climb into the $4,000 – $8,000 exterior medium range once sheathing, insulation, and flashing all need rebuilding across a larger area. Every quote reflects an on-site inspection with a moisture meter, not a phone estimate.
Aluminum siding and vinyl siding rarely absorb water themselves, but both can trap it against the sheathing if the wall behind them lacks weep holes or a drainage gap. Wood elements nearby, including a wood deck repair or an exterior brick staining project, often reveal the same moisture path once a crew starts inspecting a full elevation.
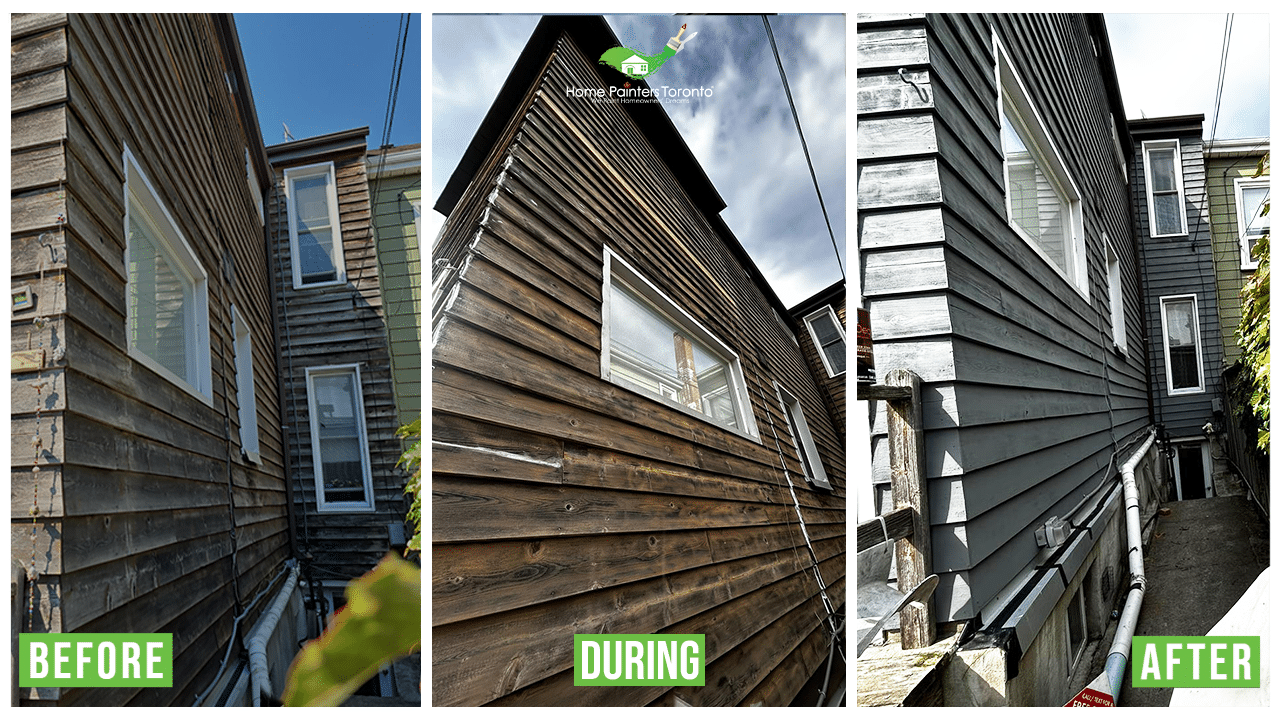
A rebuilt drainage gap and corrected flashing keep this repair dry through future GTA winters
Frequently Asked Questions
Look for a musty smell near an exterior wall, a panel that feels soft or spongy under light pressure, or paint that bubbles in one spot rather than across the whole wall. Dark staining at a seam or bottom edge is another common sign. A moisture meter reading confirms what these visible clues suggest.
Yes. Once sheathing and insulation stay wet long enough, mould can grow inside the wall cavity and migrate through to interior drywall, especially around window openings and lower wall sections where water tends to collect first.
Coverage usually depends on the cause. Sudden events such as storm damage are more likely to be covered, while gradual moisture intrusion from wear and aging materials is often excluded. A professional inspection and written assessment give an insurer clearer documentation either way.
A single wall section with one entry point typically takes a few days from opening the wall to closing it back up and matching the finish. A larger repair spanning multiple entry points or a full elevation takes longer, since sheathing needs time to dry before it gets closed in.
No. Caulking seals a surface gap, but it does nothing for sheathing that is already wet behind the wall. A full repair requires a moisture reading first, since caulking over a wet wall can trap moisture even more effectively than before.
Vinyl itself does not absorb water the way wood does, but a vinyl wall without proper weep holes or a drainage gap can trap water against the sheathing just as easily. The siding material matters less than whether the wall behind it was built to let water escape.

Concerned About Moisture Behind Siding? We're Here to Help
Moisture behind siding is a problem best caught early and fixed completely, not patched and hoped away. Home Painters Toronto brings moisture meters, WSIB-compliant crews, and a written warranty to every inspection across the GTA. Contact Home Painters Toronto for fast, free quotes and warranty-backed work on your next siding repair.
Browse our frequently asked questions for more on how we handle exterior repairs across the GTA.
Get a Free Moisture Inspection for Your Toronto Home
Fast, free same day estimates and warranty backed repairs from a WSIB compliant, family owned GTA contractor with 38+ years of experience.
Get Your Free Estimate