

Prepping a house for exterior painting is not the glamorous part of the project, but it is the part that determines whether your paint job lasts three years or ten. The single most common reason exterior paint fails early in Toronto is not the brand of paint chosen or the number of coats applied. It is prep work that was skipped, rushed, or done out of sequence.
This guide covers the complete preparation sequence our team follows on every exterior painting project, from the initial inspection through cleaning, repairs, caulking, priming, and final setup. Whether you are tackling this yourself or overseeing a contractor, every step here applies directly to the housing types and seasonal conditions common across Toronto and the GTA.
- Why prep is more important than paint product for long-lasting results
- How Toronto's climate uniquely stresses exterior surfaces and what to look for
- A complete step-by-step prep sequence: inspection, cleaning, repairs, caulking, scraping, sanding, priming
- Surface-specific prep guidance for wood siding, brick, stucco, aluminum, and vinyl
- Lead paint awareness for Toronto homes built before 1978
- Common prep mistakes that cause early paint failure
- DIY vs. professional prep: what each approach realistically involves
- What exterior painting prep costs in Toronto in 2026
- A real project case study
- FAQ answers to the most common homeowner questions
Want the prep and painting handled by professionals? Get a free quote for exterior painting in Toronto.
A well-prepared surface is the key to a successful exterior painting project. Properly prepping the surface before applying paint ensures that the paint adheres well and lasts for a long time. Here are the essential steps you will need to follow to prepare your home's exterior for painting.
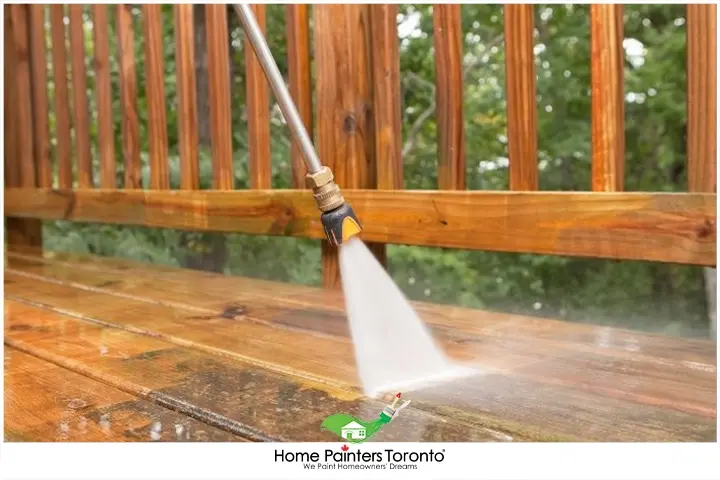
Thorough prep — inspection, cleaning, repairs, caulking, and priming done in the correct sequence — is what separates a paint job that lasts three years from one that lasts ten.
Why Prep Is the Most Important Part of Any Exterior Paint Job
Most homeowners focus their attention and budget on paint product selection. Professional painters focus most of their time and skill on preparation. The difference in priorities reflects experience. A premium paint applied over inadequate prep will fail within two to three seasons in Toronto's climate. A mid-range paint applied over excellent prep will hold up for seven to ten years.
The reason is straightforward. Paint is a film coating that bonds to the surface beneath it. If that surface is dirty, chalking, damp, or has peeling old paint, the new film has nothing to bond to reliably. Every weak point in the substrate beneath the paint becomes a future failure point in the paint above it. Freeze-thaw cycling, which Toronto experiences more than 100 times per year, exploits every adhesion weakness as moisture behind the film freezes, expands, and forces the paint off the surface.
According to Benjamin Moore's guide to painting a home exterior, a fully dry substrate is essential before any coating is applied, and sanding provides the smooth surface that improves adhesion of both paint and primer. The guide notes that if existing paint is peeling, the cause must be found and corrected before repainting, not simply painted over.
Before you begin any prep work, take a walk around your home and carefully inspect all surfaces. Look for:
- Areas where paint is peeling, bubbling, or cracking
- Wood rot or damage, especially around windows, doors, and trim
- Any areas where caulking has cracked or is missing
- Mould or mildew growth
- Any structural issues that may need to be addressed before painting
The Toronto Spring Walk-Around: What to Look For After Winter
In Toronto, the spring inspection after snowmelt is especially important. The combination of freeze-thaw cycling, ice accumulation, and wind-driven moisture over a Toronto winter leaves specific types of damage that are not visible until the exterior is fully dry and inspected in good light.
Walk the full perimeter of your home and use this inspection checklist:
- Paint cracking, peeling, or bubbling: Look at all elevations, paying particular attention to south and west-facing walls that receive the most UV and weather exposure.
- Caulk condition at window frames, door surrounds, trim joints, and where siding meets trim: Press on caulk that appears intact. If it has lost its flexibility and feels hard or crumbles when pressed, it has failed and needs replacing.
- Wood softness at sills, fascia boards, trim corners, and anywhere water can pool: Press a screwdriver into any suspect area. Sound wood feels firm. Soft or spongy wood indicates moisture damage that requires repair before any prep or painting proceeds.
- Efflorescence on brick or masonry: White or grey salt deposits indicate moisture migrating through masonry. This must be treated before any paint is applied.
- Mould or mildew on siding: Dark staining, particularly on north-facing and shaded surfaces, indicates biological growth. Mould must be killed with a bleach solution before cleaning, not painted over.
- Gutter and fascia condition: Sagging gutters, corroded joints, and fascia boards pulling away from the roofline all indicate issues that should be resolved before painting begins.
For any wood damage found during the inspection, our exterior wood repair and carpentry service handles repair work before the painting crew arrives.
Before you start any cleaning or prep work, protect the areas around your home that you don't want to damage. This includes:
- Covering plants, bushes, and garden beds with tarps
- Removing outdoor furniture and decorations
- Covering windows and doors with plastic sheeting if necessary
- Covering any outdoor electrical outlets or light fixtures
A few additional points specific to Toronto detached and semi-detached homes on standard lots:
Move vehicles out of the driveway before power washing or during painting. Overspray from pressure washing carries chalk, dirt, and paint particles further than most homeowners expect.
Protect any neighbouring property if your home is on a narrow lot where your eave line or siding is close to the property line. Tarps on the ground and on adjacent surfaces prevent paint or debris from landing on a neighbour's driveway or garden.
If you are using a paint sprayer on siding, be aware of wind direction. Spray overspray on a breezy Toronto day can travel significant distances. Our team uses sprayers on still days only and masks all adjacent surfaces before any spray application begins.
One of the most important steps in preparing the exterior for painting is cleaning. A dirty surface can prevent the paint from adhering properly, leading to peeling or flaking paint. Clean the exterior with a solution of water and a cleaning agent such as TSP (trisodium phosphate). This will remove dirt, grime, and other contaminants from the surface.
Power Washing: The Right Way for Toronto Exteriors
Power washing is the most efficient method for cleaning exterior surfaces before painting, and the one step homeowners most frequently underestimate or rush. Here is the correct sequence:
Use a pressure washer at a setting appropriate for the surface. Wood siding and trim: 1,200 to 1,500 PSI at a fan tip to avoid raising wood fibres. Brick and masonry: 1,500 to 2,500 PSI. Vinyl and aluminum siding: 1,200 to 1,500 PSI. Higher pressure than these ranges drives water into seams and joints rather than cleaning the surface, which is counterproductive.
For mould and mildew: apply a diluted bleach solution (one part bleach to three parts water) before pressure washing, allow it to sit for 10 to 15 minutes to kill the biological growth, then rinse thoroughly with clean water. Do not paint over mould. Painting over mould without killing it first allows the growth to continue beneath the new paint film and will cause the paint to fail within a single season.
After pressure washing, allow a full 48 to 72 hours of dry weather before priming or painting. Brick and wood absorb and retain moisture significantly longer than their surface appearance suggests. Applying paint over a substrate with high moisture content traps that moisture beneath the film and causes bubbling and peeling.
For homes with TSP cleaning needs beyond what power washing addresses, dilute TSP according to the product instructions, apply with a scrub brush or sponge, and rinse thoroughly before allowing the surface to dry.
After cleaning, inspect the surface for any damage that needs to be repaired. Common repairs include:
- Filling holes and cracks with an appropriate filler
- Replacing damaged or rotten wood
- Fixing any loose siding or trim
- Addressing any caulking issues
Surface-Specific Repair Guide
The repair steps required before painting depend on the type of siding and the specific damage found. Here is how our team approaches repairs by surface type.
Wood siding and trim: Fill nail holes and minor gouges with exterior-grade wood filler. Apply slightly proud of the surface, allow to cure fully, and sand flush with 120-grit followed by 220-grit. For soft or rotted wood, all degraded material must be removed back to sound substrate before any filler can be applied. Two-part epoxy wood filler is the right product for deeper rot repairs on sound surrounding wood. See our wood siding repair service for cases where boards require replacement.
Brick and masonry: Probe all mortar joints for soft or crumbling areas. Any mortar that is recessed, cracked, or soft needs to be repointed with matching mortar compound before priming or painting. Painting over failed mortar simply traps moisture behind the paint and accelerates the problem. For efflorescence, treat with a masonry cleaner, scrub with a stiff brush, rinse thoroughly, and allow to dry before applying an alkali-resistant primer. See our brick and mortar repair service for mortar work.
Stucco: Hairline cracks can be filled with exterior-grade acrylic caulk. Larger cracks require stucco patch compound matched to the texture of the existing surface. Wait at least seven to ten days after patching stucco before painting, as fresh stucco patch needs to cure fully before it can be coated. See our stucco repair service for significant stucco damage.
Aluminum and steel siding: Remove all rust and corrosion with steel wool or medium-grit sandpaper before priming. Bare metal must be primed immediately after sanding, as bare steel begins to oxidize within hours in humid Toronto conditions. Do not leave bare sanded metal unprimed overnight.
Vinyl siding: Vinyl does not require filler repairs in most cases. Damaged panels should be replaced. Painting over cracked or broken vinyl produces poor results regardless of how thoroughly the surface is prepared.
Lead Paint Awareness for Toronto Homes
If your home was built before 1978, the existing exterior paint may contain lead. This applies to many homes in established Toronto neighbourhoods including The Annex, Riverdale, Cabbagetown, Roncesvalles, and North York. Before scraping old paint on a pre-1978 home, test for lead with an inexpensive test kit available at hardware stores. If lead is present, wet-scraping techniques, containment of all debris, and proper disposal are required. Do not dry-sand lead-painted surfaces. Our professional team is trained in safe lead paint handling and carries the appropriate respirators and containment equipment for pre-1978 exterior projects.
If the existing paint is in poor condition, such as peeling, cracking, or bubbling, it may be necessary to remove it before applying new paint. Use a scraper or wire brush to remove the old paint, then sand the surface smooth.
Scraping and sanding are the most physically demanding steps in exterior prep and the ones most commonly rushed on DIY projects. Here is the correct approach:
Use a pull scraper on flat surfaces such as siding boards. For tight profiles, corners, and trim details, a detail scraper or oscillating multi-tool reaches areas a pull scraper cannot. A wire brush is necessary for rough wood siding and painted brick where the surface texture prevents a flat scraper from making full contact.
You do not need to remove all existing paint, only areas where the paint is no longer adhering firmly to the substrate. The tape test is the reliable check: press a piece of packing tape firmly onto the surface and pull it away quickly. If paint comes off with the tape, it is not adhering adequately and must be scraped. Where old paint is firmly adhered, it can remain as substrate for the new coat, but the edges of scraped areas must be sanded smooth to feather them into the surrounding intact paint. An unsanded step edge between old paint and bare surface will telegraph through the new paint as a visible line.
After scraping and sanding, sweep or vacuum all dust and loose paint chips before moving to the priming stage. Debris on the surface is a common cause of adhesion problems in the primer coat.
Caulking is an important step in the preparation process. It helps to seal gaps and cracks, preventing moisture from getting behind the paint and causing damage. Apply caulk to any gaps or cracks in the surface, including around windows, doors, and where different materials meet.
Caulking is a water management step, not just a cosmetic one. Every unsealed joint in the exterior is a potential water infiltration point. Water that enters behind the paint film will cause it to bubble and peel in the short term and will cause wood rot, mould, and structural damage in the long term if left unaddressed.
Use a paintable exterior-grade acrylic latex caulk for all joints that will be painted. Silicone caulk is not appropriate because most exterior paints will not adhere to silicone. Cut the tip of the caulk tube at a small angle, no more than 3 to 5mm opening for trim work. Run a consistent bead into the joint and smooth with a wet finger or a caulk tool immediately before it skins over.
These are the specific joints that must be caulked on every Toronto home exterior:
- Between window frames and siding at all four sides
- Between door frames and siding
- Where trim boards meet siding on their side and top edges
- At all corner board seams
- Where siding meets soffit or fascia
- Around light fixtures, outlets, and any penetrations through the siding
- Between different cladding materials (where brick meets siding, for example)
Do not caulk the bottom edge of horizontal trim elements, window sills, or the bottom of siding boards. These bottom edges need to remain open to allow any water that reaches behind the trim to drain out rather than becoming trapped. Caulking a bottom drain edge is one of the most common mistakes made during exterior prep, and it turns a water management joint into a moisture trap.
For comprehensive guidance on exterior caulking, see our exterior caulking service.
After making the necessary repairs and caulking, it is time to apply a primer. The type of primer you need will depend on the surface you're painting. For wood surfaces, use an oil-based or water-based primer. For masonry surfaces, use a masonry primer.
Primer is not interchangeable with paint, and exterior primer is not interchangeable with interior primer. The right primer for each surface type is what creates the adhesion base the topcoat needs to bond to and last through Toronto's freeze-thaw cycling.
Primer by Surface Type
Apply primer by brush on all profiled trim, window frames, and detailed surfaces to ensure full coverage into all crevices and joints. A roller can be used on flat siding areas. Allow primer to cure fully per the manufacturer's instructions before applying the topcoat.
Before you start painting, set up the necessary ladders and scaffolding. Make sure that the equipment is sturdy and secure.
Ladder and scaffolding safety is one area where the DIY vs. professional decision matters most. Working at height on an exterior painting project carries real risk, particularly on two-storey Toronto homes where gable end trim, second-storey window frames, and fascia boards can require working from 5 to 8 metres above grade.
For two-storey or multi-storey exterior work, scaffolding is significantly safer than a ladder. Scaffolding provides a stable platform that does not need to be repositioned every few feet, keeps both hands free for painting, and eliminates the risk of a ladder shift or fall. Scaffolding can be rented from equipment rental companies across Toronto, and for larger jobs the rental cost is quickly recovered in reduced time from not constantly repositioning a ladder.
If using a ladder, use an extension ladder rated for your weight plus tools, ensure it is positioned at the correct angle (the base should be one metre out for every four metres of ladder height), and always maintain three points of contact when climbing. Never paint from the top two rungs of any ladder.
For very tall or complex roofline and gable work, our professional team uses scaffolding as standard. Attempting this work from a ladder as a DIY project is one of the highest-risk decisions in any exterior painting project.
Before you begin painting, mask off any areas you don't want to paint. This includes windows, doors, trim, and any other areas that should be protected.
Use exterior-rated painter's tape for all masking on an exterior painting project. Standard interior masking tape loses adhesion when exposed to direct sun and outdoor humidity, and it will lift or fail mid-project. Apply tape on the day you intend to paint, not the day before.
A few specific masking guidelines for Toronto homes:
For glass panes at window frames, use 50mm painter's tape applied firmly along the frame edge. A steady hand with an angled sash brush eliminates the need for taping the full glass area, but a tape border at the frame line ensures a clean paint edge.
For door hardware, light fixtures, mailboxes, and house numbers, tape or remove before painting begins. Paint applied over hardware and removed later leaves ragged edges and deposits paint on the hardware itself.
For brick that is not being painted, where painted siding meets unpainted brick, use tape along the brick edge before applying primer and topcoat to the siding. Painted overspray on natural brick is very difficult to remove cleanly.
Remove all tape while the final paint coat is still slightly wet. Removing tape from fully dried exterior paint often pulls the clean paint edge with it. If paint has dried on the tape edge before you can pull it, score along the tape line with a utility knife blade before removing to ensure a clean break.
Primer by Surface Type: Quick Reference
| Surface | Recommended Primer Type | Why It Matters |
|---|---|---|
| Bare wood siding and trim | Oil-based exterior primer or high-adhesion acrylic exterior primer | Penetrates the wood grain, seals tannins on cedar and redwood, provides mechanical adhesion base |
| Previously painted wood in good condition | High-adhesion acrylic exterior primer | Bonds to existing paint, seals spot-primed areas, creates even base for topcoat |
| Bare or weathered brick | Alkali-resistant masonry primer (Benjamin Moore Fresh Start Masonry or Sherwin-Williams Loxon) | Neutralizes alkalinity, penetrates porous masonry, prevents topcoat adhesion failure from alkali attack |
| Stucco | Masonry sealer or bonding primer | Seals porosity, reduces absorbency so topcoat applies evenly |
| Aluminum siding | Self-etching or bonding primer for non-ferrous metals | Creates chemical bond on non-porous aluminum surface that standard primer cannot achieve |
| Steel or iron components | Rust-inhibiting alkyd primer | Stops rust beneath the topcoat, provides corrosion-resistant base |
| Caulked and filled areas | Spot prime before topcoat | Fresh caulk and filler absorb topcoat differently than surrounding surface; unprimed patches telegraph through the finish |
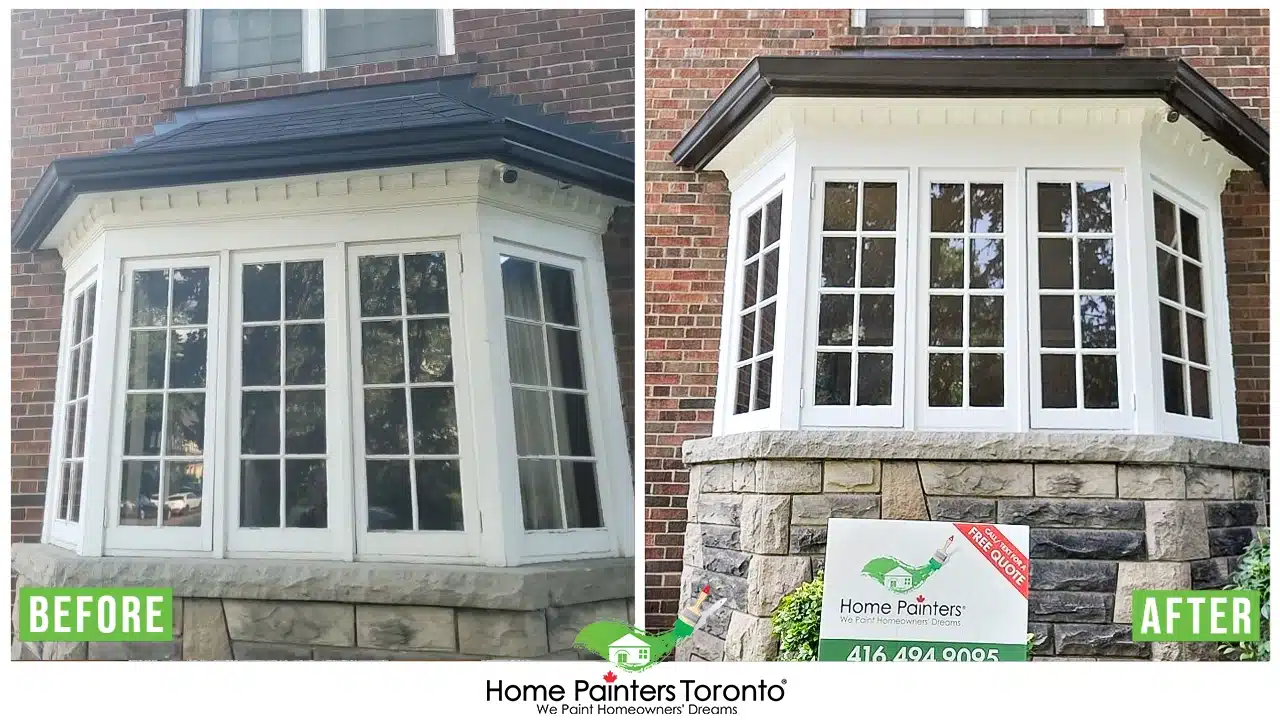
Caulking before priming and priming before painting — done in the right order on a fully dry, cleaned surface — is the sequence that gives exterior paint its full service life.
Common Prep Mistakes That Cause Early Exterior Paint Failure
After 37 years of painting Toronto homes, our team has seen the same prep failures repeatedly on DIY and under-prepared contractor jobs. Here are the mistakes that matter most.
Not allowing sufficient drying time after power washing. Applying primer within 24 hours of pressure washing is one of the most reliable ways to produce a paint job that bubbles and peels within a single winter. Allow 48 to 72 hours minimum.
Caulking before cleaning and scraping. Caulk applied before the surface is clean and stable will fail at the substrate, not at the paint surface. Always complete cleaning and scraping before any caulk is applied.
Using interior primer on exterior surfaces. Interior primers are not formulated for UV exposure, temperature extremes, or moisture cycling. They will fail faster than exterior-rated products regardless of how premium the brand.
Painting over soft or rotted wood without repair. Paint applied over degraded wood looks acceptable at first and fails within one to two seasons as the wood movement and moisture absorption destroy the adhesion beneath.
Skipping primer on bare wood or fresh repairs. Paint applied directly over bare wood, bare caulk, or fresh filler is absorbed unevenly, leaves thin spots in the film, and fails at those points first.
Not feathering sanded edges. The step edge left where old paint was scraped back and not sanded smooth telegraphs through the topcoat as a visible ridge, particularly under raking light in morning and evening.
DIY vs. Professional Exterior Prep: An Honest Comparison
| Factor | DIY Approach | Professional Approach |
|---|---|---|
| Cost | Lower materials cost; significant time investment | Higher upfront cost; significantly better long-term value per year of service |
| Time required | A full weekend minimum for average Toronto detached; more if repairs needed | Typically completed in 2 to 5 days by professional crew |
| Risk of missed damage | High; homeowners often miss soft wood spots and failed mortar during inspection | Systematic probe assessment by experienced team covers full scope |
| Lead paint risk | High on pre-1978 homes without proper equipment and training | Professional teams trained in safe lead paint handling |
| Ladder and height risk | Significant on two-storey and complex roofline work | Scaffolding standard on multi-storey; trained crew with proper equipment |
| Prep quality | Often adequate for surface paint failure; inadequate for rot or adhesion issues | Professional prep sequence designed to last through Toronto's freeze-thaw cycling |
| Result durability | 3 to 5 years with solid prep; 1 to 2 years if steps skipped | 7 to 10 years with professional prep, primer, and two topcoats |
| Best for | Sound surfaces with surface paint failure only, single-storey accessible work, homeowner comfortable with caulking and painting | Any rot, soft spots, height work, pre-1978 homes, or complex multi-surface projects |
How Much Does Exterior Painting Prep Cost in Toronto?
DIY Prep Cost Estimate
- Pressure washer rental: $60 to $90 per day
- TSP cleaner and bleach for mould treatment: $25 to $45
- Exterior wood filler and two-part epoxy filler (if needed): $30 to $60
- Paintable exterior caulk: $8 to $15 per tube (most homes require 4 to 8 tubes)
- Exterior primer (wood or masonry): $55 to $85 per 3.78L
- Sandpaper (multiple grits), pull scraper, wire brush, tack cloths: $40 to $70
- Painter's tape (exterior-grade), drop cloths, plastic sheeting: $35 to $65
- Total DIY prep materials for a standard Toronto detached home exterior: $300 to $600 CAD depending on scope and extent of repairs needed
Professional Prep Within a Full Exterior Paint Estimate
Professional exterior painting quotes in Toronto typically do not separate the prep cost from the painting cost, as they are part of a single scope. As a general guide, prep work accounts for 40 to 60 percent of the total labour time on a professional exterior painting project for a home in average Toronto condition, and a higher percentage for homes with significant peeling, rot repairs, or pre-1978 lead paint handling requirements.
Full professional exterior painting in Toronto (including prep, prime, and two topcoats) runs $2,500 to $8,500 CAD for a standard residential project depending on home size, surface condition, and scope. For a precise quote based on your specific home, request a free estimate from Home Painters Toronto. Our team has been preparing and painting Toronto exteriors since 1987 and backs all exterior work with a 3-year warranty. For a full breakdown of exterior painting costs, see our exterior painting cost guide.
Real Project: Full Exterior Prep and Painting in Toronto
East Toronto Semi-Detached: Prep-First Repaint After a Failed DIY Job
Here is a summary of a recent exterior prep and painting project our team completed on a semi-detached home in east Toronto.
The situation: The homeowner contacted Home Painters Toronto after a previous DIY paint job applied two years earlier had begun peeling extensively across the south and west elevations. The DIY job had involved minimal prep, no power washing, and no primer. The existing paint was simply applied over the chalking old coat.
What our assessment found: A systematic probe inspection of all trim found two sections of soft wood at window sills on the south elevation. Mortar joints at the lower brick band below the siding line showed significant deterioration. All existing caulk at window and door frames had failed.
What the job involved: Carpentry repair of both soft window sill sections, mortar repointing of the deteriorated joints by our masonry team, full power wash of all surfaces with a 72-hour drying period, scraping of all loose paint across both elevations, sanding of all scraped edges, removal and replacement of all failed caulk with paintable exterior acrylic latex caulk, and application of Sherwin-Williams Exterior Latex Primer to all bare wood and repaired areas. Two coats of Sherwin-Williams Duration Exterior were then applied to all siding and trim surfaces.
The result: A fully prepared, properly primed, and professionally painted exterior with an expected service life of 8 to 10 years. The homeowner noted that the project took significantly more time and scope than the DIY job two years prior, which is exactly why it will last significantly longer. The peeling that triggered the job was entirely a result of prep that was skipped at the DIY stage. Every step our team took was simply the prep work that should have been done the first time.
For more completed projects, visit our Toronto painting projects page.
Frequently Asked Questions About Prepping a House for Exterior Painting
Cleaning and drying the surface before any other step is the foundation of everything that follows. Paint applied over a dirty, chalky, or damp surface cannot achieve reliable adhesion regardless of what primer or topcoat is used. Power washing followed by a full 48 to 72-hour drying period is the single step that most directly determines whether every subsequent step works as intended.
No, not if the existing paint is adhering firmly. Only areas where the paint is peeling, bubbling, or failing the tape test (paint pulls off with tape pressed and quickly removed) need to be scraped back to bare substrate. Where old paint is firmly adhered, it can remain as a base for the new coat. The key requirement is that the edges of scraped areas are sanded smooth before priming to feather the transition and eliminate the visible step edge in the finished coat.
At minimum 48 hours in warm, dry weather. For brick and heavily weathered wood that has absorbed significant moisture, 72 hours is more reliable. The surface may look and feel dry within a few hours of washing, but subsurface moisture remains significantly longer. Priming or painting over a wet substrate is one of the primary causes of bubbling and peeling in the first season after a paint job.
Yes, in almost every case. Raw or bare wood, fresh repairs, fresh caulk, and surfaces with significant weathering or chalking all require primer before topcoat. Primer is not the same as paint and cannot be substituted. It provides the adhesion base the topcoat needs to bond to, seals tannins in wood that would bleed through a water-based topcoat, and creates an even absorbency across the surface so the topcoat applies uniformly. Skipping primer on exterior surfaces is one of the most reliable ways to produce a paint job that fails within one to two seasons.
Homes built before 1978 may have lead-based exterior paint. This is common across many of Toronto's established neighbourhoods. An inexpensive lead test kit from any hardware store can confirm whether lead paint is present. If lead is detected, dry-sanding and dry-scraping generate lead dust that must be contained and disposed of safely. Wet-scraping methods that keep debris damp and collected, combined with appropriate respirators and containment tarps, are required. If you are uncertain about lead paint handling, professional painters with lead-safe training and equipment are the right call for pre-1978 exterior projects.
Surface paint failure with no underlying wood damage is achievable as a DIY prep project for a capable homeowner comfortable with ladders, caulk, and power equipment. The areas where professional help makes the most difference are: any rot or soft wood that requires repair before prep can begin, pre-1978 homes where lead paint handling protocols are needed, any multi-storey or complex roofline work requiring scaffolding, and projects where the scope of peeling or damage is extensive enough that thorough prep would require multiple full days of work. Home Painters Toronto provides free estimates and can advise honestly on whether a project is appropriate for DIY or benefits from professional prep. Call 416.494.9095 for a free assessment.
In conclusion, proper preparation is essential for a successful exterior painting project. By following these steps and taking the time to prepare your home's exterior properly, you can ensure a professional-looking finish that will last for years to come. If you need any help or advice, don't hesitate to contact a professional painting company.
More Interesting Blogs Related to How to Prepare a Home for Exterior Painting
Want the Prep and Painting Handled by Professionals?
Home Painters Toronto has been preparing and painting Toronto exteriors since 1987. Call 416-494-9095 or email [email protected] for a FREE quote.