

Painting a century home in Toronto takes more planning than painting a newer house, because the walls, trim and siding carry a hundred years of repairs and paint layers. Owners of Victorian, Edwardian and bay-and-gable homes in Riverdale, Cabbagetown and the Annex often find lead paint, cracked plaster and soft wood once the old coats start to come off. This article explains what changes on an older house, what a professional crew does about each problem and where heritage rules fit, and it builds on our full house painting guide for Toronto homeowners. Home Painters Toronto has served the city since 1991, has painted 20,000+ homes across Toronto and the GTA, and has earned 1,200+ positive reviews on HomeStars, Google and Houzz. We see these older-home issues on job sites every week, so the advice here comes from real work.
Painting a century home in Toronto differs from a newer house in four ways. The old paint probably contains lead, and plaster walls need repair before paint. Original wood trim and windows need rot repair and careful priming. Designated heritage properties may also need City approval for exterior changes. Expect more prep time and a higher quote.
How Painting a Century Home in Toronto Differs From a Newer House
Painting a century home in Toronto differs from a newer house because most of the work happens before any finish coat goes on. Testing, repair and surface preparation take up a much larger share of the job. A 1990s subdivision home usually has drywall, vinyl windows and a few coats of latex. A Toronto semi built around 1905 can have plaster on wood lath and old-growth pine trim. It may also hide oil paint under latex and lead in the bottom layers.
Each of those materials reacts in its own way to moisture, heat and new coatings. That is why two homes of the same size can get very different quotes. Our estimators note the build year on every visit. An older house changes both the prep plan and the safety plan. The table below sums up the main differences and how a professional crew handles each one.
| Issue | Why It Matters in an Old Home | What a Professional Crew Does |
|---|---|---|
| Lead in old paint layers | Dry scraping or sanding releases toxic lead dust | Tests first, then uses lead-safe prep and containment |
| Plaster walls and ceilings | Cracks and loose plaster keep moving under new paint | Re-secures loose plaster, fills cracks, skim coats where needed |
| Calcimine or distemper ceilings | Chalky coatings soften and lift under latex | Washes them off or seals them with a suitable primer |
| Oil paint under latex | Latex peels off glossy oil enamel | Runs a rub test, deglosses and applies a bonding primer |
| Original wood trim and windows | Rot, open joints and failed glazing let water in | Repairs or replaces wood, re-caulks and primes bare wood |
| Soft historic brick and mortar | Non-breathable coatings trap moisture in the wall | Uses breathable products or leaves masonry unpainted |
| Heritage designation | Some exterior changes need City review | Checks status first and keeps colour and product records |
Why Lead Testing Comes Before Any Scraping on an Older Home
Lead testing comes first because a home this old almost certainly has lead in its lower paint layers, and dry scraping or sanding turns that paint into toxic dust. Health Canada says a home built before 1960 probably contains lead-based paint. Homes built between 1960 and 1990 may have it on the exterior. The same guidance warns against removing lead paint with sanders, heat guns or blowtorches. Those tools create lead dust and fumes that settle across floors, soil and window wells.
Testing can happen two ways. A lab can analyze paint chip samples, or a qualified tester can take readings with X-ray fluorescence equipment. Health Canada lists both methods. A documented result tells the crew which surfaces need lead-safe handling and which can be prepped normally.
Intact lead paint is often safest left in place and sealed under new coats. Health Canada notes this too, as long as the paint is not chipping or within reach of children. Peeling lead paint on sills, porches and stair railings is a different story. It needs careful removal before any new coat goes on. Our page on lead paint disclosure in Toronto covers what sellers and landlords should know about test results.
Lead-Safe Prep When Painting a Century Home in Toronto
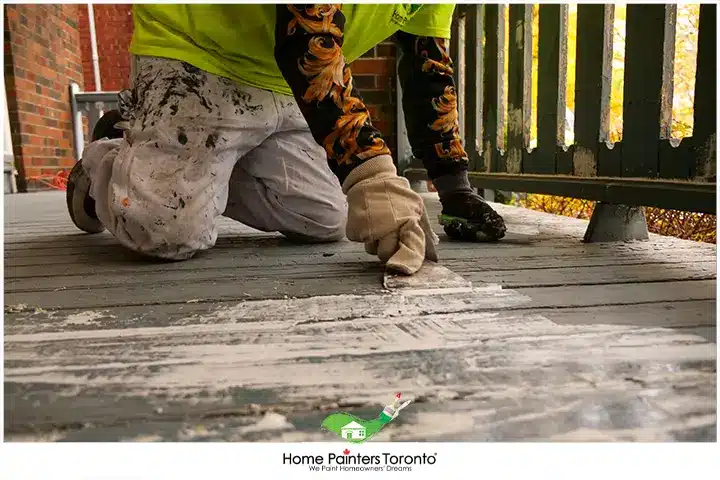
Lead-safe prep on a century home means controlling dust from the first scrape to the final cleanup. The crew lays heavy poly sheeting under the work area and mists surfaces before wet scraping. Debris goes straight into sealed bags. Workers use HEPA vacuums in place of brooms, since sweeping spreads fine dust into the air.
Indoors, the crew closes off each work area with plastic and tapes the doorways so dust stays put. Outdoors, sheeting extends past the drip line to catch chips before they reach garden soil. Our guide on how to safely remove lead paint explains the handling steps when removal is the right call. Ask any painter you interview to describe this setup before you sign.
Why Old Plaster Must Be Repaired Before It Takes New Paint
Old plaster must be repaired first because cracks, bulges and loose areas in century-home walls keep moving, and new paint only hides them for a season. Most Toronto homes from this era have plaster on wood lath, not drywall. The plaster grips the lath through small "keys" that squeeze between the wooden strips. When those keys break, the plaster sags away from the lath and cracks in long lines across ceilings.
Painting over that damage seals the problem in, but the plaster keeps shifting underneath. A proper repair starts by tapping the surface to find hollow spots. The crew then re-secures loose plaster with plaster washers or adhesive and fills cracks with a setting-type compound. Long cracks get taped so they do not telegraph back through the finish.
Wide areas of failure may need a full skim coat or a new layer of board over the old surface. Our drywall repair and installation team handles these repairs before the painters start. Repairs often grow once old paint and wallpaper come off. That is why we explain hidden repairs during home painting at the estimate stage, not halfway through the job.
Calcimine and Distemper: The Hidden Ceiling Coat That Makes New Paint Peel
Calcimine is a chalk-and-glue ceiling coating found in many older homes, and modern latex paint will not stick to it. The coating stays soft and water-soluble for decades. When latex goes over it, the water in the new paint softens the calcimine underneath. The new coat then curls and flakes off in sheets, sometimes within days.
Our crews check suspect ceilings with a damp cloth, since calcimine wipes off as white chalk. The fix is to wash it off completely or seal it with a primer made for chalky surfaces. Oil-based trim paint calls for similar caution. Latex applied straight over glossy oil enamel peels at the first bump. We run a solvent rub test on trim and apply a bonding primer wherever oil paint turns up.
How Freeze-Thaw Cycles Damage Century Wood Siding, Trim and Windows
Freeze-thaw cycles damage century wood because water gets into open joints, cracked paint and failed caulking, then freezes and expands, pushing wood fibres and paint film apart. Toronto winters swing above and below freezing many times a season. Each swing pumps more water into the same weak spots. Old-growth pine and cedar on century homes is often dense and stable, but it still rots wherever water sits.
Rot usually starts at the bottom of window sills and the ends of clapboard. Porch posts and joints where trim meets brick are close behind. Paint cannot stop rot that has already started. Soft wood has to be cut out and replaced, or consolidated with epoxy, before primer goes on. Our carpenters handle window wood replacement and repairs in-house, so carpentry and painting stay on one schedule.
| Sign | What It Usually Means | Typical Fix Before Painting |
|---|---|---|
| Paint peeling down to bare wood | Moisture is getting behind the paint film | Find the water source, scrape and prime bare wood |
| Soft spots when pressed | Rot inside the wood | Cut out and replace, or repair with epoxy |
| Alligatoring (cracked scale pattern) | Too many layers or incompatible coatings | Strip back to a sound layer before repainting |
| Gaps where trim meets brick | Failed caulking lets water in | Remove old caulk and re-seal with a paintable sealant |
| Loose or missing window glazing | Water is reaching the sash wood | Re-glaze and let it skin over before painting |
| Black streaks or mildew | Trapped moisture and poor airflow | Clean, treat the mildew and let the wood dry |
Caulking is inexpensive next to rot repair, so we re-seal open joints on every older exterior. Our exterior caulking for windows and doors service covers trim, frames and the seams where wood meets masonry. Sealed joints keep winter water out of the end grain, which is where most failures start.
Original Wood Windows and Glazing Putty
Original wood windows need the glazing putty checked and the sashes freed before any paint goes on. Old putty dries, cracks and falls out, which leaves the glass loose and the wood exposed. New glazing compound needs time to skin over before it takes paint. The crew schedules windows early in the job for that reason.
A careful painter also keeps sashes from being painted shut. A stuck bedroom window is a safety problem, not just an annoyance. The finish coat should seal the joint between the putty and the glass, which keeps rain off the wood below. Rushed window work is one of the clearest signs of a crew that does not know older homes.
What Brick, Stucco and Tudor Details Need on an Older Toronto House
Brick, stucco and Tudor details on an older Toronto house need repair and breathable products before any colour goes on, because these materials hold and release moisture differently than wood siding does. Century-old Toronto brick is softer than modern brick. It was usually laid in lime-based mortar that lets moisture escape through the joints.
Coating that brick with standard latex paint can trap water inside the wall. In winter, the trapped water freezes and pops the brick face off, a failure called spalling. Repointing with hard modern mortar causes a similar problem, since the joints end up stronger than the brick around them. The wall then sheds stress through the brick faces in place of the mortar.
For brick that needs a colour change, a penetrating stain or a breathable mineral silicate coating works with the masonry. We offer exterior brick staining backed by a 15-year warranty from Home Painters Toronto. Cracked or eroded joints get fixed first through our brick and mortar repair service.
Tudor Revival homes in areas like Lawrence Park and the Kingsway combine stucco panels with decorative half-timber boards. The boards rot where water collects along their bottom edges. The stucco cracks along the board joints as the wood moves. Our crews handle Tudor board replacement and repairs and stucco patching as part of the same project.
When Heritage Rules Apply to Painting a Toronto Home
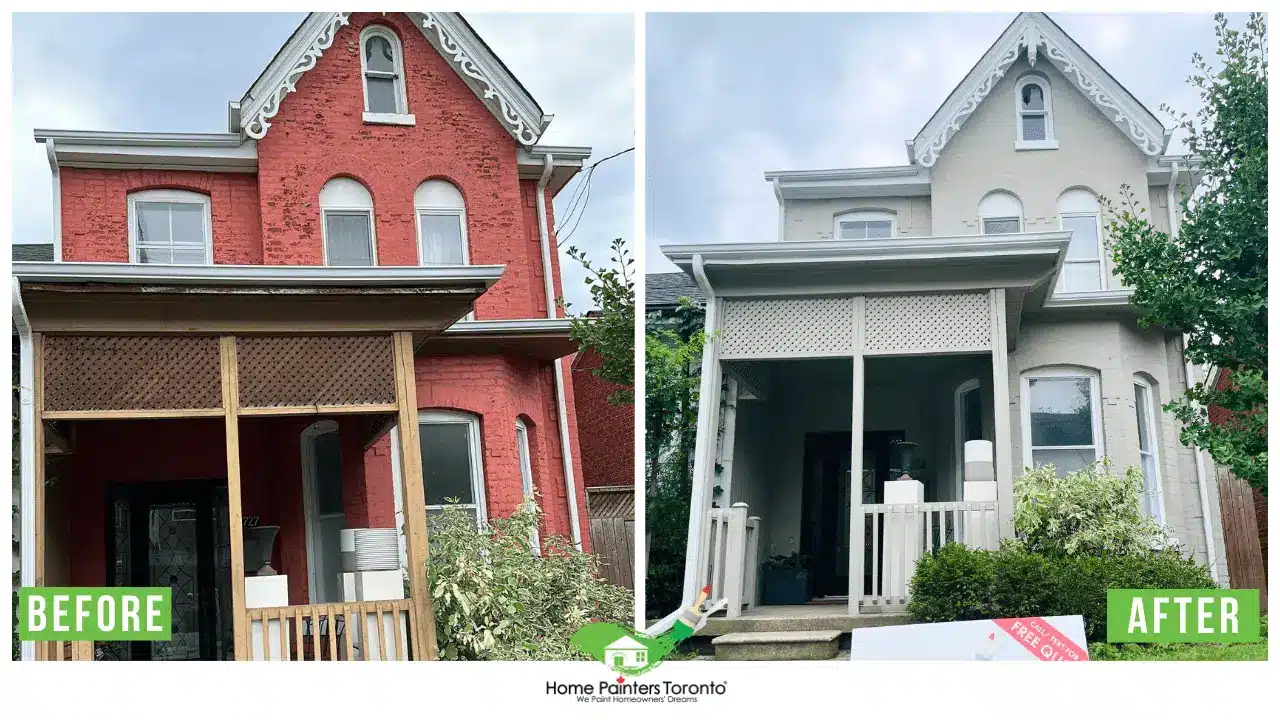
Heritage rules apply when a Toronto home is designated under Part IV of the Ontario Heritage Act or sits inside a Heritage Conservation District under Part V, and they mainly affect exterior work. Being old does not make a house designated. Many century homes carry no heritage status at all, and their owners can repaint as they wish.
Designated properties are different. City of Toronto Heritage Planning staff review changes that affect a property's heritage attributes. Some district plans also include guidance on exterior materials and colours. Changes that often draw review include painting unpainted brick and removing original trim or windows. Swapping wood for vinyl or aluminum can draw review too. Our page on house painting permits in Toronto explains when approval is needed and how to check a property's status.
Colour on a heritage home can follow evidence, not guesswork. A paint analysis takes small samples down to the earliest layer to find the colours the house first wore. The City of Toronto's Heritage Grant Program lists consultant paint analysis as eligible work, though it excludes general painting. National guidance points the same way. The Standards and Guidelines for the Conservation of Historic Places in Canada set out 14 conservation standards. They favour repairing original material before replacing it.
How Our Crews Paint a Century Home, Step by Step
Our crews paint a century home in eight steps, from testing to a final walkthrough. The work starts with testing and repair and ends with a check against a written scope.
- Assess and test. We note the build year, test suspect paint for lead, check heritage status and take moisture readings on exterior wood.
- Protect the site. The crew lays poly sheeting, covers plants and floors, and sets up containment around lead-affected areas.
- Repair the substrate. Carpenters replace rotted wood, re-secure loose plaster and fix brick joints or stucco cracks.
- Prepare the surface. Wet scraping, sanding with dust collection, washing and deglossing remove loose paint and contamination.
- Prime bare and repaired areas. Bare wood, new patches and chalky surfaces get a primer matched to the substrate.
- Caulk and glaze. The crew seals open joints and replaces failed window glazing.
- Apply two finish coats. Each coat goes on within the maker's temperature range and at the film build listed on the technical data sheet.
- Walk through and document. We review every surface with the homeowner and record products, colours and codes for future touch-ups.
Film build matters more on old wood, which absorbs paint unevenly from board to board. Benjamin Moore's Canadian technical data sheet for Aura Exterior Low Lustre lists about 2.8 mils of dry film per coat. Its Canadian product page gives a minimum application temperature of 1.7 °C. Our crews check both numbers on site, not just the forecast.

What a Century Home Repaint Costs in Toronto
A century home repaint in Toronto usually costs more than a newer house of the same size, with exteriors typically ranging from $2,000 to $30,000 CAD plus HST depending on size, condition and repair scope. These figures are Home Painters Toronto's published ranges for standard projects. Older homes tend to land in the upper part of each range. Prep, repair and lead-safe work all add labour hours. A detailed quote should list repairs apart from painting so you can see where the money goes.
| Project Scope | Estimated Cost (CAD + HST) |
|---|---|
| Exterior, small home | $2,000–$4,000 |
| Exterior, medium home | $4,000–$8,000 |
| Exterior, large home | $8,000–$10,000 |
| Exterior, extra-large home | $12,000–$30,000 |
| Interior, living or dining room | $400–$900 |
| Interior, bedroom | $400–$800 |
| Interior, bathroom | $250–$500 |
| Interior trims, doors and baseboards | $700–$1,200 |
| Interior ceilings | $1,000–$1,300 |
The table shows the base cost of the painting itself. The factors below explain why a century home often lands higher, and how each one affects the schedule.
| Factor | Effect on Time | Effect on Cost |
|---|---|---|
| Lead-safe prep and containment | Adds setup and cleanup each day | Raises labour cost |
| Plaster repair and skim coating | Adds drying time between steps | Rises with the area repaired |
| Wood rot and carpentry | Adds carpentry days before painting | Priced as separate repair work |
| Many paint layers or alligatoring | Slows scraping and may need stripping | Raises prep cost |
| Original wood windows | Slow, detailed brushwork and glazing | Raises cost per window |
| Tall house on a narrow lot | May need scaffolding and careful access | Adds equipment cost |
| Heritage review | Can push back the start date | Little direct cost, more planning |
Narrow downtown lots affect setup too, since ladders and scaffolding have to fit between houses. Street parking for the crew can also shape the daily schedule. Our cost of painting a house page explains how quotes are built in more detail.
Painting an Old Toronto House: Homeowner FAQs
Very likely, in at least some of its older paint layers. Health Canada says homes built before 1960 probably contain lead-based paint. The lead usually sits in the bottom coats, under newer latex. Testing shows which surfaces need lead-safe handling before any scraping starts.
Yes, as long as the plaster is sound, clean and properly primed. Cracks, loose areas and hollow spots need repair first, or they will show through the new paint. Chalky calcimine on ceilings must be removed or sealed, because latex will not bond to it.
Often not for routine repainting, but it depends on the property's designation. Homes designated under Part IV may need approval for changes to heritage attributes. The same applies inside a Heritage Conservation District, for example, when painting unpainted brick. Check with City of Toronto Heritage Planning before booking exterior work.
Older houses cost more to paint because prep and repair take longer. Lead-safe work, plaster patching, rot repair and detailed window work all add labour hours. The finish coats themselves cost about the same as they would on a newer home.
A premium 100% acrylic exterior paint over the right primer works best on most old wood trim. Trim with oil paint underneath needs a bonding primer first. Bare or replaced wood also needs primer before the finish coats. We often use Benjamin Moore Aura Exterior, which Benjamin Moore describes as a 100% acrylic, breathable coating.
Exterior paint life on a century home depends mostly on prep, moisture control and sun exposure, not on the age of the house. South and west walls usually wear first because they take the most sun. Home Painters Toronto backs exterior painting with a 3-year warranty. Interior painting carries a lifetime warranty, and brick staining carries a 15-year warranty.
Planning to Paint a Century Home in Toronto
Planning to paint a century home in Toronto starts with three checks: lead, repairs and heritage status. Test the paint, list the repairs the house needs and confirm whether the property is designated. Once those answers are in hand, the right painter can quote the job accurately. Use these questions when you interview companies.
- Do you test for lead and use lead-safe prep and containment?
- Are your carpenters on staff for wood, plaster and masonry repairs?
- Will the quote list repairs apart from painting?
- Which primers, finish products and film build will you use?
- Are you WSIB compliant and fully insured?
- What written warranty covers the work?
Home Painters Toronto is WSIB compliant and fully insured with $5M in general liability coverage. We also run criminal background checks on every crew member. We deliver warranty-backed results on every job, and we have worked in Toronto's oldest neighbourhoods since 1991. Read our client reviews to see how other owners of older homes found the experience.

Ready to give your century home the careful prep it needs? We offer fast, free quotes and warranty-backed work, with same-day estimates available seven days a week.
Get A Free Estimate Now!