

Common Painting Mistakes To Avoid
Avoiding common painting mistakes is the difference between a paint job that looks professional for years and one that needs redoing within a single season, and most of these mistakes trace back to a handful of preventable shortcuts. Home Painters Toronto, the HomeStars Best of Award 2026 winner with over 1,200 positive reviews and 37 years serving the GTA, sees the same mistakes repeated across Toronto homes every season, regardless of whether the project was attempted independently or by an inexperienced crew. This guide breaks down the most frequent painting mistakes, why each one happens, and what a professional approach does differently to avoid them entirely.
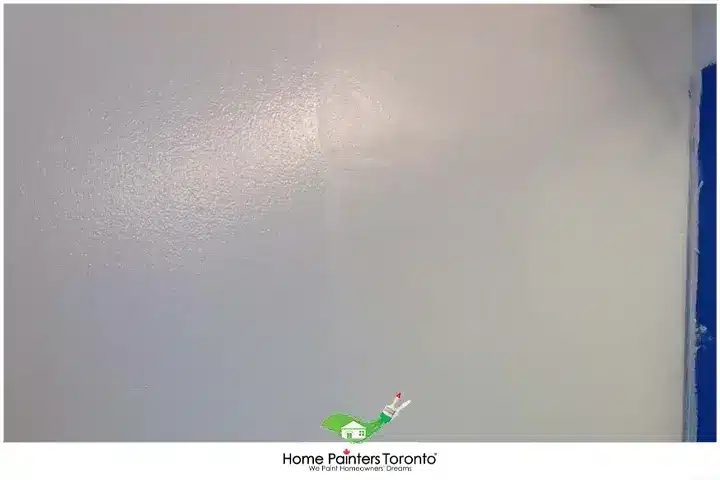
Nearly every painting mistake on this list becomes more likely once surface preparation has been rushed or skipped — it is the single shortcut that compounds every other shortcut that follows it.
Common Painting Mistakes: Skipping Surface Preparation
Excitement about a room's transformation sometimes leads to rushing past the preparation stage to reach the result faster. The problem is that when proper prep work is skipped, the paintwork suffers in ways that become visible almost immediately. Skipping prep is one of the most consequential mistakes in this entire list, because nearly every other mistake on it becomes more likely once preparation has been shortcut. According to the Painting Contractors Association's industry standards, the quality and longevity of any painting project is determined primarily by the quality of surface preparation, not by the paint product itself.
Proper preparation involves covering furniture with plastic sheeting, laying drop cloths on the floor to prevent splatter damage, completing any patchwork and sanding around the room, giving the surface a thorough clean, and removing outlet and switch covers before any paint touches the wall. Having sufficient primer and paint on hand before starting is also part of this stage, since running short partway through a project creates its own set of complications.
Common Painting Mistakes at a Glance: Cause and Effect
Each mistake on this list produces a specific, recognisable result. This table maps the most frequent mistakes to their visible consequence and the professional correction.
| Mistake | Visible Consequence | Professional Correction |
|---|---|---|
| Skipping surface preparation | Poor adhesion, visible imperfections under the new coat, premature failure | Patch, sand, clean, and protect surrounding surfaces before any paint is applied |
| Buying cheap brushes and rollers | Visible brush marks, uneven coverage, shedding bristles in the finish | Invest in quality tools matched to the paint type being applied |
| Skipping primer | Uneven colour, poor adhesion, paint absorption variance across the wall | Apply primer suited to the surface before the topcoat |
| Overloading the brush or roller | Drips, runs, and an uneven, heavy looking coat | Load the tool moderately and apply in thin, even passes |
| Rushing the second coat | Peeling, visible brush strokes, a patchy uneven finish | Respect the manufacturer specified drying time, generally 24 hours, between coats |
Common Painting Mistakes: Buying Cheap Paint Brushes and Rollers
Professional painting companies consistently note that the tools used for a job matter as much as the paint itself. Going cheap on brushes and rollers shows up directly in the finished paintwork. Even the best, most expensive paint cannot compensate for subpar application tools; the limitation becomes visible regardless of product quality.
Quality brushes and rollers provide smoother coverage and can actually reduce paint consumption over the course of a project, offsetting some of the additional upfront cost. Decent brushes and rollers, properly cleaned and stored after each use, last for years rather than needing replacement after a single project.
Common Painting Mistakes: Skipping Primer
Skipping the priming process is one of the most common mistakes for anyone undertaking their own paint job. Primer gives the topcoat a stable, consistent surface to adhere to. A properly primed surface produces a noticeably smoother finish than one painted directly without that intermediate step.
Primer also pays off by helping the paint colour read more accurately and vibrantly once applied. A 2 in 1 primer and paint product exists for surfaces that have already been painted previously, but it is not a substitute for dedicated primer on bare or significantly different substrates.
Using Low-Quality Tools
Top quality paint will not compensate for cheap brushes or rollers. Investing in high quality tools makes a measurable difference in a project's outcome. Good brushes produce smoother strokes, while better rollers provide more uniform coverage, reducing the likelihood of brush marks or uneven layers in the finished result.
Overloading the Brush or Roller
More paint does not equal better coverage. Overloading a brush or roller leads to drips, uneven coating, and a general mess that takes extra time to correct. The professional standard is straightforward: the brush is dipped about a third of the way into the paint with the excess wiped off, and a roller is loaded enough to saturate evenly in the tray without dripping when lifted.

A brush dipped about a third of the way into the paint, with excess wiped off, avoids drips at the source — more paint loaded onto the tool has never produced better coverage, only more correction work afterward.
Common Painting Mistakes: Rushing the Second Coat
Many painting mistakes share a common thread of impatience. Waiting long enough before applying a second coat is a crucial detail that is frequently overlooked. Going in too soon with a second coat can cause the paint to peel and can leave visible brush strokes that look sloppy in the finished result.
Manufacturer instructions on the paint can specify the correct drying interval, and when in doubt, waiting 24 hours between coats is the generally accepted professional standard for most interior latex products.
How Toronto's Climate Affects Drying Time Between Coats
Drying time on the paint can assumes a standard indoor temperature and humidity range, typically 18 to 24 degrees Celsius and 40 to 55% relative humidity. Toronto homes regularly fall outside that range seasonally, which changes how strictly the stated drying time should be trusted.
Winter conditions under forced air heating often produce very low indoor humidity, sometimes below 25%, which can accelerate surface drying but does not necessarily mean the paint film has fully cured beneath the surface. Summer humidity above 60% slows drying meaningfully, and a second coat applied on the can's stated schedule during a humid Toronto summer day may go on top of paint that has not finished releasing moisture, increasing the risk of the peeling and lifting described above.
| Season | Typical Toronto Indoor Conditions | Drying Time Adjustment |
|---|---|---|
| Winter (forced air heating) | 18 to 22°C; humidity often 20 to 30% | Surface dries quickly; allow full 24 hours regardless to ensure film cure beneath the surface |
| Spring and Fall | 18 to 22°C; humidity 40 to 55% | Standard label drying times generally apply |
| Summer (humid, no AC or fans) | 22 to 27°C; humidity can exceed 60% | Extend drying time beyond label guidance; use fans or dehumidification if possible |
| Summer (air conditioned) | 21 to 24°C; humidity 40 to 50% | Standard label drying times generally apply |
Painting Problems and Solutions: Diagnosing Common Issues
Every painting problem has a traceable cause and a specific correction. The following six issues account for the large majority of painting defects our team is called to assess or correct across Toronto homes.
Problem 1: Paint Drips and Runs
The culprit behind drips and runs is overloading the brush or roller with paint. The correction is straightforward: less paint on the tool produces better results. A brush dipped about a third of the way into the paint, with excess tapped off, and a roller that is evenly coated but not saturated, both avoid this problem at the source. Drips noticed while the paint is still wet are smoothed out immediately with a brush or roller; dried drips are sanded lightly once fully dry and touched up with a small amount of matching paint.
Problem 2: Uneven Paint Coverage
Skimping on primer or applying uneven layers is the usual culprit behind patchy, inconsistent coverage. A primer suited to the surface creates a smooth, uniform base. Paint applied in thin, even coats with ample drying time between them produces a more consistent result than a single thick application, and a second or even third coat is often the deciding factor for vibrant or deep colours that need full opacity.
Problem 3: Brush Marks
Low quality brushes or the wrong technique are the most common causes of visible brush marks. High quality brushes suited to the specific paint type, applied with gentle, even strokes, minimise this issue substantially. For water based paints, a paint extender added to slow drying time can reduce brush mark visibility further by giving the film more time to level out before it sets.
Problem 4: Bubbling or Blistering Paint
Painting on a damp surface or exposure to extreme moisture is the typical cause of bubbling or blistering. Confirming the surface is completely dry and free from humidity before painting prevents most cases. When bubbles do appear, the correction involves waiting for the paint to dry fully, scraping off the blistered section, sanding smooth, and repainting once a moisture free environment is confirmed.
Problem 5: Fading Colour
Exposure to sunlight or the use of low quality paint typically causes premature colour fading. Premium, UV resistant paint products are the correct choice for any surface exposed to direct sunlight. Paint with a higher lightfastness rating maintains colour vibrancy considerably longer than budget alternatives under the same exposure conditions.
Problem 6: Mould and Mildew Growth
Moisture infiltration combined with a lack of sunlight is the underlying cause of mould and mildew growth on painted surfaces. Addressing the moisture source comes first, followed by cleaning the affected area with a mould killing solution and repainting with a mould resistant product. Good ventilation in the affected space helps prevent recurrence after the repair is complete. According to Health Canada's guidance on indoor air quality during home renovations, addressing the moisture source is essential before any cosmetic repair, since painting over an active mould problem without resolving the underlying moisture only conceals the issue temporarily.
The Cost of Painting Mistakes vs Doing It Right the First Time
Correcting a painting mistake after the fact almost always costs more than the additional time it would have taken to do the job correctly from the start. This table illustrates the typical cost difference for common scenarios.
| Scenario | Cost If Done Right | Cost to Correct After the Fact |
|---|---|---|
| Surface prep skipped, paint peels within months | Included in standard project cost | Full rework: strip, prep properly, reprime, repaint |
| Wrong primer used, colour bleeds through | Correct primer: minimal added cost | Multiple extra topcoats attempting to cover; often still requires reprime |
| Cheap tools used, visible brush marks throughout | Quality brushes and rollers: modest upfront cost | Sanding and recoating affected areas; lost time and materials |
| Second coat rushed, paint peels | 24 hour wait: no added cost, only time | Scraping, sanding, reprime, and repaint of affected sections |
| Mould painted over without addressing moisture source | Moisture investigation: variable cost depending on source | Recurring mould; eventual full removal and remediation required |
For a full breakdown of professional interior painting costs in Toronto, see our interior painting cost guide.
Real Project: Correcting Multiple Painting Mistakes in a North York Home
North York Living Room: Budget Brushes, Overloaded Roller, and No Primer Over a Darker Colour — All Three Mistakes Corrected
A homeowner in North York contacted Home Painters Toronto after a previous attempt to repaint their living room produced a result they were unhappy with. The walls showed visible brush marks throughout, several drip marks near the ceiling line, and patchy coverage in one corner where the original darker colour was still faintly visible through the new paint.
Our team's assessment identified three compounding mistakes: budget brushes had been used for cutting in, which explained the visible strokes; the roller had been overloaded in places, causing the drip marks near the ceiling; and no primer had been applied before painting a lighter colour over the previous darker wall, which explained the patchy coverage in the corner that received the least natural light.
The affected walls were lightly sanded to smooth the existing brush marks and remove the drip ridges, then spot primed with a tinted acrylic primer over the area where the darker colour was still showing through. Two coats of Benjamin Moore Regal Select in Eggshell finish were applied using quality angled brushes for cutting in and a 9 mm nap roller loaded lightly and consistently. The corrected walls showed a smooth, even finish with no visible brush marks or coverage inconsistency.
Home Painters Toronto is WSIB compliant, fully insured to $5 million general liability, and all interior painting is backed by a lifetime warranty. For completed projects, visit our Toronto painting projects page. Same day free estimates are available seven days a week across the GTA.
Common Painting Mistakes: Turning Hurdles Into Stepping Stones
Every painting challenge has a traceable cause and a workable solution. Understanding why drips, uneven coverage, brush marks, blistering, fading, and mould occur transforms these common painting mistakes from frustrations into avoidable steps in the process. Reaching out to professionals when a project feels beyond the available time or expertise is always a reasonable choice, and doing so before a small mistake compounds into a larger correction is the more cost effective path.
Frequently Asked Questions About Common Painting Mistakes
Skipping surface preparation is consistently the most common and most consequential painting mistake. Proper prep, including cleaning, patching, sanding, and protecting surrounding surfaces, determines whether every subsequent step succeeds. Most other mistakes on this list become more likely, or more visible, when prep has been rushed or skipped entirely.
Paint peels when a second coat is applied before the first has fully released its moisture and cured. The fresh paint disrupts the partially set film beneath it, causing adhesion failure that shows up as peeling or visible lifting once both coats have dried. Waiting the full manufacturer recommended interval, generally 24 hours for most interior latex paints, prevents this outcome.
Yes, significantly. Cheap brushes shed bristles and apply paint unevenly, leaving visible strokes in the finished surface. Cheap rollers produce inconsistent coverage and can leave lint or fibres embedded in the paint film. Quality tools, properly cleaned and stored, last for years and consistently produce a smoother, more professional result than budget alternatives, regardless of how premium the paint itself is.
Primer is needed whenever the surface is bare drywall or wood, has been previously painted in a significantly darker or lighter colour, shows water stains or other marks that could bleed through, or has a glossy finish that needs to be dulled for adhesion. A standard recoat of a similar colour over a sound existing coat is one of the few situations where primer can sometimes be skipped.
Painting over mould without addressing the underlying moisture source only delays the problem temporarily. The moisture source needs to be identified and corrected first. The affected area is then cleaned with a mould killing solution before a mould resistant paint product is applied, with good ventilation maintained afterward to prevent the same conditions from recurring.
For many Toronto homeowners, yes, particularly for larger rooms, colour changes from dark to light, or any surface with a history of adhesion problems. Professional painters follow the surface preparation standards established by industry bodies such as the Painting Contractors Association, which consistently produce a more durable, even result than an approach that skips or rushes these steps. See our interior painting cost guide for typical project pricing.
More Helpful Blogs Related to Common Painting Mistakes
Avoid the Mistakes — Get It Right the First Time in Toronto
Home Painters Toronto is the HomeStars Best of Award 2026 winner with a lifetime warranty on all interior painting. Call 416-494-9095 or email [email protected] for a FREE same-day estimate.