
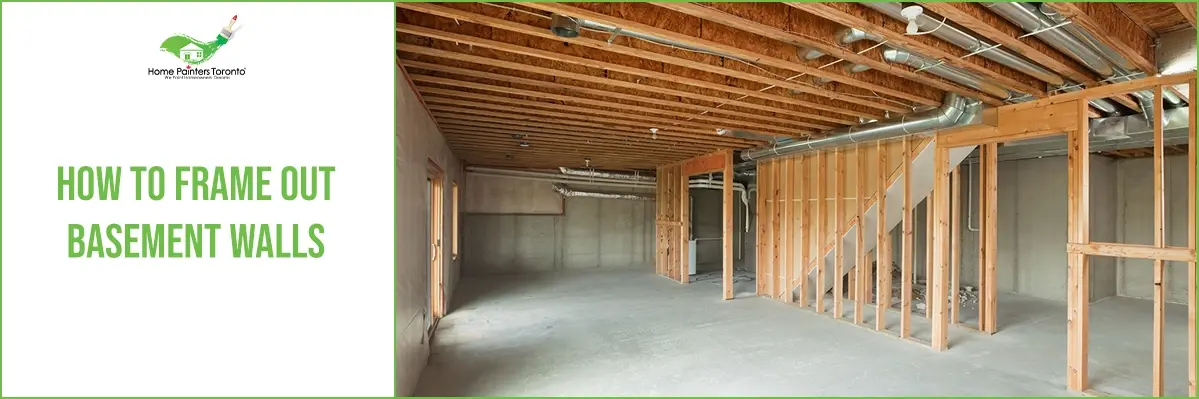
Are you looking at your unfinished basement in Toronto and thinking it’s time to make this space more usable? Or maybe you just want to re-frame one of the basement walls? Unfinished basements are not as hard to finish compared to other rooms in the house because you are working with a clean slate. One of the first things you’ll need to know is how to frame out basement walls so you can get started with renovating the rest of your basement a lot more smoothly.
Introduction to Framing Out Basement Walls
Framing basement walls against concrete marks the beginning of transforming your bare and oft-neglected basement into a vibrant, usable space. It’s an essential part of any basement finishing project, providing structure, improving insulation, and reducing noise levels. Here’s what framing out basement walls essentially entails:
- The process involves creating a series of vertical and horizontal supports, or frames, typically made from 2×4 wood studs.
- These frames serve as the skeleton of your new walls, onto which you can attach insulating materials and wall coverings, such as drywall.
- Accomplishing this process can provide a canvas for your renovated basement, paving the way for electrical and plumbing lines.
Importance of Preparation Before Framing
Framing out a basement wall is only one part of the remodelling process, but it requires thoughtful planning and adequate preparation. It’s much more than just gathering materials and deciding on a layout. Here’s why preparation is crucial:
- Dry and Waterproof Basement: Your basement must be completely dry and adequately waterproofed. A wet basement promotes mould and moisture damage, which can be catastrophic for your new walls.
- Building Codes: It’s essential to familiarize yourself with local building codes before beginning the project. These codes ensure your renovation process remains safe, and abiding by them can save you from penalties.
- Plan and Layout: Deciding on a layout beforehand is key to efficiency and optimal use of space. It helps you avoid mistakes and unnecessary alterations during the actual framing process.
The Role of Wall Plates in Framing
Wall plates provide the canvas for your wall frames—a structure onto which you’ll attach the wall studs. They are an integral part of framing basement walls, and here’s why:
- Structural Support: Wall plates serve as the base and top support of your framed wall. They hold the weight of the wall and offer a point of attachment for the vertical studs.
- Attachment Point: The top wall plate is securely attached to the ceiling joists, and the bottom wall plate is fixed to the floor. This arrangement provides security, and stability, and helps keep the vertical studs in line.
- Anchorage for Studs: Wall studs, the vertical components of the frame, are fixed between the top and bottom plates. This method creates a sturdy frame that can support various wall coverings and installations.
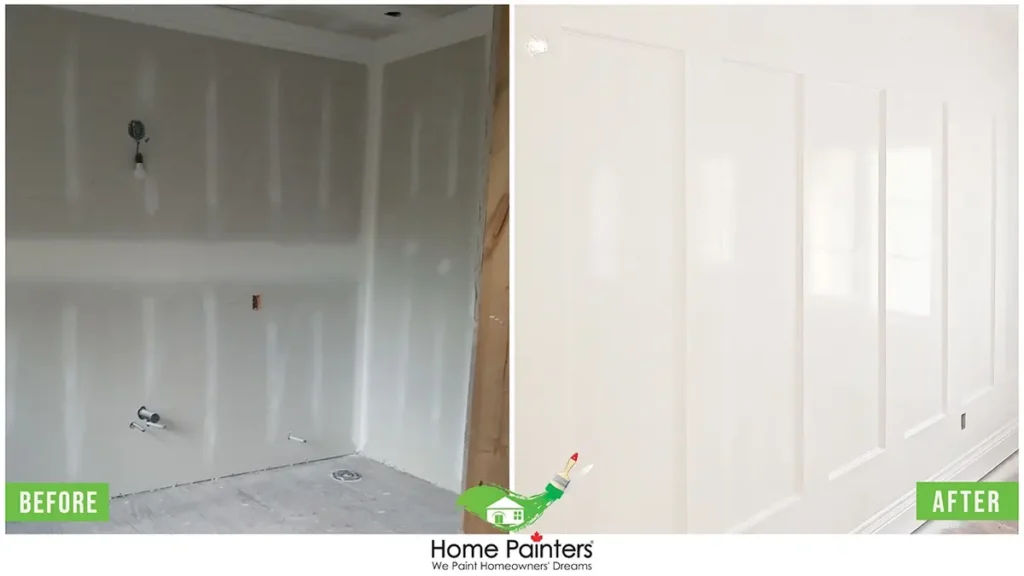
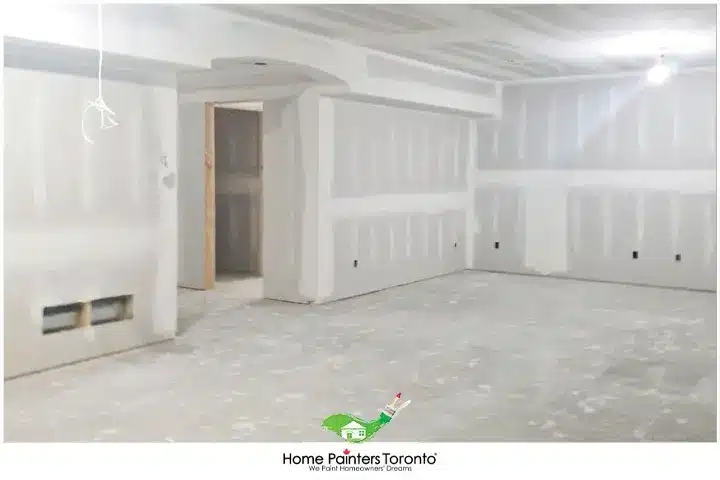
How to Frame Out Basement Walls with Drywall
Materials That You Will Need for DIY Basement Framing:
- Safety Goggles
- Foam Board
- Foam Board Glue
- Chalk Reel
- Drill
- Drill Bits
- Drywall Screws
- Hammer
- Nails
- Circular Saw
- Lumber 1×3
- Lumber 2×4
1. Exterior Basement Wall Set-Up
- It is a good idea to prepare the exterior basement wall for the interior basement walls to be attached to it.
- To start with, attach the foam board to the exterior walls with foam board glue. Foam board is an insulation that will keep the basement energy efficient.
- Using a chalk reel, draw horizontal guidelines onto the foam board about 8 cm from the top and bottom of the wall, as well as the centre.
- Drill holes through the foam board to the exterior wall and hammer in spring spikes through each pilot hole.
- Attach 1×3 boards with drywall screws so that they are lined up horizontally to the wall. Then screw in vertical 1×3 boards that are spaced about 40 cm apart from the horizontal boards.
- Cut the boards (also known as plates) to the length needed to attach them to the floor and the ceiling. Mark them every 40 cm so you know where to nail the studs into them.
HINT: You should install a cross brace only if the new wall is parallel to the ceiling joists.
2. Frame
- Start framing the interior basement wall by cutting your 2×4 boards so they become the joists. They need to be a height that reaches from the floor to the ceiling, so make sure you remember the height of the top and bottom plates before you cut them.
- Nail studs to the bottom plate by using two nails per stud and repeat this for the top plate as well.
- Carefully lift the frame into place. It is never a good idea to work alone, so get assistance from someone to lift it carefully into place.
3. Attach
- Moving to the final step to frame out basement walls, you need to attach the frame to the ceiling joists and cross braces (if installed) or the prepped exterior basement wall using nails.
- Find some shims and place them wherever necessary.
Learning how to frame a basement wall against concrete requires some patience and a well-thought-out plan. Framing out a basement wall is a way to get your basement renovation off to a smooth start, creating a put-together space so you can focus on getting everything else done properly.
If you would like some help with the rest of this job, why not give Home Painters Toronto a call? Call us NOW at 416-494-9095 or email us at [email protected] and get your free basement framing cost estimate and useful tips to frame out basement walls. And don’t forget to follow us on all our social channels below!