

If you're thinking about exterior painting in Toronto, the first question worth asking isn't what colour you want, it's how prepared is your home? Skipping or rushing the preparation phase is the single biggest reason exterior paint jobs fail early. Peeling, bubbling, cracking, and poor adhesion almost always trace back to inadequate prep, not the paint itself.
Learning how to prepare your home for exterior painting in Toronto isn't just useful knowledge, it also helps you make smarter decisions about who should do the work, what's involved, and why cutting corners now costs significantly more later.
At Home Painters Toronto, we've been handling exterior painting projects across Toronto and the GTA for over 38 years. In that time, we've seen every prep mistake in the book. This article walks you through what proper preparation looks like, what to watch for, and where professional help makes the most difference.
How to Prepare Home for Exterior Painting in Toronto: Why Prep Determines Everything
Exterior paint does two jobs: it makes your home look great, and it protects the surfaces underneath from moisture, UV exposure, and seasonal wear. Toronto's climate is particularly demanding, cold winters, wet springs, humid summers, and freeze-thaw cycles put constant pressure on any exterior coating.
When prep is done properly, a professional exterior paint job can last 7 to 10 years or more. When it isn't, you may be repainting in 2 to 3 years. That math matters when you consider the cost of labour and materials.
Proper preparation includes cleaning, scraping, sanding, caulking, priming, and where needed, repairing damaged wood before a single drop of paint is applied. Each step exists for a reason, and each one affects the final result.
Step-by-Step: What Exterior Painting Preparation Actually Involves
Inspect the Entire Exterior
Before any prep work begins, a thorough inspection of the home's exterior is essential. This means looking at every surface, siding, trim, fascia, soffits, doors, and any exposed wood, for signs of damage, rot, peeling paint, caulking failures, or moisture intrusion.
A proper inspection shapes everything that follows. Missed rot or failing caulk that gets painted over won't disappear; it will accelerate. When professionals inspect a home, they're not just looking at what's visible. They're looking for what's likely to become a problem.
According to Toronto's Building Code and Renovation Resources, keeping your home's exterior surfaces in good repair is also tied to property maintenance standards, another reason prep isn't optional.
Clean the Surface Thoroughly
No paint bonds well to a dirty surface. Exterior walls collect dirt, mildew, chalking from old paint, algae, bird droppings, and airborne grime over the years of exposure. All of it must be removed before painting begins.
Power washing is the standard method, but technique matters. Too much pressure on wood siding, stucco siding, or older brick can cause damage. Too little leaves behind the very contaminants that compromise adhesion. Professionals use commercial-grade equipment and adjust the pressure, distance, and angle based on the surface type.
After washing, the surface must dry completely, typically 24 to 48 hours, before any further work begins. Painting over a damp surface traps moisture and guarantees adhesion failure down the road.
Scrape and Sand Loose or Peeling Paint
Old, peeling, or flaking paint needs to come off. Painting over it creates an unstable base, and the new coat will fail just as quickly as the old one, usually faster, because the layers compound the problem.
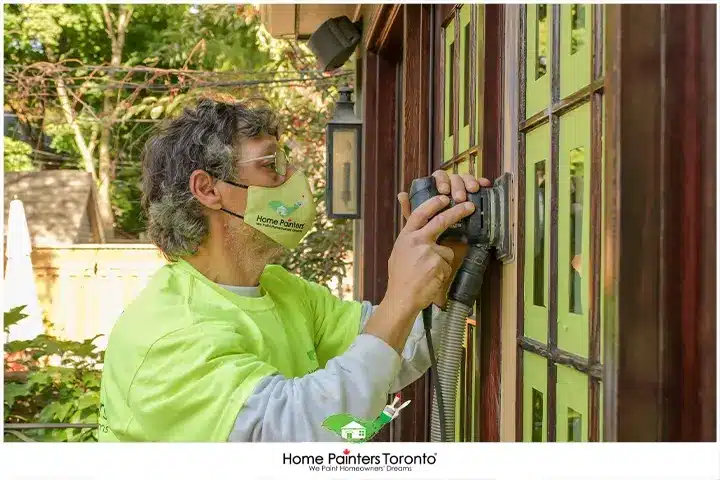
Scraping is physically demanding and time-consuming, especially on larger homes or surfaces with multiple failed layers. Sanding follows scraping to smooth rough edges and improve adhesion for the new coat.
One important note for older homes: if your property was built before 1980, there's a meaningful chance the existing paint contains lead. Health Canada guidance on lead paint recommends following safe work practices, including proper protective equipment and appropriate disposal methods. This is one of the more compelling reasons to hire professionals for prep work on older Toronto homes, rather than attempting it yourself.
Repair Damaged Wood and Surfaces
Soft wood, rot, and structural damage must be addressed before painting. Paint is not a filler, it won't stop rot from spreading, and it won't restore compromised wood's ability to hold a finish.
This is where exterior carpentry and handyman services become part of the prep process. At Home Painters Toronto, our crews can handle minor wood repairs, fascia replacement, and surface patching before painting begins, so the job is done correctly the first time rather than failing prematurely because damage was painted over.
Caulk All Gaps and Joints
Caulking seals the gaps between trim and siding, around windows and doors, and at any junction where two surfaces meet. These gaps are entry points for water. When water gets in behind the paint film, it causes peeling, bubbling, and eventually rot.
The type of caulk matters. Interior caulk, paintable caulk, and exterior siliconized caulk have very different properties and lifespans. Using the wrong product in a high-movement area, like around a window frame, can result in caulk failure within a single heating season.
Professional painters know which caulk to use where, how to tool it properly for a clean finish, and how to ensure it creates a watertight seal rather than just a cosmetic one.
Prime Bare and Repaired Surfaces
Primer is the bridge between the surface and the paint. Bare wood, patched areas, raw masonry, and any surface where old paint was fully removed all need to be primed before the finish coat goes on.
The right primer depends on the substrate. Bare wood gets an oil-based or alkyd primer for maximum penetration and moisture resistance. Masonry (brick, stucco, concrete) requires a masonry-specific primer that handles the alkalinity of the surface. Aluminum siding needs an etching primer to ensure the paint actually bonds rather than peeling off in sheets.
Our exterior painting Toronto service includes surface-matched priming as a standard part of every project scope, it's not an upsell or an afterthought.
Protect Surrounding Areas
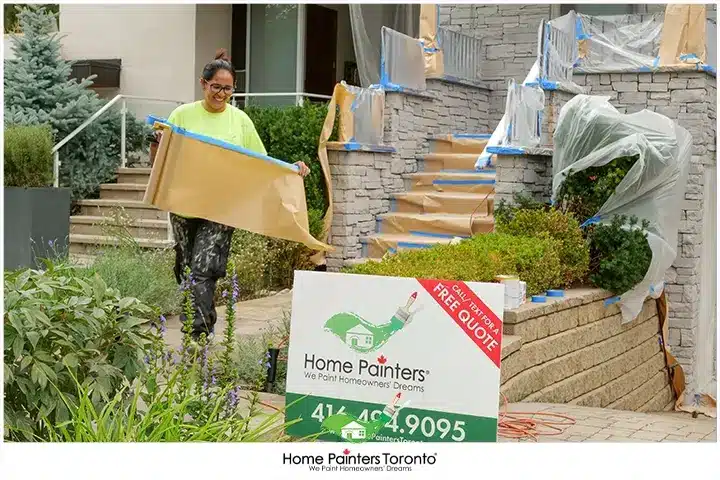
Before any paint is applied, landscaping, windows, doors, light fixtures, and anything that isn't being painted need protection. Drop cloths, plastic sheeting, and painter's tape all have to be in place.
This step is often underestimated by homeowners doing their own prep. One overspray incident or a misplaced brush on a window frame can create more cleanup and repair work than the painting itself. Professionals protect the property as part of the job, not as an optional extra.
DIY Prep vs. Professional Prep: The Honest Comparison
Understanding what's actually involved in proper exterior prep helps clarify why professional results consistently outlast DIY attempts, and why the cost difference is often far smaller than expected when you factor in time, equipment, materials, and the likelihood of needing to redo the work.
| Prep Step | DIY Reality | What Professionals Do |
|---|---|---|
| Power washing | Renting equipment, technique matters; wrong pressure damages siding | Commercial-grade washers, correct PSI per surface type |
| Scraping & sanding | Physically demanding; easy to miss flaking paint in hard-to-reach spots | Systematic full-surface scraping, sanding for adhesion |
| Caulking gaps | The wrong caulk type fails within one season | Exterior-grade caulk matched to the surface; properly tooled |
| Priming bare surfaces | Generic primer over bare wood = peeling within a year | Surface-matched primer (wood, masonry, metal) applied correctly |
| Wood rot repair | Often missed or patched cosmetically | Identified and repaired before paint goes on |
| Masking & protection | Landscaping, windows, and trim are unprotected | Full drop cloths, painter's tape, plant covers |
The table above isn't meant to discourage homeowners; it's meant to set realistic expectations. Exterior prep done right takes time, specific skills, and the right materials. Professionals have completed hundreds of these projects. That repetition translates directly into fewer mistakes and better long-term results.
Prep Considerations by Surface Type in Toronto Homes
Toronto homes come in a wide range of exterior materials, and each requires a different approach to preparation. Here's what you need to know about the most common ones.
Wood Siding
Wood requires the most attention during prep. It's vulnerable to moisture, rot, and insect damage, and its surface absorbs paint differently depending on its age, grain direction, and previous paint history. Full scraping, sanding, thorough drying time after washing, and oil-based primer on bare wood are all essential.
Aluminum Siding
Aluminum has unique properties that require specific prep. It oxidizes over time, forming a chalky layer that prevents adhesion. It also expands and contracts with temperature changes. Our aluminum siding painting approach always includes a thorough wash to remove oxidation, light sanding, and an etching primer designed to bond to metal surfaces. Skipping any of these steps leads to delamination within a season or two.
Stucco
Stucco is porous and absorbs water readily. Before painting, it must be completely dry; any moisture trapped in the stucco will push the paint off from the inside. Cracks and loose stucco need to be repaired before painting begins. A masonry primer is required to seal the surface and ensure consistent colour absorption.
Brick
Brick is often a better candidate for staining than painting, but when paint is the goal, proper prep is critical. Brick requires thorough cleaning, efflorescence removal, and masonry primer. Homeowners considering either option should read about exterior brick staining in Toronto, as an alternative, it preserves the brick's texture and breathability while still refreshing the colour.
When to Do Exterior Painting Prep in Toronto
Timing exterior prep correctly makes a real difference in how well the paint cures and how long it lasts. Toronto's climate gives us a relatively short window for optimal exterior painting conditions.
The best conditions for exterior painting are temperatures between 10 and 25 degrees Celsius, low humidity, and no rain forecast for at least 24 to 48 hours. In Toronto, that typically means late spring through early fall, roughly May through October, though specific weeks vary.
- Prep work like power washing and scraping can be done on cooler days than the final painting
- Caulking and priming also need mild temperatures to cure correctly
- Optimal window: late spring through early fall, roughly May through October
- No rain forecast for at least 24 to 48 hours before and after application
- Temperatures between 10 and 25 degrees Celsius for both air and surface
Our detailed post on the best time of year to paint your home's exterior walks through seasonal considerations in more detail.
One underappreciated advantage of hiring professionals is scheduling flexibility. Experienced crews know when to push ahead and when weather conditions require a pause. That kind of judgment comes from doing this work every season, not once every several years.
Why Toronto Homeowners Trust Home Painters Toronto for Exterior Prep
Serving homeowners across Toronto and the GTA since 1987 with thousands of completed exterior projects.
Every project starts with a detailed written estimate that covers every prep step, from inspection through final walkthrough.
All exterior painting work is backed by a 3-year workmanship warranty. Brick staining carries a 15-year warranty.
Our professional crew, not subcontractors, handles every phase of prep and painting from start to finish.
We handle minor wood repairs, fascia replacement, and surface patching before painting begins, so nothing gets painted over.
We come to you for an on-site assessment at no cost. Serving Toronto, Etobicoke, North York, Scarborough, and the broader GTA.
Frequently Asked Questions: Exterior Painting Preparation in Toronto
Thorough cleaning and the removal of all loose, peeling, or failing paint are the most critical steps. No amount of high-quality paint or primer can compensate for a surface that hasn't been properly cleaned and prepared. This is where most DIY paint jobs fall short.
Look for soft spots when you press on wood surfaces, discolouration, paint that peels away in sheets, or visible cracks that have allowed water infiltration. Any of these signs indicate wood damage that should be repaired before painting begins. A professional inspection will identify issues that aren't always visible to the untrained eye.
Prep work is typically included in a professional exterior painting estimate rather than priced separately. The cost of a full exterior paint job in Toronto varies based on home size, surface condition, height, access, and the amount of prep required. Homes with significant peeling, wood damage, or complex detailing will naturally require more prep time. Getting a written estimate that details the scope of prep included is the best way to understand what you're paying for.
Most exterior prep and painting should not be done in cold or wet conditions. Caulk and primer require temperatures above 5 to 10 degrees Celsius to cure properly, and wet or frozen surfaces simply cannot be painted successfully. Toronto's winters make exterior painting a spring-through-fall activity for most homes, though mild falls sometimes extend the season later than expected.
Look for a company with a written scope of work, clear warranty terms, evidence of proper insurance (WSIB and general liability), and a track record of reviews from Toronto homeowners. Ask specifically what prep work is included in their quote. If they can't explain it clearly, that's a sign that prep may be minimal. A professional company will walk you through every step before work begins.
Ready to Prepare Your Home for Exterior Painting in Toronto? We Can Help.
The quality of an exterior paint job starts long before the first coat of paint is applied. It starts with how thoroughly and correctly the surface is prepared. Every step in the prep process affects how the paint bonds, how it weathers, and how long it lasts.
Home Painters Toronto brings over 38 years of experience, a professional crew of in-house painters, and a written scope of work that covers every step, from initial inspection through final walkthrough. Our exterior house painting services are backed by a 3-year warranty on all exterior painting and a 15-year warranty on brick staining. We don't cut corners on prep, it's the foundation of everything else we do.
If your home is due for exterior painting this season, don't leave prep to chance. Get a free, no-obligation estimate from a team that's done this thousands of times across Toronto and the GTA.