

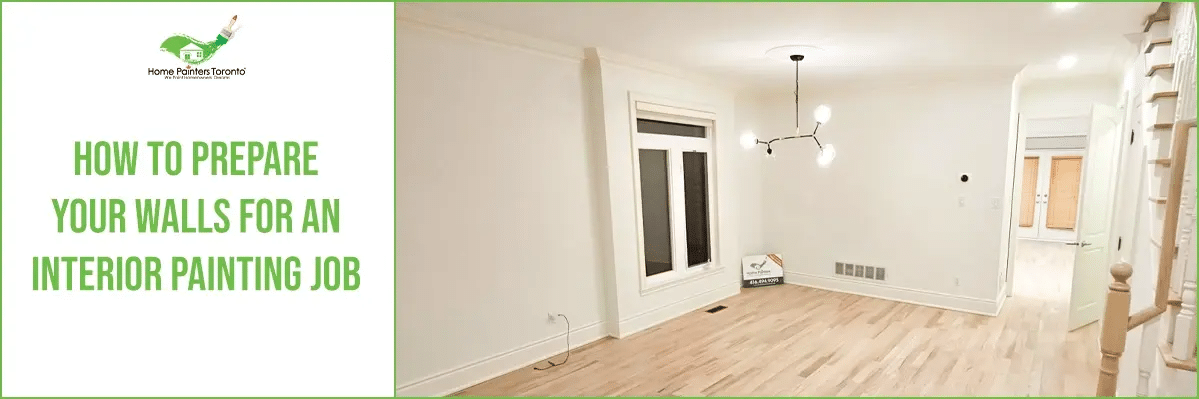
Learning how to prepare walls for interior painting correctly is the single most important factor in determining whether a paint job lasts 2 years or 8, and it is also the step that most homeowners underestimate and most general contractors rush. Home Painters Toronto, the HomeStars Best of Award 2026 winner with over 1,200 positive reviews and 40+ years serving the GTA, applies a consistent 7 step preparation sequence on every interior painting project in the GTA. If you feel like the inside of your home is looking a little dull, you may want to get an interior painting job done. However, interior painting will only be effective if you prepare your wall beforehand. To achieve the best results for your interior house painting, just follow our tips below.
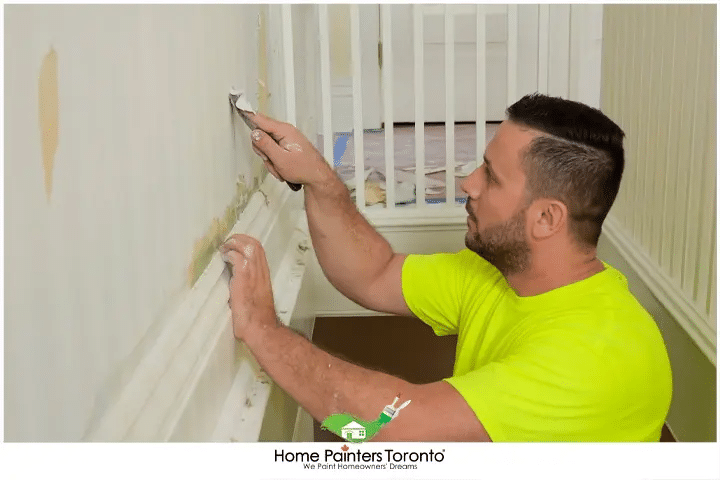
Preparation determines whether an interior paint job lasts 2 years or 8, which is why professional painters treat the 7 step sequence as more than half the work of any project.
How to Prepare Walls for Interior Painting: Why Preparation Is More Than 50 Percent of the Work and Skipping Any Step Guarantees Early Failure
The preparation sequence for an interior painting project determines the longevity, adhesion, and finish quality of the completed paint job more than the paint brand, the colour, or the number of topcoats applied. Primer applied over a greasy wall surface bonds to the grease layer, not the wall. Paint applied over unfilled cracks reveals those cracks through the new film within the first heating season. Topcoat applied over a previously glossy surface without sanding loses adhesion at the highest contact points within months. According to CMHC's guidance on home maintenance and protecting investment value, well maintained interior surfaces are among the most direct contributors to residential property value, and correct preparation is what keeps painted surfaces maintainable for years rather than requiring repainting on a 2 year cycle.
Wall Preparation Before Painting
Although the temptation is to get walls painted right away, making sure the right steps are taken in preparation produces a significantly better result. While most professionals will already know how to do so, it is best that homeowners are also aware of what steps are needed.
This awareness helps ensure that walls are fully prepared before any paint is applied.
Cleaning and Degreasing Walls Before Painting: The Step Most Homeowners Skip
How to Prepare Walls for Interior Painting: Why Cleaning and Degreasing Before Primer Is the Step That Determines Paint Longevity
Standard wall cleaning with soap and water removes visible dirt but does not remove the grease and oil that accumulate on walls near kitchens, around light switches, and at any high contact surface over years of use. Grease is chemically incompatible with paint adhesion: primer applied over a greasy surface bonds to the grease layer and peels when the grease eventually releases from the wall through thermal cycling and daily use. TSP substitute (trisodium phosphate substitute) solution is the correct degreaser for interior wall surfaces, cutting through cooking oil deposits and contact grease that soap and water leaves behind. According to Health Canada's guidance on VOCs in indoor environments, rooms should be well ventilated during all phases of surface preparation including cleaning, sanding, and priming, to manage the airborne particles and vapours generated during each step.
Mould on interior walls requires treatment with an anti mould solution before any other preparation step. Mould painted over without treatment continues to grow beneath the paint film and reappears through the topcoat within weeks. The mould is cleaned, treated with an anti mould solution, allowed to dry fully, and confirmed visually clear before any primer is applied. If the mould source is moisture infiltration from an exterior wall or plumbing, that source must be addressed before painting.
Repairing Holes, Cracks, and Surface Damage Before Painting
Surface repair before painting covers three categories of damage that require different repair approaches. Small nail holes and minor surface dents are filled with lightweight joint compound applied with a putty knife, allowed to dry, sanded flush, and spot primed before topcoat. Medium cracks from seasonal movement are filled with flexible joint compound, feathered at the edges to blend with the surrounding wall, sanded, and spot primed.
Larger structural cracks, delaminated plaster sections, or areas where water damage has compromised the wall substrate require assessment before any filler is applied. Applying filler over structurally compromised plaster produces a repair that looks correct at completion and fails within one season when the underlying plaster continues to move. The correct approach identifies whether the substrate beneath the damaged section is sound before filling, and addresses substrate issues with plaster repair, backing board, or drywall replacement as needed.
For Toronto homes where plaster walls have developed significant cracking, delamination, or water damage, our drywall repair and installation service handles all repair types including plaster, drywall, and mixed substrate sections in the same project. For a guide on the repair errors that produce early paint failure, see our guide on common painting mistakes to avoid.
Priming Before Painting: Why the Right Primer for the Specific Surface Determines Everything
When to Use Alkali Resistant Primer vs Standard Acrylic Primer on Toronto Interior Walls
Primer selection is the most consequential product decision in the interior painting preparation sequence, and it is the decision that is most commonly made incorrectly on Toronto residential projects. Standard acrylic primer is the correct specification for standard drywall surfaces in good condition. Alkali resistant primer is the correct specification for original plaster walls in heritage homes, for any new plaster repair sections, and for concrete or masonry surfaces in basement painting.
The chemistry reason for this distinction is that original plaster contains lime, which is alkaline and remains chemically reactive for decades. Standard acrylic primer applied over chemically active plaster produces an adhesion layer that is not neutralized against the lime chemistry, and the lime continues to attack the paint film from beneath over time. Alkali resistant primer contains compounds that neutralize the lime chemistry and create a chemically stable bonding layer for the topcoat. Applying standard acrylic primer over original plaster does not produce immediate visible failure but produces a finish that begins to show adhesion issues at 2 to 3 years rather than the 7 to 10 years that correct primer selection produces.
Stain blocking primer is a third primer category required wherever permanent stains (marker, nicotine, water staining) are present on the wall. Standard acrylic primer applied over these stains does not block bleed through, and the stain reappears through the topcoat within weeks of completion. Shellac based stain blocking primer or high build stain blocking acrylic primer is required at all stain locations before any standard primer or topcoat. For a full guide on primer types and their applications, see our guide on picking the right type of interior paint and our guide on low VOC vs zero VOC paint options for health conscious primer selection.
Preparing Walls in Older Toronto Homes: Plaster, Heritage Trim, and High-Build Surfaces
Preparing Walls in Toronto Heritage Homes: What Original Plaster Requires That Drywall Does Not
Toronto's Victorian and Edwardian heritage homes in neighbourhoods like Riverdale, The Annex, Leaside, and Roncesvalles have original plaster walls that require a preparation sequence significantly different from modern drywall. Original plaster develops hairline cracking through seasonal movement, carries lime chemistry that standard acrylic primer cannot handle, and may have accumulated 5 to 7 coat generations of previous paint that create a high build surface with visible brush marks from earlier application methods.
The professional preparation sequence for original plaster walls is: clean, degrease, fill all cracks with flexible joint compound, sand all filled sections flush with the surrounding surface, apply alkali resistant primer throughout all plaster surfaces, and allow full primer cure before any topcoat is applied. Where multiple coat generations have created a surface that reads as heavily textured under raking light, a skim coat of joint compound over the full wall surface before primer produces a flat base that the topcoat finishes smoothly over.
| Surface Type | Correct Primer | Why This Primer | Common Mistake |
|---|---|---|---|
| New drywall in good condition | Standard acrylic primer | Creates mechanical adhesion on porous new drywall surface; seals before topcoat | Skipping primer entirely on new drywall produces uneven topcoat sheen and poor coverage |
| Original lime plaster (heritage homes) | Alkali resistant primer | Neutralizes active lime chemistry; prevents long term adhesion failure | Standard acrylic primer does not neutralize lime; produces adhesion issues at 2 to 3 years |
| Previously painted wall in good condition, no sheen | Standard acrylic spot primer at repairs only | Bonds to existing paint film; spot prime fills only; saves full prime coat if adhesion is confirmed good | Priming entire wall when only spot prime needed; or skipping spot prime on repairs |
| Previously painted wall with glossy sheen | Bonding primer throughout after sanding | Adheres to low porosity glossy surface; sanding alone is insufficient on high gloss surfaces | Applying topcoat directly over gloss without bonding primer produces film failure within months |
| Stained sections (marker, nicotine, water staining) | Shellac based stain blocking primer at stain locations | Blocks bleed through that standard acrylic primer cannot prevent | Standard acrylic primer over stains: stain reappears through topcoat within weeks |
| Concrete or masonry (basements) | Alkali resistant masonry primer | Neutralizes concrete alkalinity; creates adhesion on non porous masonry | Standard acrylic primer on concrete: adhesion failure within one heating season |

Alkali resistant primer neutralizes the lime chemistry in original plaster that standard acrylic primer cannot handle, the difference between a finish lasting 2 to 3 years and one lasting 7 to 10.
Safety Precautions During Interior Painting
Painting a home's interior can be an exciting task, but it also comes with potential hazards. It's important to follow certain safety precautions, especially regarding ventilation, ladder use, and handling paint and other chemicals. Here's what to be aware of during the paint preparation process:
- Ensure all windows and doors are open to allow air to circulate freely.
- Use fans if necessary to encourage air movement.
- When possible, paint during periods of good weather when the home can be opened to the outside.
- Consider wearing a mask or respirator if sensitive to paint fumes.
- Always ensure the ladder is on a stable, flat surface before climbing.
- Do not overreach when painting; it's safer to come down and move the ladder.
- Follow the three points of contact rule: at least two feet and one hand, or two hands and one foot, should be on the ladder at all times.
- Do not exceed the maximum load carrying capacity of the ladder.
- Always read the manufacturer's instructions and warnings on paint and cleaning products.
- Wear protective clothing, including gloves, goggles, and a mask if necessary.
- Do not eat or drink in the vicinity to avoid accidental ingestion.
Post-painting Activities
After painting, there are various tasks to undertake, such as disposing of leftover paint, maintaining the space, and cleaning the equipment. Here are some tips:
- Never pour paint down a drain or onto the ground.
- If there is a small amount of paint left, leaving the lid off allows it to dry, then it can be disposed of in regular household trash (if permitted in the area).
- For larger quantities, consider donating the paint or hiring a professional waste disposal service.
- Store a small amount of paint for touch ups in a tightly sealed container.
- Keep a record of the paint brand, colour and finish for any future reorders.
- Regular cleaning and dusting can help maintain the look and durability of walls.
- If using water based paint, rinse brushes and rollers under running water.
- For oil based paint, use mineral spirits or paint thinner to clean tools, ensuring proper disposal of any leftover solvent.
- Dry brushes and rollers correctly to extend their life, preferably by hanging upside down.
Cost of Professional Interior Wall Preparation and Painting in Toronto in 2026
Home Painters Toronto is WSIB compliant, fully insured to $5 million in general liability, and all interior painting is backed by a lifetime warranty. All prices below are in CAD and exclude HST. For the full interior painting cost breakdown, see our interior painting cost guide.
| Scope | Estimated Cost (CAD) | Notes |
|---|---|---|
| Interior room repaint (living or dining room, standard drywall) | $400 – $900 | Full 7 step prep included: clean, degrease, repair, protect, prime, stain block where needed, two topcoats |
| Interior room repaint (bedroom) | $400 – $800 | Low or zero VOC products standard; full prep sequence included |
| Heritage plaster room (main floor, Victorian or Edwardian home) | $500 – $1,100 | Alkali resistant prime throughout; crack fill and skim coat where needed; additional prep time for plaster |
| Drywall repair before painting (cracks, holes, water damage) | $150 – $600 | Varies by extent; all repair types handled before any primer is applied |
| Stain blocking primer treatment (marker, nicotine, water stain) | $100 – $300 per affected area | Shellac based stain block at all affected sections; standard prime and topcoat over |
Frequently Asked Questions About Preparing Walls for Interior Painting
Yes. Cleaning and degreasing walls is the first step in every professional interior painting project. Standard soap and water removes visible dirt. TSP substitute solution is used where grease or oil contamination is present, particularly near kitchens, around light switches, and at any high contact surface. Primer applied over grease bonds to the grease layer and peels when the grease releases through thermal cycling and daily use.
Sanding is required wherever the existing paint surface has a glossy sheen (to provide mechanical adhesion for primer), wherever paint has chipped or flaked (to feather the edges and create a smooth transition), and wherever filler has been applied over cracks or holes (to sand flush with the surrounding wall). New drywall in good condition does not require full sanding, only spot sanding at tape joints and any rough sections. Original plaster walls benefit from a full sand to knock down any raised texture before primer.
Alkali resistant primer is the correct specification for original plaster walls in Toronto heritage homes. Original plaster contains lime that remains chemically active for decades, and standard acrylic primer applied over active lime produces an adhesion layer that is not neutralized against the lime chemistry. Alkali resistant primer neutralizes the lime and creates a chemically stable bonding layer for the topcoat. Applying standard acrylic primer over original plaster produces adhesion issues at 2 to 3 years rather than the 7 to 10 years that correct primer selection provides.
The professional approach for walls with old paint is: confirm that the existing paint is adhering well (press tape firmly, pull it away — paint that comes off with the tape is not adhering and must be removed), scrape all flaking or peeling sections to the sound base coat, sand to feather the edges at scraped sections, fill any holes or damage with joint compound, sand filled sections flush, degrease with TSP substitute throughout, and apply the correct primer for the specific substrate before any topcoat.
Interior painting with full professional preparation included costs $400 to $900 per room for a standard living or dining room, and $400 to $800 per bedroom. These prices include the complete 7 step preparation sequence. Heritage plaster rooms requiring alkali resistant primer and additional crack repair run $500 to $1,100. Drywall repair before painting runs $150 to $600 depending on the extent of damage. All Home Painters Toronto quotes include a site assessment and are free and provided the same day.
Top Related Blogs to "How to Prepare Your Walls for an Interior Painting Job"
Ready to Have Your Walls Professionally Prepared and Painted?
Home Painters Toronto is the HomeStars Best of Award 2026 winner with a lifetime warranty on interior painting and 40+ years serving the GTA. Call 416-494-9095 or email [email protected] for a FREE same-day estimate.