

Older homes across Leslieville, the Beaches, and other established Toronto neighbourhoods often carry decades of paint layers under their siding, and some of those layers were mixed with lead before Canada tightened its rules through the 1970s and into the 1990s. Lead paint on exterior siding in Toronto becomes a real concern the moment a repair crew starts scraping, sanding, or pulling boards, because that work can release lead dust into the yard and the air around the house. Homeowners planning a siding repair or a full repaint on a pre-1990 property need to know what triggers containment steps, what a professional crew does differently on an older wall, and what that adds to a project timeline and quote. This article walks through how lead paint is identified on Toronto siding, which repair activities carry the highest risk, and how a licensed contractor keeps the site, the family, and the neighbouring yard safe while the work gets done. Our complete guide to siding repair covers the broader repair process for homeowners comparing options.
Homes painted before 1990 in Toronto, and especially before 1960, may have lead-based paint layered under newer coats on the siding. Any repair that scrapes, sands, cuts, or removes boards can disturb it. Professional crews test the paint or assume lead is present, seal off the work area, and use wet methods plus HEPA vacuums to contain dust and protect the surrounding soil.
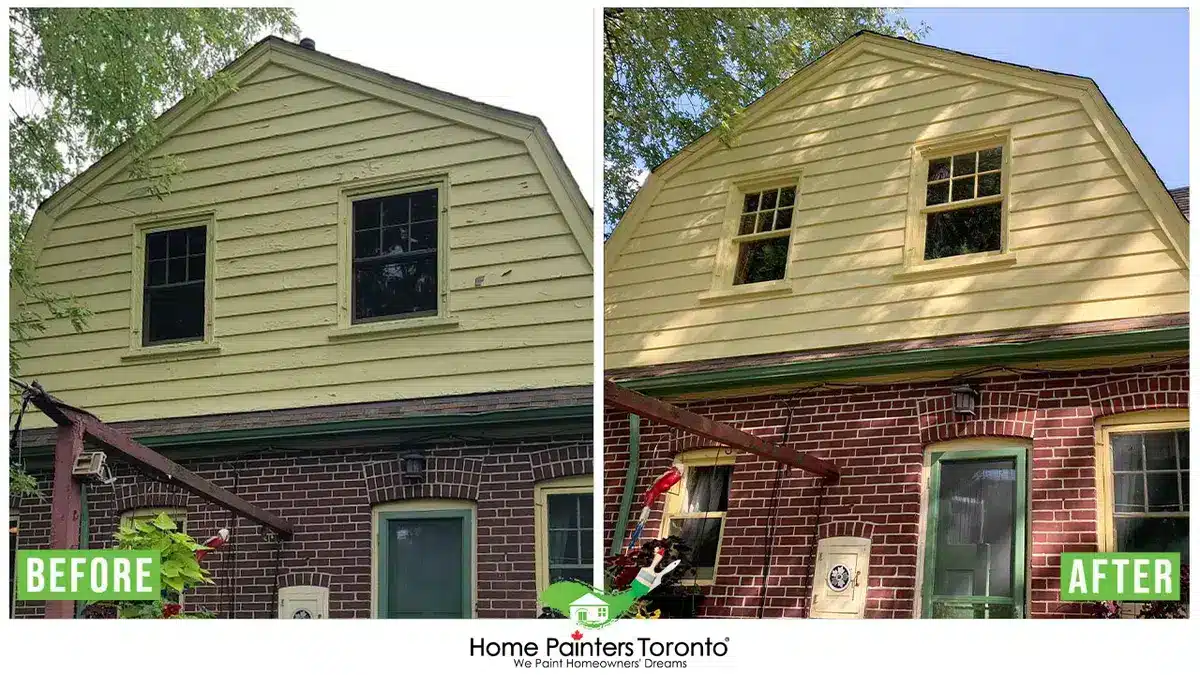
Sight alone cannot confirm lead content, no matter how many layers of paint are visible at a cut edge or a chipped corner
Does My Older Toronto Home Have Lead Paint?
Homes painted before 1990 in Toronto may have lead-based paint somewhere in the layers on the siding, and the risk climbs sharply for anything painted before 1960. Health Canada notes that houses built before 1960 are likely to have lead-based paint, and that homes built between 1960 and 1990 may still have it on exterior surfaces. Paint made after 1990 is a different story. Consumer paint sold in Canada and the United States after that point is considered virtually lead-free, so a home built and finished entirely after 1990 carries a much lower risk profile.
Home Painters Toronto identifies and safely contains suspected lead paint during siding and repainting work, but we are not a licensed lead abatement or environmental remediation company. When a project needs full abatement instead of containment and repaint, we refer clients to a licensed specialist before any work continues. Older exteriors sometimes raise a second material question alongside paint, and our asbestos cement siding guide covers what to know if the cladding itself, not just the paint, dates to before 1980.
Sight alone cannot confirm lead content, no matter how many layers of paint are visible at a cut edge or a chipped corner. A flaking, alligatored finish on a 1950s wood-clad wall looks similar whether or not lead is present. That is why testing, not guessing, is the only reliable answer for a homeowner planning repair work on an older exterior.
The confusion is understandable. Two neighbouring homes built in the same decade can carry completely different paint histories, since one may have been fully stripped and repainted in the 1990s while the other still has its original finish under six or seven later coats. Renovation records, old listing photos, and a conversation with a long-time neighbour can offer clues, but none of them replace a proper test when a repair is actually on the schedule.
Home Age and Lead Paint Likelihood
| Home Age | Likelihood of Lead-Based Paint | Typical Location Found |
|---|---|---|
| Before 1960 | High | Exterior and interior layers |
| 1960 to 1990 | Possible | Mostly exterior surfaces |
| After 1990 | Low | Rare, consumer paint virtually lead-free |
How to Identify Lead Paint Risk on Toronto's Older Exterior Siding
- Thick, built-up paint layers at butt joints and lap edges, often from decades of repainting without full removal
- A chalky, alligator-cracked finish with a fine powder residue on the hand after light contact
- A construction date before 1990 on the property record or listing history
- An older colour visible beneath the top coat wherever a chip or crack exposes the layers underneath
- No documentation from a past renovation showing the exterior was tested or fully stripped
What a Certified Lead Paint Test Involves
A certified lead paint test starts with a small paint chip sample taken from an inconspicuous section of siding, sent to a lab certified through Canadian testing standards for a layer-by-layer analysis. Some contractors also carry portable X-ray fluorescence equipment for an on-site reading, which gives a faster result without removing material from the wall. Either method beats guessing, because a visual inspection cannot separate a lead-based layer from a modern one once both are painted over. A written test result also gives a homeowner something concrete to hand a contractor, an insurer, or a future buyer.
Lab turnaround on a paint chip sample typically runs a few business days, so scheduling a test before booking a repair crew keeps the project moving instead of stalling mid-job while results come back. An on-site XRF reading is faster but is usually paired with a lab sample when the result is close to the borderline threshold.
Why Lead Paint Matters During a Siding Repair, Not Just a Repaint
Lead paint becomes a hazard through disturbance, not by sitting quietly on a wall. A siding repair disturbs far more surface area than a simple repaint ever would. Pulling a damaged board exposes and often breaks paint on every edge that board touches. Scraping a failing joint before caulking removes material in a way brushing new colour over an intact surface never does. Sanding a feathered edge to blend a patch into the surrounding wall grinds old paint into fine dust that settles on soil, decks, and window sills nearby. A crew that treats a repair the same way it treats a routine repaint skips the one step that actually matters on a pre-1990 home.
Even a small job, such as swapping two rotted boards near a downspout, opens the same cut edges and joints as a larger project. Homeowners sometimes assume a minor patch is too small to warrant containment, but the size of the visible damage has little to do with how much old paint gets disturbed once a board comes off. A professional crew applies the same lead-safe sequence to a two-board patch as it does to a full elevation repair.
The Highest-Risk Activities on an Exterior
Four repair activities create the most lead exposure risk on an older Toronto exterior, and all four are common steps in an ordinary siding job. Our guide on why paint fails on older wood siding covers several of these same triggers from a durability angle.
- Dry sanding a painted surface, which generates fine airborne dust with no water or vacuum to capture it
- Pressure washing failing paint off wood or composite siding, a habit that can also strip finish unevenly and drive water behind the cladding
- Open-flame or heat-gun stripping, which can vaporize lead directly into the air a worker is breathing
- Uncontained scraping directly over bare soil or a garden bed, letting paint chips and dust settle where children and pets spend time
A garden bed running along a foundation wall is one of the easiest places for lead-contaminated debris to accumulate unnoticed, since fallen chips blend in with mulch and soil almost immediately. Debris left in a bed after a repair can sit there for years before anyone thinks to check it. Sheeting the ground before work starts is a small step that prevents a much larger cleanup problem later.
How Professionals Contain Lead Paint on an Exterior Job
Professionals contain lead paint on an exterior job through a fixed sequence: test or assume, sheet the ground, use wet methods, capture dust with a HEPA vacuum, control debris, and verify the site before calling the job finished. Each step reduces how much lead dust leaves the immediate work area. Our wood siding repair and painting process folds these steps directly into the repair sequence rather than treating them as an optional add-on.
- Test the paint or treat any pre-1990 exterior as lead-containing until proven otherwise
- Sheet the ground and any nearby plantings with heavy poly to catch chips and dust before they reach the soil
- Use wet methods, such as misting a surface before scraping or sanding, to keep dust from becoming airborne
- Capture fine dust with a HEPA-filtered vacuum instead of a shop vacuum or a broom, because wet methods and HEPA-filtered vacuums are the control methods the Canadian Centre for Occupational Health and Safety recommends for reducing airborne lead exposure on a jobsite
- Bag and remove debris as controlled waste instead of leaving it in a yard bin
- Wipe down surfaces and verify the site is clean before removing containment
- At a recent exterior siding repair in Leslieville, our crew opened up a 1930s wood-clad wall with six visible paint layers at a cut edge.
- We sheeted the flower beds below, wet-sanded the failing top coat instead of dry sanding it, and confirmed a moisture reading under 15 percent with a pinless meter before priming.
- The finish coat was Benjamin Moore Aura Exterior in Low Lustre, applied at roughly four mils of dry film thickness per coat, matching the manufacturer's published technical data sheet.
The whole containment and repaint sequence added about a day and a half to the schedule compared with a newer home on the same street.
Homeowners can see what a full-scope visit looks like on our what to expect from a professional siding repair service page, which outlines the assessment-to-finish process step by step.
Ground Sheeting and HEPA Containment Standards on Site
Ground sheeting and HEPA containment on an older siding job follow a simple standard: cover more ground than seems necessary, and capture dust before it settles. Crews extend poly sheeting well past the drip line of the wall being worked, since a light breeze can carry fine dust further than most homeowners expect. HEPA-filtered vacuums, not standard shop vacuums, pull the finest lead particles out of the air and off surfaces instead of just moving them around. Compressed air and dry sweeping are avoided entirely, since both send settled dust airborne again.
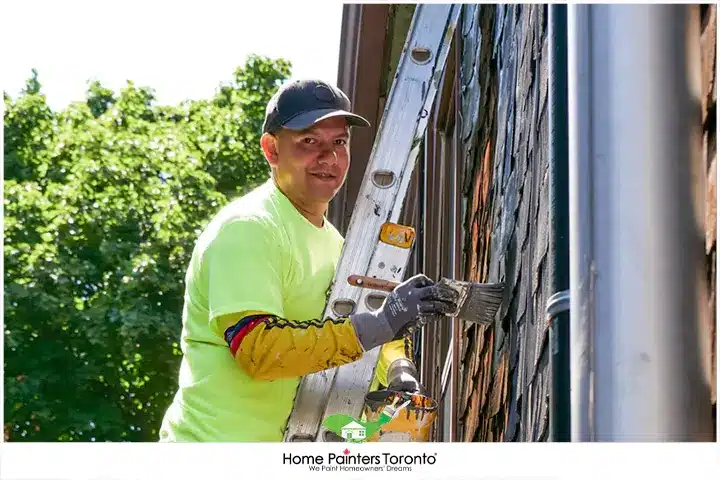
Crews extend poly sheeting well past the drip line of the wall being worked, since a light breeze can carry fine dust further than most homeowners expect
Encapsulate or Remove?
Encapsulating sound lead paint under a new coating is often the safer choice for a well-adhered exterior finish, while removal is reserved for paint that is already failing. This runs against the instinct many homeowners have that removing old paint is always the more thorough option. Removal generates far more dust and debris than sealing a stable surface under a properly prepared new coat.
| Approach | What It Involves | When It Applies |
|---|---|---|
| Encapsulation | Cleaning, priming, and sealing sound old paint under a new coating system | Old paint is intact, adhering well, and not chalking or peeling |
| Removal | Wet scraping or controlled stripping of the failing layers before repainting | Old paint is cracking, peeling, or already contaminating the surrounding area |
A contractor who defaults straight to full removal on every older home is often adding cost and dust exposure that a sound wall never needed. The right call depends on the condition of the existing finish, not on the age of the house alone. When encapsulation is the right call, the finish work follows the same standards as a standard exterior residential house painting project once the surface is sealed and prepped.
An estimator makes this call by testing adhesion across several spots on the wall, not just one visible patch, since a wall can be sound in one area and failing a few feet away. A cross-hatch adhesion check, a light scrape at a joint, and a look at how the paint behaves at a south-facing elevation compared with a shaded north wall all feed into the decision. On a home with mixed condition across different elevations, encapsulation and removal often both show up on the same project, applied wall by wall instead of as a single blanket decision for the whole exterior.
What This Adds to a Siding Repair Quote
Lead-safe practices add a distinct line item to a siding repair quote, covering testing, ground protection, and controlled cleanup, without changing the base scope of the repair itself. Home Painters Toronto's general exterior repair ranges still apply as the starting point for the work itself, and a full breakdown is available through an itemized siding repair quote.
| Project Size | Typical Base Range (CAD + HST) |
|---|---|
| Small exterior repair | $2,000 to $4,000 |
| Medium exterior repair | $4,000 to $8,000 |
| Large exterior repair | $8,000 to $10,000 |
| Extra-large exterior project | $12,000 to $30,000 |
Containment, testing, and controlled debris disposal sit on top of these ranges as a separate item, since they involve extra materials, extra time, and extra disposal steps that a newer home's project simply does not need. An unusually low quote on a pre-1990 exterior is worth a second look, because skipping lead-safe steps is one of the easiest ways for a contractor to shave a number down. HPT crews are WSIB compliant and fully insured, and every exterior repair comes with warranty-backed results regardless of what the job uncovers once the wall is open. Homeowners comparing quotes on an older property should ask each contractor to itemize containment and testing separately, instead of folding them into a single vague labour line, so the numbers can actually be compared side by side.
Homeowners can compare their contractor's track record against our own client reviews and our page on why homeowners choose Home Painters Toronto before signing off on a scope of work.
Reading a Renovation Quote for Lead-Safe Work Practices
A written quote for siding repair on a pre-1990 Toronto home should name lead-safe practices directly, not bury them inside a general prep-work line. Ask a contractor whether testing, ground sheeting, wet methods, and HEPA-filtered cleanup appear as specific line items or steps in the written scope. A quote that stays silent on any of this, especially for a home built before 1990, is worth a direct question before signing. Consumer Protection Ontario's guidance on home renovation contracts recommends a detailed written scope of work for exactly this reason, since vague language is the easiest place for corners to get cut later.
Lead Paint FAQ
Sometimes, yes, painting over lead paint is acceptable if the existing finish is sound, well-adhered, and not chipping or chalking. A new coat applied over a stable old finish counts as encapsulation, which is a recognized approach when the underlying paint is not already failing. Once the old finish is cracking or peeling, painting over it without proper prep just traps a problem under a fresh colour.
A test is strongly recommended on any Toronto home built before 1990, especially before repair work that involves sanding, scraping, or board removal. Without a test, a professional crew will treat the surface as lead-containing by default and follow full containment steps anyway. A confirmed negative result can simplify the job and remove the need for some containment steps.
Most exterior lead-safe repair work allows a family to remain home, since the containment happens outside and the work area stays sealed off from the living space. Keeping children and pets away from the immediate work zone during active scraping or sanding is still the right precaution. A reputable crew will explain the daily containment boundary before work starts each day.
Ground sheeting during the repair is what protects the soil, since it catches chips and dust before they reach garden beds or the lawn. A crew that skips sheeting can leave lead-contaminated debris in the soil for years, especially in beds close to the foundation. Removing and re-checking sheeting at the end of each work day, not only at the very end of the job, keeps debris from blowing loose overnight.
A heritage designation does not change the lead paint risk itself, but it can change how the repair is carried out on the siding. Heritage guidelines often call for matching original profiles and finishes, which can mean more surface disturbance than a straightforward board swap on a non-designated home. Combining heritage-appropriate repair with lead-safe containment takes coordination that a general contractor may not have handled before, so it is worth asking directly whether a contractor has worked on a heritage home siding repair project with older paint layers in place.

Get a Free Estimate for Your Older Home's Siding
Home Painters Toronto assesses older Toronto exteriors for lead paint risk as a standard part of every siding repair quote on a pre-1990 property, and full details on the repair process itself are available on our siding repair services in Toronto page. Our estimators flag suspect layers before any scraping or sanding begins, and every repair follows the containment steps outlined above regardless of how small the job looks at first glance. General questions about scheduling, warranty terms, or service area are answered on our general FAQ page. We coordinate testing, containment, and the repair itself in one visit whenever possible, so an older home does not need separate appointments for each step.
Reach out today for fast free quotes and warranty-backed work on your home's siding.
Contact Home Painters Toronto to get started.
Get a Free Estimate