
Using a compressed air paint sprayer can save time and money and bypass the pollution caused by aerosol paint cans.
Also, roller marks can mess up the looks of the room walls. Instead, use an airless paint sprayer or air compressor spray gun to apply a smooth coat of paint on the walls rapidly. Using an air compressor and a paint sprayer can help you cover more space at one time and can help you make sure that you get an even coat of paint on the surface area. Spraying water-based paint with an air compressor will reduce your time in painting, leaving you time to do other home chores. A spray gun, a compressor, and an air hose are the fundamental tools you need to execute this task.
How to Use a Paint Sprayer
Get to Know Your Tool
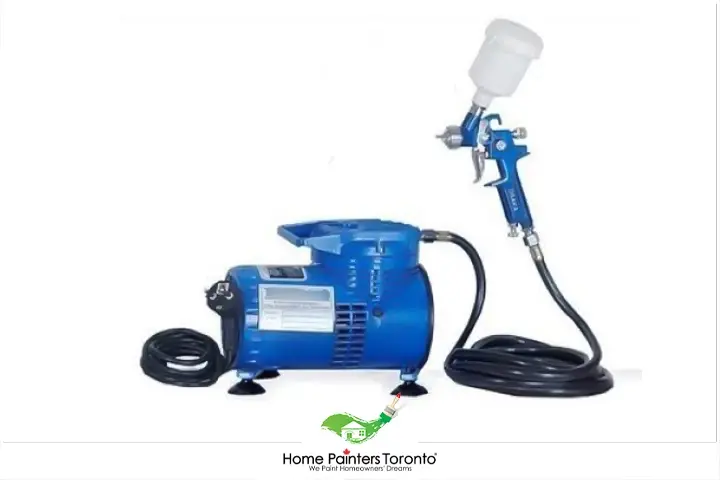
Before you dive into using your air paint sprayer, it’s crucial to know your tool. Compressed air paint sprayers typically consist of three main parts:
- Air Compressor: This provides the power that drives the paint onto the surface. A strong enough air compressor is essential in ensuring efficient paint atomization.
- Air Hose: This attaches the air compressor to the paint sprayer. The hose’s size matters, as it can affect the pressure of the air delivered to the sprayer.
- Sprayer Gun: This is the actual sprayer that contains the paint and uses forced air to distribute it on the surface.
Paint Spray Gun Working Principle
Using a paint spray gun provides a clean and uniform finish on surfaces, saving both time and paint compared to traditional painting methods. The adjustable settings cater to both large areas for broad coverage and small, intricate spaces for detail work. However, it’s vital to always adhere to safety guidelines, such as:
- Initially, try spraying on a piece of cardboard to familiarize yourself with the sprayer.
- Keep the sprayer about a foot away from the surface, moving back and forth in long, even strokes.
- Don’t spray statically in one place. Moving ensures a nice, even coat and prevents drips from pooled paint.
- Always overlap your strokes by about 50% for a uniform finish.
- Avoid heavy coats to prevent runs. Instead, apply thin coats and let it dry before applying another one.
Follow These Steps to Paint With Compressed Air!
Step 1: Preparation
As with any paint job, you’ll have to do some preparation before you begin.
What kind of paint do you use in an air compressor paint sprayer?
Select your paint (oil and latex will work, but oil is much more difficult to clean afterward). Before beginning your paint task, you must order some products.
- First, choose the best paint tint, type, and paint thinner. Many air compressor paint sprayers for walls work best with oil-based paints. But you can use latex and acrylic paints too. Just weigh both paints. You’ll likewise wish to choose an excellent paint thinner. Mixing your paint with the ideal thinner will allow more paint to spray out of the sprayer. And finally, help your painting project look much better.
- Prep the room for painting. See our room prep tutorial here. The key to spraying is ensuring everything has been taped and plastic covered before painting. Failure to do so can negatively affect you as you will spend more time and money cleaning than painting.
- Tape off all adjacent surfaces and areas where you don’t want to be painted by your best paint sprayer for walls and ceilings. You ought to likewise cover all furnishings, floor covering, and other home materials with drop cloths to avoid these things from being messed up with paint.
Also, ensure a safe, flat surface to place your paint to prevent spills and unwanted leakage.
Protect yourself
- Put on a respirator mask, gloves, and safety glasses to protect yourself. Remember that wearing a mask, safety glasses, and gloves will protect you from damaging fumes and particles and other hazardous chemicals incorporated into the paint. This is mainly because you spray paint a house with an air compressor, making the paint fine and increasing the hazardous tendency to be contacted.
- You’ll next require to sand your paint surface to remove uneven surface areas. You’ll likewise need to use a tack fabric to eliminate any sanding particles and debris from the surface area before you use the best paint sprayer for the house exterior. Again, grind, sand, and clean the area of all dust, debris, etc. Rinse the wall when you are done.
- Using a brush or roller, apply a thin primer layer to the wall.
Step 2: The Compressor
Now that you’ve prepared the wall, you may start painting with an air compressor and sprayer. You have numerous alternatives for paint sprayers, so make sure you pick the best paint sprayer for house painting.
One option is a siphon gun with a container hanging under the gun body.
Many people think about these types of guns when they visualize spray paint guns.
However, siphon guns are not as effective as you might believe. They need more significant air pressure and don’t cover an extensive area when using them. When you pick to use a siphon gun, you’ll need to invest more time and effort to finish your painting project. Nevertheless, if the area you’re painting is small, a siphon weapon may be a good option for you to check.
On the other hand, the gravity gun is similar to the siphon gun since it also stores the paint in a container.
The difference is that a gravity gun’s receptacle is connected to the top of the gun body instead of the bottom.
Since the paint leaks into the weapon’s body through gravity, this weapon requires less air pressure.
After you understand how they work specifically, this tool works better in little areas and is much easier to use. The only downside is that you’ll require a unique stand to refill the paint container.
Another type of gun is a pressure-feed gun with a pressure pot connecting to the gun through two pipes.
One hose pipe airs to atomize the paint, and the other produces the paint for the gun. Given that this gun has pipes that can vary in length, it usually is the most efficient type of gun.
Now that you know all these things, you have to prepare the compressor to paint! Here’s how:
- Turn on the air compressor and let it build pressure.
- Using your sprayer’s instruction manual, adjust the regulator to the needed pressure. This number is usually between 12-25 PSI.
- Attach the compressor to the air hose coupling on the compressor. Make it as tight as possible, and maybe use Teflon tape to get it tighter.
- Pour some paint thinner into the paint cup.
- Identify the metering valve on your paint sprayer, and open it slightly.
- Prime the paint sprayer by aiming it at a waste bucket and squeezing the trigger for a few seconds.
- Empty the spray cup of any remaining paint thinner.
Step 3: Painting
Everything is all prepped and ready to go! Next step, painting.
- Pour the paint you need into a separate, clean container.
- If it’s oil, thin the paint with paint thinner. The exact amount depends on your sprayer and paint, but it’s usually around 20% for a good paint flow. For latex paint, do the same but with water.
- Fill the paint cup on the sprayer 2/3 of the way full.
- Hold the paint sprayer about 10 inches away from the wall.
- Squeeze the trigger to spray the paint. Make sure always to keep the sprayer moving. This will prevent drippage.
- Overlap each pass slightly to avoid leaving spots.
- Allow to dry and recoat as needed.
Change or adjust the PSI to the best air pressure.
Just be reminded to change or adjust the PSI to the best air pressure, then check your paint flow on paper before spraying it on your walls. You can continue adjusting any settings on your gun until you get the proper circulation and pressure for your painting project. The fluid pressure counts on your hand, usually the lowest knob on the weapon, to 0 pressure. Start turning the knob counterclockwise while concurrently pulling the trigger back until it touches the handle. To include adequate pressure to start the paint circulation, slowly turn the knob clockwise until the trigger slightly takes off the hold and then stop.
Always also practice spraying water on paper before you spray paint. Start the spray weapon in motion before you shoot to avoid thick areas of paint on the wall. Launch the trigger before you stop the movement of the gun. As you spray, hold the weapon about 6 to 10 inches from your painting surface. Move the spray gun smoothly and sweepingly to prevent paint leakage and drip. Brush out the runs and leakage immediately with a paintbrush, and spray again until you reach your desired outcome.
Step 4: Clean Up
Now that you’ve painted your room, it’s time for a clean-up!
- Dispose of unused paint (tutorial here)
- Rinse the siphon tube of your paint sprayer with thinner oil paint or water if latex paint.
- Fill the spray cup with a little thinner (or water if latex paint), and spray until it comes out clean.
- Remove all masking tape, plastic, and drop cloths from your work area.
Indeed, painting is a time-consuming task. However, when you do the job with a paint sprayer and air compressor, the work becomes more straightforward and more efficient by reducing your work time. Any paint job you do can be professionally done look alike, even if you follow the above steps and tips.
More Interesting Blogs Related to
“How to Use a Compressed Air Paint Sprayer”


If you reside in Toronto and the GTA and need some help figuring out “How to Use a Compressed Air Paint Sprayer”, don’t hesitate to call us! We will help you pick the colours you want and show you the latest painting and home renovation trends. Our home painting services with the best pro painters have been around now for over 37 years.
Call 416.494.9095 or email [email protected] for a FREE quote for your home painting needs. And don’t forget to check us out on our social media channels below!