
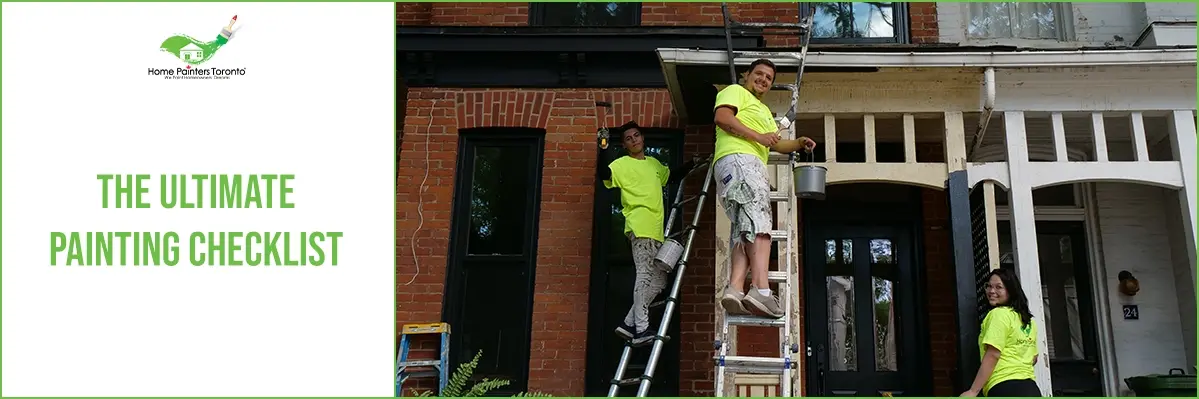
Having an ultimate painting checklist can make all the difference in ensuring a smooth, stress-free, and successful painting experience. In this blog, we’ll explore the benefits of having an ultimate painting checklist and how it can enhance your painting project. Also, we’ve put together the professional painter’s checklist that covers everything from preparation to cleanup. We’ll provide you with a painting checklist template (downloadable) of things to do before, during and after the painting process, so you can ensure that everything goes smoothly and your project is completed on time.
Are you looking to do some interior painting? There are so many things to think about when you’re looking to do an interior redesign or new home painting. So much in fact that we decided to put together the ultimate painting checklist just for you! We have everything from the inspiration stage to prep right through to painting finishes. Then comes the exceptionally fun part — seeing your space transform right before your eyes with interior painting!
So, let’s dig right into our ultimate painting checklist that is yours for the taking!
The Benefits of Having an Ultimate Painting Checklist

1. Improved Organization and Planning
One of the primary benefits of having an ultimate painting checklist is that it helps you stay organized and plan your project more effectively. By breaking down the painting process into manageable steps, you can easily track your progress and ensure you’re not forgetting any crucial tasks. Additionally, a checklist can help you determine the necessary materials and tools, calculate the amount of paint needed, and establish a realistic timeline for completion.
2. Time and Cost Efficiency
A comprehensive painting checklist can save you time and money by preventing costly mistakes and reducing the need for multiple trips to the store. By following a detailed checklist, you’ll be better prepared with the right supplies and tools, avoiding delays caused by missing items or running out of paint. Furthermore, a checklist that includes proper preparation and priming techniques can help you achieve better paint coverage, potentially reducing the number of coats needed and saving you money on paint.
3. Enhanced Quality and Professional Results
Achieving a professional-looking paint job requires attention to detail and a thorough understanding of the painting process. An ultimate painting checklist provides guidance on essential steps like surface preparation, priming, and proper painting techniques, ensuring that you’re following best practices and achieving a high-quality finish. By adhering to a comprehensive checklist, you’ll be more likely to avoid common painting pitfalls, such as uneven coverage, streaks, or peeling paint.
4. Reduced Stress and Increased Confidence
For many homeowners, tackling a painting project can be intimidating. However, having an ultimate painting checklist can alleviate much of the stress and uncertainty associated with the process. A well-structured checklist provides a clear roadmap for your project, allowing you to approach each step confidently. Knowing that you’re following a proven plan can make the entire experience more enjoyable and less daunting.
5. Easy Cleanup and Maintenance
A painting checklist with proper cleanup and maintenance steps can help keep your space fresh and well-maintained long after completing your project. By following a checklist that outlines how to clean brushes, rollers, and other tools, you’ll be better equipped to care for your painting supplies and extend their lifespan. Additionally, a checklist that covers proper paint disposal and storage can help you safely and responsibly manage leftover paint, ensuring you’re prepared for future touch-ups or projects.
Painting checklist: Going through the stages!
There’s a certain process in which painting services and individuals at home can follow. A painting checklist only helps to ensure that they properly make their way through interior redesign which involves interior painting. Starting out with the painting or interior redesign inspiration stage all the way through the painting process. Or maybe you’re looking to do some exterior painting instead or you might even hire professional painter services to get the job done!
We’ve broken down all the stages for you! Including everything involved in interior or exterior painting inspiration and paint colour decision making and budgeting. As well as painting prep work and materials needed and a painting timeline. There’s even a stress-free guide to hiring professional painting services!
STAGE ONE: Discover COLOUR INSPIRATION for your home!
For exterior painting inspiration:

Exterior Painting: Add Personality To Your Patio

Top Exterior Colours For 2020

Top Colours For Your Exterior Front Door

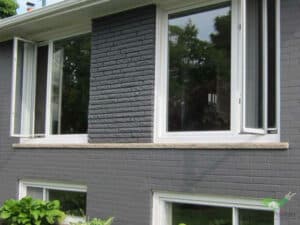
Best Colours For Exterior Brick Paint And Stain

Best Colours For Aluminum Siding Paint
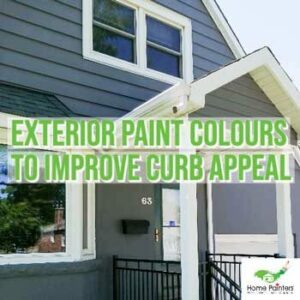
Exterior Paint Colours To Improve Curb Appeal
For interior painting inspiration:
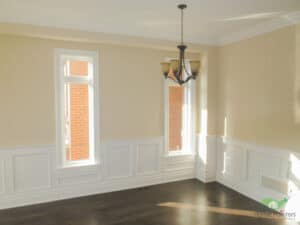
Top Colours To Choose From For Accent Wall Paint
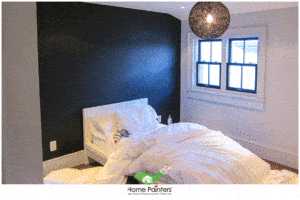
Top Colours For Bedroom Paint Ideas

Top Colours For Your Powder Room

Top Colours For Interior Trim and Doors
Top Colours to choose when you sell your home
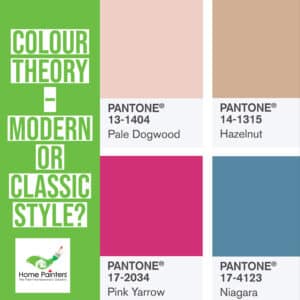
Colour Theory – Modern Or Classic Style?
STAGE TWO: PAINTING CHECKLIST BUDGETING
The budget painting checklist Part 1
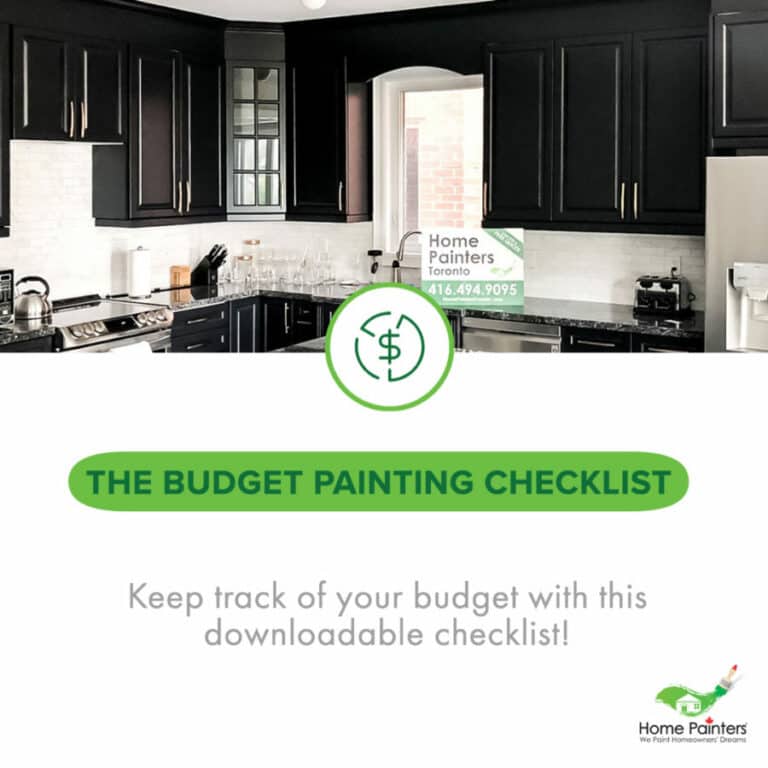
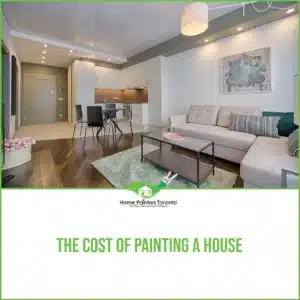
Okay, so you’ve found your source of painting inspiration and interior redesign. So, perhaps you feel as though you’re probably going to move forward with your painting project. Before you even move on to picking paint colours and all of that fun stuff, there are some budgetary items to stop and think about. Everything from interior painting costs with the actual paint and materials to figuring out interior painting cost per square foot. It all adds up in the end, doesn’t it? And you want to be sure that you’re interior painting or exterior painting project doesn’t send you over your limits moneywise. Consulting a budget and costs painting checklist will only help to ensure you stay on track with every cent you put into your painting project – whether or not you hire painting services or not!

- Firstly, have I stopped for a moment and considered if I actually have the time for an interior redesign painting project right now?
- If not, do I need to consult professional painters for the job?
- If I need to consult house painting services, is that in my budget? There are actually two types of professionals you can consult here. First, you could seek out an interior designer. This is someone or even a company who helps in the art or process involved in the interior decoration or interior redesign of a space. They can help you with everything from choosing the right interior paint colours to handling the sourcing of furniture or any crafts work required. An interior designer can really take over this whole process for you. So, if you don’t have the time and a decent budget for your interior painting and decor project, this could be the option for you. Secondly, another option you have is consulting professional painters. As we said, so much of the inspiration behind interior design rests in the interior painting you choose. If you’re unsure where to start, many residential house painting services provide professional colour consultations. So, not only will you have amazing interior paint results in the end due to the quality and time the interior painters put in. But along with hiring a professional painting company, you’ll also be privy to paint colour experts who are fully aware of what’s current, trendy and most of all, what works well in different homes and spaces!
- Have I considered just how much I am willing to spend on an interior painting or redecorating budget?
- If so, insert your preliminary painting budget here: $ ____________
- Am I willing to go over my painting and interior redesign budget, if necessary?
- Do I need to stop this process and save up for a while to really allow your vision to come to fruition?
- Am I in need of financial assistance of any kind?
- Have I asked myself if I’m simply looking to spend money on paint or does it go beyond that with decor, furniture and extra add-ons?
- Let’s say other items are involved, do I have a budget for furniture, accessories, etc.?
- If so, insert your budget for furniture and home decor accessories here: $ __________
Painting checklist budgeting part 2: Interior painting rooms & add-on costs
For this painting checklist in terms of budgeting, we want to break things down to specifics for you. After all, when you’re planning for interior painting and possibly looking to bring in professional painters, every cent counts!
Interior painting costs
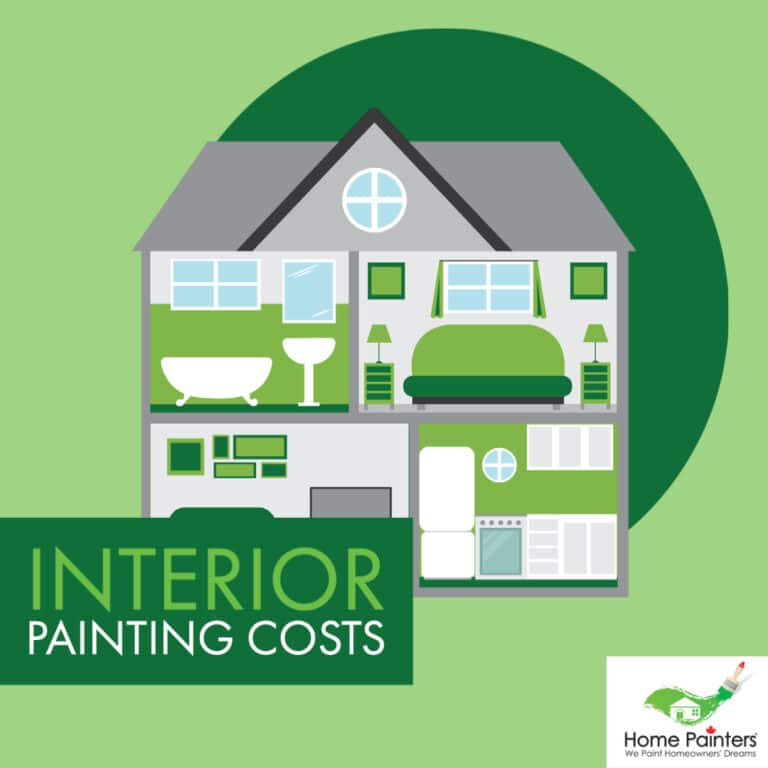
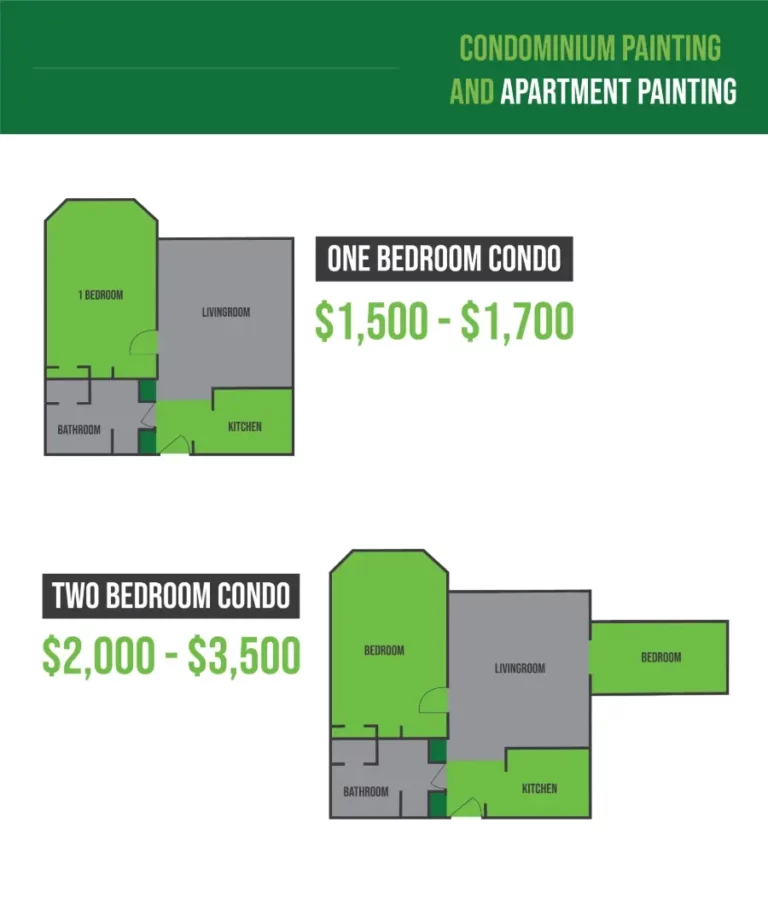
- For condominium painting and apartment painting, the pricing will vary. But you can usually expect a one bedroom condo around 600 square feet to cost $1,500 – $1,700. If you have a two bedroom apartment or condominium, you can likely expect your average cost to paint a house to be around $2,000 – $3,500.
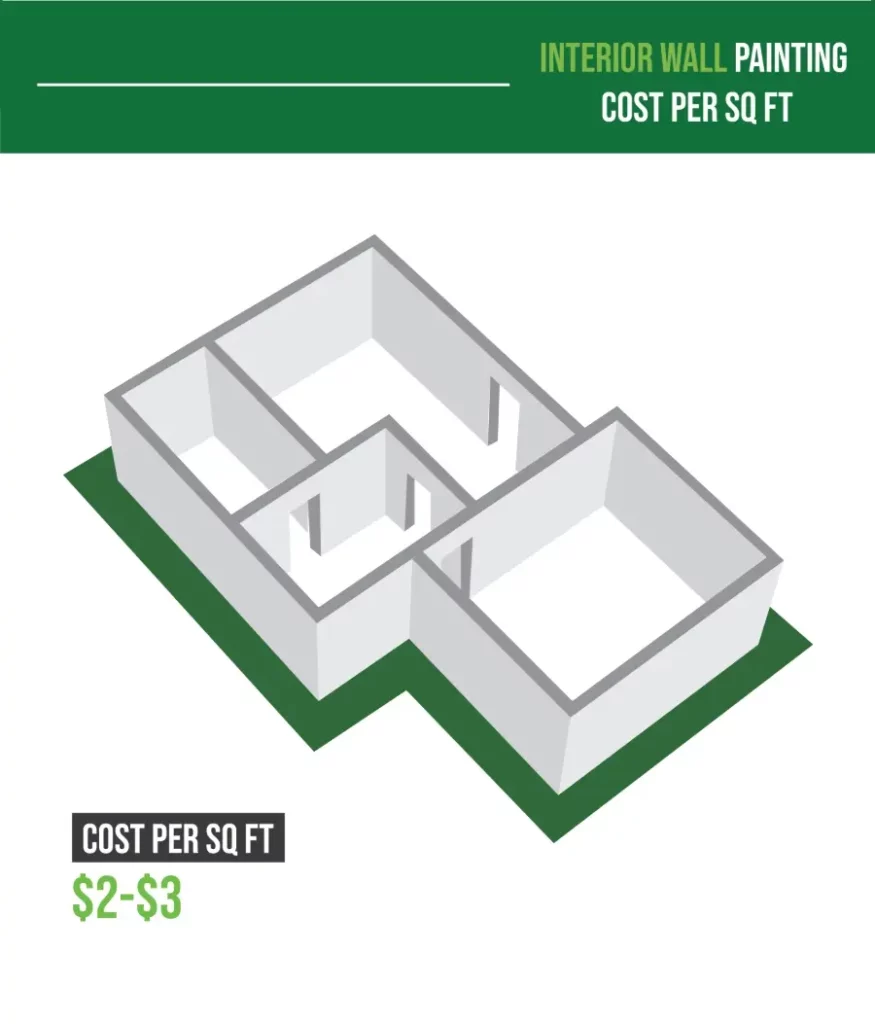
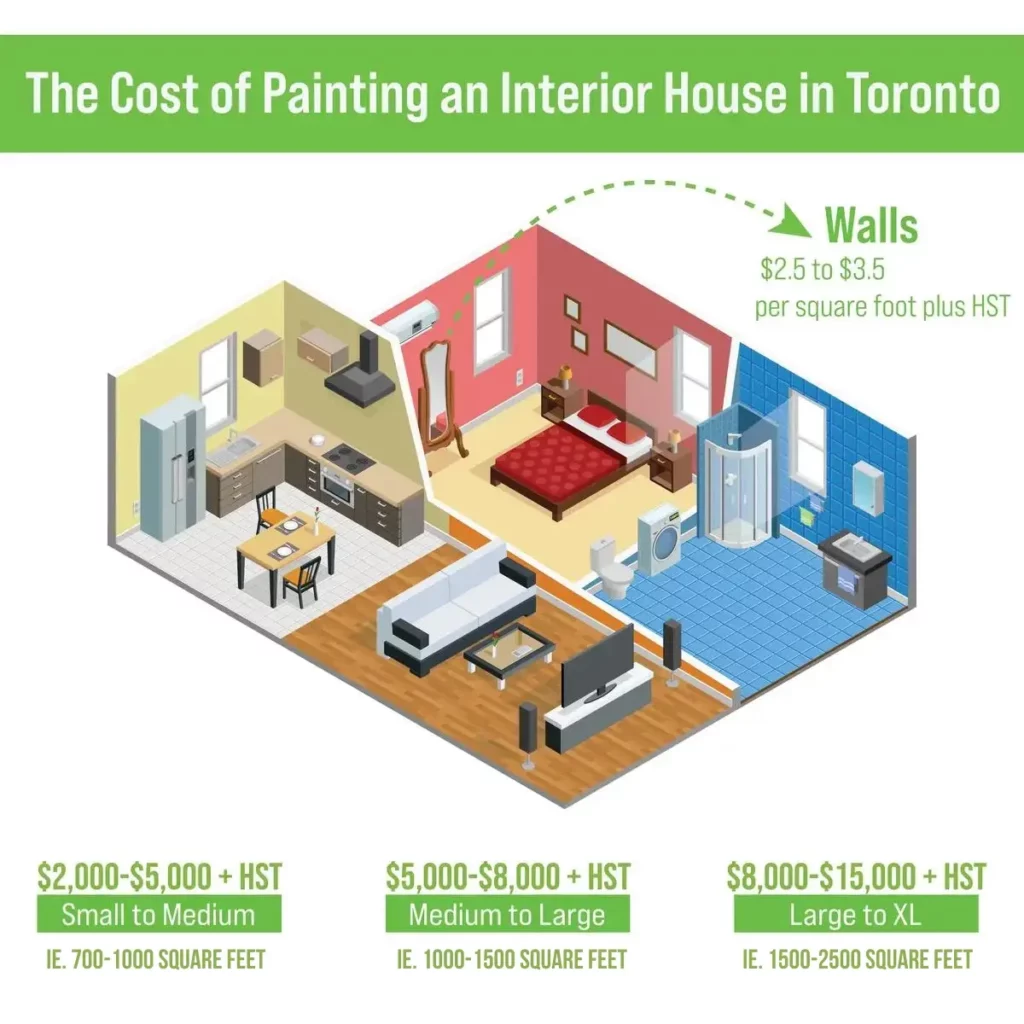
- For painting for the interior walls, the average painting cost per square foot is usually $2 – $3 for paint.
- Always keep this in mind when you’re doing your measuring when figuring out approximate painting costs.
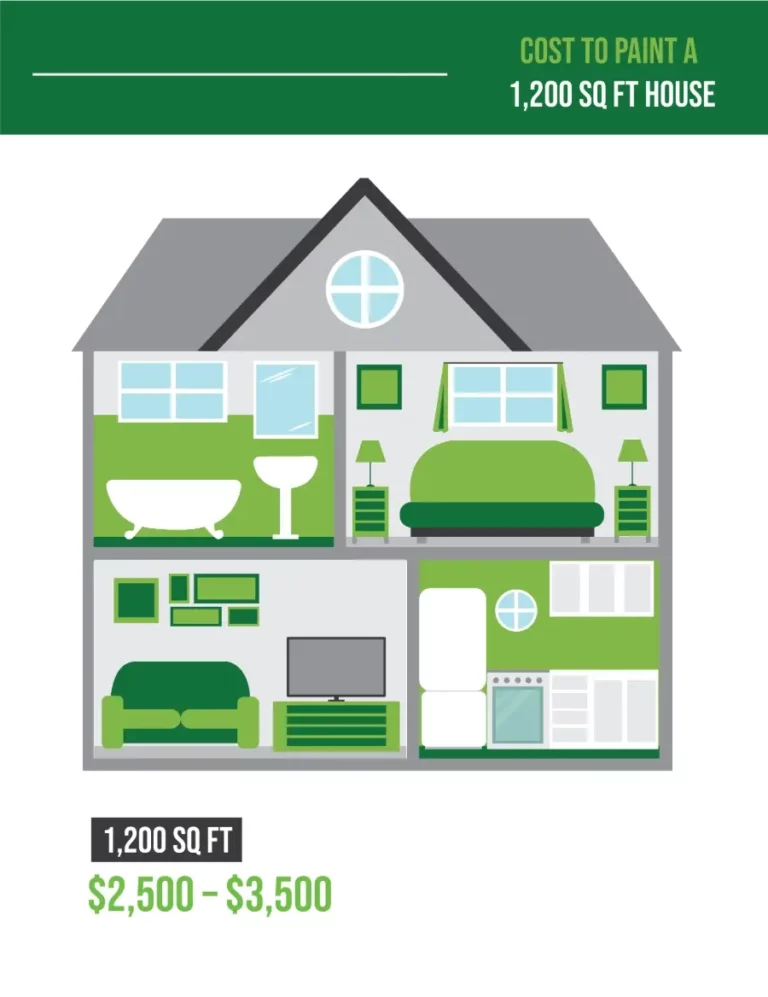
- A lot of people stop and ask — how much does it cost to paint a 1200 sq ft house. Especially in the Toronto and GTA area, an average size home is usually between 1200 – 1500 square feet. If you do the math correctly, it will likely cost you around $2,500 – $3,500 to paint your house.
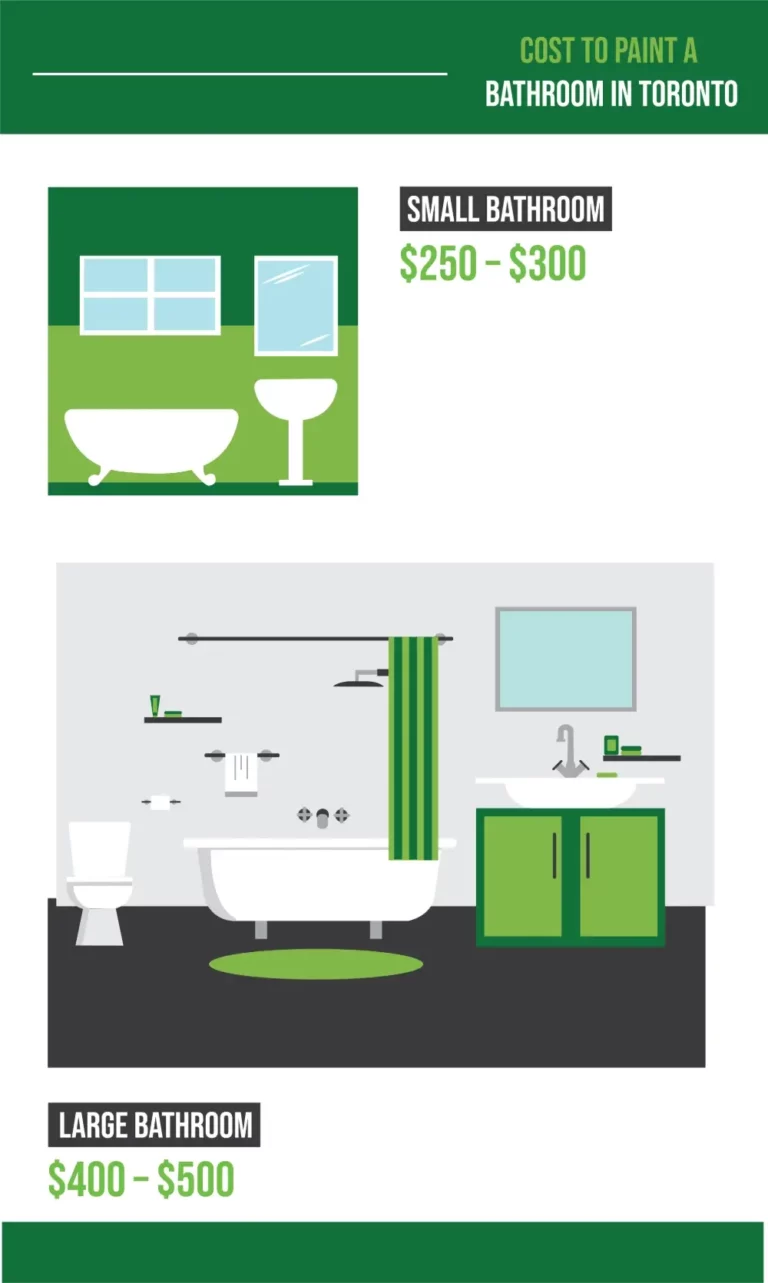
- For interior painting for the walls only in smaller rooms, like bathrooms, average cost to paint is usually $250 – $300. For larger bathrooms though, it can be $400 – $500.

- If you’re thinking about redoing your living room, dining room, den or kitchen (which are usually similar in size), the average cost is $400 – $500. For larger spaces though, it can be $800 – $1,000.

- And for bedrooms, you can expect the average cost to paint somewhere around $400 – $500. For larger bedrooms, it will likely be around $800 – $900.
The cost of painting a house in Toronto & Condo painting Toronto costs
- Pro tip for hiring professional painters: When you’re looking to hire residential house painting services, it’s best and most cost effective to try and bundle painting services together. Most painting companies want to be hired for larger painting jobs because in the end it saves them time and money. So, you can always work at trying to negotiate the painting cost for a few rooms in your house or even the entire first floor with your house painters. Also, don’t be afraid to inquire about what they consider add-ons (trim, baseboards, doors, etc.) and what’s included in their average cost to paint a house.
- Also, be sure to ask how many different interior painting colours are included in their costs. A lot of amazing professional painting services have stipulations which offer 3 – 5 different interior paint colours per service or contract. So, this is definitely worth inquiring about with your chosen painting company!
Exterior painting costs:
Maybe it’s the exterior of your house that needs a bit of a facelift! That’s okay. We can help you figure out the budget for exterior house painting costs as well. Let’s break it down:
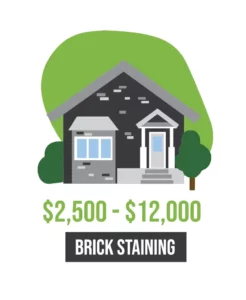
- For brick staining, the average cost can be anywhere from $2,500 up to $12,000. It all depends on the size of your home, how much exterior brick you have as well as its overall condition.
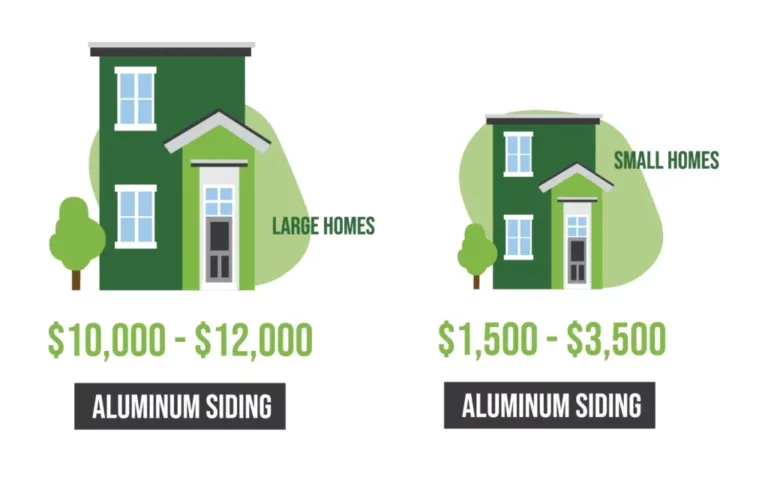
- For painting aluminum siding, for smaller Toronto homes, it can cost $1,500 – $3,500. If you have a larger sized home, it can go up to $10,000 – $12,000 in price.
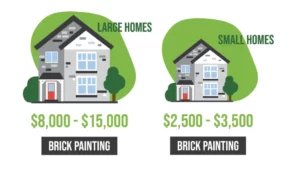
- In terms of brick painting, you can expect the average cost to paint a house to be $2,500 – $3,500. For homes larger in size, it can be $8,000 – $15,000.
- In terms of stucco siding painting, you can expect the average cost to paint a house to be $3,500 – $4,500. For homes larger in size, the cost of painting a house can go up to $7,500 for stucco siding.
Another tip for your painting checklist if you’re hiring home painting services…
We have another great tip when it comes to hiring exterior house painters that you probably haven’t even thought of.
If you’re hiring a house painter and want to get a better price for your painting job, consider doing it from October to March. This is the low season for painting companies and most of them are just trying to get their crews working so they may even slash their prices. Sounds like a nice hidden perk in hiring professional painters, right?
Painting checklist budgeting part 3: How to calculate interior square footage
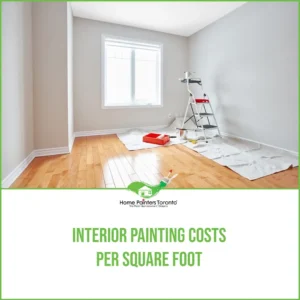
Square footage can be a bit of a funny term for a lot of people. We hear it all the time, especially in terms of real estate, home painting and interior design, but do we really know what it means? Professional painters and home painting services are experts in calculating interior painting cost per square foot, but it’s always helpful to know these things yourself. And the other question off of that is, do we know how to calculate square footage? Here is a quick guide on interior painting cost per square foot!
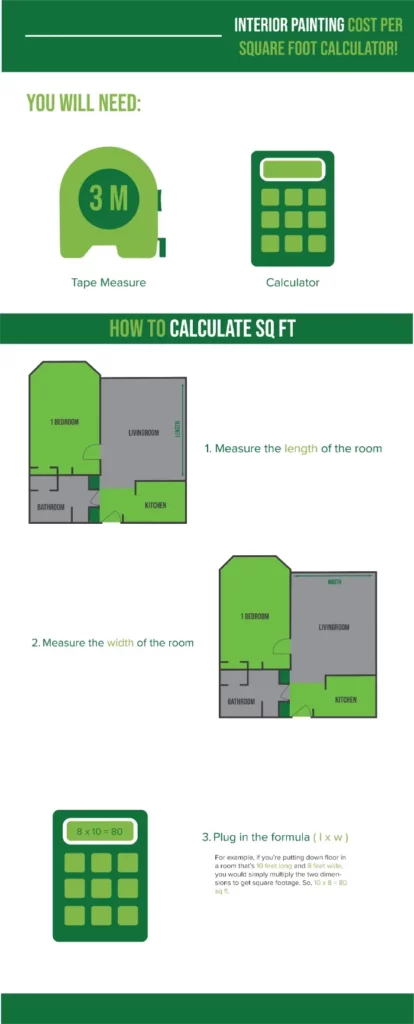
- There is actually a very simple formula when looking to get the interior painting cost per sq ft. All you need is a tape measure and calculator, which some of you might not even need!
- Firstly, you want to get your handy tape measure and measure the length of the room. If you’re unsure, the length of the room will always be the longest side of the room.
- Secondly, you measure the width of the room, which is the shortest side of the room. Be sure you take these measurements down in feet.
- For how to calculate square footage, you simply need to plug in your length and width measurements into this formula: L x W = __ in square feet.
- For example, if you’re putting down floor in a room that’s 10 feet long and 8 feet wide, you would simply multiply the two dimensions to get square footage. So, 10 x 8 = 80 square feet.
- This formula will always come in handy when you’re trying to determine average painting cost per square foot!
STAGE THREE: CHOOSING YOUR ROOM

Choosing the room you’re painting checklist (3 – 4 weeks prior)
So, you have your painting budget all figured out and are ready to actually start some of the paint planning process! Same as before, there are a few things to think about when you’re figuring out your room situation and which space exactly will be receiving an interior redesign. And don’t worry, a painting checklist is coming if you choose to go the route of hiring professional painting services!
Are you doing:
- Interior painting?
- Exterior painting?
- Painting the walls?
- Painting woodwork?
- Door painting?
- Brick painting?
- Fireplace painting?
- Ceiling painting?
Which room are you painting?:
- Living room?
- Kitchen?
- Bathroom?
- Bedroom?
- Home office?
- Entryway?
- Hallway?
- Laundry or utility room?
- Other?
STAGE FOUR: CHOOSING PAINT COLOURS

Your paint colour painting checklist (2 weeks prior)
Now that you’ve searched through or found your painting inspiration and know what space you’re painting, it’s time for the paint colour and thinking about different colour schemes. Let’s dig into all there is to consider when it comes to your paint colour, paint finishes and different types of painting!
- Do I have my paint colour picked out?
- If so, what’s the name of it, should I need any touch-ups?
- What is the paint brand I’m going with?
- Benjamin Moore? Sherwin Williams? Dulux?
- Do I have a paint sample on hand, if needed?
Latex vs Oil based Paint
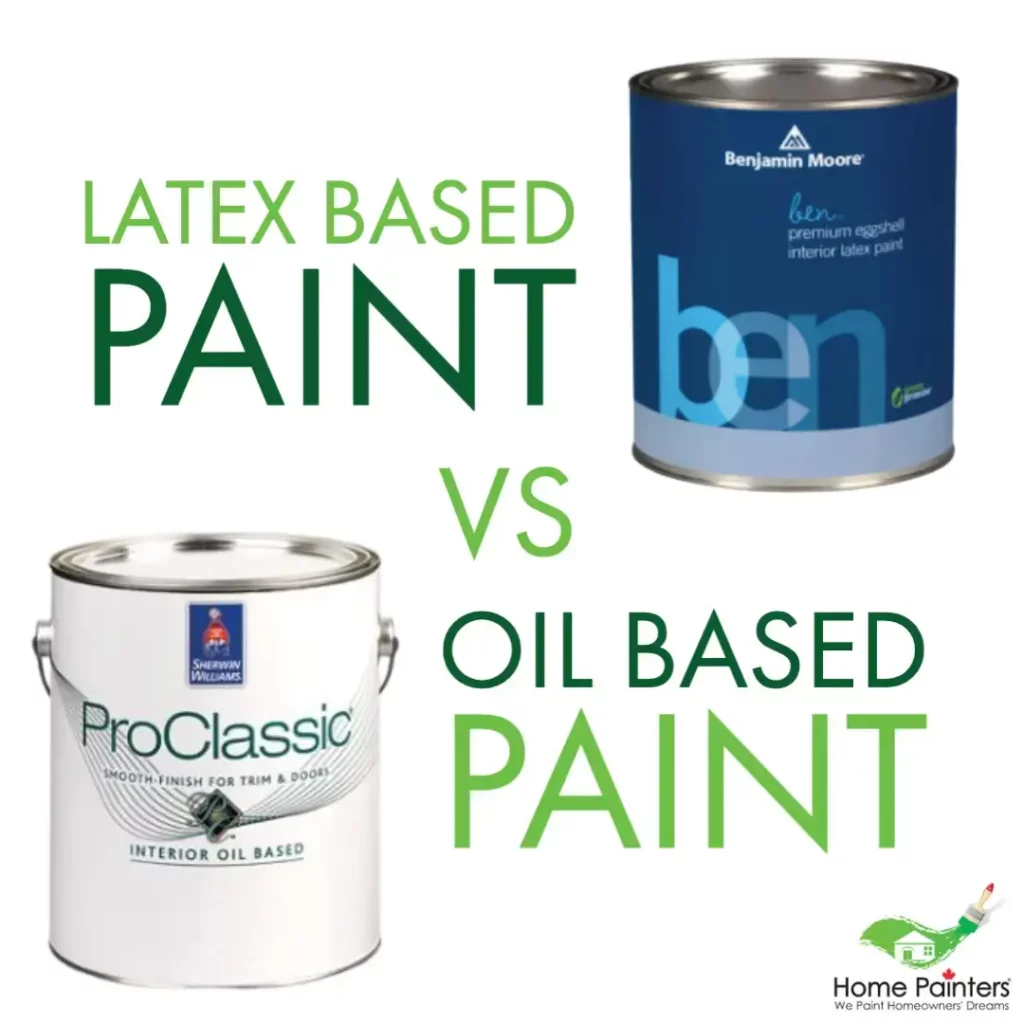
- Do I need latex paint or oil based paint?
In 2020, latex (or water based) paints dominate a lot of the market. First of all, they’re better for the environment as you can find low VOC or even zero VOC paint options in latex paint. Latex paint also dries super fast, so they’re good for spaces where you want to get two coats of paint done in a small amount of time.
In terms of latex vs oil based paint, oil based paint can be a good option for doors and trims. Since they’re a high wear and tear area, oil based paint is durable and scratch resistant. However, for interior painting and the best paint for walls, it’s probably the best idea to go with a latex paint. After all, they don’t yellow over time, they dry fast and most have low odour due to fewer VOCs. Plus, latex paints are easier to clean as you can just use soap and water. Also, latex paints are so widely available, it makes them the easier purchase for interior painting needs as well.
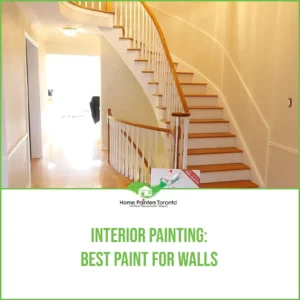
Different painting finishes
So, now that you have your paint colour all picked out and have thought about latex vs oil based paint, it’s also time to think about painting finish. If you’re unaware, sheen simply refers to the glossiness of a painting finish. Let’s break it down even further!
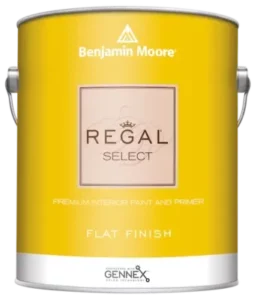
- Eggshell vs Flat Finish: These types of interior paints have the least amount of sheen or glossiness to them. For that reason, they are a good choice if you have some interior wall imperfections to hide. Flat or eggshell interior paint is commonly used for wall painting as well as ceiling paint. Flat or eggshell paint is not suggested for kitchens or bathrooms.
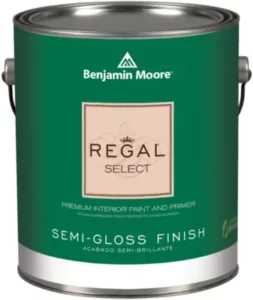
- Semi Gloss Paint: Semi gloss paint is suggested for interior painting when you need a slicker, highly durable and stain resistant finish. Basically, it’s the paint finish that’s suggested for kitchen and bathroom walls. You can also use it on trims, doors and mouldings as well. It also might be a good choice for children’s play areas, front entrance ways and hallways. When thinking about satin vs semi gloss paint finish, always keep in mind the durability of semi gloss paint and how it’s so easy to wipe clean.

- Satin Finish Paint: Satin finish paint is often described as possessing a velvety finish for wall painting. Satin finish is a little less lustrous than semi gloss paint, so it can appear both flat and glossy. It all depends on the lighting in the room. You can also use a satin finish paint in your bathroom or kitchen due to its durability. Also, when thinking about satin vs semi gloss paint, consider that satin finish paint is hard-wearing, so it can work well in hallways and living rooms too.
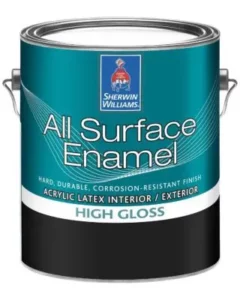
- Glossy Paint: In terms of the best paint for walls, glossy paint is not suggested as it tends to showcase most imperfections. Instead, it’s a great paint to use for cabinets, trim work, doors or moulding.
STAGE FIVE: HIRING THE RIGHT COMPANY

A Stress-free professional painting company hiring checklist (2 – 4 weeks prior):
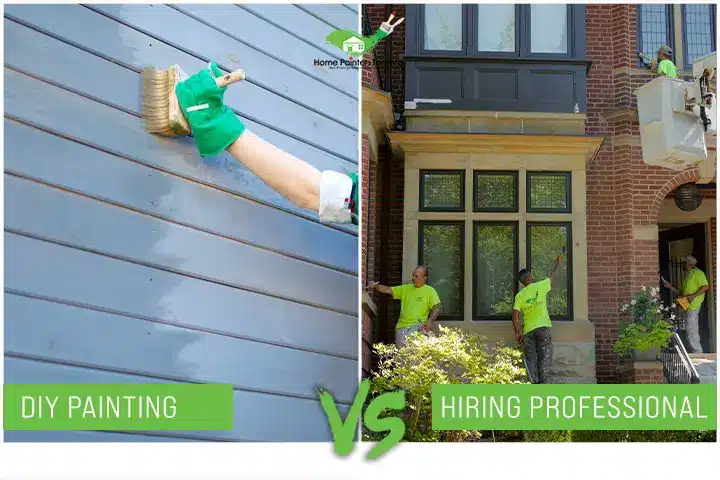
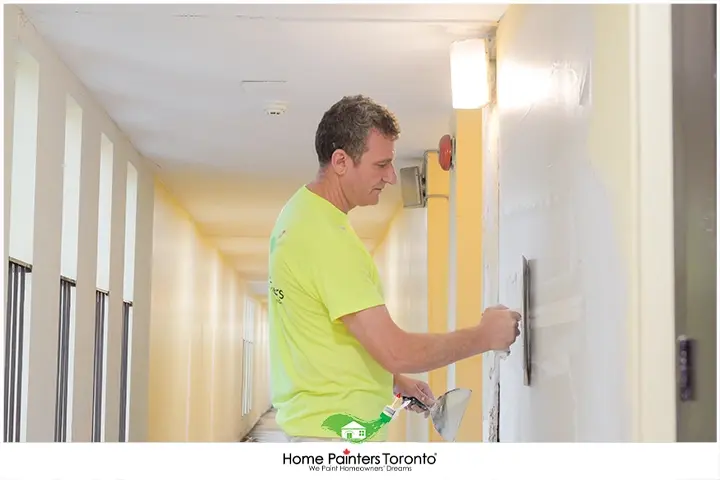
This particular section is good for those who have decided to go with a professional painting services. There are so many things to think about when you’re booking professional painters. Of course, you want to ensure that they produce quality painting work, but insurance and warranties are also important. Let’s dig into our proper painting checklist for hiring house painting services!
- Do I have a particular painting company in mind?
- Do the painting services have previous painting work they have done in the past in which I like?
- Have I looked over several customer testimonials, particularly related to the painting work I need done?
- Have I checked to see if the professional painters are properly insured?
- Do I have the proper home insurance myself in case there is an accident which involves one of the house painters?
- Does the professional painting services offer any warranties on their painting projects?
- Are the house painters known for being reliable and on time?
- Do they have a reputation of producing quality work in a timely manner?
- Have I checked the painting company’s ratings on local rating sources — Google My Business, Yelp, etc.
- Did I reach out to the painting company by phone/email/via website for a quote?
- Have I received a final quote on my painting project? If so, insert information here: $__________
- Did I hear back from the painting company to confirm work?
- Have we picked and scheduled a date for the interior painting or exterior painting work?
- Did I review, sign and properly understand the painting contract given by the house painters?
- Do I need a professional paint colour consultation prior to starting?
- Does this painting company provide this service?
- Have I made sure to note down both: the date of the colour consultation and the date(s) of the painting work?
STAGE SIX: PAINTING SUPPLY CHECKLIST
Paint supplies needed painting checklist (1 week prior):
Now it’s time to think about all the painting supplies you’re going to need. Because if you don’t have the proper supplies, you can’t really begin your house painting work! Let’s dig into everything you might need.
Do I have:
- Paint brushes
- Paint rollers
- Roller extensions
- Paint trays
- Painter’s tape
- Drop cloths
- Plastic sheeting
- Paint scraper
- Sandpaper: Fine and medium grit
- Safety gear: Goggles/face mask/gloves
- Spackle
- Caulking
- Putty knife
- Cans of paint — Do I know how many I need?
- Did I check on back orders in case I need to purchase any more paint?
- Cans of primer

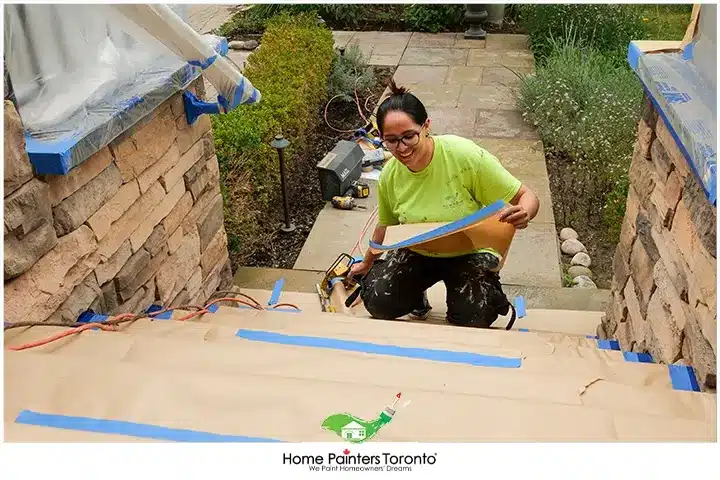
STAGE SEVEN: PREP WORK
Prep work painting checklist (2 – 4 days prior to painting work):

This is when things start to feel real! It’s also the time when you look around the space you’re having painted. You might realize that there’s some major painting prep work that needs to be done. Not to worry though. We’ve crafted the ideal prep painting checklist that won’t have you missing a single step!
If you’ve hired a house painting services, a lot of this won’t be for you to worry about. But if you’re doing the painting yourself, this painting checklist will definitely be helpful!
- Do I have all the interior paint or exterior paint I need for my painting project?
- Do I have all the primer I need for my painting project?
- Have I bought all my paint brushes, rollers, paint trays, etc.?
- Have I taken everything down off the walls (artwork, photographs, etc.)?
- Do I still need to move bulky or extraneous furniture out of the space?
- Any furniture that can’t be moved, have I moved it to the middle of the room?
- Did I cover my remaining furniture and floor (and anything else that needs paint protection) with drop cloths or plastic sheeting?
- Do I have painter’s tape on hand, if so — have I taped off where I need to (trims, baseboards, etc.)?
- Have I removed any electrical outlet covers and light switch plates from the walls?
- Have I filled in any holes or knicks with drywall patch?
- Do I still need to sand down any of the drywall patch to a smooth surface?
- Have I given my walls a good scrub with light soap and warm water?
STAGE EIGHT: DAY OF PAINTING
Your day of painting checklist
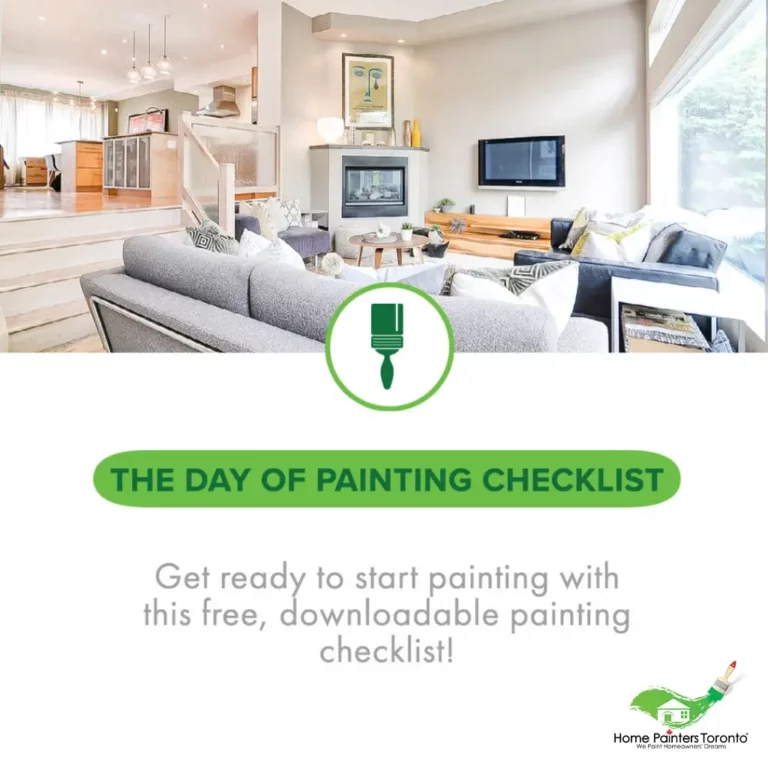
This is the really exciting part — painting day! All of your intricate planning and prep work leads to this pivotal day. You likely have everything moved out of the way with your walls perfectly prepped for the primer and paint. This is exactly where you’re going to start to see all of those dreams for your new room come to fruition. So, let’s get started ticking things off!
- Do I have my floor covered in plastic sheeting?
- Have I prepared and poured my primer into a paint tray?
- Have I grabbed my paint rollers and brushes for the primer coat?
- Did I properly executed a coat of primer prior to my first coat of paint?
- Washed and dried brushes, rollers and paint tray from primer.
- Let primer dry for 3 – 4 hours.
- While primer has dried, opened my can of paint.
- Stirred my paint with the wooden mixer.
- Properly poured paint into tray well until it’s half full.
- Have I gathered my clean rollers and paint brushes?
- Did I grab my roller and roll it back and forth in tray slope?
- Did I pick my first wall to paint and start in the corner?
- Have I completed all four walls with the first coat of interior paint?
- Did I save the trim for the last part of the room to paint?
- Did I paint the trim with an appropriate brush?
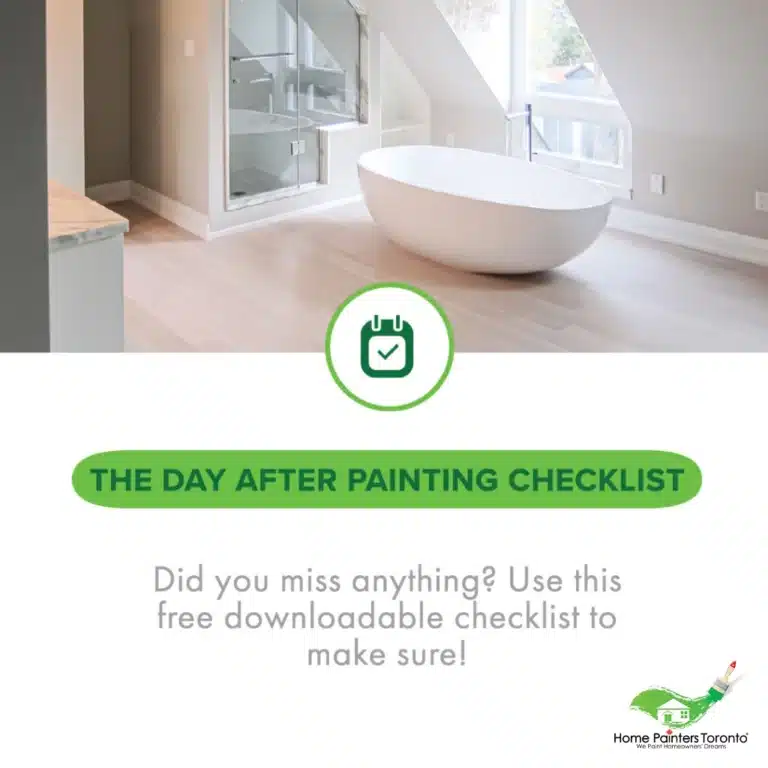
STAGE NINE: DAY AFTER
Inspection Checklist for Painting Work
After the first of interior painting is complete:
- Have I examined any parts of the wall that might require a slight paint touch-up?
- Have I kept any doors and windows open for cross ventilation for optimal drying?
- Did I leave the first coat of paint to dry for 3 – 4 hours?
- Once your first coat is dry, have I gone in with my second coat of paint?
- Have I poured the appropriate amount of paint for my paint tray?
- Have I grabbed my roller and roll it back and forth in tray slope collecting the paint adequately?
- Time to go in with second coat of paint!
- After I’ve completed the walls, have I moved on to second coat on trim?
- Have I painted all trim around the room?
- Did I double check the entire room for any missed spots or odd shading?
- Have I removed painter’s tape from around walls and trims before paint fully dries?
- Did I collect all my brushes, rollers and paint tray?
- Have I cleaned all brushes, rollers and paint tray with warm water and light soap and left them to dry?
- Have I removed floor sheeting and furniture covering after paint has fully dried?
Important Last steps for Painting Checklist
Your interior painting project is complete! All of that inspiration sourcing and painting prep has finally paid off! Or maybe you went the route of hiring professional house painters to take the pressure off. Anyway, o everything is properly dry — which can take a week or so in some cases for the paint to fully cure, you have your last bit of putting your space back together.
- Have I moved furniture back into its proper place?
- Did I hang items back on the walls?
- Have I replaced electrical outlet covers and light switch covers on walls?
- Did I take a moment to step back and fully appreciate a paint job well done?
More Interesting Blogs Related to
“THE ULTIMATE PAINTING CHECKLIST”
In summary, the Ultimate Painting Checklist is invaluable for ensuring a smooth and successful painting project. By following this comprehensive guide, you’ll be able to confidently tackle each step of the process, ultimately achieving a professional-looking and long-lasting finish that will transform your living space.
Did You Know?
If you’re hiring a house painter and want to get a better price for your painting job, consider doing it from October to March. This is the low season for painting companies and most of them are just trying to get their crews working so they may even slash their prices. Sounds like a nice hidden perk in hiring professional painters, right?
Did You Know?
When you’re looking to hire residential house painting services, it’s best and most cost-effective to try and bundle painting services together. Most painting companies want to be hired for larger painting jobs because in the end, it saves them time and money.
If you’re ready to embark on your painting journey but would like expert assistance, consider contacting Home Painters Toronto. Our team of skilled professionals is dedicated to providing top-notch service and exceptional results. Let us help you bring your vision to life and create the beautiful, inviting space you’ve always dreamed of.
Please give us a call at 416.494.9095, or email us at [email protected]. Also, don’t forget to follow us on all our social channels below!