
Painting exterior metal trim is one of those jobs that looks simple until the paint starts peeling six months later. Done right, it adds years of protection and sharp curb appeal to your home. Done wrong, you are back on a ladder before the next summer.
This guide gives you every step you need to do this job properly, from identifying your metal trim type, to the right prep sequence, to the exact products that hold up through Toronto's freeze-thaw winters. If you have aluminum window trim, steel door casing, or any other metal exterior trim that needs refreshing, this is where to start.
- Why painting exterior metal trim is different from painting wood or vinyl trim
- How Toronto's climate specifically affects metal trim and paint adhesion
- Step-by-step prep and application process
- What paint and primer to use on aluminum, steel, and galvanized metal
- A product comparison table so you can pick the right system for your surface
- How much it costs to have metal trim painted professionally in Toronto
- A real project example from a Toronto home
- Answers to the most common questions homeowners ask before starting
Need it done professionally? Get a free quote for exterior painting in Toronto.
Painting metal exterior trim is a great way to add a pop of colour or hide the rusty spots. But painting metal is a tricky thing to do, so here are some helpful tips for making sure you get the job done right. Sometimes it's the small things and final little touches that really make a difference on your home's exterior. We all want our exterior painting to look nice and make a good impression on the neighbours. That even comes down to the trim! If you have metal exterior trim and you're looking for some good tips on how to paint it, keep reading!
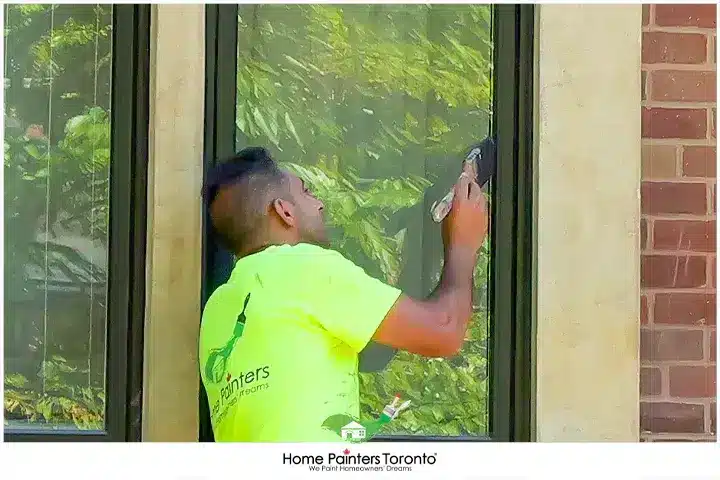
Properly primed and painted metal exterior trim holds up through Toronto's freeze-thaw winters and dramatically sharpens a home's curb appeal.
Why Painting Exterior Metal Trim Is Harder Than It Looks
Painting exterior metal trim requires a different approach than painting wood or vinyl because metal behaves fundamentally differently under paint. Wood absorbs primer and paint into its grain, creating a mechanical bond. Metal is non-porous, which means paint has nothing to grip unless the surface is properly prepared. Without the right prep and the right primer, paint applied to metal exterior trim will adhesion-fail. It will not gradually fade or wear, it will peel in sheets, often within a single winter.
Toronto's climate makes this even more demanding. The city experiences more than 100 freeze-thaw cycles per year. Every time temperatures dip below freezing and rise again, the metal trim contracts and expands slightly. Paint that lacks the right flexibility for this movement will crack at the edges and lift from the surface, allowing moisture to get underneath and accelerate peeling and rust. This is why product selection for metal exterior trim is not interchangeable with what you would use on wood siding or a fence.
There is also the rust factor. Ferrous metals like steel and iron will rust when their protective coating is compromised. Even a small nick or crack in the paint film, left unaddressed through a Toronto winter, can result in an orange rust stain bleeding through the next paint coat and a surface that requires significantly more prep before it can be repainted. Catching the surface in good condition and using a rust-inhibiting primer system prevents this cycle entirely.
According to the National Research Council of Canada's guidance on building envelope performance, exterior metal components on Canadian homes are among the surfaces most vulnerable to moisture-driven coating failure because of the combination of condensation, freeze-thaw cycling, and galvanic interactions between metals and fasteners. The practical takeaway for homeowners is straightforward: metal trim requires metal-specific products and a proper prep sequence, not just any exterior paint pulled off a shelf.
How to Paint Metal Exterior Trim
- For steel and iron: use a rust-inhibiting alkyd or acrylic metal primer. Products like Rust-Oleum Clean Metal Primer or Sherwin-Williams DTM (Direct to Metal) Primer are both reliable options. The rust-inhibiting chemistry in these primers actively prevents oxidation beneath the topcoat.
- For aluminum: use a self-etching primer or a bonding primer specifically rated for non-ferrous metals. Self-etching primers create a light chemical bond with the aluminum surface that standard primers cannot achieve on their own. Benjamin Moore's Multi-Purpose Latex Primer or a dedicated aluminum-bonding primer are both appropriate.
- For galvanized metal: use a galvanized metal primer. Standard primers do not adhere well to the zinc coating on galvanized steel. A galvanized primer or a direct-to-metal acrylic primer rated for galvanized surfaces is required.
Looking for professional exterior painting in Toronto? Home Painters Toronto provides expert prep, repairs, and durable exterior finishes built for Toronto weather. Request a free estimate today for your exterior painting project.
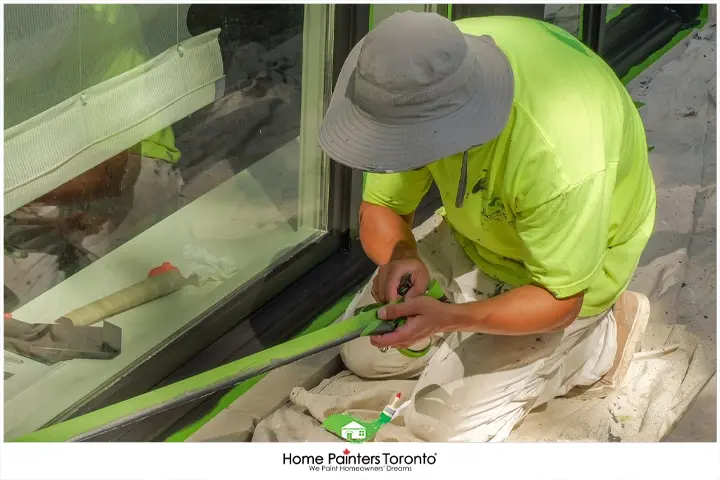
Sanding, rust treatment, and the correct metal-specific primer are the steps that determine whether a metal trim paint job lasts one season or ten years.
Colour Selection for Metal Exterior Trim
When painting exterior metal trim, choosing the right colour combination can dramatically improve your home's curb appeal. If you want something a bit more bold, you can think about creating a nice contrast. For example, you really can't go wrong with a cream or white house with black trim. To paint aluminum window trim black is a great way to add a modern and sleek look to your home's exterior. It's classic and timeless!
Exterior Metal Trim Colour Ideas for Toronto Homes
The trend toward high-contrast trim has been one of the most consistent directions in Toronto exterior painting over the past several years. Dark trims against light siding, and particularly black or near-black trim on white or cream homes, remains the most popular combination our team is asked to execute. It reads as modern, crisp, and intentional, and it works on everything from Victorian-era semis in Leslieville to newer infill builds in Leaside and Etobicoke.
For homeowners who want something less stark than a black and white combination, consider these pairings that work well with the housing styles common in Toronto:
Charcoal Trim
Benjamin Moore Kendall Charcoal or Sherwin-Williams Iron Ore against a warm grey, cream, or white siding body. This is the most versatile dark trim option.
Navy or Deep Blue Trim
Benjamin Moore Hale Navy against a natural wood tone, warm white, or light grey siding. Popular on craftsman-style homes in Riverdale and East York.
Bronze or Dark Brown Trim
Against brick or warm stone. Works particularly well on the older brick homes common across North York and Etobicoke.
Classic White Trim
On any dark siding colour for a traditional, timeless look.
For semi-gloss versus satin on metal trim, semi-gloss is the recommended sheen for exterior metal because it is more moisture-resistant, easier to clean, and shows crisper lines than satin. High-gloss is an option if you want maximum sharpness, but it also shows surface imperfections more readily, so the prep work must be immaculate. For a broader look at exterior colour combinations, see our guide to exterior paint colours.
Paint and Primer Products for Exterior Metal Trim: A Full Comparison
Choosing the wrong product for metal exterior trim is the most common reason painting jobs fail within a season. Here is a side-by-side breakdown of the main options our team uses and recommends for Toronto homes.
| Product Type | Best Metal Surface | Key Benefit | Brand Examples | Notes |
|---|---|---|---|---|
| Rust-inhibiting alkyd primer | Steel, iron, wrought iron | Stops rust under the topcoat | Rust-Oleum Clean Metal Primer, Tremclad Primer | Oil-based; longer dry time but superior rust protection |
| Self-etching primer | Aluminum, galvanized metal | Chemical bond to non-porous metal | Rust-Oleum Self-Etching Primer | Etches the surface; critical step on bare aluminum |
| DTM (Direct to Metal) acrylic primer | Steel, aluminum, galvanized | All-in-one adhesion for multiple metals | Sherwin-Williams DTM Primer | Water-based; faster dry than alkyd primers |
| 100% acrylic exterior topcoat | All exterior metal (over correct primer) | Flexibility in freeze-thaw, good UV resistance | Sherwin-Williams Duration Exterior, Benjamin Moore Aura Exterior | Most durable water-based option for Toronto climate |
| Rust-inhibiting enamel (2-in-1) | Steel, iron (intact surfaces) | Primer and topcoat in one product | Rust-Oleum Protective Enamel, Tremclad Rust Paint | Convenient but less durable than a separate primer plus topcoat system |
| DTM urethane enamel | High-wear metal trim and doors | Maximum hardness and adhesion | Sherwin-Williams DTM Urethane Enamel | Best for surfaces with daily contact; higher cost |
For most Toronto residential projects involving aluminum window trim, door casing, or soffit and fascia metal trim, the system our team reaches for most reliably is a self-etching or bonding primer followed by two coats of Sherwin-Williams Duration Exterior or Benjamin Moore Aura Exterior in the homeowner's chosen colour and sheen. For steel or iron trim with any existing rust, a rust-inhibiting alkyd primer followed by the same acrylic topcoat is the right sequence.
How Much Does It Cost to Paint Exterior Metal Trim in Toronto?
DIY Cost Estimate
- Self-etching or bonding metal primer: $20 to $45 per can or small pail, depending on coverage area
- Rust-inhibiting alkyd primer (for steel/iron): $25 to $55 per can or pail
- Premium exterior acrylic topcoat (Sherwin-Williams Duration or Benjamin Moore Aura): $65 to $110 per 3.78L
- Sanding supplies, tack cloths, painter's tape, brushes: $30 to $60
- Rust converter (if needed for existing rust): $15 to $30
- Total DIY materials for typical residential metal trim (window trim, door casing, gutters on a standard Toronto detached home): $150 to $350 CAD depending on the volume of trim and whether rust treatment is needed
Professional Cost Estimate
Professional exterior metal trim painting in Toronto typically falls in the range of $400 to $1,800 CAD for residential projects, depending on the linear footage of trim, the condition of the existing surface (clean previously painted trim versus heavily rusted or bare metal), accessibility, and whether any related prep or caulking work is included.
The largest variable in professional metal trim painting cost is surface condition. Trim in good condition with intact paint requires cleaning, light sanding, a primer coat, and two topcoats. Trim with significant rust, peeling, or corrosion requires chemical rust treatment, more extensive sanding, additional primer coats, and sometimes spot repairs before any topcoat can be applied. That additional prep is what protects the investment. Paint applied over untreated rust or inadequate prep will fail again within one to two seasons.
For a precise quote based on your specific home and trim condition, request a free estimate from Home Painters Toronto. Our team has been handling exterior metal trim on Toronto homes since 1987 and backs all exterior work with a 3-year warranty. For broader exterior painting costs, see our exterior painting cost guide.
Real Project: Exterior Metal Trim Painting on a Toronto Home
North York Two-Storey: Aluminum Window Trim Repaint with Self-Etching Primer
The situation: The homeowner contacted Home Painters Toronto after noticing that the aluminum window trim throughout their two-storey home had significant chalking and oxidation, with several sections where previous paint was lifting at the edges. A DIY repaint done four years earlier had failed because the prep work had been insufficient, with no primer applied over the aluminum before the topcoat went on.
What the job involved: Our team began by assessing all metal trim surfaces. The aluminum window trim required a thorough clean with a TSP solution to remove chalking and oxidation. All loose and peeling paint was sanded back. A self-etching primer was applied to all bare aluminum areas and allowed to cure overnight. Two coats of Sherwin-Williams Duration Exterior in a semi-gloss finish were then applied to all trim surfaces. The homeowner had selected Benjamin Moore Kendall Charcoal as the new trim colour, creating a strong contrast against the home's existing cream body colour.
The result: A clean, uniform finish across all trim surfaces with sharp edges and no visible lifting or adhesion failure. The self-etching primer step, which was skipped in the previous DIY attempt, was the critical difference in this job. Without it, paint simply cannot form a durable bond with bare or weathered aluminum. The homeowner noted a dramatic improvement in curb appeal from the colour change alone.
For more completed projects like this one, visit our Toronto painting projects page.
Frequently Asked Questions About Painting Exterior Metal Trim
For exterior metal trim, you need a paint specifically formulated or rated for metal surfaces. A 100% acrylic exterior paint from a premium brand like Sherwin-Williams Duration Exterior or Benjamin Moore Aura Exterior is appropriate for the topcoat, but only over a correct metal primer. The key requirement is that the paint must be applied over a metal-specific primer, because without proper priming, even a premium topcoat will not adhere to metal and will peel within a season. For steel and iron, a rust-inhibiting primer is essential. For aluminum, a self-etching or bonding primer is required.
Yes, without exception. This is the step most often skipped on DIY metal trim painting jobs and the reason most of those jobs fail quickly. Standard exterior primer is not designed for metal surfaces. Metal trim requires a metal-specific primer, chosen based on the type of metal: self-etching or bonding primer for aluminum, rust-inhibiting primer for steel and iron, and a galvanized primer for galvanized metal. Skipping primer on metal means the paint has no mechanical or chemical bond to grip, and it will peel off, often within one freeze-thaw cycle.
The most effective approach is to remove all existing rust before priming, treat any remaining rust with a rust converter product, then apply a rust-inhibiting primer before the topcoat. A rust converter chemically transforms the iron oxide (rust) into a stable compound that will not continue corroding under the paint. Once primed and painted with a quality topcoat, the paint film itself prevents moisture from reaching the metal and restarting the rust cycle. The most important ongoing maintenance step is to inspect metal trim annually and touch up any chips, nicks, or areas where the paint film has been compromised before moisture gets under the film and restarts rusting.
Yes, and it is one of the most popular exterior trim updates our team does on Toronto homes right now. Painting aluminum trim black or a deep charcoal creates a high-contrast look that reads as modern and crisp against white, cream, or light grey siding. The key is using the right primer for aluminum (self-etching or bonding primer) and a premium exterior topcoat in the chosen dark colour. Dark colours absorb more heat from the sun, which can accelerate expansion and contraction of the metal trim slightly, making the flexibility of the topcoat more important than it would be for lighter colours. A 100% acrylic exterior formulation handles this well.
With proper prep, the right primer, and a premium topcoat, exterior metal trim paint should last 7 to 10 years in Toronto conditions. Without proper prep or primer, paint on metal can fail within one to two seasons. The most important factor in longevity is not the brand of paint used but whether the surface was correctly prepared and primed before the first topcoat went on. Annual inspection and prompt touch-up of any chips or cracks in the paint film will extend the service life significantly.
Semi-gloss is the most practical sheen for exterior metal trim. It provides a degree of shine that is visually appropriate for trim, is more moisture-resistant than satin or flat finishes, and is easier to clean. High-gloss is an option if you want maximum sharpness and the crispest possible line, but it requires near-perfect surface preparation to look good, because it amplifies every surface imperfection. For most Toronto residential metal trim projects, semi-gloss is the professional standard.
The reliable window for exterior painting and priming in Toronto is late May through mid-October, when temperatures consistently stay above 10 degrees Celsius. Most exterior acrylic primers and paints require a minimum application temperature of 10 degrees Celsius and must stay above that temperature through the full cure period. Early September is often the ideal window for exterior metal trim work: temperatures are stable, humidity is lower than in July and August, and surfaces are not in peak direct-sun heat that can cause paint to dry too fast and reduce penetration. Avoid painting within 48 hours of rain, and always check the overnight low before starting since metal surfaces cool down faster than wood and can drop below safe curing temperatures on autumn evenings even when daytime temperatures are mild.
More Interesting Blogs Related to Useful Tips For Painting Metal Exterior Trim
Need Your Metal Exterior Trim Painted the Right Way?
If you're thinking of doing some exterior house painting but don't want to do the work yourself, let our exterior painters help! Even if you are undecided, professional house painters can help you with any problems or questions you may have. Call 416.494.9095 or email [email protected] for a FREE quote.