

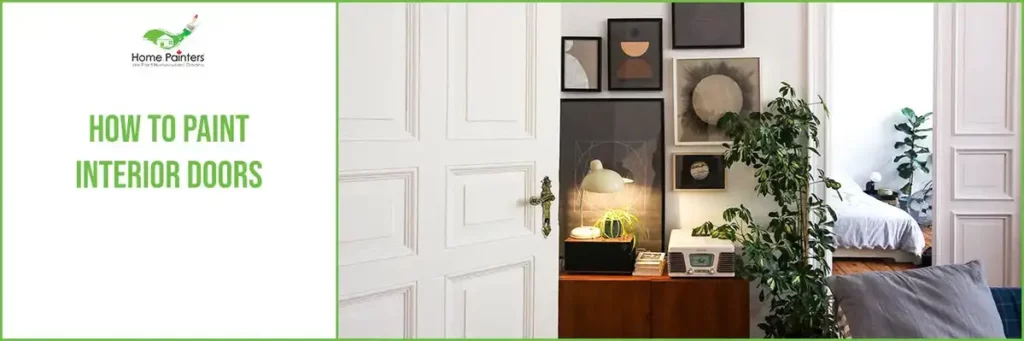
Knowing how to paint interior doors correctly is the single most visible interior painting improvement a Toronto homeowner can make, because every door in a home is seen at close range, touched multiple times daily, and immediately reveals any surface preparation shortcuts through chipping at the edge profiles within months of completion. Home Painters Toronto, the HomeStars Best of Award 2026 winner with over 1,200 positive reviews and 40+ years serving the GTA, paints interior doors throughout North York, Etobicoke, Leaside, and Riverdale every season. Whether you need a fresh coat of paint on a worn wooden door, or you're looking to jazz up the look of your door with a bold new colour, there is the proper way for painting interior doors.
Doors can act as an accent in a room and are a great way of highlighting other features or the total style of a space. Semi gloss paints are easy to clean but still have that bit of shine to draw the eye. To draw even more focus to the door, use a glossy or higher sheen paint. Once you've decided what look you want, here are some easy steps to take you through how to paint interior doors!
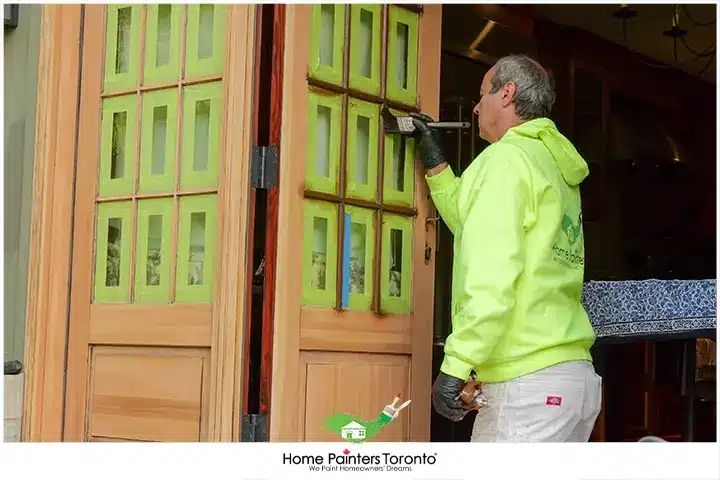
Water based alkyd enamel cures to a hard, factory equivalent finish that resists the daily contact and edge compression interior doors experience, which standard wall latex cannot withstand.
How to Paint Interior Doors in Toronto: Why the Product Choice and Preparation Sequence Matter More Than Technique
The most common cause of interior door paint failure in Toronto homes is not poor brush technique: it is product selection and preparation shortcuts. Standard interior latex paint, regardless of how carefully it is applied, does not cure hard enough on a door surface to resist the daily contact, edge compression from door frames, and cleaning agents that interior doors experience. The door edges and the pull side surface around the knob see the most contact and show latex adhesion failure within 6 to 12 months of application. According to Health Canada's guidance on VOCs in indoor environments, water based alkyd products like Benjamin Moore Advance release significantly lower VOC levels than traditional oil based alkyd paint while delivering the same hard, cured enamel surface. This makes them the correct product for interior door painting in a Toronto home, where painting is often done in winter with limited ventilation.
How to Paint Interior Doors
How Do You Know It's Time to Paint Your Door?
When it comes to interior doors, the indicators of when repainting is needed differ from exterior doors. The exterior doors in a home are exposed to the elements day after day, seeing harsh sunlight, rain and snow throughout the year. The doors inside a home do see some wear and tear, but not as much. A good interior house paint can last for several years. The time to repaint is indicated by chips or dents in the door surface. If there are windows nearby, yellowing over time may also appear. And for homeowners looking to do a makeover and need a good refresh, a fresh coat of paint transforms the door's contribution to the room's overall character.
What is the Best Way to Paint Interior Doors?
When it comes to painting interior doors, there are a few different options in terms of paint type. For a guide on the full range of oil based vs latex vs water based alkyd options, see our guides on oil based or latex paint and why use oil based paint. For interior doors specifically, water based alkyd enamel is now the professional standard. It provides the hard cured surface and smooth enamel finish that oil based paint produced, with low VOC content and soap and-water cleanup.
Materials needed for painting interior doors:
- Soap and water
- Scrub brush
- Sander
- Drop cloth
- Primer
- Paint – semi gloss or high gloss finish for an interior door painting
- Small paintbrush
- Paint roller
- Decide how painting interior doors will proceed: in place or lying flat. There are benefits to both methods. Although leaving the door on its hinges means painting both sides at the same time.
- Make sure to clean the door before painting! Even if the door looks relatively clean, a thorough scrub with soap and water first is essential.
- Once the door is clean, any chipped paint or blemishes in the wood may become visible. An uneven surface will make it more difficult to paint. Smooth out any bumps and imperfections with sandpaper.
- Be sure to wipe away any dust created with a damp cloth.
- Unlike walls, it's doubtful there will be major holes in the interior door before the door painting process. Most nicks or dents can be sanded out. If there are any large divots, simply fill them with putty and then sand them to ensure a smooth finish.
- Remove the knobs, plates, and lock mechanisms. Or tape off the doorknob and hinges to avoid messy paint splatter.
- If any hardware is removed, keep the pieces in a labelled bag so there is a clear record of how each part goes back.
- Put down a drop cloth to protect floors from paint drips and in case of paint spills.
- With a paint roller and small paintbrush, apply a primer. Make sure to read and follow the directions on the primer label for the best results.
- Allow the primer to dry for a full 24 hours before applying any paint.
- For a flat door, a paint roller will work fine, but back brushing with a wide paintbrush avoids roller stipple.
- However, most doors have some kind of panelling or details. In this case, starting with a smaller paintbrush for the panels and then painting the rest of the door with the paint roller produces the best result.
- For the correct order when painting: start with the edges. From there, if the door has any panels, paint inside those. Then paint the vertical strips down the center of the door and then the horizontal rails. Lastly, paint the vertical strips. This order ensures a uniform look while painting interior doors.
- Just like the primer, allow the paint to dry completely before applying a second coat.
- Remove all of the painter's tape to see the full effect!
- Make sure that all of the paint strokes are even and that there are no drip marks on the door. Touch up with a small paintbrush if any drip marks or stipples appear.
- Leave ample time for the paint to dry fully before replacing any hardware or using the door.
Best Paint for Interior Doors: Why Water Based Alkyd Is Now the Professional Standard in Toronto
Oil Based vs Water Based Alkyd for Interior Doors: Why the Professional Recommendation Has Changed
Traditional oil based alkyd paint was the professional standard for interior door painting for decades because it self levels to a smooth finish and cures to a hard, chip resistant enamel surface. The problems with traditional oil based alkyd on interior doors are the 24 to 48 hour dry time between coats, the strong solvent odour requiring full ventilation throughout the curing period, and the tendency to yellow in rooms with limited light exposure.
Water based alkyd products, specifically Benjamin Moore Advance, resolve all three of those limitations while producing the same hard, smooth, cured enamel surface. Benjamin Moore Advance dries to the touch in 2 to 4 hours (allowing a second coat the same day), releases minimal VOC during and after application, and does not yellow. Home Painters Toronto specifies Benjamin Moore Advance in Semi Gloss as the standard product for all interior door painting in the GTA. For a broader comparison of paint types, see our guide on picking the right type of interior paint and our overview of latex based paints.
| Product Type | Dry Time | VOC Level | Finish Hardness | Yellowing | Best For |
|---|---|---|---|---|---|
| Standard interior latex | 2 to 4 hours | Low to zero | Moderate; chips at door edges within 12 months | No | Walls and ceilings; not doors or trim |
| Traditional oil based alkyd | 24 to 48 hours | High; strong odour | Very hard; full enamel | Yes, in low light rooms | Industrial use; not practical for residential interiors in Ontario due to VOC regulations |
| Water based alkyd (Benjamin Moore Advance) | 2 to 4 hours | Low | Very hard; full enamel equivalent to oil based | No | All interior doors, trim, and cabinets; the professional standard for Toronto home painting |
Interior Door Painting Preparation: What Professional Painters Do Before Any Paint Is Applied
How to Paint Interior Doors: Why Surface Preparation Determines Whether the Finish Lasts 2 Years or 10
The preparation sequence for interior door painting determines the longevity of the finish more than the product selection or the application technique. An interior door with an existing glossy finish that is not sanded before primer is applied will peel within one to two seasons at the door edges, because the new paint film has no mechanical adhesion to the smooth existing surface. Sanding breaks the existing sheen and creates the microscopic surface texture that primer bonds to. Skipping this step is the single most common cause of early interior door paint failure.
The degreasing step is equally important on interior doors in kitchens and bathrooms, where cooking oils, moisture, and cleaning agents deposit on door surfaces over time. A TSP substitute solution applied with a cloth removes grease contamination that soap and water alone does not dissolve. The degreasing step precedes sanding on any door that has visible contamination near the knob area or in the kitchen zone.
For a full guide on the preparation errors that cause early interior paint failure, see our guide on common painting mistakes to avoid.
Painting Interior Doors In-Place vs Off-Hinge: The Trade-Off Toronto Homeowners Need to Know
Painting doors in place while they hang on their hinges allows both faces of the door to be painted in the same session, since the door can be partially opened to access each face. The limitation of in place painting is that gravity pulls any paint drips downward, and the door cannot be laid flat for panel sections where a loaded brush benefits from a level working surface. In place painting is faster and practical for maintenance recoats where the existing finish is in good condition.
Painting doors off hinge by removing the door and laying it flat on sawhorses or a workbench produces a better finish on raised panel sections, because the panel recesses can be painted with a fully loaded brush without fighting gravity. The door is painted flat on one face, allowed to cure, flipped, and the second face is painted. This method adds one to two hours per door for removal, horizontal painting, and reinstallation, but eliminates sags and drips in panel sections.
Professional painters use in place painting for flush doors and maintenance recoats, and off hinge flat painting for raised panel doors where the panel geometry creates drip risk, and for any door receiving a colour change from light to dark or dark to light where multiple coats are required.
Painting Raised-Panel and Flush Doors: Different Surfaces Require Different Approaches
Painting Interior Doors: The Correct Brush and Roller Sequence for a Smooth Finish
A raised panel door has a specific painting sequence that eliminates wet edge problems and ensures no section of the door receives paint on top of an already drying section that creates visible lap marks. The professional sequence is: panel interiors first with a brush, then panel edges and moulding profiles with a brush, then horizontal rails with a brush followed by immediate back rolling with a small roller, then vertical stiles with a brush followed by immediate back rolling. This sequence ensures that every section is completed in a continuous wet edge operation.
A flush door receives paint differently: a 4 inch roller applies the topcoat in vertical strips from top to bottom, with a 2 inch brush cutting in at the door edges and any areas the roller cannot reach. Back brushing in the direction of the wood grain immediately after rolling smooths out the roller stipple and produces a finish that reads as brush applied with no visible texture.
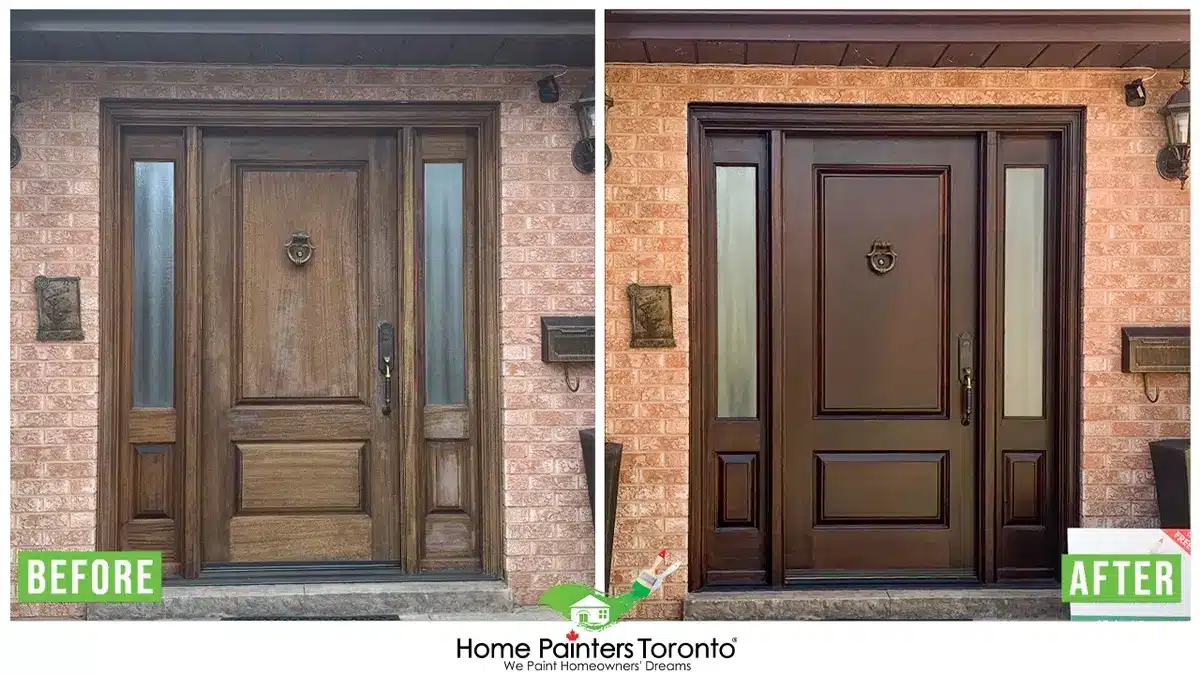
Refurbishing and Staining of Exterior Oak Front Doors
If You Need Help Picking Out a Paint Colour... Sometimes an interior painting idea is ready but a decision about a paint colour is still unresolved. The first thing to consider when picking the best paint for interior doors and trim is the mood to create. Do you want it to be bright, cheery, and vibrant? Or do you want it to be warm and inviting? Once there is a sense of what kind of mood the space should have, it will be easier to pick out the right paint colour.
If making a statement with painted doors is the goal, a few suggestions on what colour to paint interior doors: nothing makes an impact quite like Kendall Charcoal (HC 166), a deep and luxurious dark gray that looks great next to white trim. Another option to make an impact is a beautiful frosted blue with hints of grey called Blue Springs (1592). Another popular interior painting colour for doors is Wrought Iron (2124-10), a deep almost navy with hints of purple. All of these Benjamin Moore colours are available at Benjamin Moore Canada retailers throughout the GTA. Any of these choices will definitely make a statement in any room!
Cost of Professional Interior Door Painting in Toronto in 2026
Home Painters Toronto is WSIB compliant, fully insured to $5 million in general liability, and all interior painting including doors is backed by a lifetime warranty. All prices below are in CAD and exclude HST. For the full interior painting cost breakdown, see our interior painting cost guide.
| Scope | Estimated Cost (CAD) | Notes |
|---|---|---|
| Interior trim, doors, and baseboards (full home) | $700 – $1,200 | Benjamin Moore Advance water based alkyd; semi gloss finish; includes all preparation and two topcoats |
| Interior doors only (per door, included in full trim scope) | Included in $700–$1,200 trim scope | Single door repaints quoted on request |
| Bold colour door (dark to light or light to dark colour change) | May add $50–$100 per door | Additional primer coat required for full colour coverage on significant colour changes |
| Professional colour consultation for door colour selection | Included | Part of every HPT interior painting project quote at no extra cost |
Frequently Asked Questions About Painting Interior Doors in Toronto
Water based alkyd enamel is the professional standard for interior door painting. Benjamin Moore Advance in Semi Gloss finish is the specific product Home Painters Toronto specifies for all interior doors throughout the GTA. It cures to a hard, smooth enamel surface that resists chipping at door edges, does not yellow, and cleans up with soap and water. Standard interior latex paint is not appropriate for door surfaces because it cannot cure hard enough to resist daily contact.
Yes. Primer is required on all interior doors before any topcoat is applied. On previously painted doors in good condition, a light sanding followed by primer on all bare or chipped sections is the minimum. On doors receiving a significant colour change, full primer throughout is required to prevent the existing colour from showing through the new topcoat. Allowing the primer to dry for a full 24 hours before applying any paint is essential for reliable adhesion.
In place painting is suitable for flush doors and maintenance recoats where the existing finish is in good condition. Off hinge flat painting produces a better finish on raised panel doors where the panel geometry creates drip risk with gravity working against the painter. Professional painters use flat painting for any door receiving a significant colour change or where the raised panel sections are in poor condition.
The correct painting order for a raised panel door is: panel interiors first, then panel edges and moulding profiles, then horizontal rails, then vertical stiles. This sequence ensures each section is completed in a continuous wet edge operation with no section receiving paint on top of an already drying adjacent section, which would create visible lap marks in the finished surface.
Professional interior door painting is typically included as part of the interior trim painting scope, which runs $700 to $1,200 for a full home including all trim, doors, and baseboards. Home Painters Toronto uses Benjamin Moore Advance water based alkyd in semi gloss throughout, backed by a lifetime warranty. All quotes are free and provided the same day.
More Interesting Blogs Related to "How To Paint Interior Doors"
Ready to Have Your Interior Doors Painted Professionally?
Home Painters Toronto is the HomeStars Best of Award 2026 winner with a lifetime warranty on interior painting and 40+ years serving the GTA. Call 416-494-9095 or email [email protected] for a FREE same-day estimate.