
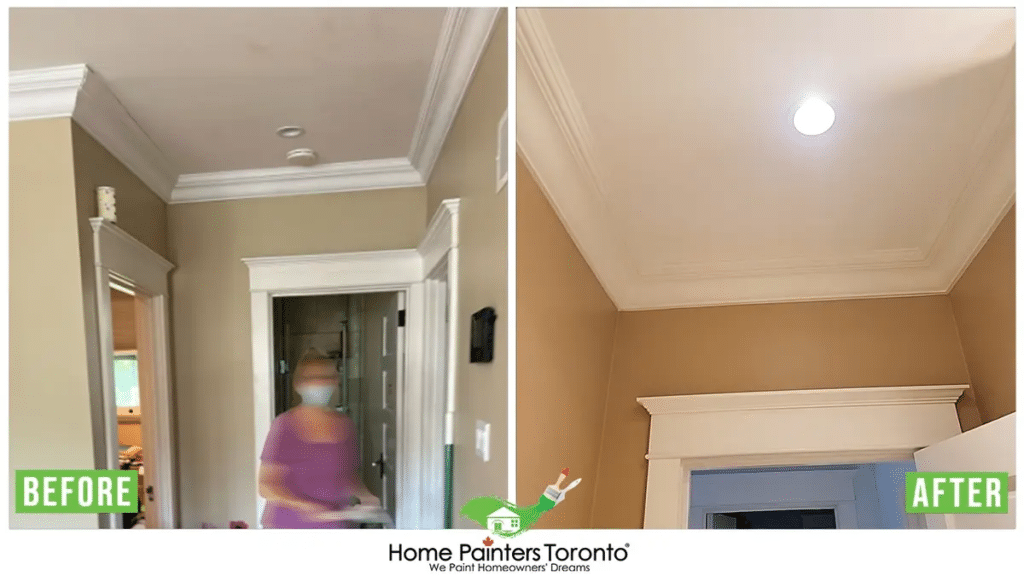
When you install crown moulding in a space, it can really change the look of your room. It depends on the type of crown moulding you choose (as there are lots of different looks), but it adds so much style and elegance. If you’re really looking to exude a sense of sophistication in your home design, crown moulding installation is a great way to do it.
Crown moulding is definitely different from trim because you have added details and carvings that really enhance a space. It’s grander. Plus, when you’re looking to sell your home, it can really add to the selling price since it’s such a refined feature. Remember, you can always hire professional painters and experts to get this job done for you. To find out how to install crown moulding the easy way, keep reading!
Understanding Crown Moulding
Before we start the crown moulding installation process, let’s take a moment to understand what crown moulding is. These are decorative trims that you fit at the junction of an interior wall and ceiling.
Used correctly, crown moulding acts as a sophisticated finishing touch to any room, enhancing the architectural style and adding a hint of grandeur. It’s available in a variety of styles, from the classical and ornate to the simple and sleek, allowing you to choose a design that suits your aesthetic.
Crown moulding: Determining what type to use
If you’re doing the crown moulding installation yourself, you’re going to want to carefully make your selection. There are a few different types to choose from. Wood crown moulding is the industry standard and really easy to get a hold of, you can stain or paint it. MDF (or medium-density fiberboard) crown moulding is another option. It’s actually meant to be painted and it’s important to note that MDF crown moulding is softer in nature. So, watch out for nicks and scratches.
PVC and polyurethane crown mouldings are usually the way to go in bathrooms and kitchens. They hold up well against humidity and moisture. They’re also pretty lightweight and easy to cut for DIY crown moulding installation. You also have polystyrene moulding which is economical and easy to install with the foam-safe adhesive. Lastly, plaster crown moulding is often used for more elaborate and large designs. Once you choose which option to go with, your crown moulding installation can begin!
How to install crown moulding: Important cuts
If you go with one of the easier options for installing crown moulding, like PVC or polyurethane, there are just a few steps. The most difficult part of crown moulding installation is cutting the corners. It’s due to the fact that the moulding sits at an angle between the ceiling and the wall. Using a coping or miter saw for these cuts is the best and easiest bet. From there, you’re going to want to measure and mark the wall for your first piece of crown moulding installation.
Then you can make your first cut for length. Cut your crown moulding at a 90-degree angle so both ends of the moulding will butt against the walls. You’re going to want to start by making 45-degree miter joints on both inside and outside corners. Be sure to press the edges firmly against the saw table. This will ensure a nice clean cut and make it easier for you to figure out how your pieces fit together for crown moulding installation.
Crown moulding installation: Using a miter saw
For a lot of people using a miter saw is one of the most complex parts of installing crown moulding. A miter saw is used to make accurate crosscuts at a variety of angles. People often worry about the exact placement of where they put the saw on the wood or moulding. It can easily be determined down the line if your crown moulding installation will go according to plan.
When you’re cutting an inside corner with a miter saw for a crown moulding installation, you’ll want to measure to the corner and transfer the measurement to the back side. Then make a 45-degree cut to create an angle in which the back side is longer than the front side. For an outside corner, simply transfer the measurement to the front side and cut the angle in the opposite direction. Then you’ll make your cuts where one piece of crown moulding will face another. Make these miter cuts very carefully and don’t be afraid to mark with pencil exactly where you need to. If you’re ever in doubt about your cutting skills in terms of crown moulding installation, remember to measure things twice!
How to install crown moulding: Last steps
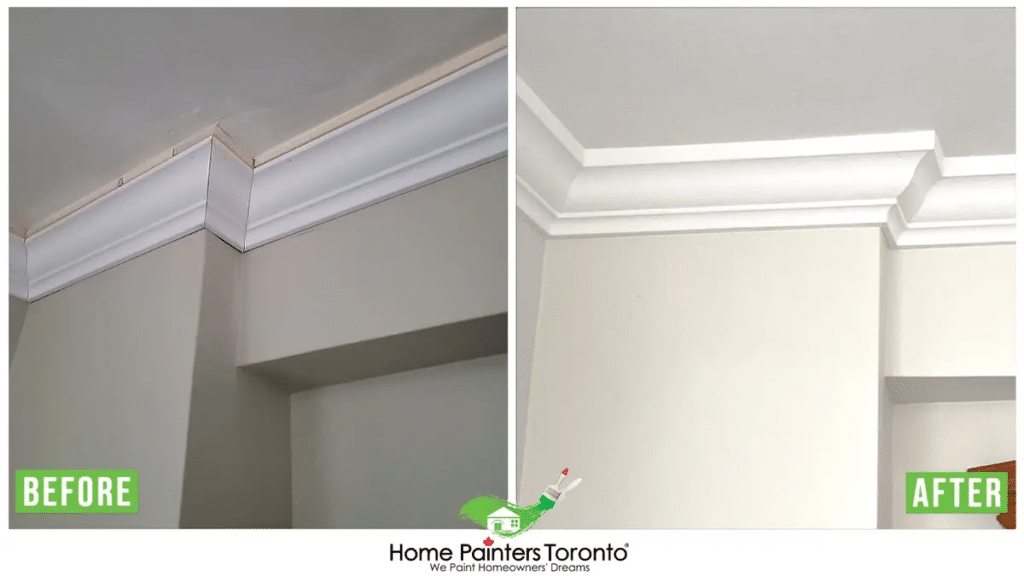
Before you head to your walls for crown moulding installation, you’re going to want to understand how each piece fits together. You’ll want to ensure that all of your cuts fit together perfectly for your crown moulding installation. If you find any gaps, this is where you stop to trim them with your miter saw.
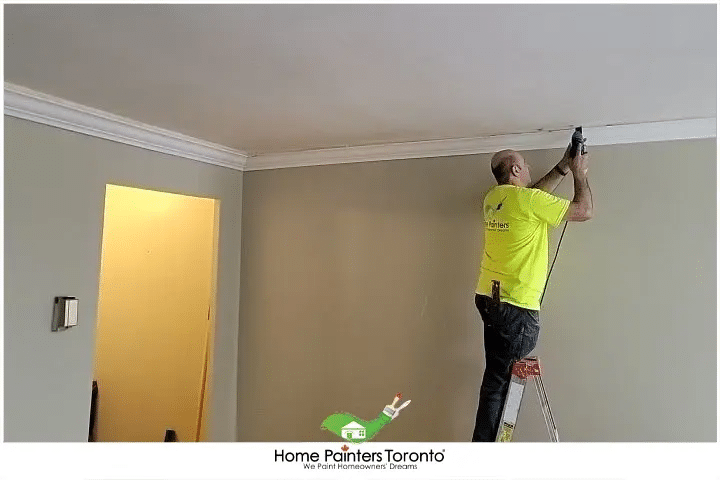
If everything is good to go, then this is the step where you start your crown moulding installation. You’ll need a proper adhesive, like LePage No More Nails paneling and moulding adhesive. This step is crucial if you’re looking for the no-nails approach to crown moulding installation. You’re going to want to push the end into the corner as tightly as possible. Then use your caulking gun (with paintable caulking) to cover up any gaps in the joint. After the securing process, you can decide whether to paint to fully complete your look!
Avoiding Common Pitfalls: Tips and Tricks for an Efficient Crown Moulding Installation
Embarking on a DIY crown moulding installation journey can be intimidating at times, especially if you are new to the process. Let’s dive into a list of tips and tricks that will help you avoid common mistakes, ensuring efficiency with your crown moulding installation.
Tip 1: Select the Right Moulding Material
Don’t let impulsive decisions affect your project; choose the right material based on the room’s purpose, your budget, and the desired style. Common materials include wood, MDF, and polyurethane. Be informed about the performance and look of each option before committing.
Tip 2: Proper Angle Setup on Miter Saw
Cutting precise angles is crucial for seamless joints and professional-grade results. Be meticulous about setting the angle on the miter saw, and practice beforehand. Familiarizing yourself with the cutting process will empower you as you tackle your project.
Tip 3: Cutting Extra Length
Always cut a little extra length while measuring your crown moulding pieces. It’s better to trim off any unnecessary material instead of dealing with a shortfall. Remember, a generous allowance can save both time and materials.
Tip 4: Use Painter's Tape
When working with fragile or painted surfaces, use painter’s tape along the edges where the crown moulding will be installed. This helps protect the walls and ceiling from damage during installation, ensuring a polished finished result.
Tip 5: Dry-fit Before Final Installation
Before committing to the adhesive and nails, always dry-fit the moulding pieces to check for accuracy, gaps, and overall appearance. Dry-fitting will help you make adjustments if required and prevent unnecessary damage or waste.
Tip 6: Keep a Steady Pace
While it’s vital to work efficiently, don’t rush the process. Give the adhesive ample time to cure and double-check your measurements. Hasty decisions can lead to costly mistakes. Remember, patience is the key to perfection.
Tip 7: Ask for Help
Crown moulding installation can be an arduous process for a single person, particularly when handling larger pieces. Don’t hesitate to ask for assistance, whether it’s a friend, family member, or a professional carpenter to install crown moulding. Teamwork can lead to a smoother and more enjoyable experience.
Conclusion
Installing crown moulding can truly elevate the style of your living spaces. With some organization, the right tools, and a helping hand from this guide, you could add some architectural elegance to your room in no time at all.
Remember, it’s all about the journey, not just the destination. So relax, take one step at a time, and enjoy the rewarding process of transforming your room. Here’s to successful DIY projects, large and small!
Most Interesting Blogs Related to
“Crown Moulding Installation: The Easy Way”


Not looking to install crown moulding on your own? If the interior painting work involved sounds like it involves too much time and energy to do yourself, call some Toronto painters who know what they’re doing! Call 416.494.9095 or email [email protected] for a FREE quote. And don’t forget to follow us on all our social channels below!