

One trend that’s growing more popular nowadays is putting whiteboard paint on your walls. Not only is it practical if you have to work at home and need more space for creativity in the office, but it’s also a lot of fun. This could be an excellent idea for a kids’ bedroom or play area as it allows them to colour on the walls without punishment. Also, do you have difficulty keeping your kids occupied while making dinner? It might be a fun idea to paint a wall in your kitchen with dry-erase whiteboard paint too!
If you think that the process of putting dry-erase whiteboard paint on your walls at home might be a complicated task, we’re here to help. It does take a few steps to get there. But once you’re done, you’ll be able to scribble and jot down important notes and schedules for years!
What Is Dry Erase Whiteboard Paint?
Before we delve into the application process, let’s understand what dry erase whiteboard paint is. Dry erase whiteboard paint is a special type of paint that, when applied to a surface, creates a dry erase board-like finish. This allows you to use dry erase markers on the wall and erase them easily. It’s a fantastic tool for those who enjoy visual thinking and interaction.
Put simply, this innovative paint can transform just about any smooth surface into a whiteboard. You can write on it using whiteboard markers and erase your work when finished, just as you would on a regular whiteboard. It’s great for both residential and commercial use.
- Grab the following essentials before you get started:
- Dry Erase Whiteboard Paint
- Primer (optional, but recommended for best results)
- Foam Roller (for smooth application)
- Paint Tray
- Painter’s Tape (for neat edges)
- Sandpaper (to smoothen any rough surfaces before painting)
- Cloth or Sponge (for cleaning)
- Drop Cloth or Newspapers (for protection against paint spills)
How to Apply Dry Erase Whiteboard Paint For Walls: A Step-by-Step Guide
Step #1: Prep Walls For Dry Erase Whiteboard Paint
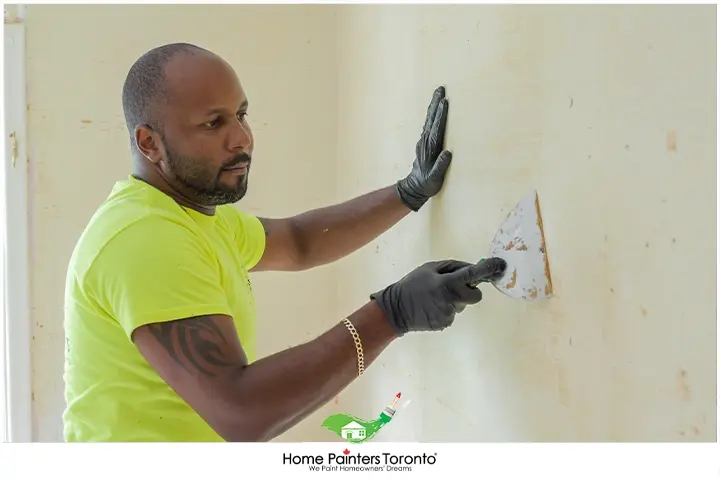
One step that’s very important on the road to making your walls ready for dry erase paint is to properly prep them. Of course, this is always a crucial step for all interior painting. But since you’re working with dry erase whiteboard paint in the end, you want your walls to be exceptionally smooth. You want to be able to write and doodle on them with no hassle!
Firstly, you want to be sure to plaster the walls to the finest detail. Every little knick or tiny hole from hanging pictures needs to be filled in. From that point, you’re going to want to go in and sand your walls and go over any bumps as well where you patched up any holes.
As we said, this step is just as important as the painting, as you want a level canvas for your whiteboard paint.
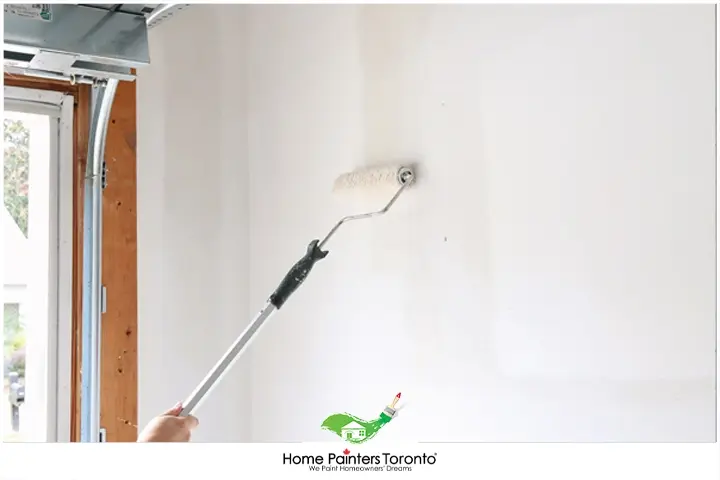
Step #2: Apply Two Coats Of Finish Paint
The second step is even further prep for your walls before the dry erase whiteboard paint goes on. It’s essential to have a good base for the whiteboard paint to sit on top of. For that to happen, you’re going to want to get a good base coat on your walls. For this, we recommend a flat latex interior paint, like Ben Interior Flat Latex Paint. This is the best whiteboard paint you can use in this case. It’s not a high gloss finish and will provide you with a nice smooth surface to write on. This is especially important if you have any nicks or bumps in your walls, as they will show through the whiteboard paint and make it look bad.
This is usually considered a finish coat, but for this type of project, it makes the perfect base for dry erase whiteboard paint. We recommend getting two coats of this on your walls as well. And be sure to let it dry fully for 24 hours before you go in with your specialty whiteboard paint.
Step #3: Apply Your Dry Erase Whiteboard Paint
Here it is, folks. The super exciting step you’ve been waiting for applying your dry erase paint! When thinking about this project, obviously, you know that you’re going to need some specialty paint. In this case,
we recommend Rust-Oleum Dry Erase Paint. For this, it’s a two-part mix that you easily put together and start painting!
This stuff is great as it applies quite thick, but in that, you want to be sure to work quickly as well. We also recommend that you get two coats of dry erase paint on your walls.
It’s also a good idea that you give your whiteboard paint approximately three days to fully set. That will ensure that it adheres perfectly to your walls and is ready for your markers to truly go to town!
Creating a clear dry erase whiteboard paint wall offers countless opportunities for collaboration, creativity, and fun. By following these steps, you can transform your own wall into an innovative space for brainstorming and so much more.
Pro Tips for Applying Remarkable Whiteboard Paint
Tip 1: Properly Prepare Your Surface
It’s important to start with a smooth, clean, and dry surface. If your wall has any texture or rough spots, lightly sand the area until it’s smooth. Then, clean the wall with mild soap and water to remove any dust or residue before you begin painting.
Tip 2: Use a Primer
Using a primer can ensure a more uniform finish and help the whiteboard paint adhere better to the surface. Choose a primer that is compatible with the whiteboard paint and apply one or two coats, allowing it to dry thoroughly before proceeding with the whiteboard paint.
Tip 3: Mix Your Paint Thoroughly
Whiteboard paint typically comes in two parts that must be mixed together before use. Make sure to follow the manufacturer’s instructions and mix the components thoroughly. Once mixed, whiteboard paint should be used within a specific timeframe (usually a couple of hours), so only mix as much as you can use within that timeframe.
Tip 4: Use the Right Tools
Use a high-quality, low-nap or foam roller to apply your whiteboard paint. A good roller will provide a smoother, more even application, reducing streaks and smudges. Stay away from the typical paintbrushes as they might leave a stroke effect that can affect the uniformity of your finish.

Tip 5: Apply Multiple Coats
For the best result, apply at least two coats of whiteboard paint. Let the first coat dry as per the manufacturer’s instructions before applying the second one. This will ensure that your wall has an even, glossy surface that mimics the feel of a traditional whiteboard.
Tip 6: Allow the Paint to Cure
After applying the paint, it’s essential to allow it to cure before use. The curing process typically takes a few days but can vary depending on the specific paint brand. This waiting period is vital as it allows the paint to harden and become a durable writing surface.
Tip 7: Maintain Your Whiteboard Wall
Maintaining your new whiteboard wall involves cleaning it regularly with a whiteboard cleaner or a damp cloth. This helps keep the surface of your wall in top condition, ensuring the dry-erase capability lasts as long as possible.

Applying dry-erase whiteboard paint isn’t complicated if you take the time to prepare your surface properly and follow the manufacturer’s instructions. With these pro tips, you can easily transform your walls into a creative and functional space that will serve you for years to come.
Ready to transform your walls into a vibrant, erasable canvas? At Home Painters Toronto, we make that vision a reality. As experts in whiteboard paint, our professional team ensures smooth, durable results every time.
Top Related Blogs Related to
“HOW TO DO DRY EASE WHITEBOARD PAINT ON YOUR WALLS”


Let’s bring your ideas to life – literally – with dry erase whiteboard paint. With Home Painters Toronto, your vision is only a phone call away! Please give us a call at 416.494.9095, or email us at [email protected]. Also, don’t forget to follow us on all our social channels below as well!