
Many people are fascinated by DIY projects. I mean, who doesn’t love perfecting a craft themselves? The same can be said about learning how to paint a room professionally. Yes, painting a room by yourself professionally, but without the need for professionals. Make sense? With these easy steps, you can learn how to paint a room yourself and brighten up your space! Continue to read on and learn how to make your painting project successful.
Planning to Paint Your Room
When starting a project, it’s important to envision how you want it to look like in the end. You’re not limited to four walls in the same color, so you can change it up and paint your accent wall in a different hue. Whether bold or slightly chill, you can choose any colour that you think best represents your room. Also, since you are painting your walls in the room, you can easily look up at the ceiling and see if that needs to be painted as well. Speaking of colour, that’s super important! It can be really overwhelming to choose what colour(s) you want, so feel free to browse through painting catalogues to see what is best. When you have an idea of what you want, you can test the shades to see how they look in the room at different times of the day.
Paint a Room
When it comes to painting a room, you should do it following this order:
- Prep: clean the entire surface and repair any defections you find
- Prime: anywhere where it’s needed and prime the walls and trim
- Caulk: Fill the gaps or cracks
- Ceiling: paint ceiling (optional) to prevent drips on walls
- Walls: apply paint using a roller
- Trim: paint trim last to avoid roller drips
- Cleanup: (the fun part) clean all your painting tools, remove drop cloths and replace furnishings
Tools and Materials
- Paint
- Paint roller
- Paint roller extension pole
- Drop cloths
- Paintbrushes
- Paint tray
- Sandpaper
- Painter’s tape
- Rags
- Putty knife
Painting a Room Preparation
When it comes to interior walls, you should usually paint with latex and it can be painted without priming, unless the existing walls are:
- Painted a dark color
- Stains, grease, or other imperfections
- Defects in the drywall that have been patched
- Painted with oil-based paint before
In situations like these, prime first with a stain blocking primer. If you want to cover any imperfections, you can spot prime without having to prime the entire room. Before painting, if there is sunlight, use it to help you detect any defects along the surface. Fill them using a putty knife and spackling compound. When the spackling is dry, sand the surface smoothly. If the surface is rough, dab the patched area with paint on a rag or sponge to copy the texture of the wall.
Interior Trim
- With older homes, interior trim is probably painted with oil-based enamel, but there have been major improvements with latex enamel and its durability. So, latex enamel is now a more popular choice. To make sure the new paint adheres properly, prime the surface so that the latex works well over the oil-based paint. How do you figure out if the surface used an oil-based or latex paint? Simply take a rag dabbed with denatured alcohol and rub it on the surface. If the paint comes off, it’s latex. If it doesn’t, it’s oil-based.

Caulking Gaps
Here are the tips to know when you are caulking gaps or cracks on your wall:
- Remove any loose old caulking with your utility knife, scraper, or putty knife
- If you have a caulking gun, you can use it to start and stop the flow of caulking easier
- For high moisture area like kitchens and bathrooms, use a caulking that is mildew and mold resistant
- 100% silicone caulk should only be used on surface that won’t be painted, such as between the tub and tile in a bathroom
- Apply caulk only to dry surfaces and when the temperature is over 50 degrees fahrenheit
How To Paint a Room Professionally for Beginners
Mix Your Paint
Use a wooden paint stick to stir the paint and you will need to re-stir o][ften throughout this project. If you are using more than one gallon of paint, combine the cans in a large bucket, in case there is a slight difference in colour.
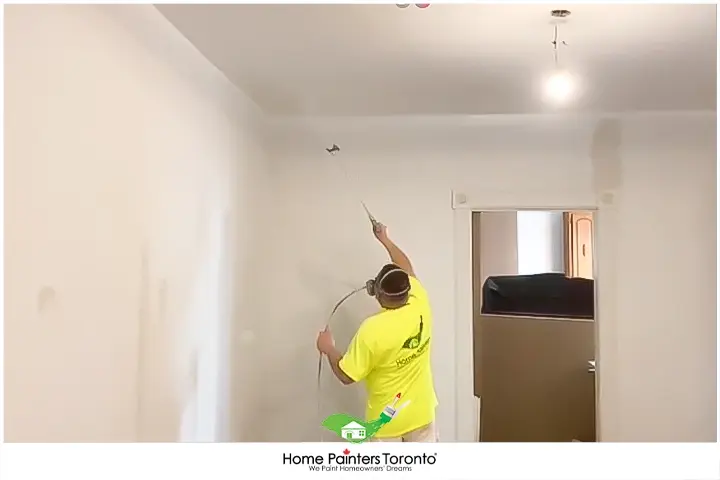
Choosing Your Paint Techniques
Now that your paint is mixed and you have a paint roller in hand, make sure you have a plan before you get started. Preferably you should work from the top of the room down, starting with the ceilings. If you are covering dark walls with a brighter colour, plan on three coats: primer and two coats of the new colour. This is to ensure nothing shows through. Do not overdo it when it comes to painting! Tackle one wall at a time. When applying paint using your paint roller, use long strokes in a W pattern for supreme coverage (also avoid pesky roller marks). When painting the trim, remove the painter’s tape and wait for the walls to dry, before applying tape to the walls. Start by painting the trim closest to the ceiling, moving on to the door and window frames, and then the baseboards.
You Need Ventilation in the Room!
Your room should be well-ventilated throughout painting. You can open your windows or use a fan. This will help speed up the drying process.
CLEAN UP TIME!
You have finally reached the fun stage (it isn’t fun at all)…..clean up time! Remove all the painters tape and pick up all the drop clothes, making sure any spills are dry before moving them. For latex and water-based paints, clean all brushes with soap and water. Oil-based paints will require mineral spirits. Use a painter’s brush to clean and reshape bristles.
Give Yourself Time
The size of your room will impact how long it will take to paint your room, also how you paint and your skill level. Considering that you are a beginner painter, don’t worry at all. Be sure to budget your time and take into account prep and cleanup time. Anything is possible and even though this is a DIY project for you, you can do it! If you follow all these tips, your room will look as though a professional painted it.
Ceiling Paint for Hallways/Bedrooms
In high-traffic areas like hallways, you will need a paint that has a satin finish. This is because they resist dreaded marks left by bumps and rubs when people move across the hall. If you use a flat finish, for example, you would clearly see all the fingerprints. Satin paint is a better option because it stays cleaner as the dirt does not grip to the slick surface as much a flat finish would. For a living room or bedroom, you should use a satin or eggshell finish because it would be a flattering look. Lastly, for a bedroom door, you should want to use a semi-gloss paint. This is because it will withstand the constant dirt on the handles and it is washable.

Painting Like a Pro: Putting Safety First
Professional painters excel at their craft not only because of their professional painting tips and tricks but also due to their meticulous attention to safety measures.
As amateur painters or DIY enthusiasts, we often get carried away by visions of the final, vibrant outcome. But remember, in every transformation, the process is as important as the result. A step often overlooked by amateur painters – but held paramount by professionals – is the application of strict safety measures, ensuring not just a stunning result but one achieved through safe and healthy means.
So, let’s dive into the behind-the-scenes journey of professional painting, ensuring you’re not just creating an artistic masterpiece but doing so with the utmost care for safety—just like a true pro!
1. Ensure a Well-Ventilated Space
Paints, especially oil-based ones, can emit fumes that might be harmful if inhaled for extended periods. That’s why painting in a well-ventilated space is essential. Simple actions like opening windows and doors can make a huge difference. For rooms with poor natural ventilation, consider investing in a fan to aid in circulating fresh air. Remember, your health is a valuable asset; let’s protect it!
2. Wear Protective Gear
While we want to make lasting memories as we revamp our spaces, we don’t want those to be paint stains on our skin or irritation in our eyes. For this reason, gearing up with the right protective equipment, such as gloves, goggles, and coveralls, can make your painting project safe and mess-free.
If you are sanding walls before painting, consider using a mask to protect yourself from dust. Be aware of your surroundings and take every possible measure to keep yourself unharmed and comfortable during the process.
3. Responsible Paint Waste Management
Do you know leftover paint can be hazardous to the environment if not disposed of properly? It could seep into the ground, contaminate water sources, or harm wildlife. Post-painting, make sure you clean your brushes and other equipment over a sink—not outside where paint could enter the storm drain.
Leftover paint should never be poured down the drain or thrown out with regular household trash. Instead, donate it, recycle it, or store it for future touch-ups. If you need to discard it, please check with your local waste facility for guidelines. Let’s do our part to preserve Mother Earth as we beautify our homes!
Summary
Remember, painting a room professionally involves more than just applying colour to the wall. Every single detail matters, from choosing the right hue and understanding your wall surface to the post-painting care. Keeping informed can help you prevent common painting mistakes and ensure a professional outcome. And that’s an achievable goal!
Most Interesting Blogs Related to
“how To Paint A Room Professionally”


If you’re thinking of doing some home interior painting but don’t want to do the work yourself, let our interior painters help! Even if you are undecided, professional house painters can help you with any problems or questions you may have. If the work involved sounds like it involves too much time and energy to do yourself, call 416.494.9095 or email [email protected] for a FREE quote. And don’t forget to follow us on all our social channels below as well!