

Painting exterior in winter in Toronto is not something you should attempt with standard exterior paints. Once temperatures drop below 10 degrees Celsius consistently, the latex coalescence process that forms a durable paint film cannot complete, and the result is a chalky, weakly-adhered coating that will fail within the first freeze-thaw cycle. The real question for Toronto homeowners approaching winter is not whether to paint in winter, but how to protect what you have and prepare properly for the first available painting window in spring.
This guide covers two related but distinct things. The first is the honest answer to the "can I paint exterior in winter?" question, including the specific conditions under which it is and is not feasible. The second is the complete DIY prep sequence to protect your home's exterior going into a Toronto winter, addressing the vulnerabilities that freeze-thaw cycling, ice, and moisture will exploit if left unaddressed before November.
- Can you paint exterior in winter? The honest answer for Toronto
- What happens to exterior paint applied in below-minimum temperatures
- Low-temperature specialty paints: what they can and cannot do
- Why prepping your exterior before winter matters as much as painting
- A complete fall exterior inspection and prep checklist for Toronto homes
- Gutters, downspouts, and drainage: what to check before winter
- Caulking before winter: what to replace, what to leave, what not to caulk
- Wood rot inspection and urgent repairs before the first frost
- What to do if you miss the painting window: protecting exposed surfaces through winter
- Interior painting as a productive winter alternative
- What fall exterior prep costs in Toronto in 2026
- FAQ answers to the most common homeowner questions
Need your exterior assessed or prepped before winter? Get a free quote now!
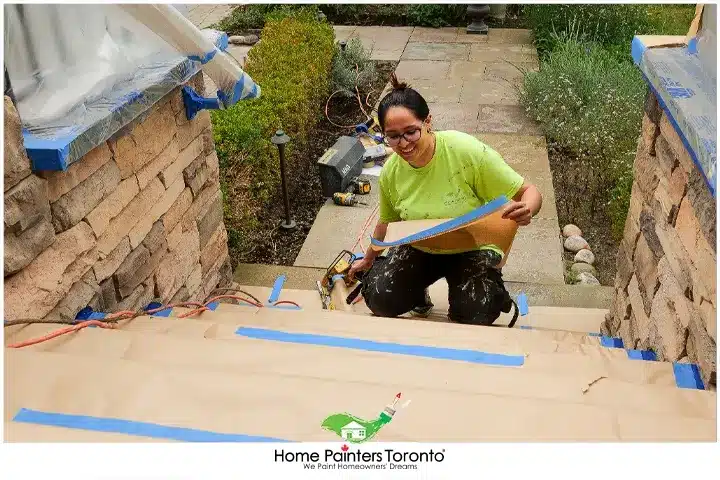
A systematic fall inspection and targeted prep — caulk replacement, bare wood priming, gutter clearing — protects your Toronto home through freeze-thaw season and reduces spring repair costs.
Prepping Your Exterior for Winter
Getting your house ready for the cold and harsh winter months is always important. Having a good assessment of your home's condition by fall will ensure a much easier spring and summer when it comes to exterior painting. Here are some tips on what to do to prep your exterior for winter.
Can You Paint Exterior in Winter? The Honest Answer for Toronto
Most homeowners search "painting exterior in winter" because they missed the fall window and are hoping there is a workaround. Here is the honest answer.
Standard 100% acrylic exterior latex paints require a minimum application temperature of 10 degrees Celsius, and the surface and air temperature must remain above this threshold for at least 24 to 48 hours after the final coat is applied. Below this temperature, the latex emulsion particles in the paint cannot melt together (coalesce) into a unified, durable film. The result is a paint that looks applied but behaves like chalk: no adhesion, no flexibility, and complete failure within the first freeze-thaw cycle.
Toronto's winters routinely produce temperatures of minus 10 to minus 20 degrees Celsius from December through February, with daytime highs staying below 5 degrees Celsius for weeks at a time. These conditions are not borderline. They are categorically unsuitable for standard exterior painting. Painting in these conditions is not a calculated risk. It is a guaranteed waste of materials.
According to Benjamin Moore's temperature guide for exterior painting, the recommended range for exterior painting is between approximately 4 and 38 degrees Celsius. More importantly, the surface temperature must be within this range at the time of application and must remain so through the curing period, not just during the brief hours of daytime warming that can occur even in January.
What About Low-Temperature Specialty Paints?
A reasonable follow-up question is whether low-temperature specialty formulations can extend the painting season into winter. Some premium products, including Sherwin-Williams Duration and Resilience, can be applied down to approximately 2 degrees Celsius. However, several important caveats apply.
"Can be applied" does not mean "will perform as well." Paint applied at 2 degrees Celsius cures more slowly, is more susceptible to dew and condensation on the uncured film, and requires careful monitoring of overnight temperature forecasts for a longer post-application window than paint applied at 15 to 20 degrees Celsius.
As Sherwin-Williams guidance on late-season exterior painting notes, the overnight low is the critical variable, not just the daytime high. Daytime temperatures might reach 5 to 7 degrees Celsius on a January Toronto day, but overnight lows of minus 5 to minus 15 mean the paint cannot complete curing before temperatures drop below the minimum threshold. The result is the same failed film that would have occurred with a standard product.
The practical conclusion for Toronto homeowners: exterior painting is not feasible in Toronto from approximately mid-November through late March in most years. The reliable fall deadline for standard exterior latex paints is mid-October. For low-temperature formulations on exceptional weather windows, that deadline might extend to early November in a mild year, but this requires daily monitoring of the five-day forecast and should not be planned as a default approach.
If you have missed the painting window this year, the right approach is to protect what can be protected through winter and plan the exterior painting for the first reliable spring window. What you can and should do now is covered in the rest of this guide.
The most important exterior winter prep step for any Toronto homeowner is a systematic walk-around in late September or early October, while there is still enough mild weather to address what you find. Walking around in November and discovering problems you can no longer fix before winter is the most expensive version of this inspection. Here is what to look for.
The Pre-Winter Exterior Inspection Checklist for Toronto Homes
Paint condition:
- Look for peeling, bubbling, or cracking paint on all elevations, especially south and west-facing walls that took the most UV through summer
- Run your hand across siding surfaces. A powdery chalky residue indicates the paint has broken down and the protective film is compromised
- Sight down trim boards and siding at an angle in early morning light. This reveals surface irregularities, lifting edges, and hairline cracks invisible in direct light
Caulk condition:
- Press on all caulk at window frames, door surrounds, and trim joints. Caulk that has hardened to the point of crumbling, or that has visibly pulled away from either surface it was bridging, must be replaced before winter
- Hairline cracks in caulk that allow water infiltration will be exploited by freeze-thaw cycling and become significant gaps by spring
Wood condition:
- Press a screwdriver firmly into all wood sills, fascia boards, trim corners, and any wood in contact with water runoff. Sound wood feels firm. Soft or spongy wood indicates moisture damage that must be addressed
- Check the bottom edge of fascia boards and the end grain of all exposed wood trim. These areas absorb moisture fastest and show rot earliest
Roof and eave:
- Look for missing, lifted, or cracked shingles at the roofline visible from the ground
- Check that all gutters are attached firmly to the fascia and slope correctly toward downspouts. Sagging gutters hold standing water that freezes in winter and adds weight that pulls the gutter away from the fascia
Foundation and grade:
- Walk the perimeter at ground level and check that the grade slopes away from the foundation, not toward it. Pooling water at the foundation freezes and expands, and is one of the primary causes of foundation cracking over time
For any wood damage found during the inspection, our exterior wood repair and carpentry service handles urgent repairs before the first frost.
Before winter arrives, you want to make sure that your gutters are free of debris. Leaves can clog your gutters and stop them from draining away water effectively. This can lead to ice damming in the winter, which can cause all sorts of problems, from roof and eave damage to basement flooding and foundation damage. Be sure to check your gutters for leaks and make any necessary repairs.
Make sure that your downspouts are directing water away from your foundation. If your downspouts are too short, water can pool near your foundation and cause problems. You can purchase downspout extensions at any hardware store to redirect the water further away from your home.
Why Toronto Ice Damming Makes Gutter Maintenance Critical
Ice damming is one of the most common and most damaging winter problems on Toronto homes, and it begins with gutters that are not cleared before the first significant snowfall. Here is the sequence: snow accumulates on the roof, heat escaping from the house melts the bottom layer of snow, the meltwater runs toward the eave and into the gutter. If the gutter is clogged, the water backs up and freezes at the cold eave line. As this cycle repeats, the ice dam builds up, eventually forcing meltwater back under the shingles and into the roof structure or wall cavity.
Ice dams cause water damage to the roof deck, wall framing, and interior ceilings that can cost thousands of dollars to repair, all preventable by clearing the gutters in October before the first heavy leaf fall is over.
For gutters with any surface corrosion, joint separation, or fascia board damage, our soffit and fascia board repair service handles gutter-related repairs before winter.
Caulking serves as a vital barrier against moisture and cold air infiltration. Over time, it can crack and allow water to infiltrate, leading to damage. Before winter sets in, inspect all the caulking around your windows, doors, and other areas where different materials meet. Any cracked or missing caulking should be replaced. Use a high-quality silicone or acrylic caulk rated for exterior use.
Caulking Before Winter: A Practical Guide
Caulking in fall, rather than spring, has a specific advantage on Toronto homes: wood is in a slightly contracted state compared to its summer-expanded state. Caulk applied to a wood joint in the contracted condition has more elasticity remaining available when the wood expands in spring and summer heat, compared to caulk applied in summer heat when the joint is already near its maximum width.
The correct product for exterior caulking before winter is a paintable acrylic latex caulk rated for outdoor use. The key requirements are that it remains flexible at temperatures down to minus 20 degrees Celsius, that it is paintable so it can be covered with the new topcoat in spring, and that it is compatible with the materials it is bridging (wood, vinyl, aluminum, or masonry as applicable).
What to caulk before winter:
- Window frame joints on all four sides where the frame meets the siding
- Door frame joints on sides and top
- Trim-to-siding joints at corner boards, sill plates, and fascia edges
- Any penetrations through the siding: plumbing vents, electrical outlets, light fixture mounting points, and dryer vents
What never to caulk:
- The bottom edge of window sills
- The bottom edge of any horizontal trim board
- The weep holes in brick veneer at the base of the wall
These drain edges must remain open to allow any moisture that enters behind the siding or trim to escape rather than being trapped. Caulking a drain edge creates a moisture trap that is more damaging than the open joint would have been.
One useful distinction for pre-winter caulk work: if the joint is actively painted and will be repainted in spring, use paintable acrylic latex caulk and leave it to cure before winter. If the joint is a structural seal around window glass or door glass that will not be painted over, a non-paintable silicone provides longer-lasting flexibility. Never use silicone on any joint that will be painted, as most exterior paints will not adhere to silicone and the paint will peel at the caulk line within one season. For a comprehensive look at exterior caulking, see our exterior caulking service.
Before winter, take a good look at the exterior of your home for any damage, particularly to the siding, fascia boards, soffits, and roof. Small damage can quickly become larger problems when exposed to freezing temperatures, snow, and ice. If you spot any rotting wood, loose boards, or damaged siding, repair or replace them before winter arrives.
Urgent Pre-Winter Exterior Repairs by Surface Type
Wood siding and trim with soft spots or rot: This is the highest-priority pre-winter repair. Moisture already present in soft or rotting wood will freeze in winter, expand the degraded fibres further, and accelerate the deterioration significantly through a full freeze-thaw season. Addressing soft wood before winter with epoxy wood filler for isolated areas, or board replacement for significantly rotted sections, prevents a repair job from becoming a carpentry replacement job by spring.
Fascia boards: These are particularly vulnerable on Toronto homes because they are at the roofline, exposed to rain, ice, and water running off the roof. A soft fascia board in October often becomes a significantly rotted fascia board by April. Check by pressing firmly along the length of each fascia board and any that feel soft should be replaced before winter.
Siding: Loose, cracked, or missing siding panels allow wind-driven moisture to enter the wall cavity directly. Reattach any loose panels and replace any with significant cracks or missing sections before winter.
Foundation parging: Any cracks in foundation parging (the cement coating on the exterior of the concrete or block foundation) should be repaired before winter. Water that enters a parging crack and freezes will widen the crack significantly through the winter, and repeated freeze-thaw cycling can dislodge parging sections entirely. Our foundation parging repair service handles urgent pre-winter foundation repairs.
If you have any bare or exposed wood on your home's exterior, it's important to apply a coat of primer or sealant before the winter. This will protect the wood from moisture, which can cause it to swell, warp, and eventually rot. If you're planning to paint in the spring, applying a primer now will give you a head start and ensure better adhesion for the finish coat.
This step is often what separates a home whose exterior holds up through a Toronto winter from one that shows significantly more damage in spring than it did in fall.
Bare wood left exposed through a Toronto winter absorbs moisture every time it rains or snows, and that moisture freezes and expands the wood grain. By spring, bare wood that might have been repairable with filler in October has often developed surface cracking and grain separation that requires more aggressive sanding or even replacement before a paint system can be applied.
The pre-winter protection sequence for bare wood is:
- Apply one coat of exterior-grade wood primer to all bare wood areas found during the inspection. This does not need to be a topcoat-quality application. Its purpose is to seal the wood fibres and slow moisture absorption through winter.
- For areas with active peeling where bare wood is exposed over a significant surface, scrape and sand the edges of the peeling area before priming. A primed bare patch surrounded by firmly-adhering old paint will hold through winter. A primed patch with poorly-adhering old paint edges will not.
- Do not apply a topcoat in late October or November as a "protection for the season" measure. A topcoat applied in below-minimum temperatures has worse adhesion than no topcoat at all. The primer alone is the right intervention at this time of year.
What to Do If You Have Missed the Full Painting Window Entirely
If you are reading this in November or December with a home that needs a full exterior repaint, here is the honest guidance.
Do not attempt to paint the exterior. The conditions are not suitable and a failed paint job is worse than the current condition in most cases, because it creates additional prep work (removing failed paint) before the spring project can begin.
Do address any urgent structural issues: caulk replacement, soft wood repair or protection, foundation parging cracks, and gutter maintenance. These can be done in mild fall and early winter weather when temperatures are above 5 degrees Celsius temporarily. Even emergency caulking during a relatively mild November day is better than leaving an open joint through the full winter.
Plan and book your spring exterior painting project now. The best exterior painting contractors in Toronto begin booking the spring season in February and March. Booking now guarantees you a spot in May, which is the optimal spring painting window. Our team at Home Painters Toronto takes spring bookings now. Call 416.494.9095 or get a free estimate online to secure your spring slot.
While painting the exterior of your home during winter is not recommended, winter is actually a great time to tackle interior painting projects. The cold and dry air can actually be beneficial for interior painting, as it helps the paint dry more quickly. Plus, with the longer nights and shorter days, you might find that you have more time to dedicate to interior projects.
There is a genuine and underappreciated advantage to interior painting in winter in Toronto: lower humidity. Toronto summers bring indoor humidity levels that slow the drying and curing of interior latex paint. In winter, the heated indoor air has very low humidity, and latex paint dries and cures faster than it does in a humid August. The result is a harder, more durable finish that reaches full cure in less time.
Winter is also when interior painting professionals tend to have more scheduling flexibility than in the spring and summer peak season. For homeowners looking to repaint interior rooms before a spring listing, scheduling interior painting in January or February and exterior painting in May allows both projects to be completed without rushing and without competing for contractor availability in the same tight spring window.
The one interior painting consideration in winter is ventilation. Water-based latex paints have low odour, but in a tightly sealed winter home, even low VOC levels accumulate more than they would with windows open in summer. Open a window slightly during painting and for several hours after, even in winter. The temperature drop is minimal with a single window slightly open, and the air quality benefit is significant.
For a full guide to interior painting services available in Toronto, including colour consultation and scheduling, see our interior painting service.

October caulk replacement and bare wood priming are the two most impactful pre-winter exterior investments on any Toronto home — both achievable on mild fall days above 5 degrees Celsius.
Advantages of Painting Your Home During Winter
While full exterior painting is not feasible through a Toronto winter for the reasons outlined above, it is worth acknowledging the legitimate advantages that exist when exterior painting is possible in the shoulder months on either side of winter.
For exterior work done in late October on warm years, or very early spring on mild years, contractor availability is better than the peak season and some contractors offer more scheduling flexibility. The lower UV of late fall and early spring also means freshly applied paint cures without the additional thermal stress that July and August direct sun produces.
For interior painting in winter, the advantages are clear: low humidity speeds curing, contractor availability is highest, and pricing is often more flexible than in the spring rush. The advantages of winter interior painting for Toronto homeowners are covered in more depth in our interior painting cost guide.
What It Costs to Prep Your Exterior Before Winter in Toronto
Most of the pre-winter exterior prep described in this guide is either DIY-feasible or involves targeted professional work rather than a full painting project.
DIY Pre-Winter Prep Costs
- Exterior acrylic latex caulk: $8 to $15 per tube (a standard Toronto detached or semi-detached typically needs 3 to 6 tubes for a full exterior caulk inspection and replacement)
- Exterior wood primer for bare wood protection: $30 to $50 for a small quantity applied to spot areas
- Exterior wood filler (epoxy or standard): $20 to $40 for soft wood repairs
- Gutter cleaning tools or service: $80 to $150 for professional gutter cleaning, or DIY with a ladder and garden hose
- Downspout extensions: $15 to $30 each at any hardware store
- Total DIY pre-winter exterior prep for a standard Toronto home: $100 to $300 CAD depending on what is found during inspection
Professional Pre-Winter Prep Costs
For homes where inspection reveals soft wood requiring carpentry repair, significant caulk failure, or foundation parging cracks, professional pre-winter prep work typically runs $300 to $1,500 CAD depending on the scope and extent of repairs needed. This is significantly less than the cost of addressing the same issues after a Toronto winter of freeze-thaw cycling has been allowed to worsen them.
For a free assessment of your home's pre-winter condition and what work should be done before the first frost, request a free estimate from Home Painters Toronto. Our team has been assessing and painting Toronto and GTA exteriors since 1987. For broader exterior painting costs in the next available painting season, see our exterior painting cost guide.
Frequently Asked Questions About Painting Exterior in Winter
No, not with standard exterior latex paints. Standard 100% acrylic exterior latex paints require a minimum of 10 degrees Celsius at application and for at least 24 to 48 hours after the final coat. Toronto winters routinely produce temperatures well below this threshold for weeks or months at a time. Some premium low-temperature formulations can be applied down to approximately 2 degrees Celsius, but these require stable overnight temperature forecasts within that range and are not a general-purpose solution for winter painting in a Canadian climate.
Below the minimum curing temperature, the latex particles in the paint cannot coalesce into a unified film. The paint appears to be applied but forms a chalky, brittle, weakly-adhered coating with no flexibility. When temperatures then drop further below freezing, the uncured paint film freezes and the structural weaknesses become permanent. The result is a paint job that peels and fails within the first freeze-thaw cycle, often within weeks of application, and which creates additional prep work before the surface can be properly repainted.
The reliable deadline for standard exterior latex paints in Toronto is mid-October. In warm years, some professional teams with low-temperature formulations and careful forecast monitoring can extend this to early November. By late October, the risk of overnight temperatures falling below the minimum curing threshold is high enough that most exterior painting should be deferred to spring.
Inspect all caulk joints and replace any that have cracked or separated. Apply exterior primer to any bare wood found during the inspection to slow moisture absorption through winter. Check gutters for blockages and ensure downspouts direct water away from the foundation. Address any soft wood or rotted sections urgently before the first frost, as these deteriorate significantly through a freeze-thaw season. These steps are all achievable in October and early November on mild days above 5 degrees Celsius, and they meaningfully reduce the amount of repair work needed before spring painting begins.
Yes. Book your spring exterior painting project now. The best teams in Toronto begin booking the spring season in February and March. Booking in November through January gives you access to preferred scheduling in May, which is the optimal spring painting window in Toronto. You can also complete any interior painting projects over winter so that the exterior is the sole focus in spring. Our interior painting service covers full interior painting scopes through the winter season.
Yes, on days when temperatures are above approximately 5 to 7 degrees Celsius and the surface is dry. Exterior acrylic latex caulk requires a minimum application temperature similar to paint to cure and bond properly. On relatively mild fall days in November, caulking failed joints before winter is valuable preventive maintenance. Avoid applying caulk to frozen or frost-covered surfaces, and confirm the forecast will stay above 5 degrees Celsius for at least 24 hours after application.
A high-adhesion exterior wood primer applied to bare wood areas before winter provides meaningful protection. Sherwin-Williams Exterior Latex Primer and Benjamin Moore Fresh Start are both reliable choices for previously painted wood where bare areas have been exposed. For bare or newly exposed wood on homes built before 1978 where lead paint may be present, follow safe handling protocols before scraping or sanding and consult our team about professional pre-winter prep. For tannin-rich species like cedar, an oil-based primer provides better sealing than acrylic exterior primer on bare wood.
Prepping your home for winter is one of the most important things you can do to protect your investment. By following these steps, you can help prevent damage and ensure your home is in good condition come spring. With these tips on winter exterior painting preparation, you should be well equipped to tackle the job.
More Interesting Blogs Related to DIY Painting Basics: Prepping Your Exterior for Winter
Need Your Exterior Assessed or Prepped Before Winter?
Home Painters Toronto has been assessing and painting Toronto and GTA exteriors since 1987. Call 416-494-9095 or email [email protected] for a FREE quote.