Embarking on the journey to tile your bathroom floor can seem like a daunting task, whether you’re stepping into the DIY world for the first time or you’re a seasoned home improvement enthusiast looking for a new challenge. The bathroom, with its moisture-laden environment and the need for a perfect blend of functionality and aesthetics, requires a careful approach. But fear not! With the right guidance and a touch of patience, you can transform your bathroom floor into a masterpiece of durability and style.
Let’s dive into a detailed, step-by-step bathroom tile guide that will empower you to take on this project with confidence.
Understanding Tile Types and Their Impact on Your Bathroom
Navigating the multitude of tile options for your bathroom flooring can initially feel like setting sail without a compass. Thankfully, we’re here to guide you with a sturdy hand on the tiller, ensuring that you find a tile that not only stands up to the unique demands of your bathroom environment but also harmonizes beautifully with your design vision.
Let’s cast a closer eye on the prime contenders: porcelain, ceramic, and natural stone.
Porcelain Tiles: The Hardy Mariners
Porcelain tiles are renowned for their resiliency and versatility, making them a commendable choice for bathrooms. Fired at high temperatures, they boast a low water absorption rate, which is exactly what you want in the splash zone of your bathroom. Not only are they dense and less porous, but porcelain tiles come in a spectacular array of designs, including convincing stone and wood lookalikes.
Pros:
- Highly water-resistant
- Sturdy and hardwearing
- Suitable for radiant in-floor heating
Cons:
- Can be on the pricier side
- Heavier, which may necessitate a stronger substrate
Natural Stone Tiles: The Majestic Schooners
For those yearning for the unrivalled luxury and unique character of natural materials, stone tiles are the jewel in the crown. Whether it’s the sleek sophistication of marble, the rustic charm of slate, or the earthy warmth of travertine, natural stone tiles make a statement that is as timeless as the ocean.
Pros:
- Unique patterns and textures
- Adds value to your property
- Exceptionally durable when properly maintained
Cons:
- Requires sealing to prevent staining
- Higher cost for material and installation
- Regular maintenance needed to preserve beauty
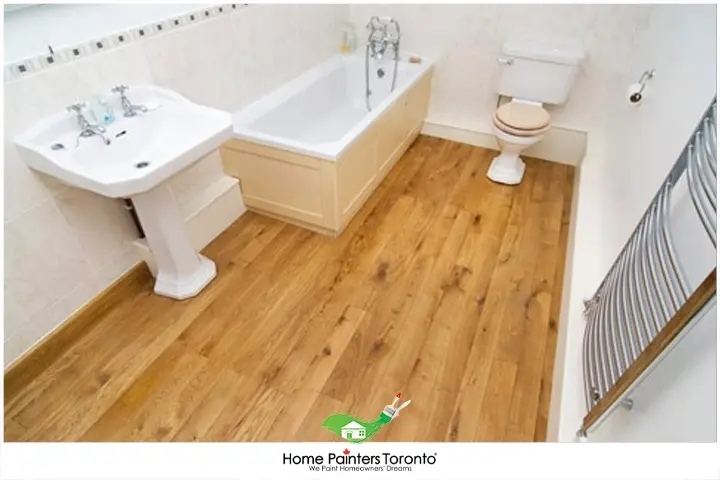
How to Tile a Bathroom Floor for Beginners
Now that your bathroom renovation project is underway, that means new fixtures, new walls, and even a new bathroom floor. Installing tile can seem like a daunting task, even in a smaller room like a bathroom. Luckily for you, this article provides easy-to-follow installation instructions on how to tile your bathroom floor and any other rooms that may need tiling!
Once you have picked out the tiles that you want on your bathroom floor, you can start the installation process. The materials that you purchase for your tile installation will depend on the type of tiles you choose, whether they be ceramic, porcelain, vinyl, cork, glass, or stone. We’ve included the most commonly needed items below, with our how-to guide covering the standard steps when it comes to tiling a bathroom floor.
Things That You Will Need For Tiling Your Bathroom Floor:
- Tiles
- Measuring Tape
- Mortar
- Grout
- Utility Knife
- 2 Large Buckets
- Sponge
- Old Towel
- Tile Spacers
- Saw
- Chalk Line
- Level
- Square
- Hammer/Nails
- Vacuum/Broom
- Pry Bar
- Notched Trowel
- Optional: Cement Board
Prep The Bathroom Floor For Installation
- Regardless of what kind of bathroom floor coverings are present, remove them and dispose of them.
- Check the sub-floor of your bathroom area and make sure it’s level and properly cleaned and vacuumed of any remaining dirt and debris.
- In the event that your sub-floor isn’t level, you will need to address that problem. This can take a lot of time and patience, but it’s important you do it well.
Mix & Apply Mortar
- Follow the instructions on the back of the mortar packaging and correctly mix it together in one of your buckets. The consistency should be thick and mud-like.
- An important tip to remember is to never mix more mortar than you can lay down within an hour’s time. This is because any leftover mortar will dry up and become unusable.
- Using a notched trowel, spread out a thin layer of mortar onto the subfloor as quickly and consistently as possible. Spread the mortar evenly in a sweeping back-and-forth motion.
Optional: Affix the Cement Board
- While not necessary, a cement board can reinforce the stability of your new flooring.
- Start by cutting the cement board to fit neatly over the top of the subfloor.
- Using a utility knife, score the cement board and lay it over the mortar you just applied to the subfloor. Secure it with nails and a hammer, and make sure the sub-floor is completely covered before applying more mortar over the top of the cement board joists.
- You will need to wait one whole day for the cement board to set and the mortar to completely dry.
Reference Where the Centre of the Bathroom Floor Is
- This step is important if you want to be accurate. It may not be necessary for those with previous flooring experience, but if this is your first time, we highly recommend you follow these instructions.
- Using a square, chalk a line perpendicular (90 degrees) from the wall across from the bathroom door.
- Following that, mark out another line perpendicular to the one you just created.
- These two chalk lines will serve as a reference for your tile installation.
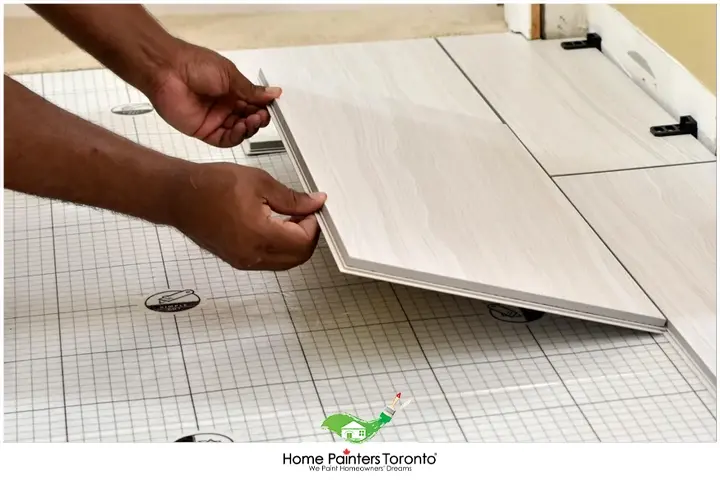
Lay The Tiles Down
- This part requires close attention to detail. Lay down two rows of tiles, one vertical and one horizontal, along the chalked guidelines.
- Adjust the tiles so that they fit snugly between the walls.
- Use the tile spacers to control your accuracy when it comes to how far apart the tiles are laid out.
- After the first two rows, you want to place the next tile in the furthest corner of the bathroom, and then work out towards the bathroom entrance.
- Press down on every tile after it has been laid on top of the mortar, and be sure it fits securely.
- You should use a level on the tiles that have been placed to ensure that they’re completely levelled off and perfectly flat.
- Depending on the fixtures on your bathroom floor, you may need to cut tiles to fit around them. Measure out the tiles that need to be fit and cut them with a saw.
- Let the tiles sit and dry according to the mortar instructions.
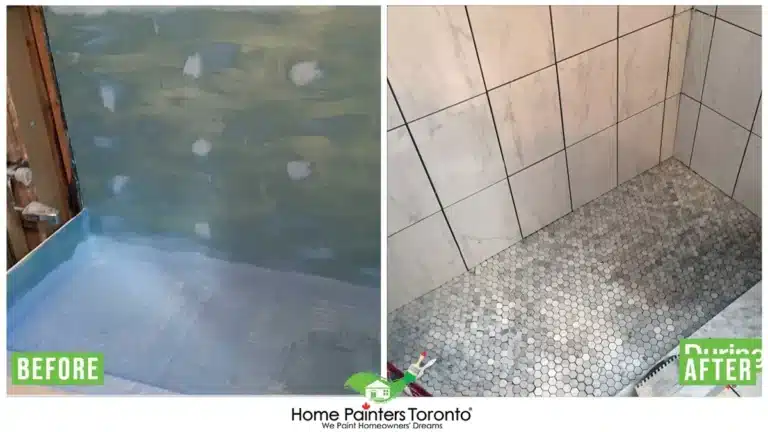
Grout the Tiles
- Once the tiles are ready to be grouted, it’s time to carefully pull out the tile spacers.
- Mix grout with just enough water in your other bucket, and apply it with a trowel over the tile lines. Do this in sections, and be sure to remove any excess grout on the tiles with a damp sponge as you go along. A sponge with rounded corners works best for this task.
- Don’t worry about the grout looking darker than you intended, it will dry to a lighter colour. If you are particularly concerned about the colour, however, dry a patch of grout with a hairdryer to determine what it will look like.
- Once you’re done grouting the tiles (and cleaning them of any excess grout), allow them to dry. Make sure no one steps on the tiles for at least a day or two.
Conclusion
How to tile a bathroom floor and walls is no small feat, but it’s a rewarding endeavour that not only enhances the beauty and functionality of your space but also adds value to your home. With a methodical approach, the right tools, and a sprinkle of patience, you can achieve professional-quality results.
Remember, the foundation of a successful DIY project is not just the technical know-how, but also the confidence to take the first step. You’ve got this! Keep this guide handy as you embark on your tiling journey, and don’t hesitate to seek assistance or clarification when needed. Your dream bathroom awaits!
Tiles are especially useful for bathroom maintenance because they are easy to clean and take care of. They are resistant to water, so they serve the bathroom both visually and practically. Bathroom tiling can be an exciting and visually stunning renovation! With patience and attention to detail, you will feel like a professional after you have learned how to tile your bathroom floor! But, if you don’t have time to tile a bathroom anytime soon, why not give Home Painters Toronto a call? They’ll help you out! Give Home Painters Toronto a call today at 416-416.494.9095 or email [email protected] to receive your free consultation and some modern bathroom floor tile ideas, as well as a free cost estimate for your bathroom floor tiling project. And don’t forget to follow us on all our social channels below!