
Painting Interior
Painting the interior of your house can be a very daunting task. But with patience, some guidance, and a bit of patience and expertise, anyone can take on the task themselves if they are motivated and enthusiastic.
In this article, we’ve put together some professional painting tips and tricks that will help you get started with your own interior painting project. And in case you are wondering how do professional painters paint interior walls, we’ve got you covered! We’ll go over the different types of paint, and we’ll also discuss how to prep your walls before painting them.
We’ve also provided the detailed interior and wall painting process step-by-step which will ensure that you’re able to complete any project with ease.
In what order do you paint the interior of a house?
When painting the interior of the house, the overwhelming question that lingers is, ” where should I start?” Fret not, this task can be simplified by targeting certain areas of the interior first to have a seamless transition between paint jobs. The rooms you choose to paint first are entirely up to you, if you want to get the hard work out of the way, start with the larger areas like kitchens, hallways, and master bedrooms.
- Start with the ceiling. This can be quite a tedious task, to begin with, but it is worth it to get it over with right at the beginning. Start by priming the ceiling and then applying the paint. It’s the area where you have the least amount of agency and paints splattering on other areas can be fixed later.
- Tackle the trim and baseboards. Think of the trim and baseboards as a frame to a photograph (your walls) get this done after the ceiling. If you get some paint on the walls when doing this, there is no harm because you still have not gotten to this step yet.
- Time to paint the walls. This is the most exciting step, get a top-notch primer, use a roller get some high-quality paint and enjoy the ride!
- Add a second coat of paint to ensure any blemishes or missed spots are covered. This will also let the paint stick better.
How do I start painting interior walls?
For some strange reason, walls seem to get the most attention in the painting world. Maybe it is because they are everywhere, and they can shape a room’s atmosphere. You want to do this task with no stone left unturned. Here are a few tips and tricks to begin to start painting interior walls.
- Get an appropriate light source. This is an overlooked tip that professionals use all the time when painting walls.
- By flashing lights on the walls, you get to see all the minor blemishes, things you missed and the overall quality of your painting skills.
- Set in painter’s tape along the convergence of the walls and ceiling.
- Get a top-quality primer and apply it if necessary. Benjamin Moore has a vast selection of elite primers for both exterior and interior purposes
- Paint alongside the edges with a 2-inch trim brush
- Roll on the paint to the walls. Now assuming that you have the best type of paint for the job to be done, try rolling in a “W” motion in order to get an even coat
- Let the paint dry for several hours. Flat paint takes a shorter amount of time compared to glossier finishes.
- Apply a second coat in the same fashion.
How to Paint Your Own House Interior
1. Move any furniture before house interior painting
- The first thing you do when painting the interior of your house or apartment is to be careful with any furniture or belongings.
- You can do this a few ways. The first thing is to move the furniture around the room depending on what you are painting.
- A good rule of thumb is to move the furniture in sections or piles so you don’t stumble or step on it or break anything.
- It is very common to move all the furniture to the middle of the room before painting the interior of your house. This gives you plenty of space to paint the interior walls, trim, and doors while staying clear of any furniture.
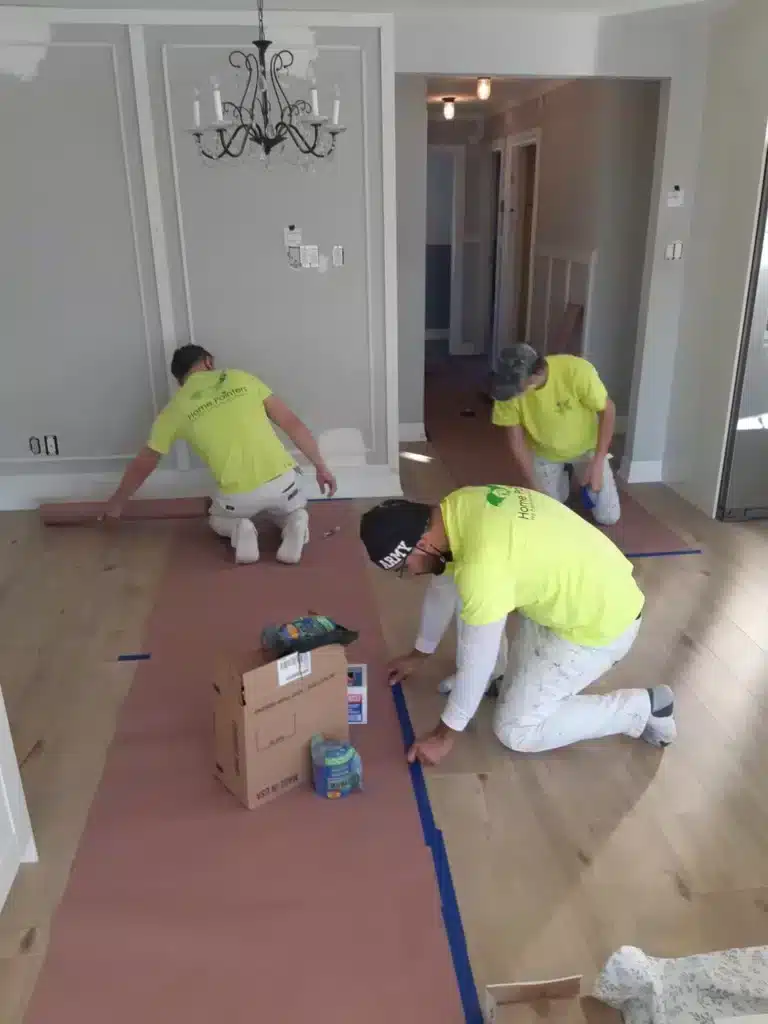
2. Protect all belongings
- You then have to protect the floors, furniture, etc with drop sheets and plastic. For the floors, sometimes it is just as well to tape plastic to the entire floor if there is hardwood and the room is empty. However, that isn’t always practical so sometimes cloth drop sheets are good enough.
- Plastic is always good to put on the furniture. If you are painting the interior for a client, this attention to detail also shows the client that you respect their belongings and are conscientious as well.
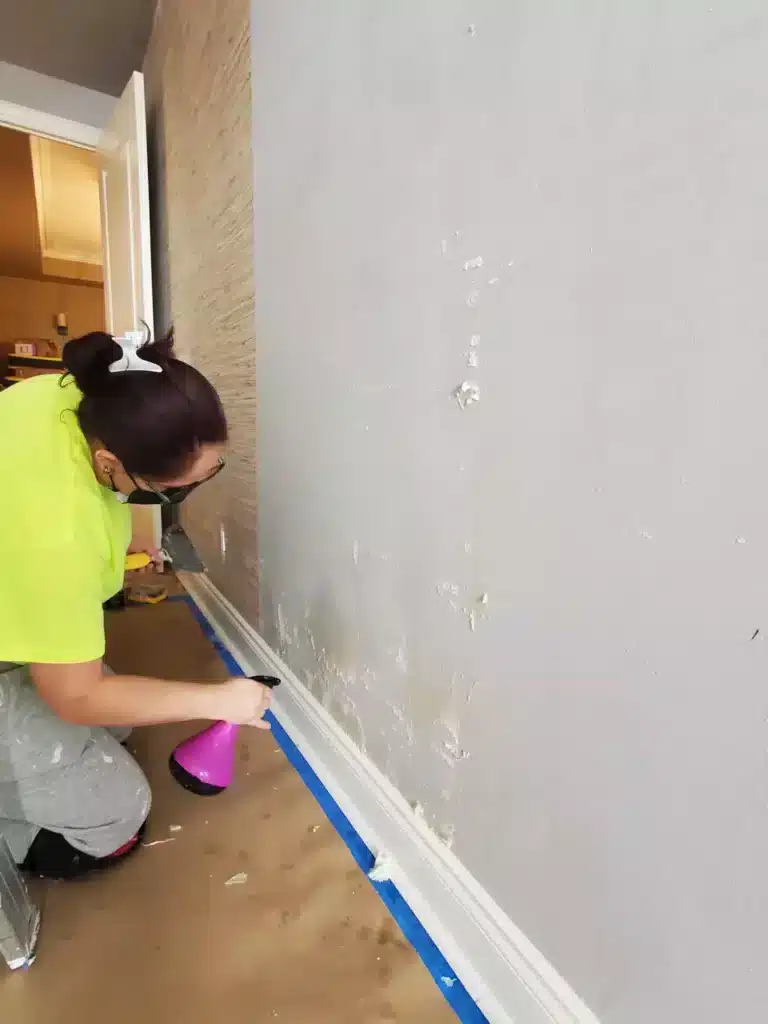
3. Surface Preparation before painting interior
- The surface preparation is the first part of the house interior painting. Preparing the walls can vary depending on the condition. But generally, it requires scanning the walls for holes, bumps, cracks, etc. You can fix these by filling them with filler or Polyfilla. A common product to use when you need the filler to dry fast is CGC Sheetrock 20. Trim as well can be caulked or filled depending on the condition as well.
Once the interior walls are filled, you want to sand them with fine sandpaper.
- The next stage before the final step of house interior painting is priming. If the walls were previously primed and painted then you just need to spot-prime those areas you filled and caulked.
There are many primers to use but latex primers are the most common. If there are crayons or magic markers due to kids writing on the wall a stain blocker will work better than a normal latex primer. If you are dealing with smoke and nicotine stains, then an odourless oil-based primer will work best. Smoke stains can be the worst to cover so to keep you from doing multiple coats this will save you some time.
4. Paint the interior
This is usually the fun part of the job. Usually, your edge in the corners and edge around all the frames, and windows first with a brush. Once that is done, with a roller and tray you can roll the big areas of the wall. Usually, 2 coats are done on most walls, sometimes 3 depending on if there is a dramatic colour change as well. Some paint brands cover better than others. Also, the quality of the paint is important as well.
- After all, many paint manufacturers have different qualities of paints for painting interiors, depending on the circumstance. We usually find Behr, Benjamin Moore, ICI Glidden, and Para all carry good lines of paint to choose from.
- Among all house interior painting activities, ceilings are a bit more difficult to paint since the entire room usually needs to be covered. When in doubt, call a professional house interior painter for the ceilings since it’s not worth it to get injured if you are not used to heights.
- Painting Interior Doors and Trim can be difficult also since trim, in particular, is usually all brushwork. Brushwork requires the most amount of expertise since it requires the ability to cut hard straight lines. Again, if you are unsure, then hire a professional painter to paint the interior or just do the trim work.
5. Clean up after painting interior
The clean up process requires vacuuming all debris and dust. Also, discarding all garbage, plastic drop sheets, materials etc. Then, of course, moving back all the furniture.
Top Related blogs on
“Tutorial – How to Paint The Interior of Your House”
Did this help make your decision as to who it should be when you hire a painting company? There is so much to think about in terms of finding the right painting contractors for the work you need to be completed. Let our professional house painters handle everything!
Call 416.494.9095 or email [email protected] for a FREE quote. And don’t forget to visit us on social media (below) as well!