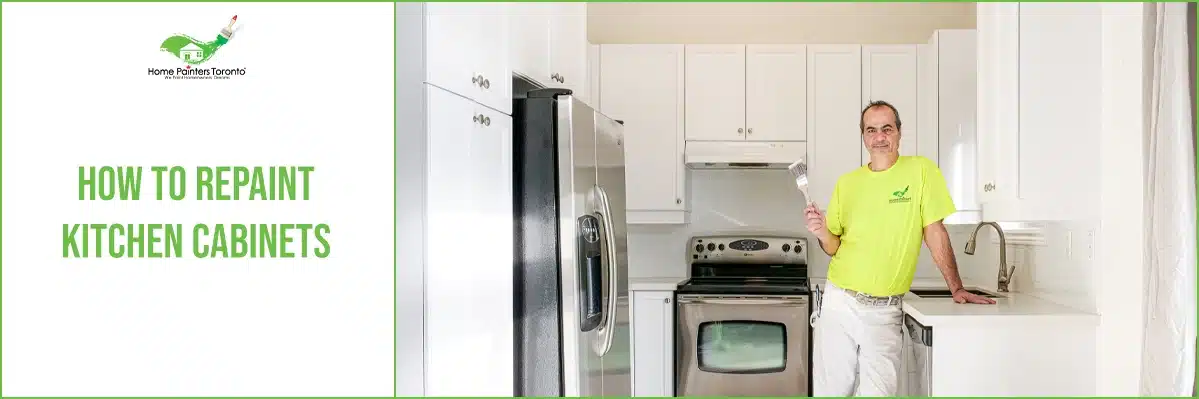
How to Repaint Kitchen Cabinet

Repainting kitchen cabinets is a great way to update your kitchen without spending a lot of money. It is an easy task that can make a big difference in your kitchen. Whether you’ve just moved into a new home or are about to sell your current one, repainting cabinets is a quick and cost-effective way to update your kitchen without breaking the bank. If you aren’t sure where to start, read on to find out how to paint kitchen cabinets professionally and make your kitchen look new again.

How to Repaint Kitchen Cabinets

Kitchen cabinet painting can be a tricky business! You are often painting on top of the wood that has urethanes and lacquers. And they aren’t always conducive to the adhesion of paint. Kitchen cabinet painting in Toronto has had big trend changes which make this process in very high demand. There are numerous ways to kitchen cabinet painting.

Painting Kitchen Cabinets For Beginners

Painting cabinets for beginners will take several days to complete, so plan accordingly. Always wear the appropriate safety gear and open the windows for ventilation.

Also, for best results, you should remove the doors and drawers and work on them in an area that’s out of the way, like a garage or basement. Make sure you’ll have proper ventilation there too.

Step 1: Assess the Cabinet’s Condition

Determine the condition of your cabinets. Surfaces that are already painted can be painted again if the existing paint is in good condition. If not, the old paint will need to be removed.

Stripping products are available that make this process easy. Simply apply with a brush, wait for the stripper to react with the old paint, then use a plastic scraper to peel it away. Once dry, remove the last of the paint with sandpaper.

Step 2: Empty the Cabinets and Remove the Doors

Empty the cabinets. You’ll be sanding later, which might get dusty. Remove the doors, drawers and hardware. As you’re removing the doors and drawers, label where they go with painter’s tape so you can reinstall them in the right spots. Place the hardware in a plastic bag or cup and label where it goes.

Step 3: Remove Dirt and Grease, and Repair Damages

Clean all surfaces with TSP cleaner to remove any grease and dirt. Repair damaged areas. Dents and holes can be filled with a wood filler. Use a putty knife to press it in and smooth it out. Let it dry according to the directions.

Step 4: Prep the Area and Sand

Can you repaint cabinets without sanding? Yes, but it’s not recommended. Sanding is the only way to ensure that your paint will adhere properly and last. If you don’t sand, your cabinets will probably peel off within a year or two. It will also be hard to get a smooth finish and even colour. And that makes your cabinets look cheap! So we recommend that you do some light sanding before painting. To do this, cover first your countertops, appliances and other areas you want to protect. Placing painter’s tape on the wall along the cabinet edges is helpful. Sand everything with medium grit sandpaper to help the paint stick to the surface. Fold the sandpaper to get into the detailed areas on doors and drawers, and in the corners of the frames.

Step 5: Vacuum the Area

Clean all surfaces with a vacuum and a tack cloth. Everything should be dust free before painting.

You can spray them or use a brush or roller. Spraying is a much more complicated process that’s often too difficult for the average DIY project. But brushing and rolling kitchen cabinets is a more economical and practical way to paint them. Here is a breakdown of how doing it that will beautify them for years to come! 

Step 1: Before Kitchen Cabinet Painting Process

Firstly, you’ll want to remove all the kitchen cabinet doors and hardware from the doors. After all, you don’t want to get primer or paint on any of the door knobs or hinges. 

Step 2: Remove Stains from Cabinets

Kitchen cabinets can often gather a lot of dirt and stains over the years due to food grease and spills. You’ll want to properly clean up any stains, oils or heavy grime from the cabinet surfaces.

Interior Kitchen Painting Design Home Painters

Step 3: Rough up Cabinet Surfaces

Then you need to rough up the smooth surfaces of the kitchen cabinets. You can rough up all the surfaces using very high-grit sandpaper (fine sandpaper). Be careful not to use sandpaper that is too coarse, as you will scratch the surfaces. You want to sand the surfaces enough so the primer and paint have a good base to adhere to.

Step 4: How to Prime Kitchen Cabinet Before Painting

Prime all kitchen cabinet surfaces with an oil-based primer.  Specialized latex primers can work also, but oil-based has been the preferred choice to ensure the best adhesion. The priming and the painting part require a skilled painter.

If the primer isn’t applied properly this will potentially ruin the finish of the kitchen cabinets. When applying the primer be careful not to put it on too thick as it will show lap marks and drip. At the same time, if it’s applied too thin then you will also get streaks which aren’t desirable either. Besides paint brushes, using sponge rollers is a good method when applying the primer. The proper application of the oil primer is essential in minimizing brush strokes and streakiness, for an ideal smooth finish.

Step 5: How to Repaint Kitchen Cabinets

This is where you apply the paint to the kitchen cabinets. Usually, two coats are desirable. When in doubt put two thin coats rather than one baby thick coat. Again, the key to getting a smooth ideal finish is the application. A combination of sponge rollers and brush applications is the way to achieve this. Allow at least 24 hours in between coats and much more if it is humidity in the air.

Step 6: Kitchen Cabinet Painting Finish

Which paint finishes to use on your kitchen cabinets? This is more of a preference but keep in mind that these kitchen cabinets need to withstand a lot of wear and tear, so choose wisely. Most commonly we use a latex satin, pearl, soft gloss, or a low-lustre finish. Oil-based paint can also be used and is a bit more durable, but they are generally very toxic smelling and difficult to use. Latex paints today are almost as durable, easier to use, environmentally friendly and easy to clean up.

Interior Kitchen Painting Design Home Painters - Cabinet Painting

Step 7: Refill Kitchen Cabinets

Once the paint has been dried for 48 hours, you can start to put the hardware and doors back on the kitchen cabinets. Keep in mind, if there is humidity in the air, it can take as long as a week or longer for the paint to totally dry and cure. So when in doubt, it’s better to wait longer rather than risk damaging or chipping them.

Once you have completed this process, you will have beautiful, up-to-date kitchen cabinets for years to come!

How to Spray Paint Kitchen Cabinets?

Spraying is a skill that takes time to learn and get used to, but it isn’t hard. I recommend practicing on cardboard before pulling the trigger on your cabinets. Always spray two coats of primer and two coats of paint, sanding in between each coat. It’s important to not only use a levelling paint for cabinets but to also follow the recoat times, allowing the coating to dry before shooting the next coat.

You can spray the doors without a spray booth but always wear a respirator, especially indoors. Set up a couple of box fans to filter dust particles away from the spray area. There are also portable spray tents that make it easier to spray inside a garage without bombing everything with over-spray.

What is the Most Popular Kitchen Cabinet Colour for 2023?

White is still the most popular kitchen cabinet colour in 2023 and beyond. However, we are seeing a shift towards warmer and more natural tones. We cover the best colours for cabinets from Benjamin Moore and Sherwin Williams like Simply White, Dove White, and Chantilly Lace.

A fresh coat of paint and an inexpensive hardware swap can make a huge difference in your space. White kitchen cabinets have been around for years and will be around for years to come for a good reason: it’s a timeless look that will never go out of style.

Kitchen Cabinets Color Combination Pictures

Brown Kitchen Cabinets with Grey Walls – This colour combination of gray walls and brown kitchen cabinets can look great together. The gray-coloured walls can feature both dark and light cabinets in your kitchen.

Light Tan White Charcoal Kitchen Colour Palette

Color Schemes for Kitchens with Brown Cabinets

Dark Brown Kitchen Cabinets With White Walls In your kitchen, you can install dark brown cabinets covering the white walls. The white walls in your kitchen should feature a few beautiful cabinets that could add more value to the overall kitchen area.

Wooden Brown Kitchen Cabinets With White Tiles The white tiles in your kitchen can make the brown wooden cabinet look a little more special. It can be a very special blend of these two colours. This is another wonderful idea you can consider while searching for colours matching brown cabinets in the kitchen.

Acrylic White and Brown Kitchen Cabinets – If you are looking for brown acrylic kitchen cabinets, you can think about having a mix of white and brown cabinets in your kitchen. Both these colours will complement each other in a great way to make the kitchen area look a little more classy and elegant.

Orange Cupboards with Brown Kitchen Cabinets – When you are all set to install brown kitchen cabinets, it is worth considering some orange cupboards. These will certainly make a good sense of comfort and attractiveness together. So, try to blend these two things together to beautify your kitchen. It could be among the best brown lamination ideas you have used.

White Kitchen Colour Palette

Bright Red and Brown Kitchen Cabinets – It is also wonderful to use bright red and brown cabinets. If you cannot find colours matching the existing kitchen cabinets, bright red could be the colour that will boost the overall appeal. Bright red is an ideal colour to use with your brown acrylic kitchen cabinets.

Average painting kitchen cabinets costs. The average cost of painting kitchen cabinets is $100 per drawer face and $175 per cabinet door. This usually averages out to a cost of $5,000 for a medium-sized kitchen. However, the cost commonly ranges from $3000 to $10,000.

More Interesting Blogs Related to

“How To Repaint Kitchen Cabinets”

With over 35 years in the painting business, Home Painters Toronto knows how to give you that professionally painted home that will last for decades. We will help you with common paint problems and show you the latest painting and home renovation trends. Don’t forget to check out our Pinterest page for an inspiring look at all sorts of kitchen cabinets!

Call 416.494.9095 or email brian@HomePaintersToronto.com for a FREE quote for your home painting needs. And don’t forget to check us out on our social media channels below!