

How To Properly Paint Over Wallpaper
Painting over wallpaper is a legitimate option for Toronto homeowners in specific circumstances, and one of the most misunderstood interior painting decisions our team is asked about every season. Home Painters Toronto, the HomeStars Best of Award 2026 winner with over 1,200 positive reviews and 37 years serving the GTA, handles wallpaper removal, wallpaper painting, and full interior painting projects across North York, Etobicoke, Scarborough, and Leaside. The professional answer on painting over wallpaper is not a blanket yes or no. It depends on the wallpaper type, the condition of the paper and the wall behind it, and whether the budget and timeline justify removal versus painting. This guide covers when painting over wallpaper works, when it fails, and the preparation process that determines the difference.
Outdated and dreary wallpaper that has been on walls for decades is a common challenge in Toronto homes, particularly in older neighbourhoods where heritage homes retain their original wall treatments. The cost and complexity of wallpaper removal, especially on 70 year old plaster walls where removal risks damaging the substrate behind it, makes painting over wallpaper an appealing alternative in specific circumstances.
The question is not simply whether painting over wallpaper is possible. The real question is whether the specific wallpaper, in its current condition, on the specific wall type behind it, is a suitable candidate for painting. Our wallpaper installation and removal service handles both scenarios: complete professional removal, and professional painting over wallpaper when conditions are right for it.
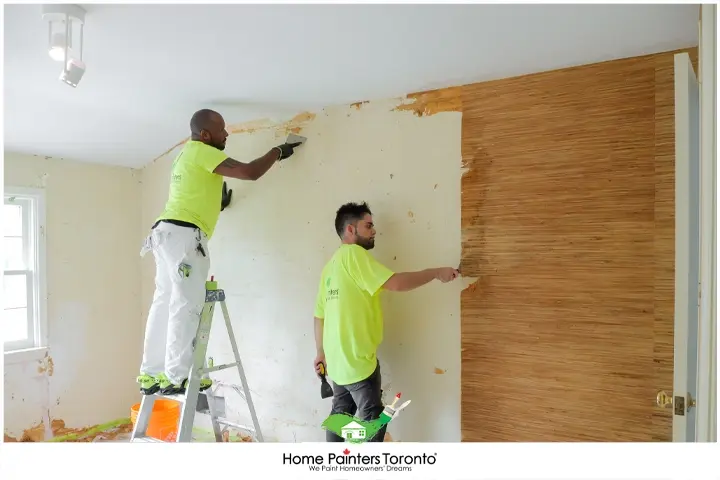
Condition assessment comes before any decision — firmly adhered traditional paper wallpaper with flat seams is a reasonable candidate for painting over; vinyl coated or peeling wallpaper is not.
Painting Over Wallpaper in Toronto: When It Works and When It Does Not
Toronto homes present specific wallpaper situations that affect this decision. According to CMHC guidance on home maintenance and moisture management, older residential wall substrates in Canadian homes are particularly susceptible to moisture related damage during wallpaper removal. When the wallpaper was applied to unprimed drywall, or directly to old plaster without a barrier coat, removal frequently tears the drywall face paper or damages the plaster surface. In these situations, painting over the existing wallpaper avoids creating a larger repair scope than the cosmetic problem being solved.
Vinyl coated wallpaper is the main exception. Paint does not bond to vinyl surfaces without aggressive surface preparation, and even with preparation, the paint film often fails at the seams where the vinyl edges resist adhesion. Vinyl wallpaper is also typically easier to remove than traditional paper wallpaper, which removes the primary argument for painting over it. The rule that guides professional assessment is: if the wallpaper is easy to remove and is vinyl coated, remove it. If the wallpaper is firmly bonded traditional paper on a fragile substrate, painting over it is a defensible option when the surface is correctly prepared.
| Condition | Paint Over It? | Reason |
|---|---|---|
| Firmly adhered traditional paper wallpaper, flat seams, no bubbles | Yes, with proper prep | Good adhesion base; seams can be plastered flat; oil based primer blocks adhesive bleed through |
| Vinyl coated wallpaper | No; remove first | Paint does not adhere reliably to vinyl; vinyl is also relatively easy to remove |
| Peeling or bubbling wallpaper in multiple locations | No; address the cause first | Peeling indicates adhesion failure or moisture intrusion; painting over it accelerates the failure |
| Wallpaper on old plaster walls where removal risks damage | Yes, with thorough prep | Protecting the plaster substrate justifies painting over; prep quality is critical |
| Wallpaper on unprimed drywall where removal tears the face paper | Yes, with repair and prime | Removing paper tears drywall face; painting over (with repair of damage already done) is preferable |
| Multiple layers of wallpaper stacked | No; assess individually; usually remove | Each layer adds moisture risk and adhesion complexity; painting typically fails within one season |
| Wallpaper with heavy embossed texture | No; sand or remove texture first | Texture shows through even two coats of paint; any sheen in the paint amplifies the pattern |
Checking the Condition of Wallpaper Before Painting Over It
Condition assessment is the non negotiable first step in any wallpaper painting project. Seams that are raised or lifting, air bubbles beneath the paper, torn sections, and areas where the wallpaper has pulled away from the substrate all become significantly more visible once the wall is painted. Paint makes imperfections more apparent, not less, particularly under any reflective sheen such as eggshell or satin.
Textured wallpaper presents the hardest scenario. Embossed patterns, heavily textured vinyl look wallpapers, and fabric backed wallpapers with pronounced surface relief all telegraph through paint regardless of how many coats are applied. A full sanding of the textured surface is required before painting in these cases, and even then the result rarely achieves the clean wall appearance that removal followed by skim coating would produce.
Professional painters typically advise full removal as the first choice when the surface condition and wall substrate allow it. Our guide on removing very old wallpaper covers the full removal process, including what to do when removal damages the wall surface behind the paper. Removal makes painting permanently cleaner. Painting over wallpaper is the better option only when removal creates a worse outcome than the wallpaper itself.
Repairing Wallpaper Seams Before Painting Over Them
Seam repair is the most important preparation step on any wallpaper painting project. The joints between wallpaper panels are visible through paint as raised lines or shadow lines, particularly in any lighting that rakes across the wall. All seams require plastering from ceiling to floor with joint compound or spackle, sanding smooth after drying, and checking under raking light before priming. Any seam that remains slightly raised or slightly recessed will show through the finished paint coat.
The drying time for seam filler must be respected before sanding. Toronto homes in winter with forced air heating and indoor humidity at 20 to 30% dry joint compound faster than manufacturer labels suggest. In summer above 60% humidity, drying is significantly slower. Sanding before full drying tears the compound and creates an uneven surface. Each seam repair is sanded with 120 grit followed by 220 grit for the smoothest possible result before priming.
Fixing Lifting Edges and Curling Seams on Wallpaper Before Painting
Lifting edges and curling seams are the most visible wallpaper defects once painted, and the most likely to cause paint failure within the first year. Where rips and tears are minor, wallpaper adhesive paste is applied to reattach the lifting section firmly to the wall, and the edge is pressed flat and held until the adhesive sets. A damp cloth removes excess adhesive from the surface before it dries.
Sections that have pulled away significantly or are beginning to hang down require removal of that section followed by a skim coat of joint compound across the entire exposed area. The compound is feathered at the edges to blend into the surrounding wallpaper surface, sanded smooth when dry, and primed with oil based primer before any topcoat is applied. This is a repair that matches the adhesion and surface quality of the surrounding wallpaper while eliminating the hanging section that would bubble and lift under paint.
All seam and edge repairs on the full wall are completed before primer is applied. Working section by section, repairing only obvious areas and then priming, consistently produces missed defects that show in the finished work under the final topcoat.

Zinsser BIN shellac based primer cures in 15 to 30 minutes and draws moisture away from the wallpaper as it dries — the product our team specifies most often for painting over wallpaper in Toronto homes.
Wallpaper Types That Cannot Be Successfully Painted Over in Toronto
Certain wallpaper conditions make painting over the surface inadvisable regardless of how thorough the preparation is. Wallpaper that is peeling in several locations indicates either adhesion failure at the wall or active moisture intrusion from behind the wall. Painting over peeling wallpaper seals the surface but does not address the underlying failure, and the new paint peels with the old wallpaper within months. The moisture or adhesion problem must be addressed before any surface treatment is applied.
Vinyl wallpaper is the second categorical exception. Paint does not bond to vinyl regardless of how thoroughly the surface is sanded and primed with standard products. Vinyl wallpaper also tends to lift at seams and edges when water based products are applied over it, making the result worse after painting than before. Vinyl wallpaper is generally easier to remove than traditional paper, which removes the main justification for painting over it.
The governing principle is straightforward: wallpaper that would be difficult to remove is almost always a good candidate for painting over. Wallpaper that would be easy to remove almost always should be removed before painting.
Fixing Surface Imperfections on Wallpaper Before Painting
Surface imperfections on wallpaper that will be painted require filling with spackle, plaster, or joint compound. The filler is applied over the imperfection, allowed to dry fully, and sanded with 120 grit sandpaper until the surface is flush with the surrounding wallpaper. All sanding dust is wiped away with a damp cloth before priming.
Peeling seams at edges are the most vulnerable points in a wallpaper painting project. The approach for these areas involves applying a thin layer of wallpaper adhesive to reattach the loose pieces, or lifting the loose sections and cutting away any material that cannot be reattached cleanly, then filling the resulting gap with spackle to produce a level surface after sanding.
Textured surfaces require the most preparation of any wallpaper scenario. The entire wall is sanded using a palm sander until the texture is as smooth as possible, then wiped with a damp cloth to remove all sanding dust. Even with thorough sanding, some texture may remain detectable under the finished paint, particularly if the topcoat is applied in a satin or semi gloss sheen. Flat finish hides surface texture best on walls painted over textured wallpaper.
Primer Selection for Painting Over Wallpaper: A Toronto Professional's Guide
Primer choice is the most technically consequential decision in the entire painting over-wallpaper process. The primer must do three things simultaneously: seal the wallpaper adhesive so it does not bleed through the topcoat and cause staining, prevent moisture from the water based topcoat from penetrating the wallpaper and releasing the adhesive bond to the wall, and create a paintable surface that the topcoat adheres to evenly.
| Primer Type | Performance on Wallpaper | Recommended Product | Toronto Use Case |
|---|---|---|---|
| Oil based primer | Excellent: seals adhesive bleed through; does not wet the wallpaper face; best adhesion base for topcoat | Benjamin Moore Fresh Start Oil Based; Sherwin Williams Exterior Oil Based Primer (used for interior on wallpaper) | Standard choice on most Toronto wallpaper painting projects; requires ventilation; takes 24 hours to dry |
| Shellac based primer (e.g., Zinsser BIN) | Excellent: fastest drying (15 to 30 minutes); superior stain and odour blocking; draws moisture out of wallpaper rather than into it | Zinsser BIN Shellac Based Primer | Preferred when wallpaper is old and may have adhesive that stains; faster project timeline; requires denatured alcohol for cleanup |
| Latex / acrylic primer | Poor on wallpaper: water based formula wets the paper face and can lift the wallpaper adhesive, causing bubbling and delamination | Not recommended for painting over wallpaper | Avoid on all wallpaper painting projects; use only on wallpaper that has been fully removed and skim coated |
Zinsser BIN Shellac Based Primer is the product our team most commonly specifies for painting over wallpaper in Toronto homes. Its fast cure time (15 to 30 minutes to recoat), stain blocking performance, and the fact that it draws moisture away from the wallpaper rather than pushing it through all make it the most reliable choice for this application. The Zinsser BIN Shellac Based Primer product page provides full technical data including coverage rates and cleanup requirements.
Prepping the Wall for Painting Over Wallpaper: The Primer Stage
Oil based primer is applied over the full wall surface after all repairs have been completed and sanding dust has been removed. The primer must cover the complete wallpaper surface from edge to edge. Spots missed by the primer allow water based topcoat moisture to reach the wallpaper in those areas, causing bubbling and delamination at those specific locations, typically within hours of the first topcoat application.
Shellac based primers offer the advantage of faster drying and slightly lower odour than traditional oil based products, though both require ventilation during application and through the drying period. Mineral spirits are needed for cleanup of oil based primer; denatured alcohol is required for shellac based products. Both are significantly more effective on wallpaper than any water based primer alternative.
After primer is dry, the wall is inspected once more under a portable work light held at a raking angle. Any remaining imperfections, bubbles, or raised seams that were not visible before priming often become apparent at this stage. Addressing these before the topcoat is applied takes a fraction of the effort required to correct them after the topcoat is done.
Oil Based vs Shellac Based Primers on Wallpaper: What Each Achieves
Both oil based and shellac based primers block adhesive staining and prevent water based topcoat moisture from penetrating the wallpaper. The performance difference between them is primarily in dry time and cleanup requirements. Oil based primers dry in 24 hours at normal Toronto indoor temperatures. Shellac based primers dry in 15 to 30 minutes and are ready for topcoat in under an hour.
The pungent odour of oil based primer is a real consideration in occupied Toronto homes. Shellac based primer has a noticeably lower and faster dissipating odour, which makes it the more practical choice in homes where rooms must be used again quickly. A shellac based primer also has the specific advantage of drawing moisture outward from the wallpaper surface as it cures, rather than pushing moisture through the face paper toward the adhesive, which further reduces the risk of wallpaper delamination during the project.
After the primer coat is dry, the wall is inspected once more and any bubbles or newly visible seams are addressed before topcoat application. Latex paint can then be applied over either oil based or shellac based primer in the normal two coat standard for interior painting.
Applying Paint Over Primed Wallpaper: What a Professional Topcoat Involves
Paint is applied over primed wallpaper the same way it is applied to any other properly prepared interior wall. Two coats of quality latex interior paint in the chosen colour and finish are the standard. The finish selection matters specifically on wallpaper: flat or eggshell finishes hide remaining surface texture better than satin or semi gloss. Our guide on wallpaper vs paint covers the broader decision context if the comparison between removing versus painting over is still being evaluated.
Dark coloured wallpaper under light paint requires additional coat coverage. An oil based or shellac based primer in a tinted formulation, tinted to a mid point between the wallpaper colour and the topcoat colour, reduces the number of topcoats needed to achieve full opacity. Without a tinted primer, dark wallpaper can require three or more coats of light paint to produce uniform coverage.
Between coats, the first coat must dry fully before the second is applied. In Toronto homes during winter with forced air heating, drying can be faster than the label suggests. Rushing a second coat over a tacky first coat causes lifting, streaking, and uneven film thickness that shows in the finished wall. A light sand between coats with 220 grit, where raised areas or texture are detected, produces the best second coat result.
Paint Over Wallpaper vs Remove Wallpaper: The Toronto Decision Framework
The choice between painting over wallpaper and removing it before painting determines the long term quality of the finished wall. Painting over wallpaper is a compromise solution that is appropriate in specific circumstances. It is never the preferred professional outcome where removal is feasible without damaging the wall.
| Factor | Paint Over Wallpaper | Remove Wallpaper Then Paint |
|---|---|---|
| Wall substrate risk | Best when substrate (old plaster, unprimed drywall) would be damaged by removal | Preferred when substrate is modern drywall in good condition |
| Long term finish quality | Good, if prep is thorough; seams may show faintly under raking light | Best possible result; wall is smooth drywall or skim coated plaster |
| Cost | Lower: no removal labour; no skim coat required | Higher: removal labour; skim coat often required after removal |
| Time to complete | Faster: 1 to 2 days for a standard room including prep and paint | Longer: 3 to 5 days including removal, drying, skim coat, prime, and paint |
| Future wallpaper removal difficulty | Significantly harder; paint seals the wallpaper to the wall permanently | Normal removal difficulty when next change is needed |
| Bubble and delamination risk | Present; latex primer over wallpaper almost guarantees bubbling | None; wall is a clean primed surface |
| Best outcome for | Rental properties, occupied homes with plaster walls, budget constrained projects | Owned homes, pre sale preparation, long term renovation projects |
Cost of Painting Over Wallpaper in Toronto in 2026
Professional painting over wallpaper in Toronto costs less than removal followed by painting because it eliminates the removal labour, adhesive washing, and skim coating steps. The prep and painting scope is still more involved than a standard wall repaint because seam repair, edge reattachment, and oil based priming add time. Home Painters Toronto is WSIB compliant, fully insured to $5 million general liability, and all interior painting is backed by a lifetime warranty. All prices below are in CAD and exclude HST.
| Scope | Estimated Cost (CAD) | Notes |
|---|---|---|
| Paint over wallpaper (single room, standard condition) | $600 – $1,200 | Seam repair, edge reattachment, oil based prime, two topcoats |
| Paint over wallpaper (heavily textured or damaged wallpaper) | $900 – $1,800 | Additional sanding and repair scope; more prep time per square metre |
| Full wallpaper removal plus skim coat plus painting (single room) | $1,200 – $2,500 | Higher upfront cost; permanent wall quality improvement |
| Wallpaper removal only (single room) | $600 – $1,500 | Includes adhesive washing; skim coat and painting priced separately |
| Interior painting (per room, no wallpaper involved) | $400 – $900 | Standard room; includes prep, prime if needed, two topcoats |
For a full breakdown of interior painting costs, see our interior painting cost guide.
Real Project: Painting Over Wallpaper in a 1940s East York Home
East York 1940s Detached: Plaster Test Removal Confirms Risk, Full Painting Over Wallpaper with Zinsser BIN, Two-Day Completion
A homeowner in East York contacted Home Painters Toronto to address dated floral wallpaper in the dining room and hallway of their 1940s detached home. The wallpaper had been on the walls since the 1970s and was firmly bonded to original plaster throughout both rooms. A test removal on one small section confirmed the concern: the plaster pulled away from the lath behind it at the seam edges, creating a repair scope that would have involved extensive re plastering before any painting could begin.
Our team assessed the full wallpaper condition across both rooms. All seams were examined by pressing along their full length. Three seams in the hallway had minor lifting at the top edge, and one area in the dining room had a small bubble approximately 30 cm in diameter at mid wall height. These areas were repaired with wallpaper paste at the seams and spackle at the bubble, sanded smooth, and confirmed flat under a raking work light before any primer was applied.
Zinsser BIN Shellac Based Primer was applied to the full wall area in both rooms in one coat, allowed to cure for 25 minutes, and the wall was inspected again under raking light. No bubbling was detected, and two previously unnoticed seam ridges were identified, spot sanded, and reprimed before the topcoat proceeded. Two coats of Benjamin Moore Regal Select in Eggshell finish were applied in a warm neutral tone. The full project across both rooms was completed in two days. The homeowner noted that the wallpaper pattern was entirely invisible under the finished paint.
Home Painters Toronto is WSIB compliant, fully insured to $5 million general liability, and all interior painting is backed by a lifetime warranty. For completed projects, visit our Toronto painting projects page. Same day free estimates are available seven days a week across the GTA.
Conclusion: When Painting Over Wallpaper Works and When Removal Is Better
Painting over wallpaper is possible with the right conditions and the right preparation, and it is often the smarter choice on Toronto homes with old plaster walls where removal creates more damage than it solves. The key is honest condition assessment, thorough seam and edge repair, oil based or shellac based priming without exception, and a quality latex topcoat in two coats. Removal is always the cleaner long term outcome where it is feasible.
Frequently Asked Questions About Painting Over Wallpaper
Painting directly over wallpaper without proper preparation always fails. The surface must be assessed for condition, all seams repaired and sanded flat, all lifting edges re adhered, all bubbles resolved, and the full surface primed with an oil based or shellac based primer before any water based topcoat is applied. Skipping the oil based primer step allows water from the latex paint to penetrate the wallpaper face and release the wallpaper adhesive, causing bubbling and delamination within hours of application.
Oil based primer or shellac based primer are the only two correct options when painting over wallpaper. Both seal the wallpaper adhesive and prevent water based topcoat moisture from penetrating the paper and releasing the adhesive. Shellac based primer (such as Zinsser BIN) dries in 15 to 30 minutes and has lower odour than oil based alternatives. Latex or acrylic primer applied over wallpaper causes bubbling and is the most common cause of wallpaper painting failure.
Removal is almost always the better long term choice when the wall substrate can withstand it. A painted wall without wallpaper beneath it is smoother, more durable, easier to repaint in the future, and free from the risk of seams showing under raking light. Painting over wallpaper is the better choice when the wall substrate is old plaster that would be damaged by removal, when the wallpaper is firmly adhered on every seam and edge, and when the budget or timeline does not allow for the full removal and skim coat scope.
Vinyl wallpaper should not be painted over. Paint does not bond reliably to vinyl surfaces regardless of preparation, and vinyl seams and edges lift under water based products. Vinyl wallpaper is also typically easier to remove than traditional paper wallpaper, which removes the main justification for painting over it. If vinyl wallpaper is encountered, removal followed by skim coating and painting is the correct approach.
Bubbling after painting over wallpaper is caused by one of two problems: water based primer or topcoat moisture penetrating the wallpaper face and releasing the wallpaper adhesive from the wall, or pre existing air pockets beneath the wallpaper that were not detected and repaired before painting. Both causes produce the same visible result: rounded bubbles that appear within hours of painting. The solution is to wait for the paint to cure, assess whether the bubble is repairable by puncturing and re adhering, and determine whether the underlying adhesion failure is isolated or systemic.
Professional painting over wallpaper in Toronto costs between $600 and $1,200 for a standard room in good condition, including seam repair, oil based priming, and two topcoats. Heavily textured or damaged wallpaper adds prep time and runs $900 to $1,800 per room. Full removal plus skim coat plus painting is more expensive at $1,200 to $2,500 per room but produces a higher quality permanent result. All quotes from Home Painters Toronto are free and provided same day.
More Helpful Blogs Related to How To Properly Paint Over Wallpaper
Painting Over Wallpaper or Need Full Removal in Toronto?
Home Painters Toronto is the HomeStars Best of Award 2026 winner with a lifetime warranty on all interior painting. Call 416-494-9095 or email [email protected] for a FREE same-day estimate.