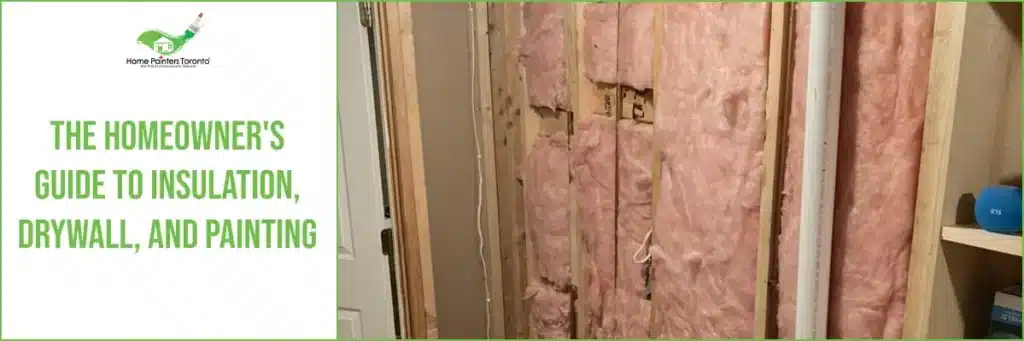
When renovating or building your home, a few aspects are as crucial as proper insulation, drywall installation, and painting. These steps not only ensure your home is comfortable and energy efficient, but they also contribute to its overall aesthetic appeal.
In this comprehensive guide, we’ll take a deep dive into the world of these stages of home transformation, breaking down the benefits and intricacies of each step. We’ll also provide some tips and tricks to help make your project go smoothly. So, let’s get started!
Insulation: Keeping Your Home Comfortable and Efficient
Insulation is a key component in keeping your home comfortable throughout the year. It acts as a barrier to heat loss and gain, particularly in roofs, walls, and floors, making your home more energy-efficient and cozy.
The Importance of Proper Insulation
- Energy Efficiency: It reduces the need for heating and cooling, lowering energy bills.
- Comfort: It keeps your home warmer in the winter and cooler in the summer, enhancing comfort.
- Noise Reduction: Soundproof insulation can also help reduce noise from outside and between different rooms and floors inside your home., making it more peaceful and quiet.
How Insulation Works
Insulation works by resisting the flow of heat. Heat flows from warmer to cooler areas until there is no longer a temperature difference. In your home, this means in the winter, heat flows directly from all heated living spaces to adjacent unheated attics, garages, basements, and even to the outdoors. During the summer, heat flows from the outdoors to the interior of your house. It provides resistance to this heat flow, maintaining your home’s temperature.
Types of Insulation
Choosing the right type for your home depends on where you need to install or add insulation and the recommended R-values for areas you want to insulate. R-value is a measure of insulation’s ability to resist heat travelling through it.
- Blanket Batts and Rolls: Made from fibreglass, mineral wool, plastic fibres, or natural fibres. Suited for spaces without many obstructions like pipes or wiring.
- Foam Board or Rigid Foam: Offers high value for relatively little thickness. It can be used to insulate almost any part of your home, from the roof down to the foundation.
- Spray Foam: Applied wet and expands into a thick foam that can be used in wall cavities, and is great for sealing around windows and doors.
- Loose-fill and Blown-in: Made from cellulose, fibreglass, or mineral wool. Ideal for adding insulation to already finished areas, irregularly shaped areas, and around obstructions.
- Reflective Insulation: Reflects heat away from your home and is usually used in attics to reduce the heat from the sun.
Where to Insulate in Your Home
There are several areas in your home where insulation plays a critical role. Focusing on these areas will yield the most significant benefits in terms of comfort and energy efficiency.
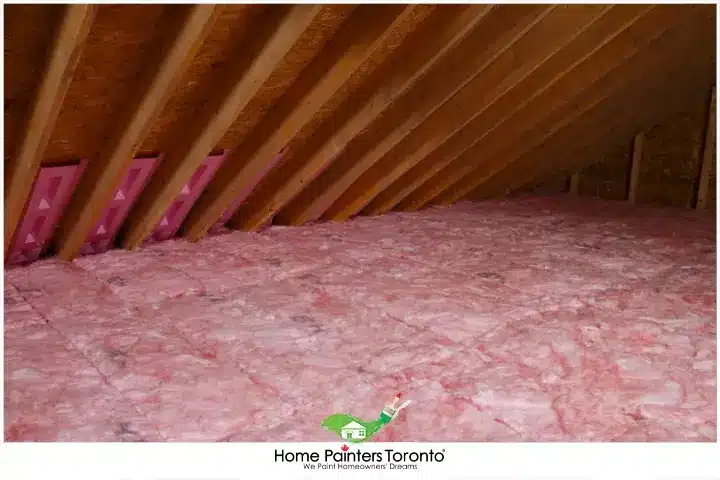
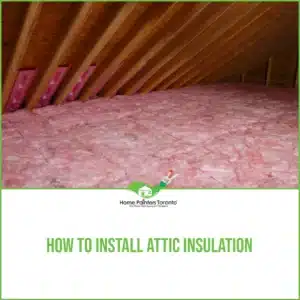
Attic Insulation
- The desirable R-value for attic insulation in Toronto is R50 to R60
- Prevents heat loss through the top of the house
- Helps maintain a consistent temperature
- Reduces the load on your HVAC system
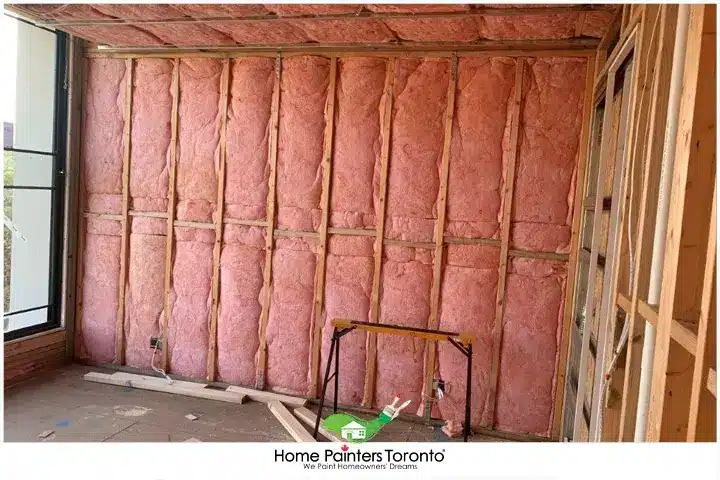
Wall Insulation
- Common types include:
- Blown-in cellulose, fibreglass, or rock wool
- Can be added to existing walls through the interior or exterior
- Cavity insulation can be installed during new builds or renovations

Floor Insulation
- Important for over garages, crawl spaces, or unheated basements
- An effective barrier against air and moisture infiltration
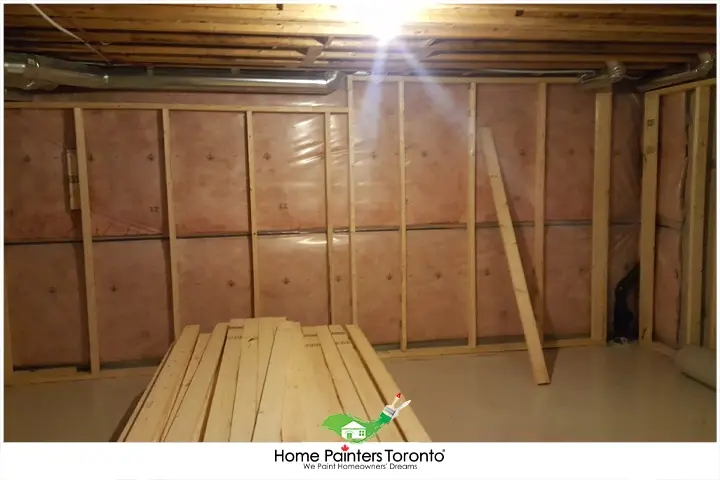
Basement Insulation
- Lowers the relative humidity, preventing moisture issues
- Helps control temperature and can improve the comfort of the space
- Reduces the potential for mould growth
Installation Tips
- Choose the Right R-Value: The R-value measures the insulation’s resistance to heat flow. The higher the R-value, the better the insulation performance. Check local building codes for recommended R-values in your area.
- Seal Gaps: Before installing insulation, seal all gaps and cracks with caulking or foam sealant. This step is crucial for preventing air leaks.
- Wear Protective Gear: Insulation materials can irritate the skin and lungs. Always wear gloves, a mask, and protective eyewear during installation.
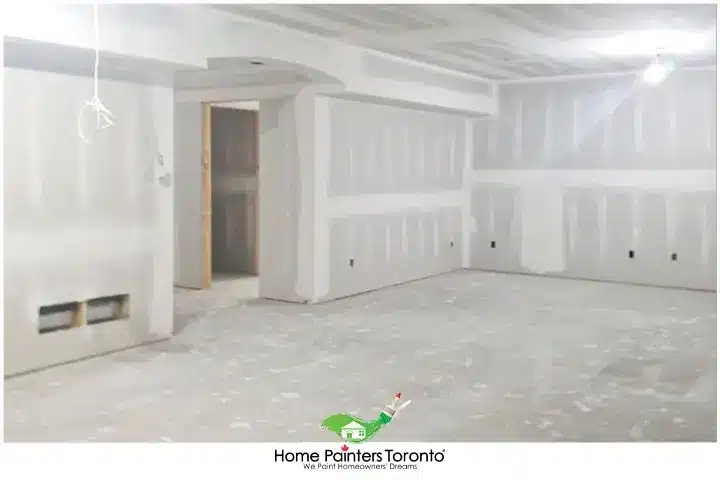
Drywall: The Foundation of Your Walls
Drywall, also known as plasterboard or gypsum board, is one of the fundamental building materials used in almost every home. It is a panel made of calcium sulphate dihydrate (gypsum) sandwiched between two thick sheets of paper. It comes in different types and sizes, each suited to a particular application.
Why Use Drywall?
- Efficiency: It is easier, faster, and cheaper to install than traditional plaster walls.
- Fire Resistance: It is inherently fire-resistant due to its gypsum content.
- Versatility: Available in various types, drywall can meet different needs, from moisture resistance to soundproofing and fire resistance.
- Smooth Finish: It provides a smooth surface ready to be painted or wallpapered.
Types of Drywall
Several types of drywall cater to various needs and building requirements.
- Regular: Also known as whiteboard or standard drywall, it’s the most common and least expensive option.
- Green Board: Similar to regular drywall but has a green water-resistant paper cover. Ideal for high-humidity areas.
- Blue Board: Highly mould-resistant and water-resistant. Used for veneer plastering, and it’s not ideal for mud, tape, or paint.
- Type X: Specifically designed to be fire resistant, excellent for garages, kitchens, or commercial buildings.
- Soundproof: Specially designed to reduce noise transmission, ideal for bedrooms, home theatres, and laundry rooms.
Choosing the Right Drywall
Selection should be based on your specific needs and local building codes.
- Consider the Thickness: Drywall panels typically range from 1/4 to 5/8 inch. Thicker panels are used in ceilings or walls where higher fire resistance is needed.
- Know Your Space: Green or blue board drywall is ideal for bathrooms or basements where moisture and mildew can be a problem.
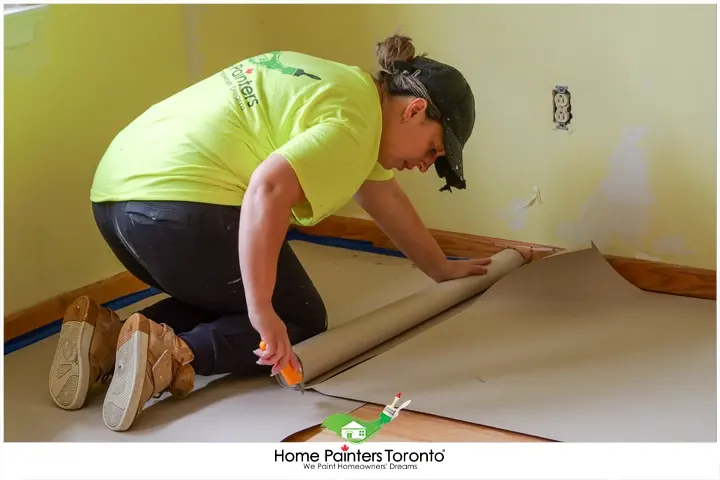
How to Install Drywall
Accurate measurements, proper planning, and being careful during drywall installation can make a significant difference in the result.
- Measure: Measure the square footage of your room to determine how much drywall you will need.
- Cut the Drywall: Use a utility knife to score your drywall’s front side where you want to cut. Break the sheet along the cut, then cut the backing paper.
- Hang the Drywall: Start from the top, attaching the drywall to the wall frame using specially designed drywall screws.
- Seal Joints: Apply a joint compound (mud) over the seams using a drywall knife. Cover the mud with drywall tape and spread another layer of mud over the top. Let it dry.
- Sand and Prime: After the joint compound is entirely dry, sand the area smooth. Apply a drywall primer to prepare it for painting.
Repairing Drywall
Drywalls might seem fragile and prone to damage like cracks, holes, or dents, but the good news is drywall repair is also a straightforward process.
- Prepare the Area: Clean away any loose debris around the damaged area.
- Apply a Patch: For holes, apply a drywall patch. Make sure it fully covers the hole.
- Apply Joint Compound: Cover the patch with the joint compound and smooth it with a drywall knife. Let it dry.
- Sand and Paint: Once dry, sand until it’s smooth and flush with the rest of the wall. Apply primer and then paint.
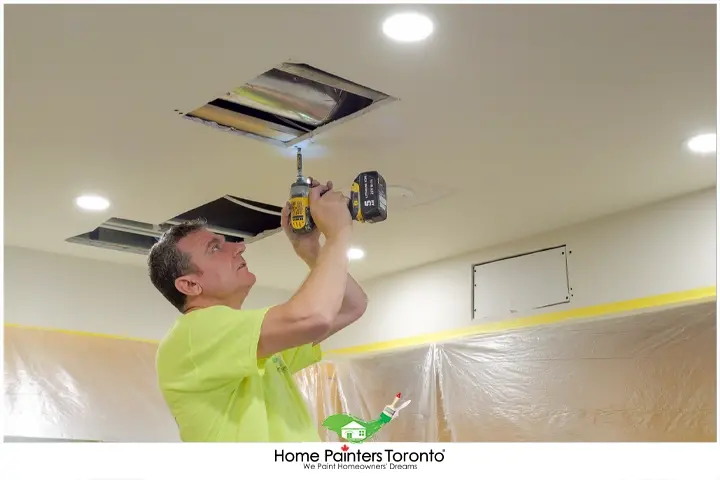
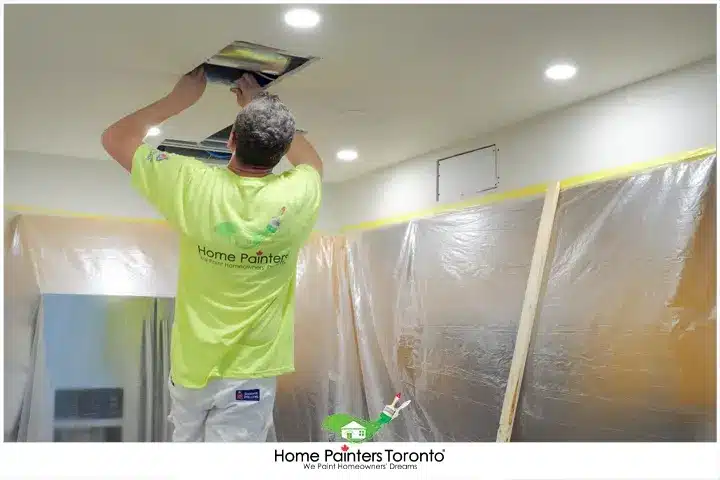
Why Hiring a Professional for Drywall is the Best Option
While the prospect of tackling a DIY drywall project may seem appealing for its potential cost savings, there are several reasons why hiring professional drywall contractors might be the better option.
Skills and Expertise
Drywall installation or repairs require a certain level of skill and experience for a seamless and professional finish. Even the smallest mistakes during installation can lead to visible seams, cracks, or bulges that can be hard to fix. A skilled professional, with their years of experience and training, can ensure the job is done right the first time, saving time and reducing waste.
Speed and Efficiency
Drywall professionals can complete the job significantly faster than an inexperienced DIY homeowner. Time is of the essence, particularly in large projects or house renovations, when other tasks depend on the completion of drywall installation.
Tools and Resources
Professionals have all the tools needed for drywall work at their disposal. Specialized tools like drywall lifts, for installing ceiling drywall, or tools for blending and smoothing compounds, might not be part of a typical homeowner’s tool kit. Acquiring these could increase the cost of your project.
Knowledge of Building Codes and Regulations
Professionals are conversant with local building codes and regulations, which might be quite complex for a layperson to follow. Non-compliance can lead to fines and may create problems if you ever decide to sell your home.
Cleanliness and Less Disruption
Drywall installation or repair can be a messy job with dust and debris. Professionals know how to contain this mess and have a routine process to clean it up effectively, causing less disruption to your home and daily schedule.
Follow Up and Warranty
Professional drywall contractors usually warrant their work. If any issues arise after the project’s completion, you can call them back to correct the problem. As a homeowner, that’s an assurance you often won’t have when doing the project yourself.
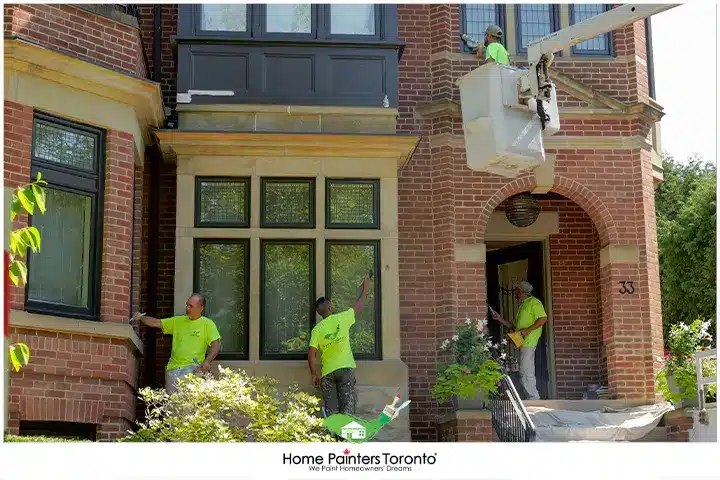
Painting: The Final Touch
House painting is one of the most satisfying and cost-effective ways to transform your space. It’s not just about adding a splash of colour; it’s a way to refresh, renew, and revitalize your living space. For homeowners in Toronto, vibrant neighbourhoods teeming with diverse styles, painting can further add to the character and charm of their dwelling. However, if rushed or not properly planned, it can yield less than satisfactory results.
Tips for Choosing Paint Colour
- Consider the Mood: Are you going for relaxed and soothing or vibrant and energetic vibes? Blues and greens promote calm, while yellows and reds promote energy and excitement.
- Think About Size and Lighting: Light colours can make a room look larger and more open, while dark colours create a cozier feel. Consider the natural and artificial lighting in the space when choosing your palette.
- Test Samples: Purchase sample cans and paint a small section of the wall before committing to a full room. Observe the colour at different times of day under varying lighting conditions.
- Colour Harmony: Ensure that your chosen colour harmonizes with the colour scheme of surrounding rooms, furnishings, and accessories.
Understanding the Scope of Your Painting Project
Before you clear out the furniture and lay down the drop cloths, you need a clear picture of what you’re about to take on.
Painting projects can vary significantly in complexity, from a basic touch-up to a complete overhaul. Here’s what to look out for:
- Assessing the Surface: Are you painting new drywall, filling in cracks on old plaster, or just changing the colour? Different surfaces require specific preparation methods.
- Fixture and Furniture Removal: Will your project involve removing light switches, outlet covers, or even major pieces of furniture? You’ll need to factor in time for these tasks.
- Number of Rooms and Hallways: Multifaceted projects will take longer, so be realistic about how much you can tackle in one session.
- Height of Walls and Ceilings: High ceilings or walls will require additional equipment, and often, professional assistance.
- Architectural Features: Intricate mouldings, baseboards, or trim can complicate painting and require careful attention to detail.
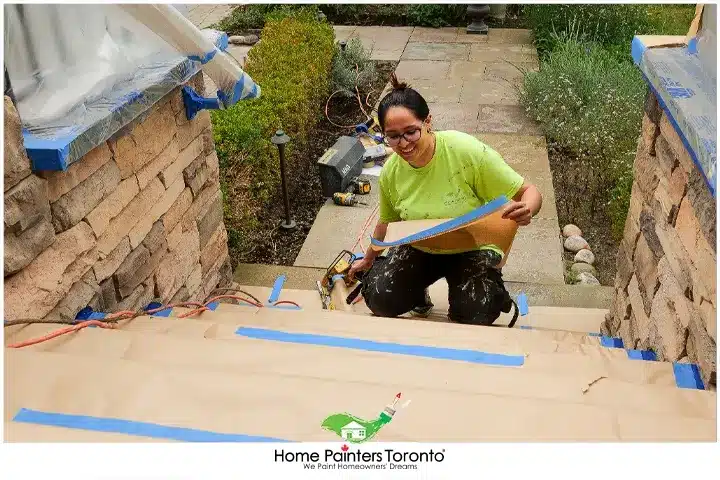
Preparing Your Painting Space
Preparation is key to a successful paint job. This stage lays the foundation for a smooth process and a quality finish.
- Clear the Room: Remove all furniture, decorations, and light fixtures. Use this as an opportunity to declutter and simplify your space.
- Patch and Repair: Inspect your walls for any holes, dents, or cracks. Use spackling compound to patch these areas, and sand smooth once dry.
- Clean the Walls: A simple solution of water and mild detergent can clean grease and dirt to ensure the paint can adhere properly.
- Protect Your Belongings: Use drop cloths to cover everything you don’t want to paint. Secure the drop cloths with painter’s tape to prevent any spills.
- Apply Primer: Priming is crucial to providing a smooth, even surface for your paint. It can also cover up stains and help the paint stick better.
- Masking: Use painter’s tape to protect window and door frames, baseboards, and any other areas you want to keep paint-free.
Choosing the Right Paint
With the space prepped and your vision in mind, it’s time to select your paint.
- Type of Paint: Choose between flat, semi-gloss, or satin finishes based on the look you want and the needs of your space.
- Colour Selection: Many factors can impact how a colour looks in a room, from lighting to room size. Sample pots are your best friend in this process.
- Quantity: Measure your walls and ceiling to calculate the square footage and purchase enough paint. Factor in additional coats and touch-ups.
- Quality: Invest in good quality paint. It not only covers better but often lasts longer, which means fewer repaints down the line.
- Eco-Friendly Options: Look for paints with low VOCs (volatile organic compounds) if you’re concerned about air quality in your home.
Essential Painting Tools and Equipment
To paint effectively, you’ll need the following tools:
- Paint Brushes and Rollers: High-quality brushes and rollers can make a huge difference in how the paint applies and the final look.
- Paint Trays and Liners: These will hold the paint as you work and prevent messes.
- Extension Poles: These are useful for reaching high walls and ceilings without the need for a ladder.
- Step Ladders: A safe, sturdy step ladder is a must-have for most painting projects.
- Paint Sprayer (optional): If you’re painting a large area, a paint sprayer can save time and effort.
Edging Tools: Invest in good edging tools to get clean lines where walls meet.

The Art of Painting
With everything set up, it’s time to lay down that first stroke. Here’s how to paint like a pro:
- Cut in First: Paint a strip along the edges of your walls, and ceiling, and trim with a brush. This is called cutting in and it creates a border for your roller.
- Roll in a W Pattern: For the main areas, use a roller and apply paint in a W or M shape to ensure even coverage.
- Work From Top to Bottom: Start with the ceiling, then the walls, and finish with the trim. This way, any paint splatter is covered in the next step.
- Apply Paint Evenly: Don’t overload your brushes or rollers. Apply the paint in thin, even layers for the best finish.
- Allow for Drying Time: Follow the manufacturer’s instructions for drying time between coats. Making sure each coat is fully dry before the next will lead to a more durable finish.
- Overnight Storage: If you’re not done in one day, a tightly sealed brush or roller can be stored in the fridge to keep the paint from drying out.
Additional Tips for Toronto Homeowners
Toronto homeowners, in particular, face unique considerations when it comes to painting:
- Climate Influences: The humid summers and chilly winters can affect the paint’s drying time. Be mindful of this when planning your project.
- Older Homes: Many homes in Toronto are rich with history and architectural detail. Take care to preserve and highlight these features during your painting.
- Condo Restrictions: If you’re living in a condo, you might have restrictions on the types of painting you can do, especially when it comes to common areas. Always check with your building management or condo board before beginning a project.
- Local Contractor Standards: If you opt to hire a professional, be aware of the contractor standards in Toronto. It’s advisable to get multiple quotes and check references.
When to Hire a Professional
While DIY painting can save you money, there are scenarios where it’s best to hire a professional painting company:
- Inexperience: If you’ve never painted before, especially if you’re dealing with complex surfaces or features, a professional can ensure a high-quality finish.
- Complex Prep Work: Projects that involve extensive repairs or involve hazardous materials may be best left to those with the proper training and equipment.
- Time Constraints: If you’re on a tight schedule or have a large project, professionals can often work more quickly and efficiently.
- High Ceilings or Specialty Finishes: Some jobs simply require specialized equipment and experience that only a professional possesses.
Wrapping Up
Insulation, drywall, and painting are critical phases in home construction and renovation that collectively enhance the comfort, energy efficiency, and aesthetics of your home. By understanding and carefully implementing each step, you ensure that your home not only looks inviting but also performs to its highest potential in terms of energy conservation and comfort level. Remember, patience and attention to detail during these processes can significantly impact the quality and longevity of your home renovation projects.
More Interesting Blogs Related to
“The Homeowner’s Guide to Insulation, Drywall, and Painting”


Ready for a Home Makeover? Contact Us Now! Transform your home with Home Painters Toronto’s professional insulation, drywall, and painting services! Enjoy a beautiful, efficient, and high-quality update to your living space. Call us today at 416.494.9095 or email [email protected] for a FREE quote. And don’t forget to follow us on all our social channels below!