
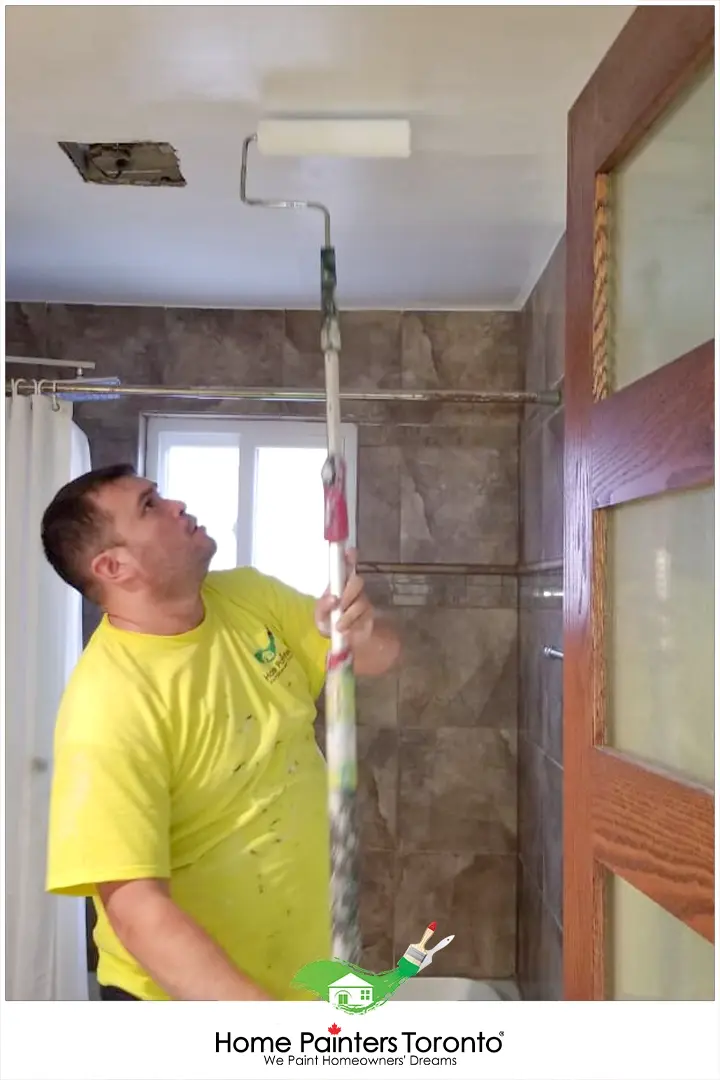
Painting The Ceiling In A Bathroom
Bathroom ceiling painting is one of the most common interior painting jobs in Toronto homes, and also one of the most frequently done wrong. Skip the right primer, ignore the humidity, or use standard interior paint, and that fresh coat will be peeling again within a season. This guide covers everything you need to get it right the first time: the correct prep steps, the best mould-resistant products, what to do when the ceiling is already peeling, and what a professional job actually looks like.
Here is what to know before you open a single tin:
- Bathroom ceilings fail faster than any other interior surface due to constant steam and humidity
- The right primer is not optional — it is the single biggest factor in how long the paint lasts
- Standard interior paint will fail in a bathroom ceiling, even quality brands not rated for humid conditions
- Mould-resistant paint treats the symptom; fixing ventilation treats the cause
- Peeling must be fully stripped before repainting — painting over it guarantees the same result
Bathroom ceiling painting done correctly — proper primer, mould-resistant topcoat, and two coats — protects a Toronto ceiling for 5 to 7 years even in high-humidity conditions.
Why Paint the Bathroom Ceiling?
Since bathrooms tend to be humid, it is important to maintain a bathroom ceiling that is resistant to moisture to prevent mildew and mould growth. Painting with the appropriate bathroom ceiling paint serves as a protective layer while also enhancing the aesthetic appeal of the room.
Why Toronto Bathrooms Are Especially Hard on Ceiling Paint
Toronto's climate creates specific conditions that make bathroom ceiling paint fail faster than in milder regions. The city's seasonal swings from humid summers to dry winters cause materials to expand and contract constantly. Older Toronto homes in neighbourhoods like Leslieville, The Danforth, and Roncesvalles commonly have smaller bathrooms with lower ceilings and older ventilation systems that were never designed to handle the moisture output of modern showers and baths.
Homes built before the 1980s often have original plaster ceilings in bathrooms. Plaster is highly alkaline and will cause paint to fail without an alkali-resistant primer underneath. Many homeowners repaint directly over old paint without testing whether it is still adhering, which leads to the new coat pulling the old one off within months.
According to Health Canada guidance on indoor air quality and moisture, poorly ventilated bathrooms are one of the leading contributors to mould growth in Canadian homes, and that mould growth is almost always visible first on the ceiling, directly above the shower or bath. This is precisely why bathroom ceiling painting requires a different product system than any other room in the house.
Choosing the Right Ceiling Paint For Bathroom
When painting a bathroom ceiling, it is crucial to select a paint designed to withstand moist conditions. Look for paints labelled bathroom ceiling paint mould resistant or 'for bathroom use.' These paints feature additives that help prevent the growth of mould and mildew.
While colour choice is a matter of personal preference, lighter colours are the best bathroom ceiling paint colours that can help make a small bathroom feel larger and brighter.
Best Paint for Bathroom Ceiling - Product Comparison
Not all bathroom paints perform equally in Toronto conditions. Here is how the most commonly recommended products compare on the factors that matter most for bathroom ceilings.
| Product | Type | Finish | Mould Resistance | Best For | Approx. Price (CAD) |
|---|---|---|---|---|---|
| Benjamin Moore Aura Bath and Spa | 100% Acrylic Latex | Matte | Excellent | High-humidity bathrooms, Toronto climates | $85 to $100 per 3.78L |
| Benjamin Moore Kitchen & Bath | 100% Acrylic Latex | Pearl / Eggshell | Very Good | General bathroom ceilings and walls | $70 to $85 per 3.78L |
| Sherwin-Williams Emerald Interior | 100% Acrylic Latex | Matte / Eg-Shel | Excellent | Bathrooms with active moisture issues | $90 to $110 per 3.78L |
| Zinsser Perma-White | Water-Based | Semi-Gloss | Outstanding | Ceilings with prior mould staining | $60 to $75 per 3.78L |
| Glidden One Coat Interior | Acrylic Latex | Flat | Good | Budget touch-ups, low-humidity bathrooms | $40 to $55 per 3.78L |
| Standard Interior Latex (any brand) | Acrylic Latex | Various | Poor | Not recommended for bathroom ceilings | $30 to $50 per 3.78L |
How to Repaint a Bathroom Ceiling Like a Pro
Ceiling paint peeling is a sign that the surface has already lost adhesion, and painting over it will only hide the problem temporarily. The damaged coating needs to be stripped back to a stable surface so the new primer and paint can bond properly. This step is critical because loose paint, trapped moisture, soap residue, and previous low-quality coatings can all cause the new finish to peel again.
Our team starts by diagnosing why the bathroom ceiling paint failed in the first place. In Toronto homes, the cause is often poor ventilation, repeated humidity, moisture trapped above the ceiling, improper primer, or paint that was never designed for high-moisture rooms. Once the cause is identified, we can repair the surface correctly, choose the right primer and bathroom-grade coating, and create a smoother, longer-lasting finish.
Before a bathroom ceiling is repainted, the surface needs more than a basic wipe-down. Moisture, mildew, soap residue, dust, and hidden contaminants can stop primer and paint from bonding properly, which often leads to early peeling, staining, or uneven coverage.
Professional-grade cleaning and mould treatment help create a stable surface before any coating is applied. This is especially important in Toronto bathrooms where humidity, poor ventilation, and repeated condensation can weaken the existing finish. By treating the ceiling properly before priming, our team helps improve adhesion, reduce the risk of recurring mould stains, and extend the life of the new paint job.
After cleaning the bathroom ceiling, this is when you are going to want to tape off any corners of the walls. This will help prevent any mess or bleeding through, especially if it is just the ceiling that needs a refresh. Also, be sure to put down drop cloths on the floor, bathtub and countertops as well.
One thing that is a major concern for a lot of people who are painting the ceiling in a bathroom is what kind of paint to use. This is going to make a huge difference in how your paint holds up over time. Since bathrooms are exposed to water, mildew, and steam day in and day out, you need paint that was designed to withstand those conditions.
If you go with Benjamin Moore's Kitchen & Bath paint, which we expertly recommend, it actually already has primer in it. Another option is their Aura Bath and Spa paint as well. This paint is specially designed to be mildew resistant, even in the most humid conditions. Glidden One Coat Interior Paint & Primer is another great option, as it is a high-coverage premium paint and holds up well in humid spaces.
Which Primer Should You Use for a Bathroom Ceiling?
The primer you choose is just as important as the topcoat, and in bathrooms it is often where the job succeeds or fails. Here is what our team uses in Toronto bathrooms by situation:
- Active mould staining present: Zinsser Bulls Eye 1-2-3 or Zinsser Mould Killing Primer. These encapsulate stains and kill surface mould before the topcoat goes on. Do not skip this step if you see black or grey spots on the ceiling.
- Older plaster ceiling in a Toronto home: Use an alkali-resistant (AR) primer such as Benjamin Moore Fresh Start All-Purpose Primer. Plaster is highly alkaline and will break down standard primer bonds.
- Previously painted drywall in good condition: A moisture-resistant acrylic primer is sufficient. Benjamin Moore Fresh Start Moisture Barrier is a reliable choice.
- Bare drywall after a patch repair: PVA drywall primer first to seal the fresh compound, then a moisture-resistant topcoat primer before painting.
Proper ventilation helps bathroom ceiling paint dry, cure, and last longer. Our team checks for condensation, weak airflow, and fan-related moisture issues, then advises whether an exhaust fan upgrade is needed before repainting.
Bathroom ceilings always need two coats of paint because one coat rarely provides enough film build to resist moisture, steam, and repeated condensation. A second coat strengthens coverage, improves durability, and helps the finish protect the ceiling longer.
Professional painters handle all cleanup and waste disposal as part of the service. Once the final coat has dried, our team removes protective coverings, cleans the work area, and leaves the bathroom ready to use.
The eight-step sequence — inspect, strip, clean, patch, prime, first coat, second coat, ventilate — is what separates a bathroom ceiling job that holds for 5 years from one that peels in a season.
Bathroom Ceiling Painting - Step-by-Step at a Glance
Use this as a quick reference before starting your bathroom ceiling painting project. Every step matters; skipping any one of them is the most common reason the job has to be redone.
| Step | Action | Time Required | Pro Tip |
|---|---|---|---|
| 1 | Inspect for mould, leaks, and peeling paint | 30 minutes | Fix any active leaks before painting; painting over a leak is temporary at best |
| 2 | Strip all peeling paint back to a sound surface | 1 to 3 hours | Use a wide scraper and feather the edges smooth; do not paint over any loose material |
| 3 | Clean ceiling with three parts water, one part bleach | 30 minutes | Allow to dry for at least 2 hours before the next step |
| 4 | Patch any holes or cracks with joint compound | 1 hour + overnight dry | Sand smooth once fully dry; do not rush this step |
| 5 | Apply mould-inhibiting or alkali-resistant primer | 1 to 2 hours | Full dry time before topcoat: minimum 2 hours, ideally overnight |
| 6 | Apply first coat of mould-resistant bathroom ceiling paint | 1 to 2 hours | Start at the corners and cut in before rolling |
| 7 | Allow to dry fully and apply second coat | 1 to 2 hours plus 4-hour dry | Two coats are always recommended in bathrooms |
| 8 | Remove tape and drop cloths; ventilate for 24 hours | 30 minutes | Run the exhaust fan continuously for the first 24 hours after painting |
Inspiring Bathroom Ceiling Ideas
A freshly painted bathroom ceiling can dramatically liven up your bathroom's aesthetics. However, if you are looking for a bit more than just a new coat of paint, here are some inspiring bathroom ceiling ideas that offer unique alternatives.
1. Glossy Paint
Consider painting your bathroom ceiling with high-gloss paint. This option not only reflects more light, making your bathroom feel larger and brighter, but its water-resistant properties also make it ideal for humid environments such as the bathroom.
2. Patterned Wallpaper or Stenciling
Add interest to your bathroom by applying wallpaper or creating a stencil design on your ceiling. With endless pattern options available, this approach can add an unexpected and charming touch. Appropriately sealed, it can also withstand the moist conditions of a bathroom.
3. Wood Paneling
For a more rustic or beachy vibe, consider installing wood paneling on your bathroom ceiling. This option provides a warm and natural element to your bathroom design. When treated and sealed correctly, it can also resist the effects of humidity.
4. Stretch Ceiling
A stretch ceiling can add an element of modern design to your bathroom. Made from vinyl, it can seamlessly cover your existing ceiling, providing a waterproof solution that comes in various finishes, like matte, satin, glossy, or even translucent.
5. Beadboard Ceiling
A beadboard ceiling can impart a traditional, cottage-like charm to your bathroom. Often painted in white or soft hues, the grooved panels are effective at deflecting moisture and are easy to install.
6. Tin or Faux-Tin Tiles
Tin or faux-tin tiles create a vintage, decorative effect. They offer great resistance to humidity while displaying a visually appealing pattern that can become a central design element.
Remember, repainting is just one way to refresh your bathroom ceiling. With these innovative ideas, creating a bathroom with enhanced style and practicality becomes an exciting ordeal. Your bathroom ceiling is not merely a functional aspect, but an opportunity to showcase creativity and individual aesthetics.
How Much Does Bathroom Ceiling Painting Cost in Toronto?
Cost is one of the most frequently searched questions about bathroom ceiling painting, and most guides skip it entirely. Here is an honest 2026 breakdown for Toronto homeowners.
DIY Cost Estimate
- Mould-inhibiting primer (1L): $25 to $40 CAD
- Mould-resistant topcoat, e.g. Benjamin Moore Aura Bath and Spa (1L): $30 to $45 CAD
- Joint compound for patches (small tub): $15 to $25 CAD
- Sandpaper, tape, drop cloth, brush and roller: $25 to $50 CAD
- Total DIY materials for an average bathroom ceiling: $80 to $160 CAD
DIY is very achievable for a bathroom ceiling in good condition. The difficulty rating is low to moderate. Where most homeowners run into problems is in the prep stage, specifically stripping peeling paint completely and choosing the right primer for the surface type. Both are covered in the steps above.
Professional Cost Estimate for Bathroom Ceiling Painting in Toronto
Most professional bathroom ceiling painting jobs in Toronto range from $250 to $600 CAD, depending on the size of the bathroom, ceiling condition, and whether mould remediation or plaster repair is also needed. If active mould is present, remediation before painting adds $150 to $400 to the job.
The premium for professional work is not just labour. It is access to commercial-grade primers, proper diagnosis of the moisture source, and the guarantee that the prep work is done correctly. For a precise quote, see our interior painting services page or contact us for a free estimate.
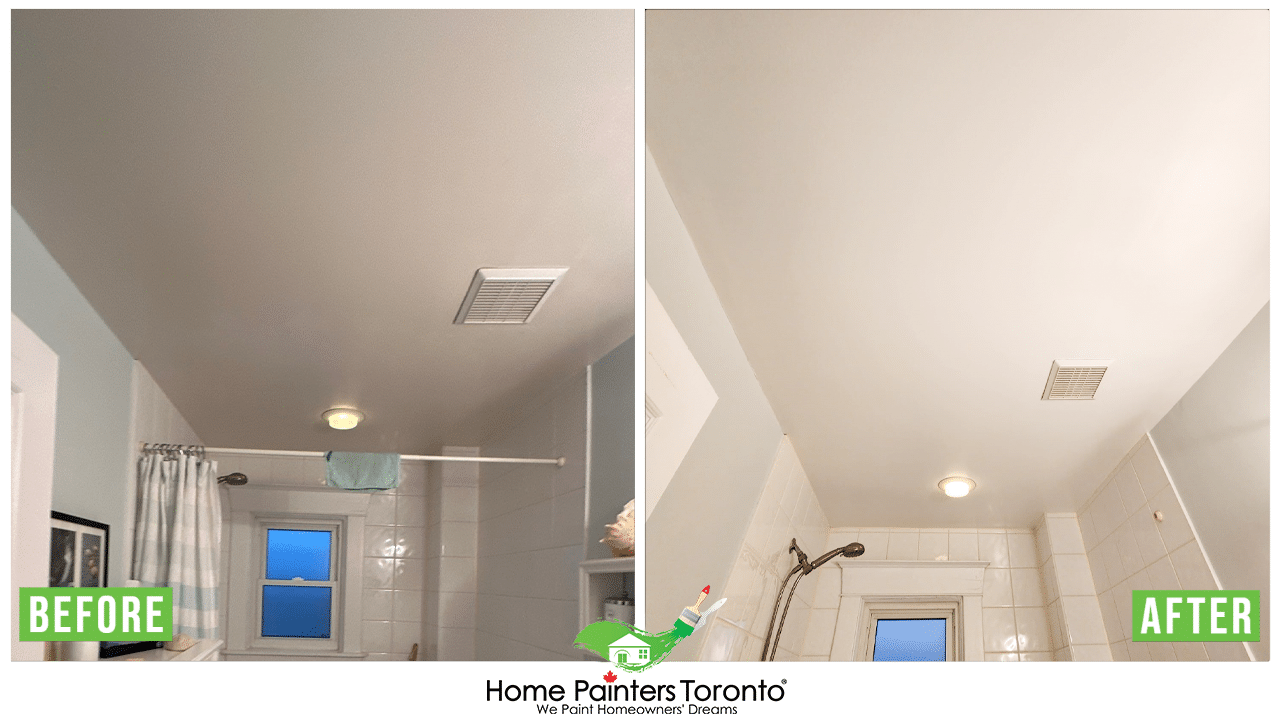
Real Project - Bathroom Ceiling Painting and Mould Repair in Toronto
East Toronto Semi-Detached: Plaster Bathroom Ceiling Repaint with Mould Treatment
One of the best ways to understand what a professional bathroom ceiling job actually involves is to look at a completed project. Here is a summary of a job our team completed in Toronto.
The situation: A homeowner in an older semi-detached home in east Toronto contacted Home Painters Toronto after noticing persistent mould staining on their bathroom ceiling. Two previous DIY attempts with standard interior paint had both failed within six months. The homeowner was frustrated and unsure whether the ceiling itself was damaged.
What the job involved: Our team inspected the bathroom and identified two root causes. First, the exhaust fan was undersized and positioned over the vanity rather than the shower, leaving the shower corner in a persistent condensation zone. Second, the original ceiling was plaster that had never been properly primed before the previous latex coats were applied. All existing paint was stripped back to the plaster surface, the area was treated with Zinsser Mould Killing Primer, and an alkali-resistant primer was applied to address the plaster alkalinity. Two coats of Benjamin Moore Aura Bath and Spa in a matte finish were applied. The homeowner was also advised to upgrade the exhaust fan, which was done separately before final painting.
The result: A clean, lasting finish with no mould recurrence after 18 months. For more completed projects like this one, visit our Toronto painting projects page.
Last Few Painting Tips
A few things to remember along the way when you are painting your bathroom ceiling:
- Get the right paint for the job! Use a high-quality paint that is made to withstand mildew and moisture.
- When you are actually painting your bathroom ceiling, it is best to start in the corners. You can work your way across the room once you have those small areas taken care of.
- Also, be sure to let the paint dry in your bathroom for a good 24 hours. This will help to prevent any peeling of bathroom paint later on.
- If you have windows or a fan, get that cross-ventilation going as well!
Don't forget to check out our Pinterest page for all sorts of interior painting inspiration!
While painting the bathroom ceiling may seem daunting, it is a manageable task with the right tools and knowledge. Yet, if the task seems too challenging or if your bathroom has a high or complex ceiling design, do not hesitate to contact professional painters to ensure an excellently finished project.
Remember, as the saying goes, the devil is in the details. A newly painted ceiling can elevate your bathroom's overall aesthetic, making it a place of comfort, relaxation, and style.
Frequently Asked Questions About Bathroom Ceiling Painting
For Toronto bathrooms, Benjamin Moore Aura Bath and Spa is the product our team recommends most consistently. It is a 100% acrylic latex paint in a matte finish that is specifically formulated for high-humidity environments. Sherwin-Williams Emerald Interior in a matte or eggshell sheen is an equally strong alternative. Both resist mould and mildew without requiring a separate mould-resistant primer, though we always recommend priming separately for the best adhesion on Toronto ceilings.
Yes. Standard interior paint is not formulated to handle the sustained humidity and steam exposure of a bathroom ceiling. It will absorb moisture, lose adhesion, and peel, typically within one to two seasons in Toronto conditions. Only paint rated for bathrooms, kitchens, or high-humidity areas should be applied to a bathroom ceiling.
Peeling bathroom ceiling paint has three common causes: inadequate surface preparation, wrong primer, and poor ventilation. All three need to be addressed together. Strip all peeling material before repainting, use a mould-inhibiting primer on the bare surface, and ensure your exhaust fan is adequate for the size of your bathroom. For a full guide on this topic, see our blog on how to fix peeling paint on bathroom ceiling.
No. Painting over active mould will trap it beneath the paint film temporarily, but the mould will continue growing and the paint will lift and stain within months. The surface must be treated with a mould-killing solution, such as a diluted bleach wash or a dedicated mould-killing primer like Zinsser Mould Killing Primer, before any topcoat is applied. If the mould is extensive or returns after treatment, the source of moisture needs to be identified and fixed.
This is a personal preference decision, but there are practical considerations. A bright white or very light ceiling makes a small bathroom feel taller and more open. Matching the ceiling to the walls can create a cocooning effect that works well in larger bathrooms. In either case, the ceiling product should always be rated for high-humidity use, regardless of the colour chosen.
Most bathroom-rated latex paints, including Benjamin Moore Aura Bath and Spa, are dry to the touch within 1 to 2 hours and ready for a second coat in 4 hours under normal Toronto indoor conditions (18 to 22 degrees Celsius, 40 to 60% humidity). Full cure, where the paint reaches maximum hardness and moisture resistance, takes approximately 30 days. Avoid steam exposure for at least 24 hours after the final coat.
With proper prep and the right product, a bathroom ceiling should last 5 to 7 years before requiring repainting. Latex paint not suited for bathrooms may need repainting every 1 to 2 seasons. The biggest factors in longevity are ventilation, surface preparation, and primer choice, not the brand of topcoat.
Call a professional when the ceiling has active mould growth that keeps returning, when there is visible plaster failure or soft spots in the ceiling surface, when you have already repainted and it is peeling again, or when the bathroom ceiling is high or has complex angles. Our team serves Toronto and the GTA and can assess the cause, not just the symptom. Contact us at 416.494.9095 or see our interior residential painting service for more.
Top Interesting Blogs Related to Painting The Ceiling In A Bathroom
Does Your Bathroom Ceiling Need a Refresh?
Home Painters Toronto serves Toronto and the GTA and can assess the cause, not just the symptom. Call 416-494-9095 or email [email protected] for a FREE quote.