
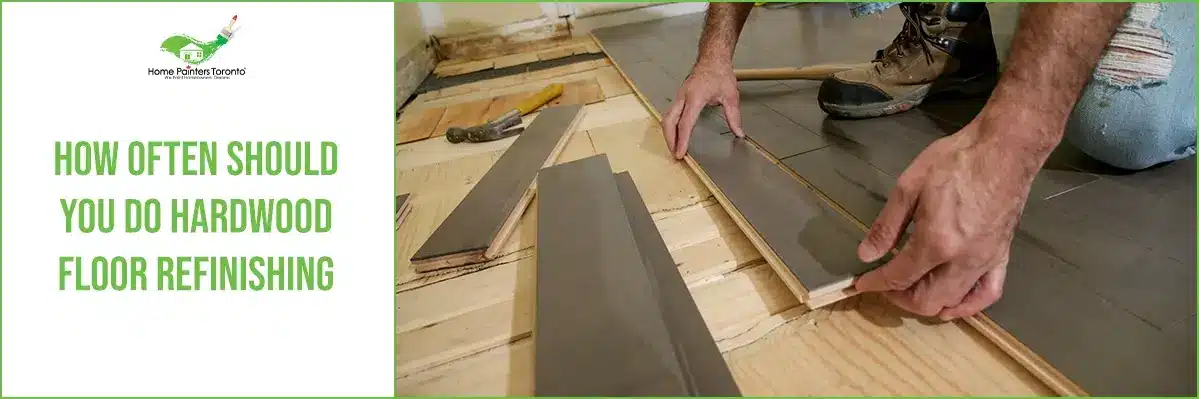
Do you have hardwood floors? Are you getting bored of the look of them and want to change things up? Or perhaps you’re one of those people who can’t keep things the same for more than a few months? Hardwood flooring is great because it gives you so many options to keep things fresh without replacing your entire floor. If you want to do hardwood floor refinishing yourself, read on to learn how often you should be refinishing hardwood floors and how to repair hardwood floors as well.
Factors to Consider Before Refinishing
Before discussing the frequency of hardwood floor refinishing, it’s essential to understand that several variables contribute to the wear and tear of hardwood floors:
- Type of wood: Different hardwood species have varying levels of hardness, which affects their durability (e.g., Oak, Walnut, Maple, and more). Softer woods may require refinishing more often than harder ones.
- Finish type: Modern finishes like polyurethane provide more resistance to scratches and scuffs, while traditional finishes like shellac or varnish tend to wear faster.
- Traffic and usage: High-traffic areas, pets, and children can cause faster wear and tear on floors.
- Maintenance habits: Regular cleaning, placement of area rugs, and using furniture protectors can significantly impact the longevity of your hardwood floor finish.
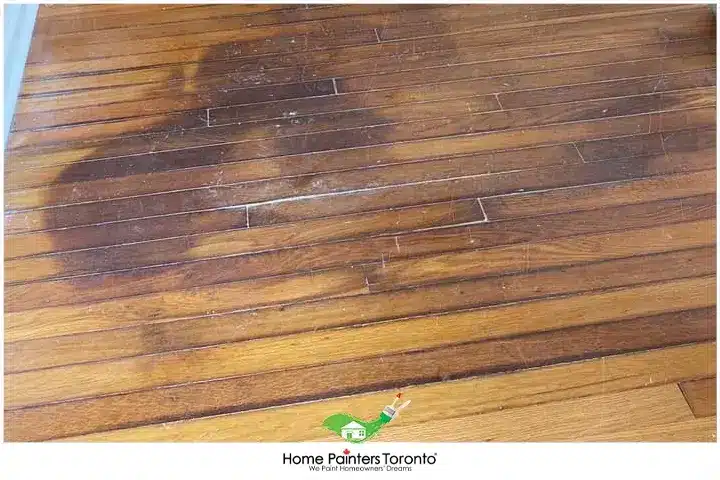
Signs That It's Time to Refinish Your Hardwood Floor
Look out for these common signs of bad hardwood floor refinishing that signal the need for refinishing:
- Scratches and scuffs: Over time, even minor scratches accumulate and can make the finish appear dull.
- Discolouration and fading: Sunlight, water, and chemicals can all cause your floor’s colour to fade or become discoloured.
- Worn finish: A lack of sheen or visible wear in high-traffic areas could indicate that it’s time for refinishing.
- Water damage: If water droplets seep into the wood instead of beading, it’s a good sign that your floor’s finish needs attention.
Materials You Will Need for Hardwood Floor Installation:
- Dust Mask/Safety Goggles/Boots
- Mop/Wood-safe Floor Cleaning Agent
- Sander/Sandpaper
- Buffer
- Microfiber Cloth
- Hardwood Floor Finish
- Tray or Jug to put the Finish in
- Paintbrush
- Paint Roller
- Vacuum and a New Filter
- Chalk
- Chisel
- Spade Bit/Drill
- Circular Saw
- Nails
- Rubber Mallet
- Utility Knife
- Replacement Hardwood Flooring
- Pry Bar
- Measuring Tape
- Pneumatic Nail Gun/Nails
- Wood Putty
- Vapor Barrier Paper
- Felt or 15lb Tar Paper
1. How Often Should Hardwood Floor Refinishing Be Done, and What Is the Cost?
- Usually engineered hardwood flooring is ¾ inches thick, or sometimes more. With this thickness, it is safe to refinish them up to 4-6 times.
- If you are happy with your flooring and just want to refinish it to give it a new life, hardwood flooring usually only needs to be refinished once every 7- 10 years.
- Typically, you’ll find a professional to come in and do refinishing work; the cost can be anywhere from $3 – $4 per square foot. In total, if you have a space that’s between 1,500 – 2,000 square feet, you’re looking at anywhere from $6,000 – $8,000.
- When you decide to go the DIY route, you can cut the cost to a mere fraction of the price!
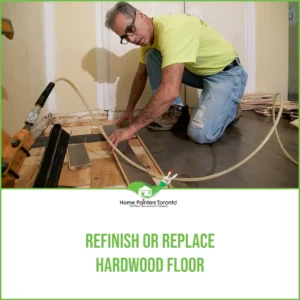
2. Repairing Or Patching A Hardwood Floor
- First, visually determine where you need to replace the hardwood floor. If necessary, draw a line so you know where to cut and remove the damage.
- Secondly, with a chisel about 1” cut through the top of the hardwood flooring, about 1/8”.
- Then, using a spade bit, you should drill two holes next to the line to remove the rest of the wood.
- Chisel along with the trim and the full edge of the butt joint carefully and accurately.
- You can use a carbide-tipped blade for flooring that will cut through nails to get rid of all the old hardwood that has been damaged.
- Get your replacement piece ready; hopefully, you found one that perfectly matches your existing hardwood floor plank, but it can be hard to find; matching up the stain of your old hardwood floor to blend might be a little tricky.
- Use a circular saw to cut through the floor very carefully so the saw blade passes down on the flooring just before the other end of the board. Repeat where necessary and make parallel relief cuts about an inch apart down to the center of the flooring plank that will be replaced. The saw blade should be set about 1/16” deeper than the floor thickness.
- With a chisel, utility knife, and possibly a pry bar, you should be able to remove the strip of flooring between the relief cuts and pull out the tongue and groove edges of the old floor.
- Measure the length of the old piece of hardwood floor match the replacement piece and cut it to fit.
- Now you can install the new board. Insert the tongue side into the groove and drop it into place. Secure by tapping or using a rubber mallet.
- Drill 1/8” nail holes by the end of the replacement board and by each joist. Nail in securely, and you have repaired/patched up your hardwood floor successfully!
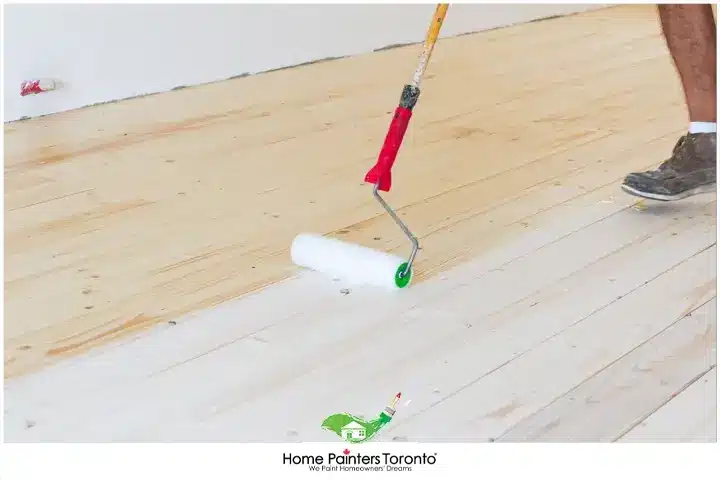
3. Hardwood Floor Refinishing
- At the beginning of this process, be sure to clean your floor thoroughly first and assess the situation.
- Sand the floor down where it needs to be repaired.
- Wear a dust mask and buff out the area where the damage is. Dust flies around so a dust mask is vital to protect your lungs.
- Leave it to sit for a while; about a half-hour should be good.
- When you return to the floor, vacuum up the dust and sweep clean. You can dry-tack the floor using a microfiber cloth.
- Apply a finish to the floor with a paintbrush and cut in along the edges.
- The best finish to do hardwood floor refinishing is polyurethane. It handles high-traffic spots well and is resistant to almost everything.
- Working quickly though! Apply the finish with a roller and apply it to the rest of the floor where you are refinishing.
- Allow drying for a solid 3 – 5 hours time. You should put back any furniture after a day to be sure nothing gets scratched on the freshly refinished hardwood floor!
4. Laying Hardwood Down
If you are installing hardwood floors, congratulations! You’ll have a beautiful charming new floor that will instantly increase the value of your home.
- Firstly, measure the room where you will be laying the hardwood flooring down and count some extra space for any diversions from trial and error.
- Secondly, make sure your subfloor is secure. You should have ¾” plywood already down before placing the hardwood flooring.
- If there is any creaking, drill a screw where the sound is emitting from. Clean the subfloor thoroughly before installing.
- You will need to have a vapour barrier paper to roll out over the subfloor. Felt or 15-pound tar paper should be used.
- Using chalk or a pencil, draw where the baseboards and the joists are.
- Remove shoe moulding, chalk out a line of 3.8” from the baseboard, and place the boards.
- Use a longboard for the first row, align the edge of the board with the chalked line and then drill holes through the hardwood into the subfloor/joist.
- Face-nail the first row instead of using pneumatic nails to assure security.
- Laying the boards vertically on the joists will create solid ground.
- After installing the planks, drill holes into the tongue of the boards and nail in.
- With a pneumatic nail gun, nail into the tongue of the hardwood plank.
- Lastly, fill in any gaps and fill holes with wood putty.
Now that you have a new floor, is it time to do some interior painting?
Now that you have your flooring situation all figured out, are you looking around at the paint on the walls and thinking of doing spruce? That’s okay because there is time to do it all! Plus, think of how accomplished you’ll feel once your space is completely revamped from top to bottom.
If you’re unsure about interior paint colour trends, check out this blog here. We’ve listed all of the top colours of the season and where you might think to use them. If it’s your living room that needs sorting out and you can’t quite pinpoint what you want to do, check out this blog related to the best paint for living rooms. Sometimes all you need is a little inspiration to get you started!
Tips for Extending the Life of Your Hardwood Floor Finish
To maximize the longevity of your hardwood floor finishes, follow these simple tips:
- Clean regularly: Sweep and use a microfiber mop or vacuum with a hardwood floor attachment to keep dirt and debris from scratching the surface.
- Use mats and area rugs: Place mats at entrances and area rugs in high traffic areas to protect the floor from wear and tear.
- Furniture pads: Always use felt pads or furniture coasters under the legs of furniture to prevent scratches.
- Avoid water and harsh chemicals: Clean up spills as soon as possible, and avoid using vinegar or harsh chemical cleaners on your floors.
- Trim pet nails: Keep your pets’ nails trimmed to minimize the chances of scratches and scuffs on the floor’s surface.
Taking care of your hardwood floors does not end with refinishing. Regular polishing is another key aspect of the hardwood floor maintenance routine. So, you may wonder – how often should wood floors be polished?
Most flooring professionals suggest polishing your wood floors every 2 to 4 months, depending on the amount of traffic on your floor. Polishing helps fill in microscopic scratches, adding a protective layer that extends the life of your floor finish without the need for a complete refinish. Using a high-quality, water-based polish can help maintain the gloss and shine of your floor, keeping it looking like new for a longer period.
Summary
By understanding the factors that affect the life of your hardwood floor finish and adhering to a proper maintenance routine, you can ensure that your investment remains beautiful and lasts for years to come. Remember, refinishing is an integral part of hardwood floor care, but it doesn’t have to be a frequent ordeal. A little attention to detail goes a long way toward maintaining your home’s stunning hardwood floors.
More Interesting Blogs Related to
“How Often Should You Do Hardwood Floor Refinishing?”


Do you need assistance with refinishing hardwood floors, hardwood floor repairs, or laying hardwood flooring down? It sounds like you might just be in need of some help from our expert Toronto carpenters. And don’t forget that along with that comes some professional house painters who have been in the biz for over 37 years now! HPT is your number-one solution! Call us NOW at 416-494-9095 or email [email protected]! Don’t forget to check us out on all our social channels (below) as well!