
When it comes to any project, whether it be for school or for work, every individual has a specific way they getting their work done. The same goes for painting jobs! Each painter has different methods and secrets to how they deliver successful projects. Professional painters are good at their job because not only are they efficient, but their preparation is top-tier. They produce fast results, without comprising the finished product. While most house painters have different techniques and painting tips, the only thing that matters is how the project turns out. Keep reading if you want some top painting tips!
How to Paint Using A Brush
Professional Painting Tips and Tricks
Preparation is Key
The first step in any DIY project is proper preparation. This step is particularly critical when it comes to painting. Make sure your walls are clean, dry, and free of any loose particles. If you come across any cracks or holes, now is the time to fill them up using a putty knife and spackling paste.
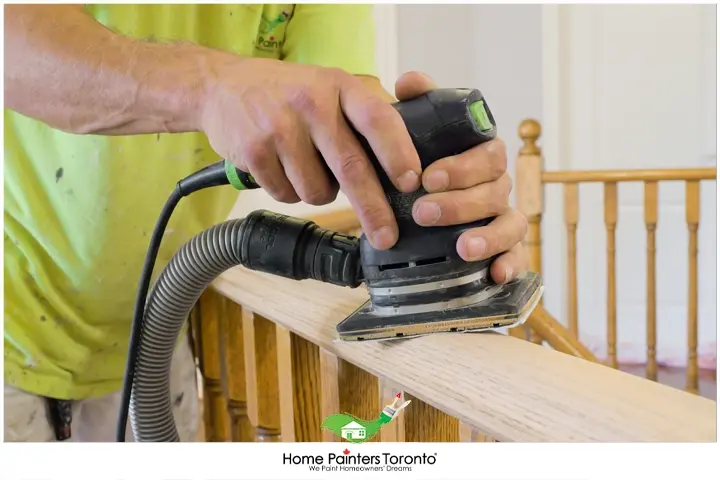
Sandpaper is your best friend
- Before even thinking about interior painting or choosing a specific colour, the surface has to be smooth. Without a perfectly smooth surface, there is no point in painting because your walls will not look good in the end. Sanding your walls would guarantee to remove rough spots in your trims and burrs.
- To sand effectively, start from the baseboard to the ceiling. You will need sandpaper (of course) and a sanding pole. Sand horizontally along the baseboard and ceiling. Gently sand the wall, so that you do not damage the wall. Then, use a sanding sponge to get into the crevices. All this to say that sanding your walls is extremely important to the overall success of your painting job.
Buy quality supplies
- All painting tips you receive will be helpful, but the best one is probably to buy quality supplies. You’ve heard the phrase “quality over quantity,” right? Buying quality paint supplies not only is a good investment, but it will always help you long-term.
- Purchasing a $5 plastic paint brush will make your walls look like a child did the work. Not to mention that plastic paint brushes are a false economy and the bristles will all fall out. To avoid this unnecessary trouble, you should purchase a 2.5-inch angled brush because you can always wash and reuse it.
- In addition, it is extremely durable and even when you use it on an expensive paint, it will run smoothly and give you the perfect coverage. A quality paintbrush will offer you the best coverage and make the painting process be quick and efficient.
Test Before You Commit
Consider testing your chosen paint colour on a small patch of your wall before committing to it. Lighting conditions can vary throughout the day, so it’s important to observe the colour in natural light, artificial light, and at different times of the day.
Pro tip: Let the test patch dry for at least a few hours or overnight – paints often darken as they dry.
Follow The "W" Technique
When you start painting, the goal is to apply the paint as evenly as possible. The demonstrated and time-honoured technique for achieving this is known as the “W” technique. Dip your roller into the tray, remove excess paint, and then paint a large “W” onto your wall. Without lifting the roller, fill in the “W” with more paint. Continue this process until the wall is fully covered.
Pro tip: Don’t overload your brush or roller with paint; it can lead to drips, which are tricky to fix once dry.
Clean Up Thoroughly
Finally, keep in mind that a proper cleanup will make your next DIY paint project far easier. Clean your brushes well, seal up your paint cans, and store everything properly.
Pro tip: If you wrap your brush or roller tightly in plastic and store them in the fridge, they’ll keep fresh for up to four days!
Additional Painting Tips
- Cover your furniture: Moving furniture around in a single space can be extremely difficult, especially when it is drawers and beds you have to move around. In that case, you should cover your furniture with plastic sheets and tape them at the bottom. This way, you don’t have to completely remove them from the room and they stay protected from dripping paint and dust from sanding.
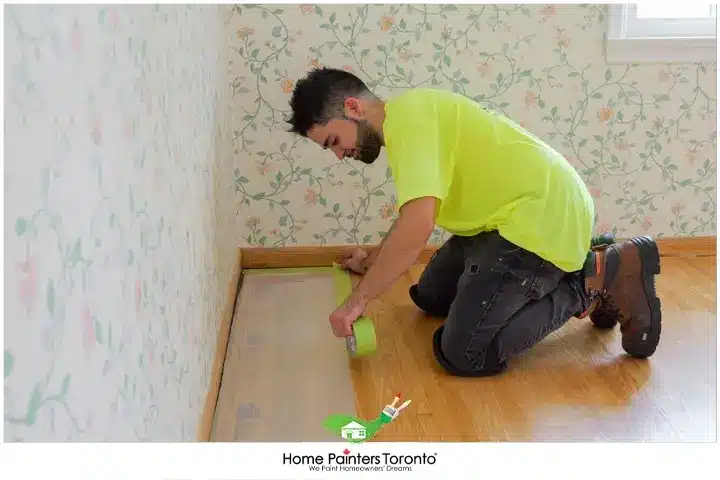
- Use a putty knife to seal tape: What is the most discouraging thing to happen when you have finished painting? Peeling your tape off only to notice that the paint bled through. This can happen but do not panic because it is preventable. To avoid this, you need to make sure the tape is properly adhered to on the surface. Apply the tape along the wood, then press down on it using a putty knife. This allows for a good seal and prevents paint from going through. Also, use painter’s tape and not masking tape because masking tape leaves behind a sticky residue. Using painter’s tape is more reliable because it can be left on the surface for a long time and will still peel off fast.
- You need drop cloths: As beginner painters, you might use bed sheets as protection from dripping paint, but this is never a good idea. Thin sheets won’t ever fully stop spills from seeping through your floor, but instead, you should use drop cloths. They absorb spilled paint and are not slippery, so you can avoid an unwarranted injury.
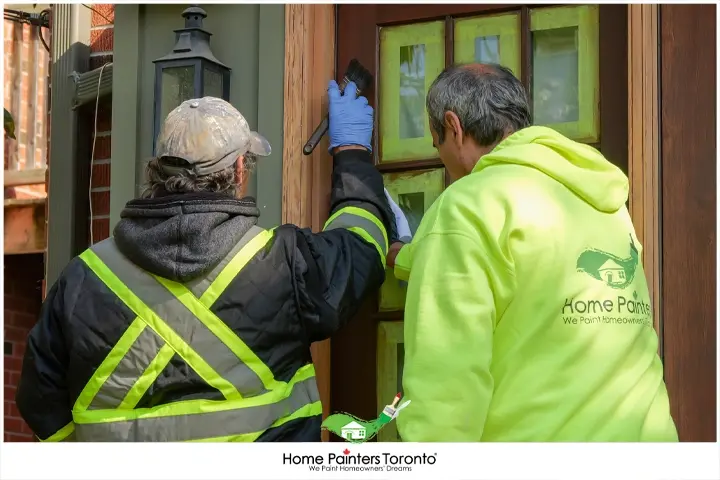
- Don’t try to tackle too many things at once: I know sometimes we tend to tackle too many things at once because we want everything to get done quicker, but with painting, you should never do that. It’s easy to paint all the corners and trim, but don’t. Interior painting services would cut one wall, and then roll it before tackling the next section. By doing it this way, it will allow the paint to blend together nicely.
Be sure to Stay safe
Painting can seem like an easy job, even for veteran painters, but the worst can happen. For example, being in a bad set (painter’s lingo for being in a physically bad position) isn’t good news. Not to mention, it’s absolutely preventable! Let’s just say your ladder isn’t long enough, so you couldn’t reach the ceiling. That’s okay. Instead of harming yourself and stretching out your arms, it is better to just get off the ladder and move it to a more comfortable position. You just avoided a potential injury.
Conclusion
And there you have it- Painting tips for DIY projects for beginners! This is your step-by-step guidance to turn your DIY painting projects into masterpieces. Remember, the key to successful painting is patience and proper preparation. Happy painting!
More Interesting Blogs Related to
“Painting Tips For DIY Projects“

Not into the whole DIY thing yourself? Why not rely on our expert pro painters instead? Home Painters Toronto has been in service for over 36 years now. Our expert interior house painters are quality-obsessed! Call 416.494.9095 or email [email protected] for a FREE quote. And don’t forget to follow us on our social media channels below!