
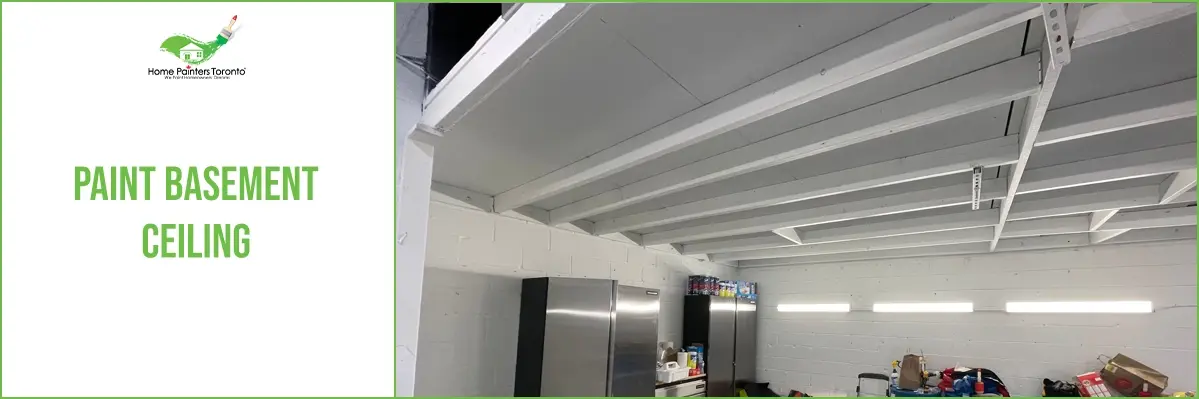
To paint a basement ceiling, you will need plenty of materials and paint that will be durable. Painting your basement ceiling is much faster than drywall. When you use a sprayer, it takes about 3 hours, with breaks in between to let the paint dry. Drywall, on the other hand, takes many days to complete. Not to mention that drywall ceiling involves much more work and neck aches. Nobody wants that, right? In this blog, we will discuss why you should paint a basement ceiling and the cost of such work.
Benefits of Painting a Basement Ceiling
Benefit: 1
- One of the benefits of painting a basement ceiling is that it leaves access to pipes. If your house has unfinished work when it comes to your pipes, an exposed ceiling will allow you unlimited access to those pipes. Something that will be helpful to you in the future.
Benefit: 2
- Another benefit is that it’s pretty inexpensive to paint a basement ceiling. Drywall is pretty inexpensive too, but painting a basement ceiling requires you to have a sprayer, paint and primer. I think we all want to keep away unwanted guests if you know what I mean (pest problems). Exposed rafters mean that pests will have nowhere to live, something that will be very useful to homeowners.
Benefit: 3
- We didn’t even mention how nice your basement ceiling will look! If you want your basement to look industrial, the exposed beams and pipes will do that for you.
Cost of Painting Basement Ceiling
The cost depends on the materials you buy and if it is a DIY or professional project. Below are some rough estimations.
Paint sprayer: $300 (the bigger, the better)
Primer: $84
Paint: $150
Drop cloths: 10-$15
Paint respirator: $40
Buying the paint and primer in 5-gallon buckets will help save you money, as you will have some leftovers for future painting projects.
Painting Pipes in a Basement
Yes! You can paint your pipes! It is the perfect way to make them disappear visually. To ensure that the paint sticks, be sure to use primer. Even if you have multiple materials: copper pipes, PVC, ducts, metal ductwork, etc. The paint can cover all the surfaces and make the space look entirely refreshed! Choose an eggshell finish, more shiny and neat.
Protect Yourself from Overspray!
This part will make it seem like spraying is super difficult and time-intensive, but try not to stress too much, especially if this is a DIY project. Even if you do overspray, it’s pretty easy to clean up.
- First, remove everything from the room
- Tarp everything you cannot remove from the room
- Tarp the floor! If you’re worried about slipping, use the contractor’s paper
- To secure the tarps, use tape if needed
- Ensure you use the tarp on the windows and shut all the doors in the room
- Wrap off lights in plastic bags (may need external lighting)
Please use safety equipment (goggles, respirators, gloves, paint coveralls, and shoe protectors) for spraying the ceiling because of gravity, of course.
Priming Basement Rafters
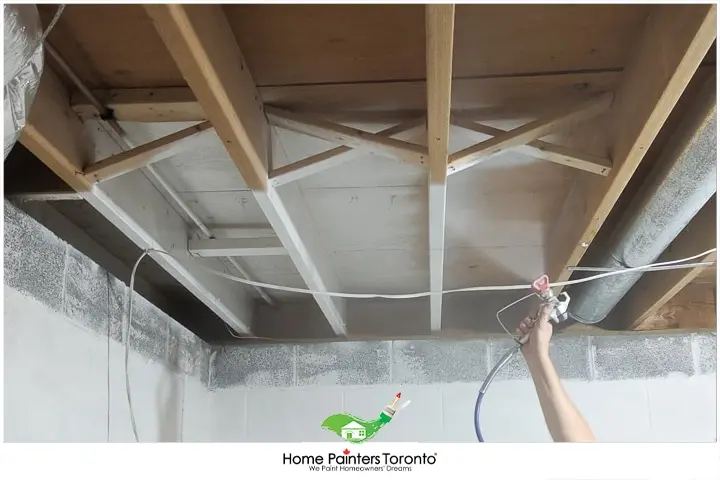
To ensure the paint sticks, you must apply primer to all the different surfaces on a basement ceiling. This includes pipes, wood and ductwork. Also, it helps you get to a light colour quicker. If you are planning on painting your ceiling white, you will need to seal the wood using a strong primer. For sealing wood tannins, use a shellac-based primer. If you don’t, the knots will show, as will the yellow tannins from the pine wood that is used for framing a ceiling. You will need ammonia clean-up time. Now, for a black ceiling, you should still prime everything. However, make sure the primer is tinted gray for better coverage. When you spray the primer, your rafters should immediately look brighter and cleaner. Remember, when you spray, move as quickly as possible. If you stay in one place too long, you will get drips. To ensure full coverage, spray 3 coats of primer.
After priming, it’s time to paint! You will need a lot less paint than primer because the rafters and beams soak up a lot of primer. Spray using the same technique as last time, and you will need 3 coats of paint. Although it might not be necessary, stick with up to three coats.
What Type of Paint Should You Use?
Before embarking on this project, it’s crucial to choose the right type of paint. Given that the basement usually has a higher degree of humidity and varying temperatures, it would be ideal to choose a paint with mould and mildew resistance, such as kitchen and bath paint. This kind of paint would be the best basement ceiling paint. If you have a drop ceiling or tiles, consider using paint specifically designed for this type of material.
Choosing a Colour
So, what colour to paint the basement ceiling? The choice of colour depends on the overall feel and functionality you want from your basement. While a black or darker shade might evoke a modern, theatre-like experience, it might make the ceiling seem lower. On the other hand, lighter shades like white or off-white can create a more open, airy feel and help to reflect light around the room.
The Painting Process
- Preparation: Start preparations by cleaning the ceiling. Remove any cobwebs and dust. For stubborn stains on a bare ceiling, you may need a stiff scrub.
- Protection: Protect walls, floors, and any fixtures with drop cloths or plastic sheets.
- Priming: While priming isn’t necessary for all types of paint, if you’re using traditional latex or oil-based paint, you’ll want to make sure to prime the ceiling first.
- Painting: Using a paint sprayer can make the process easier and more efficient, especially if your ceiling structure is exposed. Apply thin, even coats and let each coat dry before applying the next one.
Professional Painters
I know our personal instincts are to do everything ourselves, but who said getting help is bad? Especially for home renovation projects, it would be a lot more helpful to you to seek professional help from professional painters. That way, nothing will go wrong, and your home will look as beautiful as ever! Although there is a lot to consider, a little help from experts will go a long way toward improving the status of your home.
Conclusion
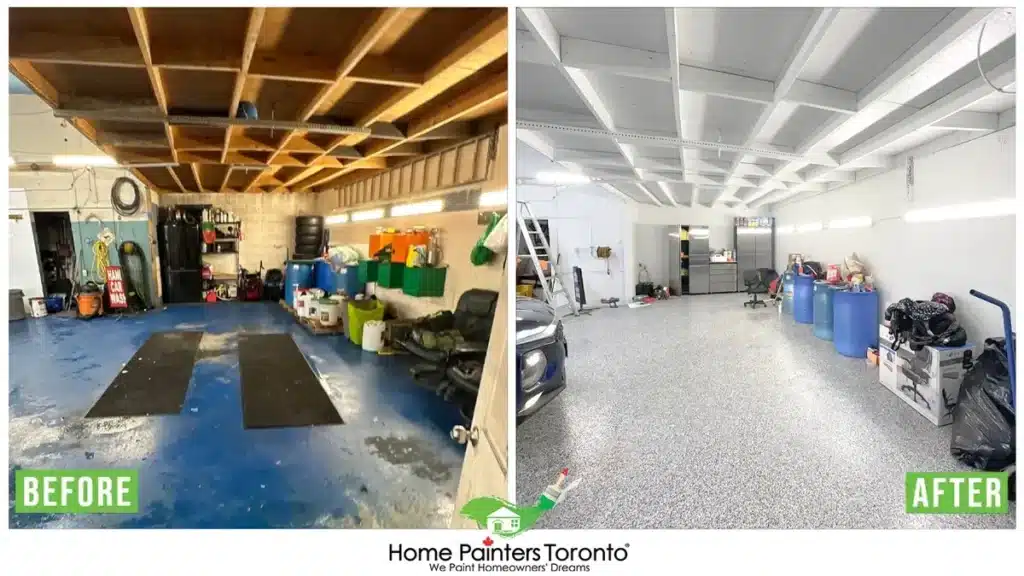
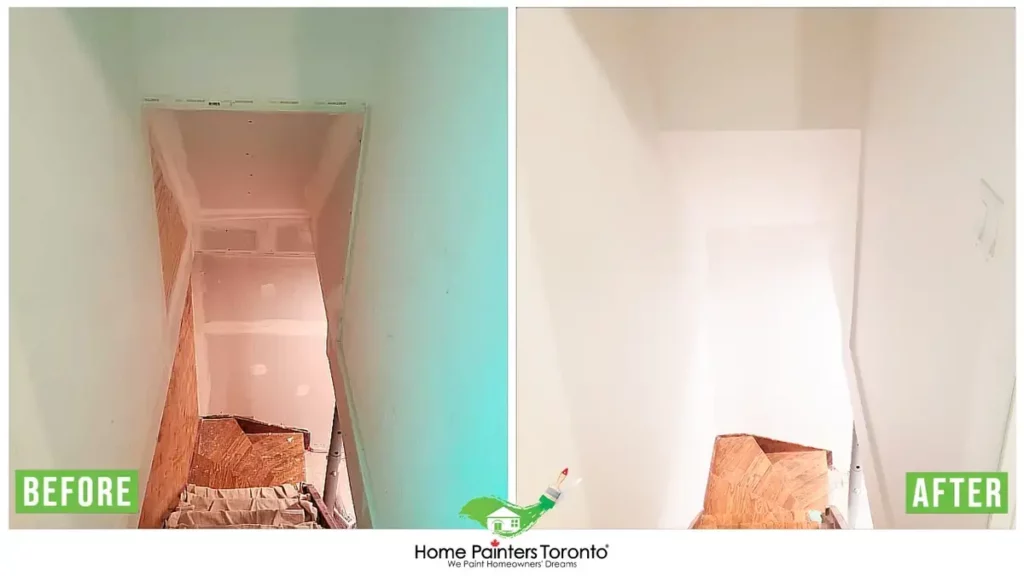
A fresh coat of paint on your basement ceiling can dramatically improve the look and feel of the space. This relatively inexpensive upgrade can make your basement appear brighter, spacious, and more finished, enhancing its functionality and enjoyment for homeowners and guests alike. Whether you do it yourself or entrust the job to professionals, painting your basement ceiling promises to be a game-changer for your home’s aesthetics.
More Interesting Blogs Related to
“Paint Basement Ceiling”


If you’re thinking of doing some home interior painting but don’t want to do the work yourself, let our interior painters help! Even if you are undecided, professional house painters can help you with any problems or questions you may have. If the work involved sounds like it involves too much time and energy to do yourself, call 416.494.9095 or email [email protected] for a FREE quote. And don’t forget to follow us on all our social channels below as well!