With a little planning, you can go far in life. That goes for everything you do, even with playing the interior of your house! With a little planning and a step-by-step guide, you will know how to paint a house interior. Not to mention the interior of your home will look visually appealing and comfortable to your standards. Below we will tell you how to paint a house interior, a rough timeline and all the materials needed to execute a beautiful home.
Painting the Interior of Your Home
An estimated time to complete the interior of your home is 5-10 days. Might be less with the help of professional painters, but that is a rough estimation. Also, it depends on the size of your home too. When starting a project, it’s important to envision how you want it to look like in the end. You’re not limited to four walls in the same color, so you can change it up and paint your accent wall in a different hue. Whether bold or slightly chill, you can choose any colour that you think best represents your room. Speaking of colour, that’s super important! It can be really overwhelming to choose what colour(s) you want, so feel free to browse through painting catalogues to see what is best.
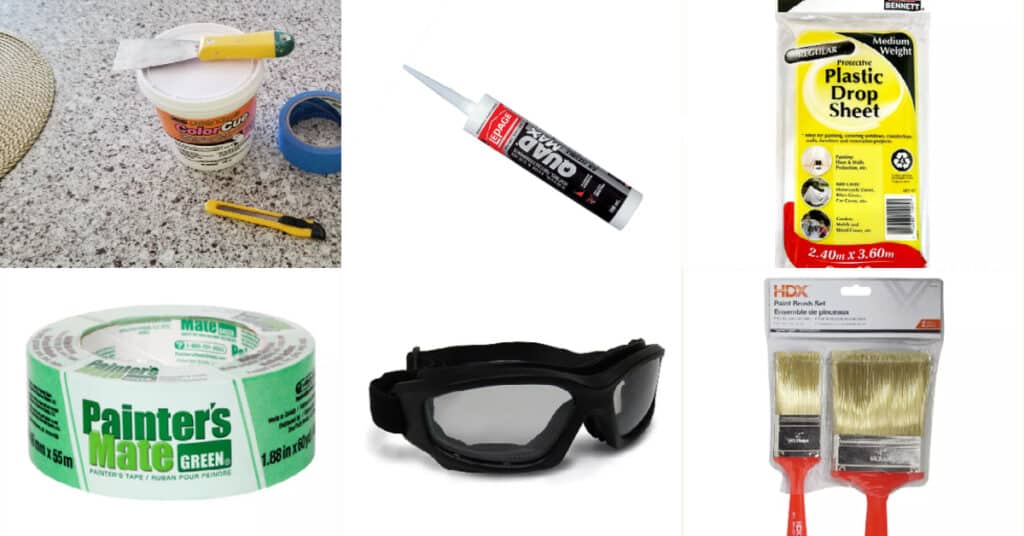
Materials Needed
- Paint (obviously)
- Drop cloths
- Painting masking tape
- Angled paint brush
- Step ladder
- Roller frame (width of 230 mm or 270 mm)
- Nap (fabric) for the roller (size depends on wall structure)
- Roller pole
- Paint tray (match it with frame width)
- Damp rag or sponge
- Bucket of water (to clean materials)

** The estimation of paint you’ll need is 4L and that is to cover a standard sized room.
How To Paint a House Interior
| Colour Scheme | → you need to determine the colour scheme that you want to incorporate. As inspiration, look at the colours in your surrounding rooms and spaces before determining the colour scheme for your walls, doors, ceilings, trims, etc. |
| Paint Calculator | → To help determine the amount of paint you will need. Most interior paints are 4m2/L. |
| Proper Ventilation | → open any windows in your surrounding area to improve ventilation and so that the paint can dry quicker. |
| Preparation is Key! | → You can decide how you want to paint by either painting one room at a time or by the type of paint you’ll be using. Regardless of what you decide to do first, be sure to prepare all your walls before starting. |
| Drop Cloths | → Put these on your floors and on any furnishings you don’t want to get paint on. |
| Painters Masking Tape | → Apply painter’s masking tape to fittings and all trim edges that may be difficult to paint around. |
| Direction to Paint | → preferably you should be painting from top down. This goes for painting a room. |
| Ceilings | → Try to start with painting the ceilings. |
| Walls | → Now, you can paint the walls. |
| Doors | → Once finished with the walls and they are fully dry, paint the doors, window frames and trims. |
| Patience is Key! | → We tend to want to do things very fast, but with painting the interior of a house, patience is key! You need to allow an adequate time for the walls, doors, window frames and ceilings to dry . |
| Let the Creativity Begin! | → Now, you can have some fun with your house! Add your furnishings and unleash the creativity to add life into your newly decorated home! |

How to Paint a House Interior for Beginners
Step 1: Choosing the Right Paint
It all begins with paint for wall selection. The choices might seem endless, but we’re here to simplify the process. The main points to consider are:
- Paint Sheen: Paint comes in various sheens, such as flat, eggshell, satin, semi-gloss, and high-gloss. Each sheen has a different level of shine and durability. High-gloss paint is stain-resistant and easy to clean, making it suitable for high-traffic areas, while flat or matte paint provides a less shiny finish, ideal for ceilings and low-traffic areas.
- Paint Color: This aspect is highly individual, but consider the room’s purpose and size, your decor style, and the lighting conditions. Light shades can make small spaces feel more spacious, while darker paints add depth and intimacy to larger rooms.
Step 2: Calculating How Much Paint You Need
Measure your room’s square footage to estimate the amount of paint needed. A gallon of paint typically covers around 350-400 square feet with one coat. Remember, textured and unprimed walls may require more paint, and it’s always a good idea to have a little extra for touch-ups.
Step 3: Preparing the Room
Prepping your space is as crucial as the painting itself. Remove furniture or cover it with drop cloths. Mask off areas that you don’t want to be painted with painter’s tape for clean lines. Finally, clean your walls to ensure a smooth application.
Step 4: Priming Your Walls
Primer ensures the paint adheres better to surfaces, providing a uniform colour base. It’s a particularly necessary step if your walls are stained if you’re painting over a darker colour, or if you’re transitioning from oil-based to water-based paint.
Step 5: Painting - The Main Event
Now, the moment you’ve been preparing for—painting! Start with ‘cutting in’, where you paint the corners and areas next to the trim with a brush. Following this, use a roller for large wall spaces. Apply paint in a ‘W’ pattern for even distribution. Don’t rush; take time to ensure you’re getting a smooth finish.
Step 6: Applying Additional Coats and Clean-up
Allow the first coat to dry completely before applying another. Two coats usually provide a satisfying depth of colour. After painting, clean brushes and rollers, remove painter’s tape, move back your furniture, and enjoy your newly refreshed space!
Ceiling Paint for Bedrooms/Hallways
In high-traffic areas like hallways, you will need a paint that has a satin finish. This is because they resist dreaded marks left by bumps and rubs when people move across the hall. If you use a flat finish, for example, you would clearly see all the fingerprints. Satin paint is a better option because it stays cleaner as the dirt does not grip to the slick surface as much a flat finish would. For a living room or bedroom, you should use a satin or eggshell finish because it would be a flattering look. Lastly, for a bedroom door, you should want to use a semi-gloss paint. This is because it will withstand the constant dirt on the handles and it is washable.
Paint Your House in the Winter!
What most people don’t know is that painting your house in the winter means lower costs and you save time! It’s a win-win combo. Many professional painters in Toronto offer lower costs when you paint your house in the winter. Who doesn’t love painting the interior of their house at attractive prices? Sounds pretty good to me. Now, it does depend on the painting company you choose and their pricing, but you can potentially save about 10-30% off the regular price for painting during the winter! It is a great steal for you and at the same time, perfecting the look of your home at a time where some people wouldn’t want to do it.
TOP Blogs Related to
“HOW TO PAINT A HOUSE INTERIOR”
If you’re thinking of doing some home interior painting but don’t want to do the work yourself, let our interior painters help! Even if you are undecided, professional house painters can help you with any problems or questions you may have. If the work involved sounds like it involves too much time and energy to do yourself, call 416.494.9095 or email [email protected] for a FREE quote. And don’t forget to follow us on all our social channels below as well!


