

Pressure washing siding damage is one of the most common calls our Etobicoke and Mississauga crews handle every spring. A rented pressure washer set too high, or aimed at the wrong angle, can force water past lap joints and weep holes into the wall assembly behind the cladding. The siding often looks clean for a few weeks before the real problem surfaces as staining, blistering paint, or a musty smell near an interior wall. Vinyl, aluminum, wood, stucco, and fibre cement siding each respond differently under pressure, and a technique that works fine on a driveway or a deck can strip a finish or drive water where it was never meant to go. This guide, part of our complete guide to siding repair, breaks down what actually happens to each material, and when a soft wash or a hand clean is the safer choice for a Toronto exterior.
Pressure washing siding damage happens because siding is built to shed water falling downward, not water forced upward and sideways under pressure. High settings can push water past lap joints and weep holes into the wall, strip aged aluminum and wood finishes, and open hairline cracks in stucco, so a lower-pressure soft wash is usually the safer choice.
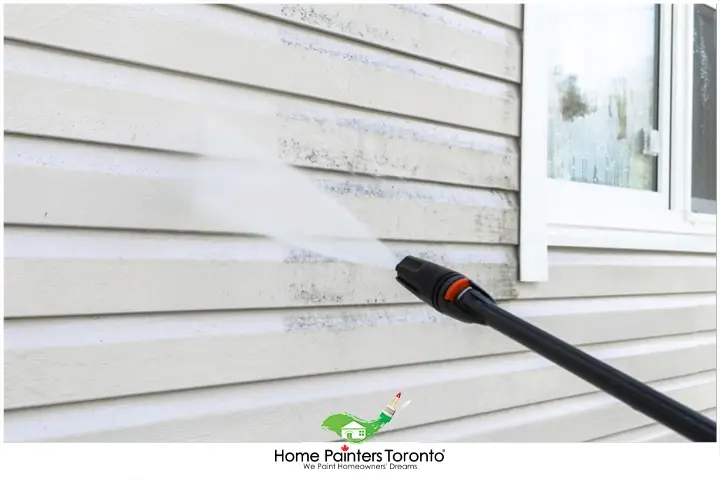
A technique that works fine on a driveway or a deck can strip a finish or drive water where it was never meant to go
What Pressure Washing Does to Siding
Pressure washing does two things to siding at once. It strips dirt, algae, and chalking off the surface, and if the pressure or angle is wrong, it drives water into places siding was never built to get wet. Siding panels overlap in a shingle pattern designed to shed water falling downward from rain. A pressure washer held at eye level or angled upward reverses that design, forcing water up and under the lap edge instead of down and off it.
Georgia-Pacific's care guidance for its vinyl siding sets a maximum pressure of 2,400 PSI with a 40-degree fan tip, and specifically warns against aiming the wand upward because collected water behind the panel can leak, stain, or cause decay. Most professional soft-wash crews stay well under that ceiling, closer to 1,300 to 1,600 PSI, because the goal is to lift dirt, not blast it off. The Painting and Decorating Contractors Association treats aggressive pressure washing the same way it treats over-sanding, as a prep step that can do more harm than the weathering it is meant to remove.
Why Aiming the Wand Upward Causes the Most Pressure Washing Siding Damage
Aiming the wand upward is the single biggest cause of pressure washing siding damage on Toronto homes. Vinyl and aluminum panels lock together at a lap joint with a small gap that lets the wall breathe and drain. Spraying downward keeps water moving along the outside of that gap and off the wall. Spraying upward pushes water directly into the gap, past the weep holes, and into the wall cavity behind the cladding, where it has no easy way back out.
How Each Material Responds
Each siding material fails in a different way under a pressure washer, so the safe approach changes by material, not just by how dirty the wall looks.
| Material | What Happens Under Pressure | Risk Level |
|---|---|---|
| Vinyl | Water forced up behind laps and out through weep holes into the wall cavity | High |
| Aluminum | Chalked painted finish strips unevenly, leaving patchy bare metal | Moderate to High |
| Wood and cedar | Grain raised, and soft fibres gouged out of the surface | High |
| Stucco | Surface eroded, and hairline cracks opened wider | Moderate |
| Fibre cement | Board face holds up well, but caulk lines and butt joints can be blown open | Moderate |
Stucco that develops hairline cracks under repeated pressure washing should be reviewed under our stucco crack repair guidance before another wash opens the cracks further.
The Damage That Shows Up Weeks Later
The damage from an aggressive pressure wash rarely shows up the same day. It surfaces days or weeks later, once trapped water has had time to move through the wall assembly.
- A musty smell near an interior wall that was not there before
- Staining on the siding or the wall below it that appears after the next rainfall
- Blistering or peeling paint on wood trim near the washed area
- Mould growing behind panels, discovered only when a section is opened for repair
We cover how moisture trapped behind siding progresses from a damp smell to structural rot in a separate guide, which is worth reading if any of these signs sound familiar.
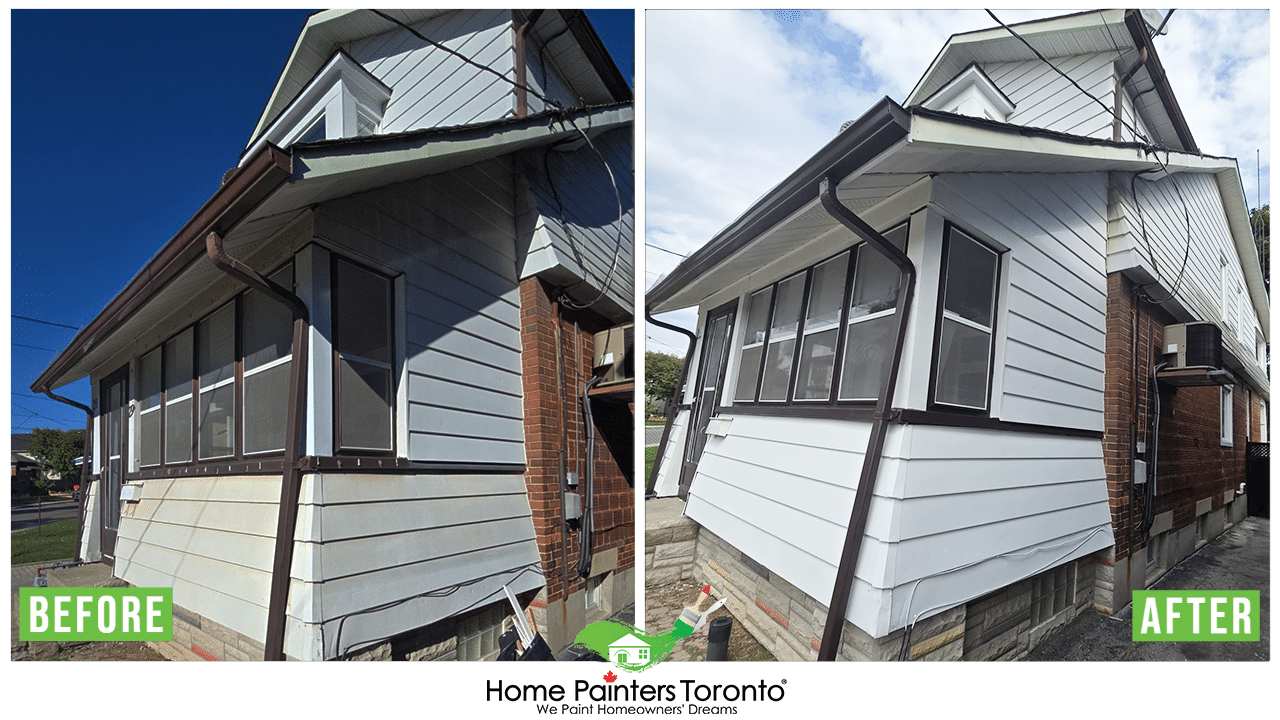
The damage surfaces days or weeks later, once trapped water has had time to move through the wall assembly
Green Growth, Algae, and Moss: What They're Telling You
Green growth on siding tells you where a wall stays damp longer than it should, not just where it needs a scrub. Algae and moss need consistent moisture to establish themselves and spread.
A green patch on a shaded north-facing wall is expected in Toronto's climate. A green patch on a south-facing wall in full sun usually means something is keeping that specific spot wet. A common source in the GTA is a leaking or overflowing gutter dumping water onto one section of wall every time it rains. Washing the growth away without addressing the moisture source means it returns within a season, and repeated washing on the same damp spot is what eventually causes real damage. If algae keeps returning inside the same band year after year, that section is worth having checked for mould behind the siding itself, not just on top of it.
When Cleaning Isn't the Fix
Cleaning is not the fix when the problem is the finish itself, not dirt sitting on top of it. Chalked aluminum, deeply weathered cedar, and a wall that keeps staining below a broken gutter all need a repair or a refinish, and washing them again only delays that work.
Chalked Aluminum Needs Refinishing, Not a Wash
Chalked aluminum siding needs refinishing, not another wash. The white, powdery residue on older aluminum siding is the paint binder breaking down under UV exposure, and pressure washing strips it unevenly, leaving a blotchy, two-tone wall. Once chalking reaches that stage, a proper fix means priming with a bonding primer rated for chalky substrates and refinishing the panel. Our aluminum siding refinishing service handles this stage directly instead of trying to wash a chalked wall back to new.
Deeply weathered cedar with a grey, fibrous surface usually needs restoration work, not a wash cycle, because the damaged fibres have to come off entirely before a finish will hold. Our cedar siding repair team assesses whether the wood underneath is sound before recommending a clean, a restore, or a partial replacement. And a stained wall below a leaking gutter will restain the moment the gutter overflows again, so the gutter has to be repaired before the wall stays clean for good.
Soft Washing and Safer Alternatives
Soft washing uses low pressure and a cleaning solution to lift dirt and organic growth without forcing water into the wall, and it is the safer choice for most Toronto siding.
- Keep pressure under roughly 1,600 PSI on vinyl, aluminum, and stucco
- Angle the wand downward and away from lap joints and weep holes at all times
- Use a biodegradable cleaning solution and give it a short dwell time before rinsing
- Rinse from the top of the wall down, in a side-to-side motion, not straight on
- Hand clean tight trim, corners, and areas around windows with a soft-bristle brush
Cost to Repair Pressure-Washing Damage in Toronto
Repairing pressure-washing damage costs less the earlier it is caught, and the price depends on how much of the wall was affected, not on the siding material alone. A single blown joint or a strip of stripped paint is a spot repair. Water that reached the sheathing behind several panels is a different job entirely.
| Scope of Damage | Typical Work Involved | Estimated Cost (CAD + HST) |
|---|---|---|
| Spot repair (one or two panels, a section of trim) | Replace or reseal the affected panels and re-caulk joints | $2,000 - $4,000 |
| Section refinish (one elevation) | Strip, prime, and refinish the damaged wall | $4,000 - $8,000 |
| Full exterior refinish (multiple elevations, moisture behind cladding) | Open the wall, dry and repair sheathing, refinish all sides | $8,000 - $10,000+ |
These ranges assume the damage is limited to the finish and the cladding itself. If a wash forced water behind the wall long enough to reach the sheathing or framing, the repair moves toward the full cost of siding replacement, which is why an early assessment matters more than the wash itself. A written, itemized quote should separate the visible repair from any hidden moisture work, so homeowners are not surprised mid-project.
How to Check Your Siding for Existing Pressure-Washing Damage
Checking for pressure-washing damage takes about ten minutes and does not require opening the wall, so it is worth doing before booking any repaint.
- Press firmly on the bottom few inches of several panels and feel for give or sponginess
- Look inside the weep holes along the bottom edge of vinyl panels for water staining or a chalky white residue
- Check trim and corner posts for gaps that have opened since the last wash
- Note any spot where the paint looks duller or slightly bubbled compared to the rest of the wall
- Smell for a faint musty odour along the inside of exterior walls, especially in a basement or ground-floor closet
None of these checks are conclusive on their own, but two or more together are a reasonable signal to book a moisture reading before a repaint goes ahead. Our estimators bring a pin-type meter to every pre-paint assessment for exactly this reason, since a visual check alone misses moisture sitting an inch or two below the surface.
How Long Siding Needs to Dry Before a Repaint
Siding needs to dry to a wood moisture content under roughly 15 percent before a coating will bond and perform as intended, which after a wash can take anywhere from a few days to over a week depending on temperature, humidity, and sun exposure.
- At a recent exterior repaint in Etobicoke, our crew found the cedar trim reading 22 percent moisture content on a pin-type meter immediately after the homeowner's cleaning company had power washed the walls.
- We held off priming for six days, checking moisture daily, until the readings settled under 15 percent across every test point.
- Once the substrate was ready, we applied Benjamin Moore Aura Exterior in Low Lustre at the manufacturer's specified 5 mil wet film thickness per coat, and the finish has held through two Toronto winters without a callback.
Canada Mortgage and Housing Corporation's guidelines on measuring moisture in wood building materials point to 19 percent or less for wood-based sheathing before finishes are applied, and most paint manufacturers want the surface drier still. Painting over a substrate that is still holding water from a wash is one of the most common causes of early blistering and peeling on Toronto exteriors, and it is why a full exterior repaint quoted in the $4,000 to $8,000 CAD plus HST range for a medium-sized GTA home should always include a moisture check as a line item, not an afterthought.
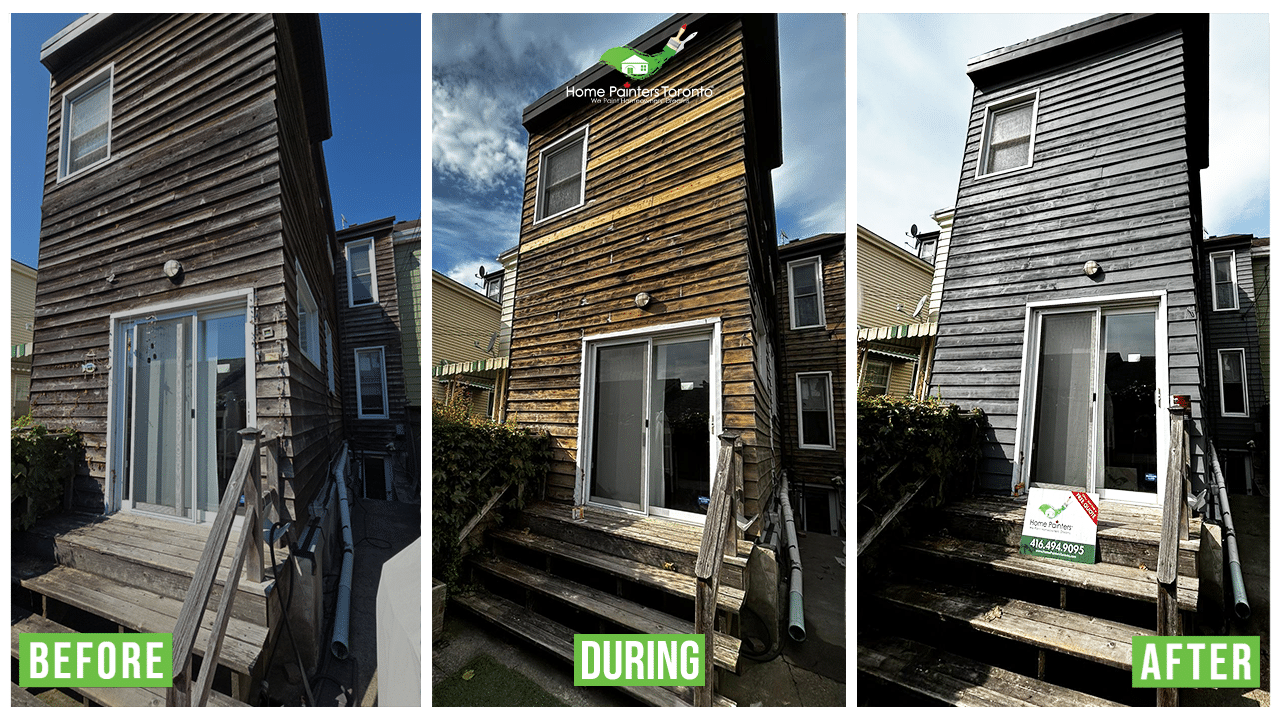
The finish has held through two Toronto winters without a callback since the readings settled under 15 percent before priming began
What a Controlled Prep Wash Involves
A controlled prep wash before a repaint is not the same process as routine maintenance cleaning. Our crews test an inconspicuous section first, then hold a fixed low-pressure setting for the entire wall instead of adjusting it on the fly. Pressure is skipped entirely on any section where trim or caulking already looks compromised, and that area gets hand cleaned instead. Debris and cleaning solution are rinsed completely before the wall is left to dry, since leftover residue trapped under a coat of primer can cause adhesion failure just as easily as trapped moisture. This is also when a crew flags anything that needs repair before painting starts, instead of discovering it once a section is already primed.
The 15 Percent Moisture Threshold Before Repainting
A wood moisture content above 15 percent is the threshold where most exterior paints and stains start to fail early. Above that level, moisture trapped under the film pushes outward as the wall dries, so the coating blisters or peels within a season or two instead of lasting the 3-year warranty period a properly prepped exterior should reach.
As a WSIB-compliant, fully insured contractor, we check moisture readings before every repaint and back the finished work with warranty-backed results, not a guess at when the wall is dry enough. For homes with wood or cedar cladding, our wood siding repair and painting team handles the moisture check and the finish coat as one sequence, so nothing gets painted before it is ready. The same drying standard applies whenever we are brought in for exterior residential painting on a home that was recently washed by another contractor. It is one of the details reflected in our 1,200+ verified client reviews, and part of why Toronto homeowners keep choosing us for exterior work, as outlined on our why Toronto homeowners choose us page.
Pressure Washing Siding FAQ
Yes, vinyl siding can be pressure washed safely at low pressure, generally under 1,600 PSI, with the wand angled downward and away from lap joints. The risk is not the pressure washer itself; it is a high setting and an upward spray angle forcing water behind the panels.
Aluminum siding often looks worse after washing because the surface was already chalking, and pressure stripped the degraded paint layer unevenly. That patchy result means the finish needs refinishing, not a second wash.
Washing removes visible algae but rarely removes it permanently, because algae needs sustained moisture to grow back. Unless the damp source, whether it is shade, an overflowing gutter, or poor drainage, gets fixed, the growth typically returns within a season.
Siding should dry until its wood moisture content reads under about 15 percent before painting, which can take anywhere from a few days to over a week after a wash depending on temperature, humidity, and sun exposure. A moisture meter reading is the only reliable way to confirm it, not a visual check.
Pressure washing at the wrong pressure or angle can void a siding manufacturer's warranty, since most manufacturers specify maximum PSI and spray-direction limits in their care instructions. Keeping receipts or notes on the settings used can help if a warranty claim ever comes up.
Stucco should be cleaned at 1,200 PSI or lower, since higher settings erode the cement surface and widen any hairline cracks that are already there. A soft wash with a cleaning solution is often enough for stucco without pressure at all, especially on walls with visible cracking.

Get a Free Assessment Before You Wash or Repaint
A quick assessment before you wash or repaint can save you from paying for the same repair twice. Our estimators check the material, the moisture level, and any existing damage before recommending a cleaning method, and every repair we complete is backed by our written warranty terms, including a 3-year warranty on exterior work. Learn more about our siding repair services or reach out directly for a same-day estimate.
Home Painters Toronto offers fast free quotes and warranty-backed work on every siding and exterior painting project across the GTA.
Contact Home Painters Toronto to book your free, no-obligation assessment today.
Get a Free Estimate