Essential Tips for Painting Window Casings and Wall Repair Post-Installation

When you finish installing your windows, it’s just the start of creating a fantastic and aesthetically pleasing look. In your journey to perfect the appearance, two crucial tasks come up: painting the window casing and repairing the walls post-installation. Let’s guide you through these essential aspects in detail.

Preparing for the Project

Before the brush touches the paint, thorough preparation is key. It minimizes messes, reduces the likelihood of errors, and ultimately saves time.

Understanding Paint Types & Finishes ​

There’s more to paint than colour. Choosing the right type and finish is the first step to ensuring durability and a look that you will love for years to come.

  • Latex or Oil-Based? Latex paints offer easier cleanup and are less prone to yellowing over time. Oil-based paints are usually more durable.
  • Gloss, Semi-Gloss, or Matte? High gloss is the most durable and easiest to clean, while matte and eggshells offer a softer look that can cover imperfections.

Gathering the Right Tools

Investing in quality tools can make the actual painting process go much smoother. For window casings, small brushes with an angled tip can reach tight corners easily.

  • Quality Brushes: Look for 2 ½-inch sash brushes meant for cutting in small areas.
  • Paint Tray with Liners: This keeps your paint clean for touch-ups.
  • Painter’s Tape: Use to protect surfaces you don’t want to paint.
  • Drop Cloths: Protect floors and furniture from paint splatters.

Preparing the Window Area

For the best paint job, the window area must be clean and smooth. Wipe down the casings to remove dust and grime, and sand imperfections to create an even surface for the paint.

  • Cleaning the Area: Use a mild detergent to clean the window and remove any dirt or grease.
  • Taping Off: Carefully tape around the window panes to avoid getting paint on the glass.
  • Sanding: Use fine-grit sandpaper to smooth out any paint or wood imperfections. Wipe down with a tack cloth to remove sanding debris.
window casings

Painting the Window Casings

Precision is paramount when painting window casings. Sloppy work can detract from the newness and sheen, which is why attention to detail at this stage is non-negotiable.

Technique and Order of Painting

Follow these steps to achieve a professional look for your window casings.

  • Priming: Before painting, apply a primer to improve paint adhesion and cover any stains.
  • Cutting In: Carefully cut in paint along the edges of the casings with a steady hand and patience.
  • Filling: After the cut-in is complete, use a larger brush to fill in the middle areas.

Second Coat: Once the first coat dries, follow up with a second coat for solid coverage.

1. Look & Style

If your vinyl has faded or a little worn, painting your windows and trims can give your home exterior a style boost, a fresh splash of contrast, and even make your windows look brand new.  Whether you are excited by new home improvement projects or looking to sell, painting your vinyl windows and trims will make you feel great when you are pulling into the driveway or organizing your next barbeque.

Dealing with Common Issues

Mistakes happen, and it’s crucial to know how to address them without starting over. Here are a few common painting problems and their fixes:

  • Drips and Runs: If you notice drips forming, catch them with a brush before they dry.
  • Bleeding: If paint bleeds under the tape, use a small brush to touch up the lines.
  • Streaks: Streaks can be minimized by using a light touch and paying attention to the paint’s consistency.

Caring for Your Brushes

Properly cleaning and storing your brushes ensures they will be there for your next project. Rinse thoroughly with water for latex paint and mineral spirits for oil-based paint. Store brushes flat or hanging to keep their shape.

painter painting the window casings

Post-Installation Wall Repair

Wall repair is often necessary after window installation. Filling holes and cracks is simple enough, and with the right approach, they’ll be undetectable under a fresh coat of paint.

Choosing the Right Materials

For small holes, spackling is the ideal filler. For larger areas or cracks, a joint compound may be necessary. Both are readily available in hardware stores.

  • Spackling: Dries quickly and is easy to sand, making it perfect for smaller repairs.
  • Joint Compound: More robust and better suited for larger surfaces or structural repairs.

Application Techniques

Apply the spackling or joint compound with a putty knife, pressing firmly to fill the hole or crack. For corner repairs, a corner tool is recommended. Once dry, sand lightly to smooth the surface.

  • Smooth Application: Spread the filler evenly, slightly overfilling the area to account for shrinkage.
  • Sanding: Use a fine-grit sanding sponge for a smooth, even surface. Take care not to sand too aggressively, which could remove too much material.
  • Repeat if Necessary: Some repairs may require a second application to fill all imperfections.
wall repair

Priming Walls Before Painting

Primer helps the paint adhere to the repaired areas and creates a uniform surface. Apply it to the repaired areas and blend it with the rest of the wall for a cohesive look.

  • Matching Texture: Ensure the texture of the repaired area matches the rest of the wall, or apply additional texture with a roller if necessary.
  • Quality Primers: Use a good-quality primer for better coverage and adhesion.

Painting the Walls

The walls are the backdrop to your life, and a smooth, expertly painted surface provides the best canvas for your decor.

Cutting in and Rolling

Similar to the window casings, walls require cutting along edges, followed by rolling on the bulk of the paint. Use a sturdy step ladder to reach high spots if needed.

  • The “W” Technique: Use a “W” or a “M” pattern with the roller for even coverage.
  • Watch for Drips: Just as with the window casings, monitor for drips. Catch and roll them out before drying.

Ensuring a Uniform Finish

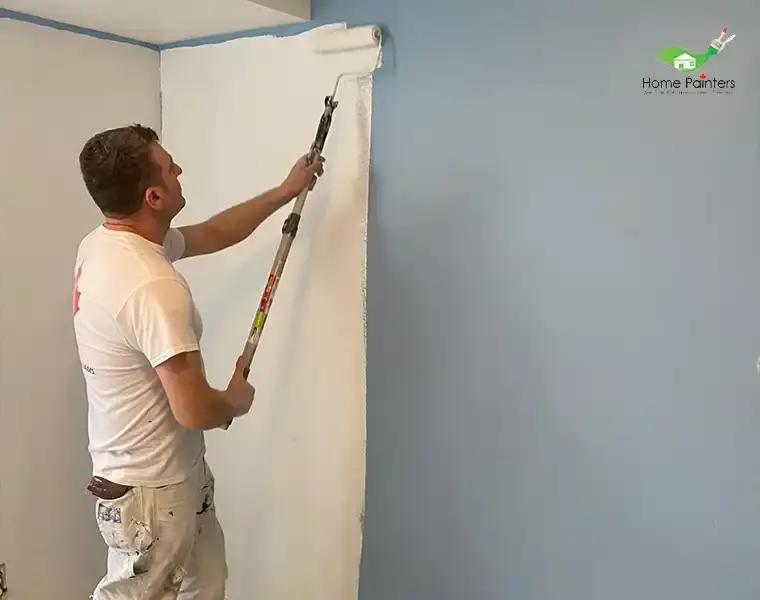
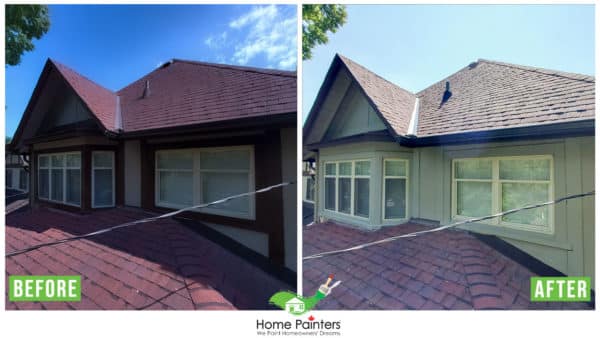
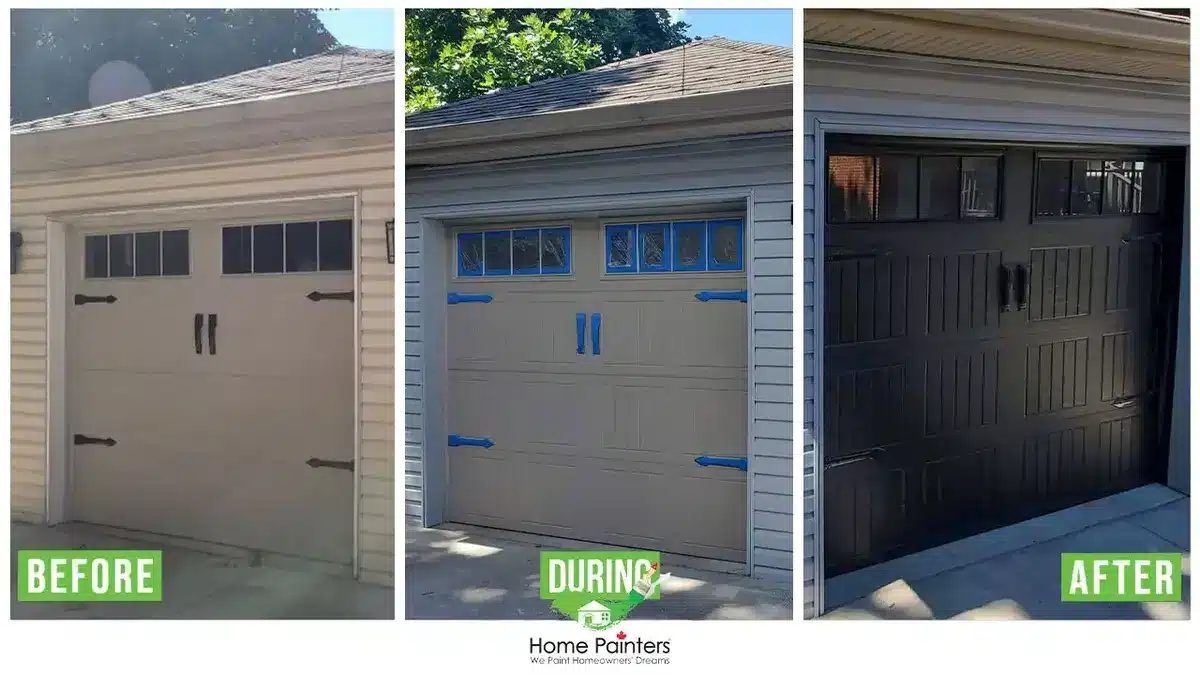
After the first coat, determine if a second coat is necessary. The additional layer can significantly enhance the colour and cover any imperfections.

  • Proper Drying Time: Allow the first coat to dry completely before assessing the need for a second coat.
  • Consistency: Make sure the second coat is applied with the same consistency as the first for a uniform finish.
Painting Walls

Final Touches

The final steps for wall painting are the smallest but make the biggest difference. Remove the painter’s tape carefully, touch up any areas that require it, and stand back to admire your work.

  • Removing the Tape: Pull the tape back on itself at a 45-degree angle for crisp lines.
  • Touching Up: Keep a small brush handy for touch-ups. Thin the paint slightly if applying multiple coats to ensure it blends in with the wall.
  • Appreciate Your Work: Take a moment to appreciate your newly refreshed space. The colour, precision, and effort you put into painting your window casings and repairing your walls have truly made your house a home.

More Interesting Blogs Related to
“Essential Tips for Painting Window Casings and Wall Repair Post-Installation”

Don’t have the time or expertise to tackle your home painting and repair projects? Leave it to the professionals. At Home Painters Toronto, we promise a flawless finish, timely completion, and hassle-free service. Transform your space effortlessly. Contact Home Painters Toronto today and let us bring your renovation dreams to life. Call us today at 416.494.9095 or email Brian@HomePaintersToronto.com for a FREE quote. And don’t forget to follow us on all our social channels below!